Britax B-SAFE User Manual
Hide thumbs
Also See for B-SAFE:
- User manual (94 pages) ,
- Assembly instructions manual (52 pages) ,
- User manual (47 pages)

Subscribe to Our Youtube Channel
Related Manuals for Britax B-SAFE


Summary of Contents for Britax B-SAFE
- Page 1 B-SAFE™ User Guide Guía del usuario IMPORTANT: Thoroughly read and follow all instructions. IMPORTANTE: Lea y siga cuidadosamente todas las instrucciones.
-
Page 3: Table Of Contents
Securing an Infant ..................32 Care and Maintenance ................36 Stroller Compatibility ..................42 Warranty .......................43 instrucciones en español ................45 ©2013 Britax Child Safety, Inc. All rights reserved. Printed in China P469000_R5:03.13 This product and its components are subject to change without notice. -
Page 4: Warnings
• NEVER leave child unattended. • The use of aftermarket covers, inserts, toys, accessories, or tightening devices is not approved by Britax. Their use could cause this infant car seat to fail Federal Safety Standards or not perform as intended in a crash. - Page 5 A child can strangle in loose infant car seat straps. • NEVER use in or on strollers unless approved by Britax. • ALWAYS lift infant car seat by handle after installation in base to verify that it is secure.
-
Page 6: Important Notes
Safety Information Important Notes • Verify that the child seat is securely installed and the harness is properly adjusted around the child each time the child seat is used • Discontinue use of this child seat if it has been in a moderate or severe crash. -
Page 7: Certification
Send your name, address, e-mail address if available and the restraint’s model number and manufacturing date to Britax Child Safety, Inc. P .O. Box 91167 Allentown, PA 18109-9925, or call 1-888-427-4829, or register online at www.Britax.com/registration. For recall information, call the U.S. -
Page 8: Infant Car Seat Capacities
Safety Information Infant Car Seat Capacities Rear-Facing Weight 4 – 30 lbs (1.8 – 13.6 kg) Use rear-facing only with children: • who weigh between 4 and 30 lbs (1.8 and 13.6 kg) and • who are 32 inches in height (81.3 cm) or less and •... -
Page 9: Using Latch
Safety Information Using LATCH WARNING! • Use either the LATCH system or the vehicle belt methods to install this child seat. Using both is not approved and may cause the child seat not to perform as intended. • Verify that your vehicle is equipped with LATCH anchors. If LATCH anchors are not available, you must use vehicle belt installation methods. -
Page 10: Incompatible Vehicle Seat Belts
Incompatible Vehicle Seat Belts Incompatible Vehicle Seat Belts WARNING! The following types of vehicle seat belts are NOT compatible with this child seat. If any of the belt types listed below are in the chosen seating position, choose another vehicle seating position. -
Page 11: Vehicle Compatibility
Vehicle Compatibility Vehicle Seating Positions WARNING! DO NOT place child seat rear-facing in the front seat of a vehicle with a passenger air bag unless deactivated. DEATH or SERIOUS INJURY can occur. See your vehicle owner’s manual for child seat installation instructions. -
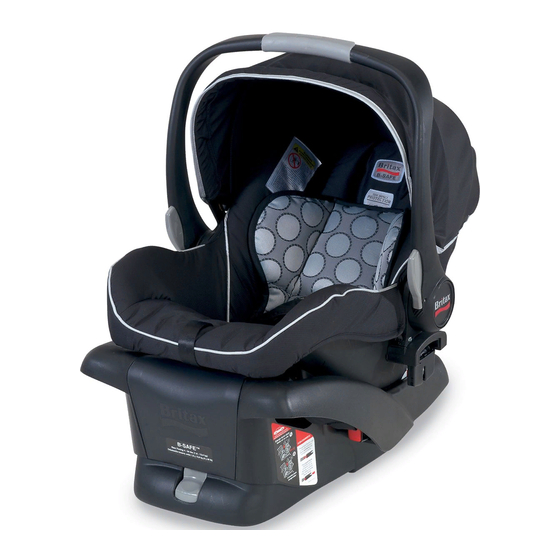
Page 12: Child Seat Features
Child Seat Features Canopy Harness Adjuster Lever (Under Cover) Head Pad 10 Harness Adjuster Strap Carry Handle Adjuster 11 Comfort Pads Carry Handle 12 Chest Clip Stroller Adapter 13 Harness Straps Shell 14 Harness Buckle User Guide (in pocket behind cover) 15 Buckle Strap Cover 16 Belly Pad... - Page 13 Child Seat Features 17 18 26 27 28 29 17 Serial Number & Manufacture 25 Base Serial Number and Date Label Manufacture Date Label (Underside of the Base) 18 Harness Slots 26 Lower Connector Adjuster 19 Harness Straps (LATCH) 20 Harness Yoke 27 Lower Connector (LATCH) 21 Car Seat Release Lever 28 Recline Adjustment Foot...
-
Page 14: Installing The Base
Installing the Base Before You Install • Check that your vehicle seat belt is compatible with the infant car seat by referring to your vehicle owner’s manual and page 8 in this user guide. • For lap belt installation, check your vehicle owner’s manual to determine how to lock your vehicle belt system. -
Page 15: Recline Angle Indicators
Installing the Base Recline Angle Indicators • Correct recline angle is acheived when the green marker on each recline angle indicator is visible between the two lines. • Vehicle must be parked on a level surface. LATCH Connectors • Push and hold the LATCH connector release button to remove the LATCH connectors from the... -
Page 16: Latch Installation
Installing the Base LATCH Installation WARNING! • Only raise the base as described in these instructions. Do not use anything to raise the base of the infant car seat off the front edge of the vehicle seat. In a crash, this could cause the infant car seat not to perform as intended. - Page 17 Installing the Base • Place the base in the desired location on the seat and press the LATCH connectors onto the adjacent vehicle anchors until a click is heard. NOTE: Pull the LATCH connector to verify that it is secure. •...
-
Page 18: Lap-Shoulder Belt Installation
Installing the Base Lap-Shoulder Belt Installation WARNING! • Only raise the base as described in these instructions. Do not use anything to raise the base of the infant car seat off the front edge of the vehicle seat. In a crash, this could cause the infant car seat not to perform as intended. - Page 19 Installing the Base • Press the base firmly into the vehicle seat while removing all slack from first the lap portion and then the shoulder portion of the vehicle seat belt. • Hold the vehicle belt tight and close the upper portion of the lock-off.
-
Page 20: Lap Belt Installation
Installing the Base Lap Belt Installation WARNING! • Only raise the base as described in these instructions. Do not use anything to raise the base of the infant car seat off the front edge of the vehicle seat. In a crash, this could cause the infant car seat not to perform as intended. - Page 21 Installing the Base IMPORTANT: The lock-off does NOT secure this type of vehicle belt. Vehicle belt MUST be locked according to the vehicle owner’s manual. • Press the base firmly into the vehicle seat while removing all slack from the vehicle seat belt.
-
Page 22: Attaching The Car Seat
Installing the Base Attaching the Car Seat • Ensure that the base is securely installed. • Place the infant car seat into the base and press down until a click is heard. • Pull up on the infant car seat to verify attachment. -
Page 23: Unistalling The Base
Uninstalling the Base Uninstalling the Base • For LATCH install, press the adjuster release button on the LATCH connector strap and loosen the strap. • Press each of the red release buttons on the LATCH connectors and pull them off of the vehicle anchors. -
Page 24: Installing Without Base
Installing Without Base Before You Install • Check that your vehicle seat belt is compatible with the infant car seat by referring to your vehicle owner’s manual and page 8 in this user guide. • Check your vehicle owner’s manual to determine how to lock your vehicle belt system. -
Page 25: Belt Guides
Installing Without Base Belt Guides • Release the elastic loop on the stroller adapter and lift the cover to expose the belt guides for installation. -
Page 26: Lap-Shoulder Belt Installation
Installing Without Base Lap-Shoulder Belt Installation WARNING! • Secure child in the infant car seat before installing car seat in vehicle. • Check your vehicle owner’s manual to determine how to lock your vehicle belt system. • Release the elastic loop on the stroller adapter and lift the cover to expose the belt guides for installation. - Page 27 IMPORTANT: If you cannot lock your vehicle seat belt you must use a locking clip. Locking clips are available from Britax at 1-888-427-4829. • Adjust the infant car seat handle to any locked position. • Verify that all connections are secure. Check that: * The vehicle belt is not twisted.
-
Page 28: Lap Belt Installation
Installing Without Base Lap Belt Installation WARNING! • Secure child in the infant car seat before installing car seat in vehicle. • There are many different kinds of vehicle lap belts. Check your vehicles owner’s manual to determine what kind of belt system is in your vehicle and how to lock it. - Page 29 Installing Without Base • Push the infant car seat firmly into the vehicle seat while removing all slack from the vehicle belt. • Adjust the infant car seat handle to any locked position. • Verify that all connections are secure. Check that: * The vehicle belt is not twisted.
-
Page 30: Securing Your Child
Securing Your Child WARNING! • Adjust harness to fit clothes the child is wearing. Remove bulky coats and/ or jackets before putting child in infant car seat. • Adjust the belts provided with this child seat so they fit snugly around your child. - Page 31 Securing Your Child • Slide one harness strap off of the yoke. • From the front of the seat, pull the harness strap through and out of the cover and head pad. NOTE: Do not remove the comfort pad or chest clip when changing harness height.
-
Page 32: Adjusting The Buckle Strap
Securing Your Child Adjusting the Buckle Strap IMPORTANT: Your infant car seat has been assembled with the buckle strap in the inner position for infants weighing less than 11 lbs (5 kg). Once your child reaches 11 lbs (5 kg) re-route the buckle position to the outer slot. - Page 33 Securing Your Child • Pull the buckle, retainer and strap completely out of the shell and cover. • Turn the buckle strap retainer so that the short side will go through the slot in the infant car seat cover and shell. •...
-
Page 34: Securing An Infant
Securing Your Child Securing an Infant IMPORTANT: Ensure that you have followed all instructions for installation and adjustment of the harness and buckle into the correct position for your child. • Loosen the harness by pressing down the harness adjuster lever while pulling both harness straps forward. - Page 35 Securing Your Child • Place the child in the infant car seat as shown. Slouching Sitting Up • Position the harness straps around the child. • Buckle the harness by inserting one buckle tongue at a time into the buckle. * Connection is confirmed with an audible click after inserting each buckle tongue.
- Page 36 Securing Your Child Securing an Infant continued • Gently pull up on the harness straps to tighten the lap section of the harness, which should fit low on the child’s body. • Slowly pull the adjuster strap to tighten the harness around the child.
-
Page 37: Handle Position
Securing Your Child • Verify that the harness is not twisted and the child is properly secured. Check that the: * Buckle is fastened * Harness straps are not twisted * Harness is snug * Chest clip is level with armpits IMPORTANT: * Always pull on the harness after securing the child to make sure the buckle and harness are fastened securely. -
Page 38: Care And Maintenance
Care and Maintenance User Guide Storage • Keep the user guide in the storage pocket under the cover along the side of the infant car seat. Seat Storage • Store the infant car seat in a safe, dry place when it will not be used for an extended period of time. - Page 39 Care and Maintenance Easy Cover Removal • From the back of the infant car seat remove both harness straps from the harness yoke. • From the front of the infant car seat pull both harness straps out of the shell, cover and head pad.
-
Page 40: Refitting The Cover
Care and Maintenance Refitting the Cover • Slide the harness, buckle and adjuster strap through the appropriate slot in the cover. • Stretch the elastic at the head and foot of the cover over the head and foot of the shell. •... -
Page 41: Cleaning The Cover
Care and Maintenance • Ensure that the harness strap is not twisted and rethread it through the head pad and then through the appropriate slot in the cover and shell. • From the back of the infant car seat, reattach the harness straps to the harness yoke. - Page 42 Care and Maintenance Cleaning the Shell • BRUSH AWAY LOOSE DEBRIS using a soft bristled brush. • SPONGE CLEAN using warm water and mild soap. • TOWEL DRY • DO NOT: * Use solvents * Use abrasive cleaners * Bleach * Machine wash * Machine dry * Disassemble the harness...
- Page 43 Care and Maintenance Cleaning the Buckle • Remove the buckle (page 30 - 31). • THOROUGHLY RINSE using warm water. • TEST THE BUCKLE by fastening and unfastening until an audible click is heard after inserting each buckle tongue. If clicks are not heard, repeat cleaning procedure.
-
Page 44: Stroller Compatibility
Stroller Compatibility Britax Strollers • Set the parking brake. • Line up the stroller adapters on the side of the infant car seat with the recievers on the britax stroller. • Push down until the car seat locks into place. -
Page 45: Warranty
The warranty and remedies as set forth above are exclusive and in lieu of all others, oral or written, express or implied. In no event will Britax, or the retailer selling this product, be liable for any damages, including incidental or consequential damages, arising out of the use or inability to use this product. -
Page 47: Instrucciones En Español
Sujeción del niño ..................76 Cuidado y mantenimiento .................80 Consejos y solución de problemas ............86 Garantía ......................87 ©2013 Britax Child Safety, Inc. Reservados todos los derechos. Impreso en China P469000_R5:03.13 Este producto y sus componentes están sujetos a cambios sin previo aviso. -
Page 48: Advertencia
• NUNCA deje al niño desatendido. • Britax no aprueba el uso de cubiertas, piezas, juguetes, accesorios o dispositivos de ajuste que no sean de Britax Child Safety, Inc. El uso de estos podría hacer que el asiento no rinda como debería durante un accidente o incumplimiento de las Normas Federales de Seguridad para Vehículos de Motor. - Page 49 • NUNCA use en o sobre los cochecitos a menos que sean aprobados por Britax. • SIEMPRE levante asiento de seguridad para niños por la manija después de la instalación en la base para verificar que esta seguro.
-
Page 50: Información De Seguridad
Información de Seguridad Notas importantes • Cada vez que use el asiento de seguridad para niños, compruebe que está sujetado correctamente y que el arnés está perfectamente ajustado al tamaño del niño. • Debe dejar de utilizar este asiento de seguridad para niños si ha estado implicado en un accidente moderado o grave. -
Page 51: Certificación
(si dispone de una), el número de modelo del dispositivo de retención y la fecha de fabricación a la dirección siguiente: Britax Child Safety, Inc. P .O. Box 91167 Allentown, Pensilvania 18109-9925 (EE. UU). También puede optar por llamarnos al teléfono 1 888 427 4829 o registrarse en línea en www.BritaxUSA.com/registration. -
Page 52: Capacidades De Asiento Infantil
Información de Seguridad Capacidad de Asiento de Seguridad Para Niños Orientación Trasera Peso de 1,8 a 13,6 kg (de 4 a 30 lb) Usar la orientación trasera sólo con los niños: • que pesen entre 1,8 y 13,6 kg (4 y 30 lb) y •... -
Page 53: Utilización De Sistema Latch
Información de Seguridad Utilizando el sistema LATCH Anclajes inferiores y Correa de sujeción del sistema de anclaje LATCH ADVERTENCIA! • Utilice el sistema LATCH o los métodos de cinturón del vehículo para instalar este asiento de seguridad para niños. Uso de ambos no está aprobado y puede hacer que el asiento de seguridad para niños no funcionará... -
Page 54: Cinturones De Seguridad De Vehículo Incompatibles
Cinturones de Seguridad de Vehículo incompatibles Cinturones de seguridad de vehículo incompatibles ADVERTENCIA! Los siguientes tipos de cinturones de seguridad de vehículos NO son compatibles con este asiento de seguridad para niños. Si el asiento donde desea colocar el asiento de seguridad para niños está equipado con uno de los cinturones especificados a continuación, debe elegir otro asiento del vehículo. -
Page 55: Compatibilidad Con El Vehículo
Compatibilidad con el Vehículo Asientos del vehículo ADVERTENCIA! NO coloque el asiento de seguridad para niños orientado hacia atrás en el asiento delantero de un vehículo que tenga airbag, excepto si este está desactivado, ya que podría causar DAÑOS GRAVES o incluso el FALLECIMIENTO del niño. -
Page 56: Características Del Asiento De Seguridad Para Niños
Características del Asiento de Seguridad Para Niños Canopy Palanca de ajuste del arnés (debajo de cubierta) Almohadilla para la Cabeza 10 Correa de ajuste del arnés Ajustador de la Manija 11 Almohadillas de confort Manija 12 Broche pectoral Adaptador de Cochecito 13 Correas del arnés Estructura de Asiento 14 Hebilla para el arnés... - Page 57 Características del Asiento de Seguridad Para Niños 17 18 26 27 28 29 17 Etiqueta con la fecha de 25 Etiqueta con el número de serie y la fecha de fabricación de la fabricación y el número de serie Base (Parte inferior de la Base) 18 Ranuras del arnés 26 Ajuste del conector inferior 19 Correas del arnés...
-
Page 58: Instalación De La Base
Instalación de la base Antes de instalar • Compruebe que el cinturón de seguridad del vehículo no es incompatible con el asiento de seguridad para niños refiriéndose a su manual de propietario del vehículo y a la página 52 de este manual del usuario. •... -
Page 59: Indicadores De Nivel De Base
Instalación de la base Indicadores del ángulo de reclinación • El ángulo de reclinación será correcto cuando el marcador de color verde que se encuentra en cada indicador del ángulo de reclinación pueda verse entre ambas líneas. • El vehículo debe estar estacionado sobre una superficie plana. Conectores LATCHs •... - Page 60 Instalación de la base Instalación con LATCH ADVERTENCIA! • Sólo se debe elevar la base como se describe en estas instrucciones. No use nada para elevar la base del asiento de seguridad para niños en la orilla delantera del asiento de vehículo. En un accidente, esto podría causar que el asiento de seguridad para niños no funcionará...
- Page 61 Instalación de la base • Coloque la base en la ubicación deseada en el asiento y presione los conectores LATCH sobre los anclajes inferiores del adyacentes hasta que se oiga un clic. NOTA: Tire del conector LATCH para verificar que es seguro. •...
-
Page 62: Instalación Con Cinturones De Banda Horizontal Y Transversal
Instalación de la base Instalación con cinturones de banda horizontal y transversal ADVERTENCIA! • Sólo se debe elevar la base como se describe en estas instrucciones. No use nada para elevar la base del asiento de seguridad para niños en la orilla delantera del asiento de vehículo. - Page 63 Instalación de la base • Presione la base firmemente sobre el asiento del vehículo mientras se quita toda la holgura de la primera parte del cinturón y, a continuación la parte del hombro del cinturón de seguridad del vehículo. • Mantenga el cinturón del vehículo apretado y cierre la parte superior del seguro.
-
Page 64: Instalación Con Banda Horizontal
Instalación de la base Instalación con banda horizontal ADVERTENCIA! • Sólo se debe elevar la base como se describe en estas instrucciones. No use nada para elevar la base del asiento de seguridad para niños en la orilla delantera del asiento de vehículo. En un accidente, esto podría causar que el asiento de seguridad para niños no funcionará... - Page 65 Instalación de la base IMPORTANTE: Este tipo de cinturón de vehículo no puede ser asegurado por medio del seguro. El cinturón del vehículo deberá ser cerrado de acuerdo al manual del propietario del vehículo. • Presione la base firmemente sobre el asiento del vehículo mientras se quita toda la holgura del cinturón.
-
Page 66: Montaje Del Asiento De Seguridad Para Niños
Instalación de la base Montaje del asiento de seguridad para niños • Asegúrese de que la base es instalada de forma segura. • Coloque el asiento del coche en la base y presione hacia abajo hasta que se oiga un clic. •... -
Page 67: Desinstalación Del Base
Desinstalación del Base Desinstalación de la Base • Para el sistema LATCH, presione el botón de ajuste de la correa del conector LATCH y afloje la correa. • Presione cada uno de los botónes de desbloqueo de color rojo en los conectores LATCH y aléje los conectores de los anclajes de vehículo. -
Page 68: Instalación Sin Base
Instalación sin Base Antes de la Instalación • Compruebe que el cinturón de seguridad del vehículo no es incompatible con el asiento de seguridad para niños consultando el manual de propietario del vehículo y la página 52 de esta guía del usuario. •... -
Page 69: Guías De Cinturón
Instalación sin Base Guías de Cinturón • Suelte la cinta elástica en el adaptador de cochecito y levante la cubierta para exponer las guías de cinturón para la instalación. -
Page 70: Instalación Con Cinturones De Banda Horizontal Y Transversal
Instalación sin Base Instalación con cinturones de banda horizontal y transversal ADVERTENCIA! • Asegurar al niño en el asiento de seguridad para niños antes de instalar el asiento en el vehículo. • Revise su manual de propietario del vehículo para determinar la forma de bloquear su sistema de cinturones de seguridad. - Page 71 IMPORTANTE: Si no puede bloquear el cinturón de seguridad usted debe utilizar un sujetador (broche) que se usa para fijar el cinturón de seguridad. Estos sujetadores están disponibles cortesía de Britax llamando al 1-888-427-4829. • Ajustar la Manija de transporte a cualquier posición fija y bloqueada.
-
Page 72: Instalación Con Banda Horizontal
Instalación sin Base Instalación con Banda Horizontal ADVERTENCIA! • Asegurar al niño en el asiento de seguridad para niños antes de instalar el asiento en el vehículo. • Hay muchos diferentes tipos de cinturones de seguridad con banda horizontal. Revise su manual de propietario de vehículos para determinar qué... - Page 73 Instalación sin Base • Presione el asiento de seguridad para niños con firmeza sobre el asiento del vehículo mientras se quita toda la holgura del cinturón del vehículo. • Ajuste la manija de transporte a una posición bloqueada. • Compruebe que todas las conexiones son seguras. Compruebe que: * El cinturón de seguridad del vehículo no esté...
-
Page 74: Sujeción Del Niño
Sujeción del Niño ADVERTENCIA! • Ajuste el arnés para adaptarse a la ropa que el niño está usando. Retire abrigos voluminosos y / o chaquetas antes de colocar al niño en el asiento de seguridad para niños. • El arnés debe quedar perfectamente ajustado alrededor del niño de manera que este esté... - Page 75 Sujeción del Niño • Deslice una correa de arnés del gancho del arnés • Desde la parte delantera del asiento, tire de la correa del arnés hacia delante y fuera de la cubierta y la almohadilla para la cabeza. NOTA: No quite las almohadillas de confort o broche pectoral cuando se cambia la altura del arnés.
-
Page 76: Ajuste De La Correa De La Hebilla
Sujeción del Niño Ajuste de la correa de la hebilla IMPORTANTE: Su asiento de seguridad para niños ha sido fabricado con la correa de la hebilla en la posición interior para bebés que pesen menos de 11 libras (5 kg). Una vez que su niño cumpla 11 libras (5 kg), cambia la posición de la hebilla a la ranura exterior. - Page 77 Sujeción del Niño • Tire del retenedor de correa de la hebilla hasta que este quede completamente fuera del armazón y la cubierta. • Gire el retenedor de correa de la hebilla de modo que el lado corto pasará a través de la cubierta y de la ranura del armazón.
-
Page 78: Sujeción Del Niño
Sujeción del Niño Sujeción del Niño IMPORTANTE: Asegúrese de que usted ha seguido todas las instrucciones para la instalación y el ajuste del arnés y la hebilla en la posición correcta para su hijo. • Afloje el arnés del asiento de seguridad para niños pulsando el botón regulador del arnés y tirando adelante... - Page 79 Sujeción del Niño • Coloque al niño en el asiento de seguridad para niños como se indica. Sentado Slouching encorvado Sentado Sitting Up Arriba • Coloque las correas del arnés alrededor del niño. • Abroche el arnés insertando las lengüetas de la hebilla uno por uno.
- Page 80 Sujeción del Niño Sujeción del Niño continuó • Suavemente tire hacia arriba de las correas del arnés para apretar la parte ventral del arnés, que debe encajar en la parte inferior del cuerpo del niño.. • Tire lentamente de la correa de ajuste del arnés para ajustar el arnés alrededor del niño.
- Page 81 Sujeción del Niño • Compruebe que el arnés no esté torcido y el niño está bien sujetado. Compruebe que: * Hebilla esta abrochada * Las correas del arnés no estén torcidas * Broche pectoral esta a nivel de las axilas IMPORTANTE: * Siempre tire del arnés después de asegurar al niño para asegurarse de que la hebilla y el arnés están bien puestas.
-
Page 82: Cuidado Y Mantenimiento
Cuidado y Mantenimiento Almacenamiento de Guía del Usuario • Mantenga las instrucciones en el bolsillo de almacenamiento debajo de la cubierta en el lateral del asiento de seguridad para niños. Almacenamiento de Asiento • Guarde el asiento de seguridad para niños en un lugar seguro y seco cuando no se utiliza durante un período prolongado de tiempo. - Page 83 Cuidado y Mantenimiento Retiro de Cubierta • Desde la parte posterior del asiento, quite ambos correas del arnés del gancho del arnés. • Desde la parte delantera del asiento, tire de la correa del arnés hacia delante y fuera de la cubierta y la almohadilla para la cabeza.
- Page 84 Cuidado y Mantenimiento Reinstalación de la cubierta • Deslice el arnés, la hebilla y la correa de ajuste a través de la ranura correspondiente en la cubierta. • Estire el elástico en la parte superior e inferior de la cubierta sobre la parte superior e inferior del armazón.
-
Page 85: Limpieza De La Cubierta
Cuidado y Mantenimiento • Asegúrese de que la correa del arnés no esté torcido y pasarla a través de la almohadilla de la cabeza y luego a través de la ranura correspondiente en la cubierta y armazón. • Desde la parte posterior del asiento, vuelva a colocar las correas del arnés al gancho del arnés. - Page 86 Cuidado y Mantenimiento Limpieza de Armazón • Eliminar los residuos sueltos con un cepillo de cerdas suaves. • Limpiar con una esponja con agua tibia y jabón suave. • SECAR CON TOALLA • NO: * Use solventes * Limpiadores abrasivos * Utilizar lejía * Lavar a máquina * Secar a máquina...
- Page 87 Cuidado y Mantenimiento Limpieza de la Hebilla • Retire la hebilla (pg 74 - 75). • Enjuague bien con agua tibia. • PROBAR LA HEBILLA abrochándola y desabrochándola hasta que escuche “clic” después de inserter cada lengüeta. Si no oye ningún clic, debe proceder a limpiar la hebilla de nuevo •...
-
Page 88: Consejos Y Solución De Problemas
• Levante el armazón adaptador o el asiento para niños para asegurarse de que está bien fijado. Cochecitos No Britax IMPORTANTE: Los adaptadores de coche puede ser necesario retirar al montar en un coche no Britax. -
Page 89: Garantía
Britax no aprueba el uso de cubiertas, piezas, juguetes, accesorios o dispositivos de ajuste que no sean de Britax Child Safety, Inc. Su uso podría hacer que el asiento no cumpla con las normas federales de seguridad automotriz o que no rinda como debería durante un accidente. - Page 90 Notes...
- Page 92 Britax Child Safety, Inc. Tel. : 1-888-427-4829 4140 Pleasant Road Fort Mill, SC 29708 www.Britax.com A Britax Childcare Group Limited company...
Need help?
Do you have a question about the B-SAFE and is the answer not in the manual?
Questions and answers