Table of Contents
Advertisement
Quick Links
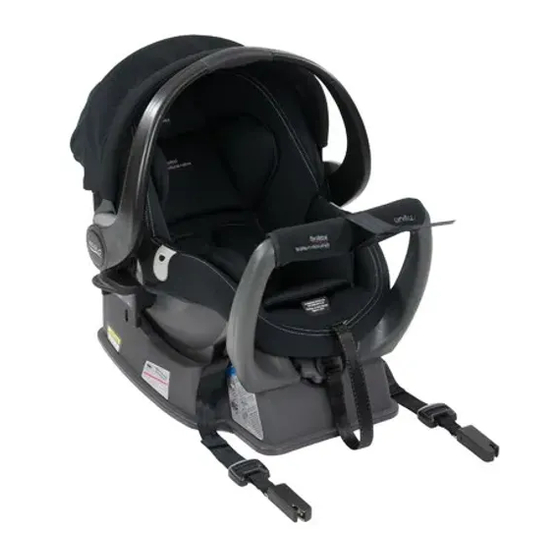
NOTE: Style may vary from image shown.
IMPORTANT: KEEP THIS BOOKLET IN THE PLACE
PROVIDED ON THE CHILD RESTRAINT BASE
BABY CAPSULE
ISOFIX COMPATIBLE
Birth to 12 months (approx.)
Instructions for Installation & Use
Series No. BS0040A-i20133
Instructions for Installation & Use
Suitable for low birth
weight and premature
infants without restrictive
medical conditions.
1
Advertisement
Table of Contents

Related Manuals for Britax Safe-N-Sound BABY CAPSULE BS0040A-i20133 Series


Summary of Contents for Britax Safe-N-Sound BABY CAPSULE BS0040A-i20133 Series
- Page 1 BABY CAPSULE ISOFIX COMPATIBLE Birth to 12 months (approx.) Instructions for Installation & Use Series No. BS0040A-i20133 Suitable for low birth weight and premature infants without restrictive medical conditions. NOTE: Style may vary from image shown. IMPORTANT: KEEP THIS BOOKLET IN THE PLACE PROVIDED ON THE CHILD RESTRAINT BASE Instructions for Installation &...
- Page 2 QUICK SETUP: ISOFLEX™ (BASE) QUICK SETUP: SEATBELT (BASE) Level Level Pull Pull Pull Press Press Instructions for Installation & Use Instructions for Installation & Use...
- Page 3 QUICK SETUP: HARNESS ADJUSTMENT QUICK SETUP: SECURING BABY Click LOW BIRTH AVERAGE SIZE LARGER GROWING WEIGHT INFANT BABY BABY BABY Pull to tighten KEEP LEVEL Instructions for Installation & Use Instructions for Installation & Use...
- Page 4 INTRODUCTION INTRODUCTION Phù hợp với bé sơ sinh nhẹ cân và bé sanh thiếu tháng không có tình trạng sức Suitable for low birth weight and premature infants without restrictive medical conditions. khỏe giới hạn. Chỉ được sử dụng ở vị trí hướng mặt về phía sau cho đến khi vai của To be used only in a rearward-facing position until the infant's shoulders reach the bé...
- Page 5 Carefully read all the instructions for installation in this book. If in doubt about the method SPECIAL FEATURES of installation, consult Britax childcare or agent or a child restraint fitter or, in New ALTERNATIVE INSTALLATION Zealand, to consult the agent for the vehicle.
- Page 6 IMPORTANT : • Use the restraint exactly as shown in the instructions. • Do not use the child restraint facing forwards. Do not use excessively upright or reclined. • Supervision of children is needed because they may be able to undo the buckles and adjusters.
-
Page 7: Shoulder Height Markers And A Growing Child
SHOULDER HEIGHT MARKERS AND A GROWING CHILD SHOULDER HEIGHT MARKERS AND A GROWING CHILD NEW BABY The Baby Capsule is not suitable for your child when their shoulders are above the shoulder height marker. Shoulders below the Shoulder Height Marker. If the babies neck muscles are unable to support their head then the child should remain rear facing, choose a child restraint that will take larger babies in rear facing. -
Page 8: Shoulder Height Markers And The Next Step
SHOULDER HEIGHT MARKERS AND THE NEXT STEP SHOULDER HEIGHT MARKERS AND A GROWING CHILD Shoulder height markers are provided on this restraint for a visual indication that the Next type of restraint that can be used in the car for your child is safe to ride in this restraint. -
Page 9: Special Features
SPECIAL FEATURES SPECIAL FEATURES BABY CAPSULE BASE Harness Tongues Harness Buckle 1. Padded Insert (style may vary) 2. Shoulder Height marker 3. Buckle Tongue Holders (if fitted) 10. Belt Guide Hooks 4. Harness Adjuster (under flap) 11. Capsule Latching Points 5. -
Page 10: Seatbelt Installation
30. Carry Handle 24. Car Seat belt 18. ISOFLEX™ Connector Release Button 31. Carry Handle release latch 19. ISOFLEX™ Connector 25. Britax CLICK & GO™ Adaptor 32. Canopy 20. Tension Indicator (Green when activated) 26. Baby Capsule 33. Storage Pocket 21. -
Page 11: Suitable For Use
SUITABLE FOR USE USING THE BABY CAPSULE 570mm If the baby’s neck muscles are unable to support their head, then the child should remain REMOVING BABY CAPSULE FROM BASE rear-facing, choose a restraint that will suit larger A. Grasp the handle with one hand. With the other babies in a rear-facing mode. -
Page 12: Installing The Base
USING THE BABY CAPSULE INSTALLING THE BASE ADJUSTMENT OF HANDLE POSITION INSTALL INTO VEHICLE The Baby Capsule features a sturdy carry handle which can be used in conjunction with Remove all packaging from the Baby Capsule. the curved base to convert it to a rocker. At the base of the handle there are two large Consult the car owner’s handbook for location of top tether anchorage points. - Page 13 HOW TO INSTALL THE BASE - INSTALLING THE BASE WITH ISOFLEX™ CONNECTORS Always leave a WHAT ARE ISOFIX LOW ANCHORAGES IN A VEHICLE? rearward slope angle of ISOFIX low anchorages are fixed, standardised anchoring points for securely installing approximately 10° to 15° an ISOFIX compatible child restraint in a vehicle with ISOFIX low anchorages.
- Page 14 HOW TO INSTALL THE BASE - HOW TO INSTALL THE BASE - WITH ISOFLEX™ CONNECTORS WITH ISOFLEX™ CONNECTORS C. Press and hold the adjuster release G. Feed the ISOFLEX™ connector straps under the belt guide hooks as shown. Ensure button and pull the connector strap the straps are not twisted.
- Page 15 HOW TO REMOVE THE BASE - HOW TO INSTALL THE BASE WITH ISOFLEX™ CONNECTORS - WITH SEATBELT REMOVE THE BASE HOW TO INSTALL BASE USING LAP SASH SEATBELT To store the ISOFLEX™ connectors on the underside of the base A. Place the base in the desired A.
- Page 16 HOW TO INSTALL THE BASE - WITH SEATBELT HOW TO INSTALL - TOP TETHER STRAP C. Push downwards and rearward on Belt Guide Hooks Once the Capsule is fitted to the base, refer to the restraint base to compress it into page 45.
- Page 17 BABY CAPSULE SETUP HOW TO INSTALL - TOP TETHER STRAP HARNESS FEATURES IMPORTANT : 1. Outer crotch strap slot The Top tether strap must be fitted at all times when the baby is in the car when 2. Middle crotch strap slot using either the seatbelt or the ISOFLEX™...
-
Page 18: Lap Strap
BABY CAPSULE SETUP BABY CAPSULE SETUP CROTCH STRAP LAP STRAP LOW BIRTH WEIGHT LOW BIRTH WEIGHT The Baby Capsule is fitted with three crotch strap CROTCH STRAP LAP STRAP The Baby Capsule is fitted with two lap strap Crotch positions. Correct location of crotch strap will assist positions. -
Page 19: Shoulder Straps
BABY CAPSULE SETUP BABY CAPSULE SETUP ADJUSTING THE SETTING UP THE HARNESS ALWAYS OVER THE BAR SHOULDER STRAPS This section covers the setting up of the harness to fit the infant. Fitting the harness is not required. Securing of the infant is covered later in the instructions. Remove infant from the Baby Capsule prior to making adjustments. -
Page 20: How To Use
BABY CAPSULE SETUP HOW TO USE F. The Baby Capsule is fitted with four shoulder PLACING INFANT IN CAPSULE strap positions. As the baby grows, the If your child is of low birth weight or less than 3kg then you will probably need to use the shoulder straps must be moved to higher harness arrangement for low birth weight babies. - Page 21 HOW TO USE HOW TO USE B. Place the two harness tongues D. Place each arm through each shoulder strap of the harness. into the Buckle Tongue Holder Position the buckle of the crotch strap as shown right. (if fitted). Move the harness buckle E.
- Page 22 HOW TO USE HOW TO USE PLACING BABY & BABY CAPSULE ONTO BASE F. Ensure slack is removed from the lap straps by pulling the shoulder harness straps through the This is the same process for either ISOFLEX™ or buckle tongues, then pull the Harness Adjustment seatbelt installation.
- Page 23 HOW TO USE HOW TO USE REMOVING BABY & BABY CAPSULE FROM BASE REMOVING BABY FROM BABY CAPSULE A. Rotate the carry handle to the "non-rocking position" A. Loosen the top tether strap. Ensure that the adjuster does not fall on the baby. and ensure the Canopy is fully open.
-
Page 24: How To Install In An Aircraft
HOW TO USE HOW TO INSTALL IN AN AIRCRAFT HOW TO INSTALL USING AIRCRAFT LAP BELT TO FIT AND USE THE CANOPY The Baby Capsule without base is suitable for use on aircraft. A. Push the two plastic frame sections at both The Baby Capsule must be used in accordance with the aircraft operators procedures, sides onto the Baby Capsule at the inside of and any directions or instructions from the aircraft operator, pilot or crew. - Page 25 HOW TO INSTALL IN AN AIRCRAFT HOW TO INSTALL IN AN AIRCRAFT The Baby Capsule base may be included with 'checked in' luggage (for use after C. Place handle in "non-rocking" position, flight). Aircraft label is located on the underneath of the Baby Capsule. It demonstrates that is, fully backwards.
-
Page 26: Care And Maintenance
E. If any part of the restraint is cracked, broken or not operating seek repair immediately indication of a sluggish harness buckle is that you cannot - contact Britax Customer Service 1300 303 330 3-bar hear a click when engaging the last harness tongues. To... - Page 27 CARE & MAINTENANCE CARE & MAINTENANCE COVER (STYLE MAY VARY) TO REMOVE THE COVER The restraint has a flame retardant cover which is removable for cleaning. Cleaning A. Remove the Canopy (see page 46) and padded insert instructions are on the care label attached to the cover. If fluffy cover is fitted then (if supplied) as described on page 55.
-
Page 28: To Replace The Cover
If an aftermarket accessory is used that is not recommended Baby Capsule. by Britax then ensure that the accessory is for this restraint compliant with AS/NZS 8005 and stated as suitable for use with this child restraint. -
Page 29: Other Accessories
Shoulder harness OTHER ACCESSORIES Slots for the Only use accessories designed and recommended by Britax Childcare Pty Ltd for this pillow ties CANOPY product. Refer to page 46. SHOULDER PADS - Style may vary The shoulder pads may require release by press studs. -
Page 30: Installation Of Car's Upper Anchorage Point
Extension Strap distance to be measured. Consult the vehicle owner’s handbook for location of anchorage fittings or anchorage Length 300mm (Use Britax Safe-n-Sound part 0035 or 0291). points and the possible use of spacers. Some vehicles may have an anchor fitting Length 600mm (Use Britax Safe-n-Sound part 0036 or 0290). - Page 31 INSTALLATION OF CAR'S UPPER INSTALLATION OF CAR'S UPPER ANCHORAGE POINT ANCHORAGE POINT IF THE CAR IS NOT FITTED WITH CHILD IF THE CAR IS FITTED WITH CHILD UPPER ANCHORAGE FITTING UPPER ANCHORAGE RESTRAINT UPPER ANCHORAGE RESTRAINT UPPER ANCHORAGE Fig.1. FITTINGS FOR SEDANS ONLY Attachment Bolt POINTS POINT...
- Page 32 INSTALLATION OF CAR'S UPPER ALTERNATIVE INSTALLATION IF SEATBELT ANCHORAGE POINT LOOSENS ONLY USE A 5/16 UNC GRADE 5 BOLT. IF THE LAP-SASH SEAT BELT NOTE: Marking on BOLT IS NOT THE CORRECT LENGTH THE CAR If a seat belt will not stay tight, then a the top of a Grade 5 MANUFACTURER’S HAND BOOK CAN PROVIDE Gated 3-Bar Slide may be used to prevent...
-
Page 33: Alternative Installation If Seatbelt Loosens
Sash belt can only go one way, as shown above. • Britax CLICK & GO™ Adaptor (not supplied) that fits to the receivers on the portion stroller side armrests. The stroller instruction manual will provide full instructions on use of the stroller. -
Page 34: Travel System Integral Latch
CAPSULE - LATCH METHOD LATCH METHOD You may need to remove the Britax CLICK & GO™ Adaptors (see page 71 to 73) to A. Ensure that the arm bar (or tray) is fully locked in position on both sides of the enable fitment on some strollers when using the integral latch system. - Page 35 FRAME E. Check the Capsule is securely attached to If the Baby Capsule is fitted with Britax CLICK & GO™ Adaptor, then fit as follows: the stroller arm bar by lifting the Capsule before use. A. Remove Stroller seat or Carry cot from stroller frame (refer to your stroller instructions).
- Page 36 HOW TO REMOVE THE BRITAX THE STROLLER FRAME CLICK & GO™ADAPTOR A. Squeeze both carry handle release latches Unhook To remove the Britax CLICK & GO™ Adaptor, and rotate the handle upwards, into the “carry elastic ensure handle is in “rocking position”. position”.
- Page 37 E. Now replace the trim pull elastic underneath the HOW TO REPLACE THE BRITAX CLICK & GO™ADAPTOR adaptor and hook. Place elastic in groove shown A. To attach the Britax CLICK & GO™ Adaptor to the Baby Capsule ensure the below. Hook elastic Capsule's Handle is in “Rocking position”...
-
Page 38: Travelling Tips
Children travelling unrestrained and standing up in the car are in danger of serious injury All Britax Safe-n-Sound child restraints are manufactured to Australian/New Zealand or death. Traffic regulations in all states require children to be secured in child restraints Standards AS/NZS1754-2013 which require us to advise users of child restraints to "Destroy... - Page 39 Our Crash Exchange Terms and Application form are accessible on our website. Please visit www.britax.com.au for further information. Instructions for Installation & Use Instructions for Installation & Use...
- Page 40 NOTES NOTES AUSTRALIA Britax Childcare Pty. Ltd. A.B.N 55 006 773 600 Head office and registered address: Level 4, 650 Lorimer Street, Port Melbourne, VIC, 3207 P.O. Box 5119 Garden City, VIC, 3207 Customer Service 1300 303 330 Email au-custserv@britax.com www.britax.com.au...
-
Page 41: Warranty
The Safe-n-Sound, ISOFLEX trademark is the property of Britax Childcare Pty. Ltd. (Australia). The BRITAX and CLICK & GO trademark are the property of Britax Childcare Holdings Ltd, UK. We reserve the right to alter this product without notice.
Need help?
Do you have a question about the Safe-N-Sound BABY CAPSULE BS0040A-i20133 Series and is the answer not in the manual?
Questions and answers