Code Reader 2.0 User Manual
Code reader 2.0 user manual
Hide thumbs
Also See for Code Reader 2.0:
- User manaul (67 pages) ,
- Product reference manual (16 pages) ,
- Quick start manual (2 pages)

Related Manuals for Code Code Reader 2.0


Summary of Contents for Code Code Reader 2.0
- Page 1 User Manual Manual Version 04 C001537_04_CR2 User Manual Save Settings This version of the manual supports firmware 2362 and greater. Release Date: 2/18/05...
-
Page 2: Statement Of Agency Compliance
Statement of Agency Compliance The CR2 has been tested for compliance with FCC regulations and was found to be compliant with all applicable FCC Rules and Regulations. IMPORTANT NOTE: To comply with FCC RF exposure compliance requirements, this device must not be co-located or operate in conjunction with any other antenna or transmitter. - Page 3 NO WARRANTY. This technical documentation is provided AS-IS. Further, the documentation does not represent a commitment on the part of Code Corporation. Code Corporation does not warrant that it is accurate, complete or error free. Any use of the technical documentation is at the risk of the user. Code Corporation reserves the right to make changes in specifications and other information contained in this...
-
Page 4: Table Of Contents
Table of Contents Chapter 1 - Getting Started Introduction ........................2 Unpacking .......................... 3 Targeting and Reading Techniques .................3-4 Imager Field of View and Resolution ................4-5 CR2 Decode Zone ......................6 Chapter 2 - Installation Guides USB Interface ........................8 RS232 Interface ......................... - Page 5 Table of Contents Code 93 Symbology ....................27 Code 128 Symbology ....................27 Composite Symbologies .................... 27 4.10 Data Matrix Symbology ....................28 4.11 GoCode Symbology ....................28 4.12 Interleaved 2 of 5 Symbology ................28-29 4.13 Maxicode Symbology ....................29 4.14 Micro PDF417 Symbology ..................
- Page 6 Table of Contents Chapter 6 - CR2 Programming: Trigger Settings Left Trigger Programming ..................42 Right Trigger Programming ..................42 Handle Trigger Programming ..................43 Chapter 7 - CR2 Programming: User Feedback CR2 Feedback Definition Guide ................45-46 Volume & Vibrate Mode Settings ................47 Laser Settings ......................
- Page 7 Table of Contents Chapter 11 - CR2: Maintenance and Troubleshooting 11.1 Reset Reader ........................ 63 11.2 General Safety Information ..................63-64 11.3 Warranty ........................64-65 11.4 CR2 Accessories ...................... 65-66 11.5 Frequently Asked Questions ..................66-67 11.6 CR2 Maintenance ......................68 11.7 CR2 Troubleshooting Guide ..................
-
Page 8: Chapter 1 - Getting Started
Chapter 1 - Getting Started C001537_04_CR2 User Manual Save Settings... -
Page 9: Introduction
1.1 - Introduction CR2 is a revolutionary new bar and 2-dimensional code reader. Developed to be the first universal reader, no other single device performs as many functions. With a cost of ownership far less than comparable systems, the CR2 incorporates a unique dual path optical system, a 1.3 million pixel CMOS sensor, and a 400 MHz processor. -
Page 10: Unpacking
1.2 - Unpacking Remove the imager from its packing and inspect it for damage. If the scanner was damaged during shipping, please call Code at (801) 495-2200. The standard CR2 unit is shipped with a USB cable interface. The unit also features a battery blank that must be installed in the unit at all times. -
Page 11: Imager Field Of View And Resolution
1.3 - Targeting and Reading Techniques (con’t) To read a symbol with the CR2: The CR2 features omnidirectional decoding. Center the symbol in any orientation within the laser dot aiming pattern (figure 1.3). Figure 1.3 Note: The CR2 can read a symbol that is not centered however, the CR2 performs best when a code is centered. - Page 12 1.4 - Imager Field of View & Resolution (con’t) If only the near field is used (small, high density symbols), the far field image can be ignored. If only the far field is used (large, lower density symbols), the near field can be ignored. Further optimization may be obtained by "windowing"...
-
Page 13: Cr2 Decode Zone
1.5 - CR2 Decode Zone C001537_04_CR2 User Manual - Save Settings... -
Page 14: Chapter 2 - Installation Guides
Chapter 2 - Installation Guides C001537_04_CR2 User Manual Save Settings... -
Page 15: Usb Interface
2.1 - Installation Guide - USB Interface To connect the CR2 to your host computer via USB interface: 1. Make sure the USB cable is sufficiently attached to your CR2 unit (figure 2.1). 2. You DO NOT need to power off your host computer (figure 2.2). -
Page 16: Rs232 Interface
2.2 - Installation Guide - RS232 Interface To connect the CR2 to your host computer via RS232 interface: Make sure the RS232 cable is sufficiently attached to your CR2 unit (figure 2.4). Connect the RS232 interface cable to your host computer (figure 2.5). -
Page 17: Ps/2 Interface
2.3 - Installation Guide - PS/2 Interface Power off the host computer. Attach the end of the PS/2 cable with the single connector to the CR2. If external keyboard exists, unattach your keyboard from the host and connect the appropriate connector to the PS/2 cable Connect the other connector to host computer into keyboard port . -
Page 18: Bluetooth Radio Overview
2.4 - Bluetooth Radio Overview Overview This version of the CR2 features a Bluetooth® wireless radio. The radio allows for point to point wireless communication with other Bluetooth devices that support serial port protocol (SPP). The following guide will give you general instructions on connecting your CR2 to a desktop or laptop computer with a Bluetooth radio. - Page 19 2.4 - Bluetooth Radio Overview (con’t) Radio Range and Transferring Data The CR2 radio is a Class 1 device. If connected to another Class 1 device the unit has roughly a 300 foot line of sight operating range. If connecting to a Class 2 or Class 3 device, the operating range may drop to match the lower range.
-
Page 20: Bluetooth Radio Overview
2.4 - Bluetooth Radio Overview (con’t) Save Settings Scan the code below to make the RF settings permanent on the reader: Save Settings Disconnecting from the Device You may force disconnection by reading the disconnect code below (The CR2 may not appear disconnected in the slave Bluetooth connection manager for 10 –... -
Page 21: Switching Cables
2.5 - Switching Cables Attaching and Switching Cables The CR2 is available with USB, RS232 and PS/2 cables. All of the cables are connected to the CR2 with a 8-pin DIN connector. Different cables may be required for different hosts. Palm Held CR2 To install a cable on the standard palm-held unit, correctly line up the 8-pin DIN connector (figure 2.11) into back end of the unit. -
Page 22: Attaching Handle
2.6 - Attaching Handle Attaching the Handle To attach the handle, please follow the following steps. Place the CR2 in the cradle of the handle and slide the unit back (figure 2.17). Be careful not to place fingerprints on the front glass when attaching handle. Once the 8-pin DIN connector of the handle begins to enter the opening in the back of the unit, firmly press the unit back until the unit is flush against the handle (figure 2.18). -
Page 23: Cr2 Battery And Battery Blank
2.7 - CR2 Lithium Ion Battery and CR2 Battery Blank CR2 Battery Blank All cabled CR2 units feature a battery blank. THE BATTERY BLANK NEEDS TO BE ATTACHED AT ALL TIME WHEN USING THE CR2. Installing the battery blank is identical to installing the battery. -
Page 24: Chapter 3 - Cr2 Programming: Optimizing The Reader For Your Environment
Chapter 3 - CR2 Programming: Optimizing the Reader for Your Environment C001537_04_CR2 User Manual Save Settings... -
Page 25: Introduction
3.1 - Introduction The CR2 may be easily optimized for any workplace. By setting a few parameters from your scanning environment you can take advantage of the readers dual path 1.3 megapixel imager and 400 MHz processor. If you are scanning large codes, small codes or even multiple sizes of different codes, by defining the working range and the type of symbols the reader must process, the CR2 will offer lightning fast decodes. - Page 26 3.1 - Introduction (con’t) When choosing the correct setting for your environment (i.e. printed labels, direct marks...) we recommend trying several settings. For a large majority of users, the B1 or B3 settings are satisfactory. If you would like to greatly improve the reader’s performance on medium to large 1-D codes, try the D1 or D3 setting, The chart and definitions below will help you understand the readers configuration for each setting.
-
Page 27: Global (All Triggers) Optimization Matrix
3.1 - Introduction (con’t) Near Field (NF): The nearest field of the CR2’s two image fields. The Near Field has the highest resolution (1024 x 640 DPI). It has an optimal focal point of 4” (101.6 mm) away from the lens of the reader. -
Page 28: Left Trigger Optimization Matrix
3.3 - Left Trigger Optimization Matrix Large Small Working Range * Factory Default Small to Large Symbols Small to Medium Symbols Medium to Large Symbols Near and Far Range (Close Range Only) (Far Range Only) * All triggers programmed to this setting at shipment. After setting the configuration, you must scan the save settings code or your reader will lose its settings if the reader is powered off. -
Page 29: Handle Trigger Optimization Matrix
3.5 - Handle Trigger Optimization Matrix Large Small Working Range * Factory Default Small to Large Symbols Small to Medium Symbols Medium to Large Symbols Near and Far Range (Close Range Only) (Far Range Only) * All triggers programmed to this setting at shipment. After setting the configuration, you must scan the save settings code or your reader will lose its settings if the reader is powered off. -
Page 30: Continous Trigger Off
3.7 - Continous Trigger Off Scan the following code to turn the continous trigger feature off: Continous Trigger Off C001537_04_CR2 User Manual Save Settings... -
Page 31: Chapter 4 - Cr2 Programming: Symbology Settings
Chapter 4 - CR2 Programming: Symbology Settings C001537_04_CR2 User Manual - Save Settings... -
Page 32: Introduction
4.1 - Introduction The following chapter will allow a user to change the symbology settings on the CR2. To reset the unit to factory defaults or to save the current settings please scan one of the codes below: Save Settings Reset to USB Factory Defaults Reset to PS/2 Factory Defaults Radio settings will... -
Page 33: Codablock F Symbology
4.4 - Codablock F Symbology Scan the following codes to enable/disable Codablock F symbology settings: Codablock F On Codablock F Off (Default) Sample Codablock F Code Note: When Codablock F and Code 128 decoding are enabled, there is some danger of mistakenly decoding a damaged Codablock F symbol as a Code 128 symbol. -
Page 34: Code 93 Symbology
4.6 - Code 39 Symbology (con’t) Code 39 Short Margin On Code 39 Short Margin Off (Default) Sample Code 39 Code 4.7 - Code 93 Symbology Scan the following codes to enable/disable Code 93 symbology settings: Code 93 On (Default) Code 93 Off Sample Code 93 Code 4.8 - Code 128 Symbology... -
Page 35: Data Matrix Symbology
4.10 - Data Matrix Symbology Scan the following codes to enable/disable Data Matrix symbology settings: Data Matrix Rectangle On Data Matrix Rectangle Off (Default) Data Matrix Inverse On Data Matrix Inverse Off (Default) Sample Data Matrix Code Sample Data Matrix Code 4.11 - GoCode Symbology GoCode is a miniature, two-dimensional (2-D) symbol. -
Page 36: Maxicode Symbology
4.12 - Interleaved 2 of 5 Symbology (con’t) Int 2 of 5 Two Digits Off Int 2 of 5 Four Digits On Int 2 of 5 Four Digits Off Sample Int 2 of 5 Code 4.13 - Maxicode Symbology Scan the following codes to enable/disable Maxicode symbology settings: Maxicode On Maxicode Off (Default) Sample Maxicode... -
Page 37: Pdf417 Symbology
4.16 - PDF 417 Symbology Scan the following codes to enable/disable PDF 417 symbology settings: PDF 417 On (Default) PDF417 Off Macro PDF 417 On Macro PDF 417 Off (Default) Sample PDF 417 Code If your data is encoded into multiple PDF 417 codes, the Macro PDF 417 feature allows a user to scan these PDF 417 codes and combine the information. -
Page 38: Postal Symbologies
4.18 - Postal Symbologies All postal codes default settings are OFF. Scan the following codes to enable the appropriate Postal symbology: Note: If you wish to change which Postal code is activated, you MUST scan the disable all postal codes symbol and then scan your desired symbology. -
Page 39: Rss Symbology
4.20 - RSS Symbology Scan the following codes to enable/disable RSS symbology settings: RSS Limited On RSS 14 and RSS 14 Truncated On RSS 14 Stacked On RSS Expanded On All RSS On All RSS Off (Default) Sample RSS Limited Code Sample RSS 14 Code Sample RSS 14 Truncated Code Sample RSS 14 Stacked Code... -
Page 40: Chapter 5 - Cr2 Programming: Interface Communication Settings
Chapter 5 - CR2 Programming: Interface Communication Settings C001537_04_CR2 User Manual Save Settings... -
Page 41: Reader Id And Firmware Version
5.1 - Reader ID and Firmware Version To find out the Reader ID and firmware version, open a text editor program (i.e. Notepad, Microsoft Word...) and read the following code: Note: For units with a Bluetooth Radio, the Reader ID is also your Bluetooth Radio PIN #. Reader ID and Firmware You will get a text string with your firmware version and CR2 ID number (see below): Xap/iVVVVWWWWXXXXSSSSSSSSSSPXX-XX+XX... -
Page 42: Usb Interface
5.3 - USB Interface USB Downloader - This mode is the standard way of transferring unformatted, unpacketized data through the USB port. USB Native Two Way Mode - This mode is utilized when there is a need for bidirectional communication between the CR2 and an application through the USB port (i.e. -
Page 43: Bluetooth Radio Auto Connect
5.5 - Bluetooth Radio Interface (con’t) RF Two Way Mode (con’t) - of software called CodeXML Router Bluetooth Edition (BE) that automatically provides packet protocol verification. CodeXML Router BE allows for end-to-end Bluetooth handshakes that eliminate the case of out-of-range data loss. Scan the following codes to set the Radio Frequency (RF) communication settings: RF One Way Mode - Max Range (Default) RF One Way Mode - Max Reliability... -
Page 44: Bluetooth Radio Time Out Settings
5.5.3 - Bluetooth Radio - Time Out Scan the following codes to set the period of time before the Bluetooth Radio will go into sleep mode from inactivity: Note: Increasing the time before the unit will time out will decrease battery life. 90 Seconds (Default) 5 Minutes 10 Minutes... -
Page 45: Rs232 Interface
5.6 - RS232 Interface RS232 One Way Mode - This mode is the standard way of transferring unformatted, unpacketized data through the serial/RS232 port. RS232 Two Way Mode - This mode is utilized when there is a need for packetized, bidirectional communication between the CR2 and an application through the serial/RS232 port. -
Page 46: Baud Rate
5.6.3 - RS232 Interface - Baud Rate Scan the following codes to set the appropriate baud rate: 1200 2400 4800 9600 19200 38400 57600 (Default) 115200 5.6.4 - RS232 Interface - Parity Scan the following codes to set parity: Even None (Default) 5.6.5 - RS232 Batch Mode Considerations In RS-233 Cabled mode, the CR2 thinks it is always connected even though the serial cable is... -
Page 47: Keyboard Support
5.7 - Keyboard Support Scan the following codes to set appropriate keyboard mapping: US Keyboard Mapping (Default) Universal Keyboard Mapping Custom Keyboard There is more keyboard support on the Code website at: http://www.codecorp.com/support/specialinstructions.htm If you require a special configuration, please contact Code at (801) 495-2200. 5.8 - Cabled Reader - Time Out Settings Will only work in versions 2098 and above. -
Page 48: Chapter 6 - Cr2 Programming: Trigger Settings
Chapter 6 - CR2 Programming: Trigger Settings C001537_04_CR2 User Manual Save Settings... -
Page 49: Left Trigger Programming
6.1 - Left Trigger Programming Scan the following codes to set the left trigger functionality: Read Codes with Both Imagers (Default) Read with Far-Field Imager ONLY Read with Near-Field Imager ONLY Upload Stored Data Left Trigger Take Picture Note: If you program a trigger to another function, you will need to reset any performance code setting from Chapter 3. 6.2 - Right Trigger Programming Scan the following codes to set the right trigger functionality: Read Codes with Both Imagers (Default) -
Page 50: Handle Trigger Programming
6.3 - Handle Trigger Programming Scan the following codes to set the handle trigger functionality: Read Codes with Both Imagers (Default) Read Code with Far-Field Imager ONLY Read Code with Near-Field Imager ONLY Upload Stored Data Handle Trigger Take Picture Note: If you program a trigger to another function, you will need to reset any performance code setting from Chapter 3. - Page 51 Chapter 7 - CR2 Programming: User Feedback and Continous Scan Settings C001537_04_CR2 User Manual - Save Settings...
-
Page 52: Cr2 Feedback Definition Guide
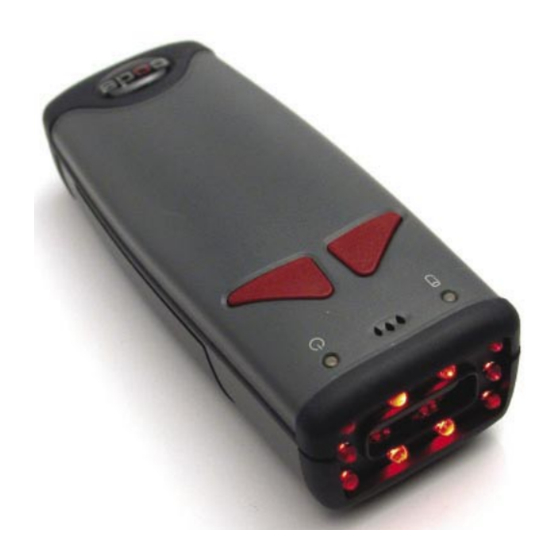
7.1 - CR2 Feedback Definition Guide The CR2 features two (2) LED’s on the front of the unit. These LED’s give feedback on different functionality of the CR2 unit. Each LED has a small icon underneath that represent the following: Memory / Connection Icon Battery or Power Icon The CR2 unit will automatically flash battery or power status every 15 seconds. - Page 53 7.1 - CR2 Feedback Definition Guide (con’t) Normal Operation Feedback (con’t) Memory/Connection Battery Sound Successful Decode Solid Green and Data Transfer Flash Green 1 Beep via cable Flash either Flash Amber Successful Decode Green, Amber or Red and Data Store 1 Beep or Red see table 2.1...
-
Page 54: Volume & Vibrate Mode Settings
7.2 - Volume and Vibration Settings Scan the following codes to set vibration mode: Vibrate On / Beep On Vibrate On / Beep Off Vibrate Off / Beep On (Default) Scan the following codes to set your reader’s volume: Beep Off Beep Low Beep High (Default) 7.3 - Laser Settings... -
Page 55: Continous Scan Settings
7.4 - Continous Scan Scan the following codes to turn continous scanning on/off: Both Near & Far Field On Near Field Only On Far Field Only On Off (Default) Note: This function is only reccommended for short term use because of battery consumption. See section 7.4.1 for Sleep Time Out Settings 7.4.1 - Continous Scan - Sleep Time Out Will only work in versions 2098 and above. -
Page 56: Duplicate Scan Delay
7.4.3 - Continous Scan - Duplicate Scan Delay Scan the following codes to set the delay time for reading duplicate codes: 0 Seconds (Default) 1 Second 3 Seconds 7.5 - Code Readability Index The Readability Index provides a measurement of a specific symbol’s ease or difficulty to be decoded by the CR2. - Page 57 7.5 - Code Readability Index (con’t) Once read, each time a data symbol is read, the index will be output, followed by a comma, (,) followed by the decoded data. The Reader will continue to output the Readability Index upon every read until disabled, either by reset or by reading the Readability Index Output Disable: Readability Index Output Disable: C001537_04_CR2 User Manual -...
-
Page 58: Chapter 8 - Cr2 Programming: Batch Mode
Chapter 8 - CR2 Programming: Batch Mode C001537_04_CR2 User Manual Save Settings... -
Page 59: Batch Mode Settings
8.1 - Batch Mode The CR2 unit features a batch mode for applications requiring a portable reader. Batch mode allows a user to store scanned data to the reader’s non-volatile memory. The user may transfer the data to a host computer when needed. To utilize batch functionality you will need to purchase the 1400 mA or 1950 mA Lithium Ion battery from a Code representative. - Page 60 8.1 - Batch Mode (con’t) Feedback After a successful decode in batch mode, the unit will beep once and the memory LED will flash either red or amber depending on memory level and every 15 seconds the battery LED will flash green, amber or red depending on the battery level.
-
Page 61: Time Stamp Settings
8.1 - Batch Mode (con’t) Transfer Only Unsent Data in Memory Delete Scanned Data from Memory Note: Not applicable in “Log Only Mode” use “Transfer All Data In Memory”. Enable Auto Transfer Buffer Memory Disable Auto Transfer Buffer Memory (Default) RS232 Considerations In RS-233 Cabled mode, the CR2 will behave as it is always connected even though the serial cable is disconnected or the power adapter is unplugged. -
Page 62: Chapter 9 - Advanced Cr2 Programming: Decode Performance
Chapter 9 - Advanced CR2 Programming: Decode Performance C001537_04_CR2 User Manual Save Settings... -
Page 63: Decode Time Led's For Non-Standard Inks
9.1 - Decode Time & LED’s for Non Standard Inks The default settings for the CR2 are designed for optimal, general purpose performance with good quality symbols on typical surfaces. For poor quality codes or codes on non-standard surfaces (shiny, low-contrast), the unit may require: More time to process the code before the system abandons the image and restarts on a new decode attempt. -
Page 64: Targeting Zone Tolerances
9.3 - Set Targeting Zone Tolerances Scan one of the following codes to set the decode accuracy of the CR2 unit. The 50 setting is the most accurate while the 1600 code is the most tolerant (If you set the unit to a 50 setting, you have to aim the targeting dot directly on the desired code for it to be read). -
Page 65: Vga And Sxga Settings
9.5 - VGA & Megapixel Settings User’s may optimize the CR2 unit’s megapixel (SXGA) imager (1280 x 1024) to a VGA (640 x 480). This feature is used to decrease the pixel sampling area, which will greatly increase processing speed. This is an advanced feature used for the rapid decoding of 1-dimensional/linear codes and larger module size 2- dimensional codes. - Page 66 Chapter 10 - Advanced CR2 Programming: Prefix, Suffix and CodeXML C001537_04_CR2 User Manual Save Settings...
-
Page 67: Prefix Settings
10.1 - Prefix Settings If you scan the following codes, you may lose your current settings. Make sure to save settings on your reader before scanning the prefix codes. If you scan more than one prefix you will receive each scanned prefix in your scanned data (i.e. -
Page 68: Reader Text Commands
10.2 - Suffix Settings (con’t) Suffix - Tab Suffix - Tab Suffix - Erase / None Only Use with USB Only Use with Keyboard, PS/2 RS232 Mode Keyboard Mode or with CodeXML Router or PS/2 CodeXML Bluetooth Modem 10.3 - Prefix & Suffix Settings Scan the following codes to erase all prefix and suffix data. -
Page 69: Chapter 11 - Cr2: Maintenance And Troubleshooting
Chapter 11 - Maintenance and Troubleshooting C001537_04_CR2 User Manual - Save Settings... -
Page 70: Reset Reader
11.1 - Reset Reader to Factory Defaults Scan the following codes to reset reader: Reset to USB Factory Default Settings Reset to PS/2 Factory Default Settings Radio settings will Radio settings will not be reset with not be reset with this code. -
Page 71: Warranty
Agreement. The Code Corporation warranty may be extended by the customer at an additional cost under the terms of Code Corporation at the time of the extension. -
Page 72: Cr2 Accessories
11.3 - Warranty (con’t) If warranty service is required, Code will issue a Return Material Authorization Number. Products must be shipped in the original or comparable packaging, with shipping and insurance charges prepaid. Code will ship the repaired or replacement product freight and insurance prepaid in North America. Shipments from the US or other locations will be made F.O.B. -
Page 73: Frequently Asked Questions
11.4 - CR2 Accessories (con’t) Optional Accessories The following accessories are also available by contacting a Code representative: • USB, PS/2 or RS232 interface cables (Figure 11.2) • 1400 mAH or 1950 mAH Long-life Lithium-Ion batteries (Figure 11.3) •. Clip-on pistol grip handle (Figure 11.4) •... - Page 74 11.5 - Frequently Asked Questions (con’t) The CR2 only supports the following symbologies: MaxiCode, PDF417 (including Macro support), Data Matrix, QR Code, MicroPDF417, GoCode, Composite, Code 11, Aztec, Code 39, Code 128, Pharmacode, UPC/EAN/ JAN, Int 2 of 5, Codabar, Codablock F, Code 93, RSS, Posnet, Planet, Japanese Post, Australian Post, Royal Mail, KIX, MSI Plessy Why will my CR2 Bluetooth radio not connect? Make sure the Bluetooth radio on the host device is installed correctly, turned on,...
-
Page 75: Cr2 Maintenance
11.6 - CR2 Maintenance The CR2 device operates efficiently and reliably and needs only a minimum of maintenance to operate. A few tips are given below for maintenance suggestions. Cleaning the CR2’s Window The CR2’s window should be clean to allow the best performance of the device. The window is the clear plastic piece inside the head of the Reader. -
Page 76: Cr2 Troubleshooting Guide
11.7 - Troubleshooting Guide If utilizing Windows 98, you will need to upgrade to the second edition. The CR2 will only support Bluetooth USB devices with serial port profile. Call the Code Corporation to inquire about CodeXML Router. CodeXML Router offers Bluetooth serial port to keyboard wedge communication for applications that require keyboard port input.
Need help?
Do you have a question about the Code Reader 2.0 and is the answer not in the manual?
Questions and answers