Advertisement
Table of Contents
- 1 Table of Contents
- 2 Front Panel Layout
- 3 Rear Panel Layout
- 4 Connection Diagram
- 5 Basic Operations
- 6 To Access the Menu
- 7 Making a Recording
- 8 Playing Back a Recording
- 9 Transfering a Recording to USB
- 10 Main Menu Layout
- 11 Remote Viewing
- 12 Troubleshooting
- Download this manual
See also:
User Manual
Advertisement
Table of Contents

Subscribe to Our Youtube Channel
Related Manuals for ESP DVR8iP


Summary of Contents for ESP DVR8iP
- Page 1 8 C H A N N E L N E T W O R K A B L E C C T V S Y S T E M W I T H I N T E G R A L 1 T B H A R D D R I V E U S E R M A N U A L...
- Page 2 SAFETY NOTICE IMPORTANT PRECAUTIONS! HIGH VOLTAGE HAZARD! HIGH VOLTAGE INSIDE! • Please keep this manual for later use. • Please strictly comply with the warning indications on the machine and in this book. • Please abide by instructions when operating. •...
-
Page 3: Table Of Contents
Contents Front panel layout ..........4 Rear panel layout . -
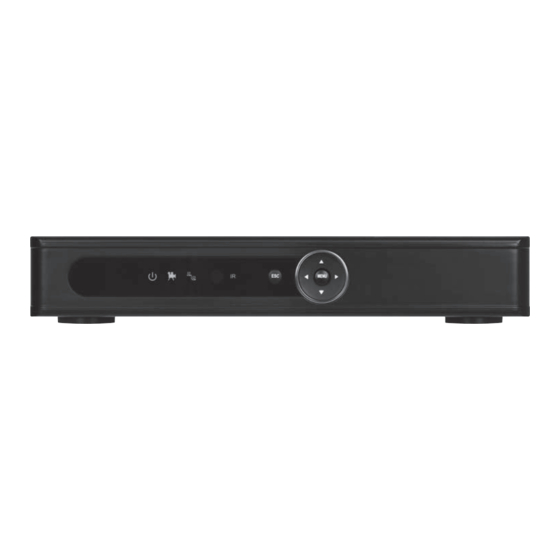
Page 4: Front Panel Layout
Front Panel FUNCTION LED COLOUR Main power on Blue Alarm Indication Blue HDD/Record Indication Blue Escape Navigation keys for Menu Connection Diagram... -
Page 5: Rear Panel Layout
Rear Panel 10 11 No. interface ID Description ALARM Switch alarm output (normally open contact) INPUT/OUTPUT External devices require a power supply VIDEO-IN Video input BNC connectors x 8 VIDEO-OUT Video output BNC AUDIO-OUT Audio output AV VGA display output HDMI HDMI display output AUDIO-IN... -
Page 6: Basic Operations
Basic operations POWER ON Plug the red lead from the 5-way power supply marked DVR into the 12VDC power supply input on the DVR. Turn on the DVR at the mains power point. The Power supply indicator light (Blue) will illuminate on the DVR front panel followed by several short bleeps. -
Page 7: To Access The Menu
To reset the system turn the main power off and back on after 5 minutes. NB. If the password has been lost please call ESP Technical Support on 01527 515150 for assistance. -
Page 8: Making A Recording
Making a recording RECORD CONFIGURATION Quick Set-up Guide for Recording: OPTION 1 For Manual Record (Cameras Recording Continuously): From the live camera view: • Right-click on the screen to bring-up the shortcut menu and log-in. • Select record mode and highlight the ‘ALL’ option for ‘Manual’ and click ‘OK’. This menu also allows selection of ‘Schedule’... - Page 9 OPTION 2 For Motion Detection Record (Activated by Motion): From the live camera view: Right-click on the screen to bring-up the shortcut menu and log-in to the ‘Main Menu’. • Select Main Menu> Record > Record Plan to access the ‘Record Plan’. •...
-
Page 10: Playing Back A Recording
PLAYING BACK A RECORDING Right click on the live camera view, login and enter playback directly from the shortcut menu. In the playback menu refer to the right hand side of the screen and enter the following; • Select Month and Year of the required recording •... -
Page 11: Main Menu Layout
ADDITION BACKUP MENU OPTIONS Type Select all recorded material or recordings made from specific triggers such as alarm or motion detection events. Channel Select the channels that you wish to back up. Start Time Select the start date and time of the desired back up. End Time Select the end date and time of the desired back up. - Page 12 Record Each channel can be configured for recording resolution, frame rate and picture quality. High resolution with high frame rates at high quality will create the highest amount of data (Bit rate) and therefore fill up the hard drive at the quickest rate. The ‘Record Plan’ can be found in this option for Scheduled recording.
- Page 13 Alarm Functions include Motion Detect, Video Blind, Video Loss, Alarm Inputs/Output settings and Abnormality alerts. Switch / Do not operate this function. This function changes the operation of the DVR’s software, the DVR will not operate correctly if these settings are adjusted in any way.
-
Page 14: Remote Viewing
Remote viewing NETWORK INTRODUCTION There are two main ways to connect your DVR to your network; • A connection from the DVR’s LAN port via an Ethernet cable to the router. • Using the DVRWLA (wireless adaptor dongle), which enables the DVR to obtain a connection to the network via Wi-Fi. - Page 15 Disclaimer: ESP are unable to guarantee that your PC/mobile device will be compatible with the DVR and software’s. Your specific model of phone, tablet or other device, the hardware it contains, your service provider, the types of data services they offer and your specific phone/device plan will all affect the performance of your PC/mobile device for remote access to the DVR.
- Page 16 BASIC WEB OPERATION – CONTROL PANEL BUTTONS (Internet Explorer / Cloud) Split Choose how many camera images you wish to display. For 4 channel DVRs choose ‘view 4’ or for 8 channel DVRs choose ‘view 8’ etc. Playback Enters playback mode; used for searching and playing back recordings already stored on the DVR.
-
Page 17: Troubleshooting
Troubleshooting The DVR cannot boot up normally. Possible reasons are as follows: 1 The power supply is not correctly connected. 2 The power supply is damaged 3 The hard disk is damaged. 4 The front panel is damaged. 5 The main board of the DVR is damaged. The DVR reboots automatically or stops working after boot up a few minutes. - Page 18 The local video is not clear. Possible reasons are as follows 1 The image quality is too bad. 2 The reading program is wrong. Reboot up the DVR. 3 The data line of the hard disk is damaged. 4 The hard disk is damaged. 5 The hardware of the DVR is damaged.
- Page 19 The image is not clear or there is no image in network preview state or video file playback state. Possible reasons are as followed: 1 Network is not stable. 2 The user machine has limited resource. 3 Choose the play-in-team mode in the network setup of DVR. 4 The region shelter or channel protection is set.
- Page 20 Elite Security Products Telephone: 01527 51 51 50 Unit 7, Target Park, Shawbank Rd Fax: 01527 51 51 43 Lakeside, Redditch B98 8YN email: info@espuk.com...
Need help?
Do you have a question about the DVR8iP and is the answer not in the manual?
Questions and answers