Advertisement
Saving energy and creating healthy, comfortable environments
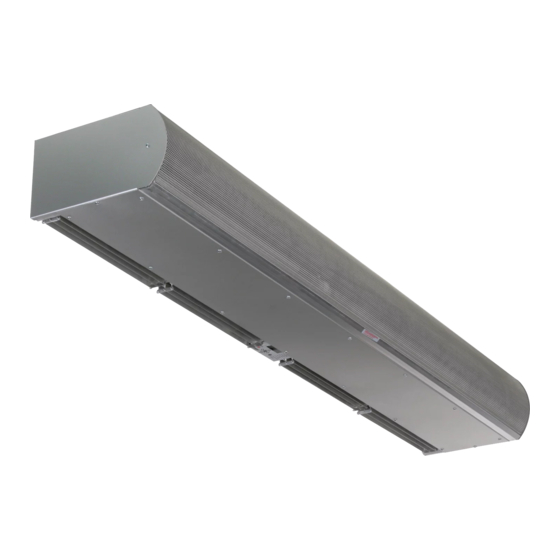
MAXAIR
AIR CURTAIN
/AIR DOOR
MADE IN THE USA
Installation & Maintenance Instructions
TABLE OF CONTENTS
I. UNCRATING.......................................................................................................................................................................................................... 2
II. GENERAL MOUNTING INSTRUCTIONS ...........................................................................................................................................................2
III. WALL MOUNTING .............................................................................................................................................................................................2
IV. SUSPENDED MOUNTING ................................................................................................................................................................................ 3
V. ELECTRICAL CONNECTIONS ........................................................................................................................................................................ ....4
VI. FIELD CONNECTIONS ......................................................................................................................................................................................6
VII. OPERATION INSTRUCTIONS ......................................................................................................................................................................... 6
VIII. MAINTENANCE AND CLEANING ................................................................................................................................................................. 7
IX. SERVICE ............................................................................................................................................................................................................ 7
INTELLISWITCH®...................................................................................................................................................................................................10
QUICK START OPERATION.......................................................................................................................................................................... .10
FAQ's (FREQUENTLY ASKED QUESTIONS)................................................................................................................................................ 12
THE INTELLISWITCH® PROGRAMMING)....................................................................................................................................................14
X. TROUBLESHOOTING........................................................................................................................................................................................19
XI. WARRANTY ......................................................................................................................................................................................................20
WARNING: TO REDUCE THE RISK OF FIRE, ELECTRIC SHOCK OR INJURY TO PERSONS, OBSERVE THE FOLLOWING:
A. Read all instructions before installing or using this air curtain.
B. Use this unit only in the manner intended by the manufacturer and described in this manual. Any other use not recommended by the
manufacturer may cause fire, electric shock, or injury to persons. If you have any questions, contact the manufacturer.
C. Before servicing or cleaning unit, switch power off at service panel and lock the service disconnecting means to prevent power from
being switched on accidentally. When the service disconnecting means cannot be locked, securely fasten a prominent warning device,
such as a tag, to the service panel.
D. Installation work and electrical wiring must be done by qualified person(s) in accordance with all applicable national and local codes
having jurisdiction, including fire-rated construction. See page 4, ELECTRICAL CONNECTIONS (NEC Code ANSI/NFPA No. 70).
E. When cutting or drilling into wall or ceiling, do not damage electrical wiring and other hidden utilities.
F. To reduce the risk of fire, do not store or use gasoline or other flammable vapors and liquids in the vicinity of the air curtain.
G. This air curtain is hot when in use. To avoid burns, do not let bare skin touch hot surfaces. Keep combustible materials, such as furniture,
pillows, bedding, papers, clothes, etc. and curtains at least 1 inch from the top, back, front, sides and at least 6 feet from the discharge of
the air curtain.
H. Extreme caution is necessary when any air curtain is used by or near children or invalids, and whenever the heater is left operating
unattended.
I.
Do not operate any air curtain after it malfunctions. Disconnect power at the service panel and have the air curtain inspected by a
reputable electrician before reusing.
J. To disconnect the air curtain, turn controls to "off", and turn off power to the air curtain circuit at main disconnect panel.
K. Do not insert or allow foreign objects to enter any ventilation or discharge opening as this may cause an electric shock or fire, or damage
the air curtain.
L. To prevent a possible fire, do not block the air intake or discharge of the air curtain in any manner.
M. The air curtain has hot and arcing or sparking parts inside. Do not use it in areas where gasoline, paint, or flammable vapors or liquids are
used or stored.
N. This heater may include an audible or visual alarm to warn that parts of the heater are getting excessively hot. If the alarm sounds (or
illuminates), immediately turn the heater off and inspect for any objects on or adjacent to the heater that may have blocked the airflow or
otherwise caused high temperatures to have occurred. DO NOT OPERATE THE HEATER WITH THE ALARM SOUNDING (OR ILLUMINATING).
IMPORTANT INSTRUCTIONS
www.intelli-how2.com 800-245-4455 www.berner.com
READ AND SAVE
THESE INSTRUCTIONS
No.
Date
ZEPHYR
AIR CURTAIN
II-470
August, 2013
/AIR DOOR
MADE IN THE USA
Advertisement
Table of Contents

Related Manuals for Berner Maxair


Summary of Contents for Berner Maxair
-
Page 1: Table Of Contents
IMPORTANT INSTRUCTIONS READ AND SAVE THESE INSTRUCTIONS Saving energy and creating healthy, comfortable environments II-470 MAXAIR Date August, 2013 AIR CURTAIN /AIR DOOR ZEPHYR MADE IN THE USA AIR CURTAIN /AIR DOOR MADE IN THE USA Installation & Maintenance Instructions TABLE OF CONTENTS I. -
Page 2: Uncrating
INDOOR MOUNTING ONLY - Environmental/Insect/Dust Control Be installed Indoors Only. The MaxAir /Zephyr Air Door are designed to be an effective barrier D. Proceed to either Section III - WALL MOUNTING against cold drafts in the winter and hot air in the summer. To achieve... -
Page 3: Suspended Mounting
C. Remove the wall mounting plate from the unit to install. (for each inch over 4") The wall mounting plate (included) is designed to fit flush with the top of the MaxAir/Zephyr Air Door. Therefore the location of the wall mounting plate will determine the final Clearance Height location of the top of the air door. -
Page 4: Electrical Connections
FIGURE 4 - Installing Air Door on Wall Mounting Plate Proceed to Section V - Electrical Connections. V. ELECTRICAL CONNECTIONS All electrical wiring and connections MUST be performed by qualified personnel in accordance with the National Electri- cal Code ANSI/NFPA No. 70 (latest edition) or, in Canada, the FIGURE 6 - Suspended Mounting Canadian Electrical Code, Part 1-C.S.A. - Page 5 NOTE: One Intelliswitch serial cable assembly (part # Electrical Knockouts 505SC***INT485-A) is required for every unit that is to be used as a master/slave. “***” denotes length of cable Wiring Tray Cover Wiring Diagram and in feet- “008” = 8 feet long. Temperature Sensor For Master/Slave operation, a serial cable connection must Inside...
-
Page 6: Field Connections
VII. OPERATING INSTRUCTIONS Note: If a longer cable is required than was supplied, it can be ordered from the factory or made by using A. GENERAL OPERATION standard flat telephone cable, phone jack connectors Air curtain operation may be divided into four areas: and the proper crimping tool. -
Page 7: Maintenance And Cleaning
CAUTION: ELECTRIC SHOCK HAZARD Disconnect power whenever servicing unit. More than one disconnect may be required to de-energize unit. Any service performed on the MaxAir/Zephyr air door MUST be FIGURE 9 - Airflow Adjustment done by qualified personnel. Berner air doors require very little servicing. All parts are eas- VIII. - Page 8 A. INTELLISWITCH DISPLAY BOARD REMOVAL NOTE: GROUND RING TERMINAL MUST BE SITUATED OR OR REPLACEMENT BEND SUCH THAT IT DOES NOT TOUCH ANY TRACES ON CAUTION: Do not expose the bare board to static electricity, THE CONTROL BOARD water, extreme heat or extreme moisture. 11.
- Page 9 grille up and then away from the unit. 14. Install the trigger bar on the replacement motor so Remove the bottom access panel by removing the that it is not closer than 0.030” to the motor bearing Phillips head screws on the bottom of the unit. cap (including shaft movement).
-
Page 10: Intelliswitch
How to operate your MaxAir & Zephyr Air Door that comes with a factory installed digital programmable controller called the Intelliswitch™ INTELLISWITCH™ QUICK START OPERATION www.intelli-how2.com When power is turned on to the Air Door, all of the lights on the display will light briefly while the Intelliswitch™... - Page 11 Modes of Operation continued: The following modes can be customized see “Programming the Intelliswitch” for more info. For use on heated units only, requires a door switch. When the temperature drops below the thermostat set point and the door is closed, the “PluS”...
-
Page 12: Faq's (Frequently Asked Questions)
Even though every MaxAir/Zephyr unit is individually tested at the factory before shipment, on occasion improper functionality may be experienced. Here is a list of common questions: Q. - Page 13 INTELLISWITCH™ FAQ’s Continued (Frequently Asked Questions) www.intelli-how2.com any mode that is activated by the door switch. heat should shut off when the wires are separated. 5.) If the air curtain is heated, make sure that the thermostat For more complex troubleshooting of either thermal cutouts or isn’t wired to the door switch leads.
-
Page 14: The Intelliswitch® Programming)
2.2. Multi-level Options A. PROGRAMMING THE INTELLISWITCH™ Multi-level options require additional actions to access an op- tions setting. The right or left arrow is required to enter into an To reduce the risk of injury and ensure proper operation all option. - Page 15 AUTO – air door will run when terminals 9 & 10 are • active for AUTO, DELU and PLUS Mode. Note: to turn off this feature the Start Time must be set connected through a switch (i.e. doorswitch) and the equal to Stop Time (including am/pm).
- Page 16 Set the temperature set point for internal thermostat for Zone The Program menu allows parameters for the following options being programmed. Degree type is based on degrees selected to be set: on the User Menu. • Number of Zones: 1 or 2 • Days of the week to operate per zone 5.1.7. Start Time: multi-level • Mode (Off-On-Auto-Deluxe-Plus) Set start time for zone program to activate including am/pm.
- Page 17 The Diagnostic Menu displays the following parameters: Er 51 – Status of this error is not available. It only appears when • Software version release there has been an event that has corrupted the settings in • Speed Range Setting memory. When corrupted settings are identified the control • Internal Thermostat reading – Celsius will reset all settings (except for Speed Range) back to Factory • Internal Thermostat reading – Fahrenheit...
- Page 18 Note: Selecting the incorrect speed range can damage the 8. External Connections motor(s) beyond repair and potentially create abnormally There are three types of external connections available on the high temperatures. Intelliswitch™. • Door Switch • External Thermostat Speed ranges are dependent upon the air curtain Series, motor • Serial Connection type and heat option.
-
Page 19: Troubleshooting
X. TROUBLESHOOTING CAUSE SYMPTOMS REMEDY • Power supply line open (no power) • Check power source, check method of control in ON NO AIR position • Fuse blown/circuit breaker tripped • Replace fuse(s)/reset breaker • Motor overload tripped • Internally protected motor - should reset automatically after cool-down, if not, replace motor. • Failed switch • Replace switch MOTOR RUNNING/FANS ARE NOT ROTATING • Replace fan sleeve/reengage coupling • Broken or damaged flexible hub • Tighten set screws/tighten fan on shaft • Shaft rotating inside fan ELECTRICAL CONTROLS NOT FUNCTIONING WHEN DOOR IS OPEN • Turn switch to “ON” position • Selector switch is in off position • Repair or replace limit switch... -
Page 20: Warranty
XI. WARRANTY Berner International (“The Company”) warrants all new equipment to be free of defects in workmanship and material for a period of five years (5 years) on unheated models and two years (2 years) on heated models from the original date of shipment, provided the equipment has been properly cared for, installed and operated in accordance with the limits specified on the nameplate and The Company’s instructions.
Need help?
Do you have a question about the Maxair and is the answer not in the manual?
Questions and answers