Table of Contents
Advertisement
For more information, visit www.desatech.com
For more information, visit www.desatech.com
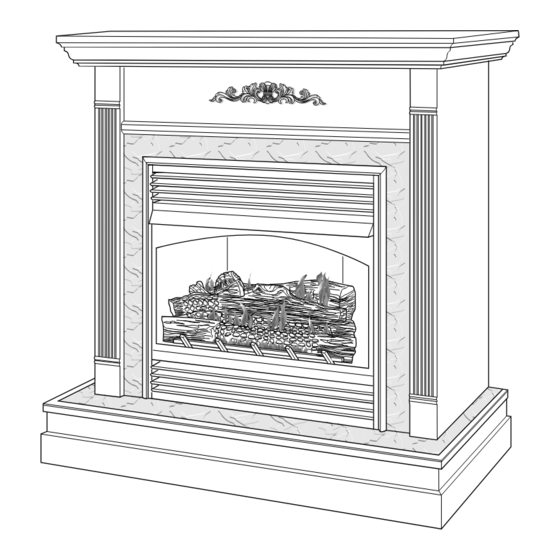
Shown with optional cabinet mantel,
hearth base, and trim accessories.
CGEFP33PRA, CGEFP33NRA, EFP33PRA, EFP33NRA,
Gas Fireplace with Total Control System (TCS)
WARNING: If the information in this manual is not fol-
lowed exactly, a fire or explosion may result causing
property damage, personal injury, or loss of life.
— Do not store or use gasoline or other flammable
vapors and liquids in the vicinity of this or any
other appliance.
— WHAT TO DO IF YOU SMELL GAS
• Do not try to light any appliance.
• Do not touch any electrical switch; do not use
any phone in your building.
• Immediately call your gas supplier from a
neighbor's phone. Follow the gas supplier's
instructions.
• If you cannot reach your gas supplier, call the
fire department.
— Installation and service must be performed by a quali-
fied installer, service agency, or the gas supplier.
This appliance may be installed in an aftermarket,* permanently located, manufactured
(mobile) home, where not prohibited by local codes.
This appliance is only for use with the type of gas indicated on the rating plate. This appliance
is not convertible for use with other gases.
* Aftermarket: Completion of sale, not for purpose of resale, from the manufacturer
Save this manual for future reference.
Save this manual for future reference.
UNVENTED (VENT-FREE) GAS FIREPLACE
TM
OWNER'S OPERATION AND INSTALLATION MANUAL
VTGF33NR, and VTGF33PR
Shown with optional hearth
base accessory.
WARNING: Improper installation,
adjustment, alteration, service, or
maintenance can cause injury or
property damage. Refer to this
manual for correct installation and
operational procedures. For assis-
tance or additional information con-
sult a qualified installer, service
agency, or the gas supplier.
WARNING: This is an unvented gas-
fired heater. It uses air (oxygen)
from the room in which it is in-
stalled. Provisions for adequate
combustion and ventilation air must
be provided. Refer to Air for Com-
bustion and Ventilation section on
page 5 of this manual.
Advertisement
Table of Contents

Subscribe to Our Youtube Channel
Related Manuals for Desa CGEFP33PRA


Summary of Contents for Desa CGEFP33PRA
- Page 1 Shown with optional cabinet mantel, Shown with optional hearth hearth base, and trim accessories. base accessory. CGEFP33PRA, CGEFP33NRA, EFP33PRA, EFP33NRA, VTGF33NR, and VTGF33PR Gas Fireplace with Total Control System (TCS) WARNING: Improper installation, WARNING: If the information in this manual is not fol-...
-
Page 2: Table Of Contents
TABLE OF CONTENTS SAFETY INFORMATION TABLE OF CONTENTS SAFETY INFORMATION ............2 SPECIFICATIONS ..............32 SERVICE HINTS ............... 32 PRODUCT IDENTIFICATION ............. 3 LOCAL CODES ................4 TECHNICAL SERVICE ............. 32 UNPACKING ................4 REPLACEMENT PARTS ............32 WIRING DIAGRAM ..............33 PRODUCT FEATURES .............. -
Page 3: Product Identification
SAFETY INFORMATION PRODUCT IDENTIFICATION SAFETY INFORMATION Continued This appliance is only for use with the type of gas indicated on 16. To prevent performance problems with propane/LP units, do the rating plate. This appliance is not convertible for use with not use propane/LP fuel tanks of less than 100 lb. -
Page 4: Local Codes
LOCAL CODES UNPACKING PRODUCT FEATURES LOCAL CODES PRODUCT FEATURES Install and use fireplace with care. Follow all local codes. In the OPERATION absence of local codes, use the latest edition of The National Fuel Gas This vent-free fireplace is clean burning. It requires no outside Code, ANSI Z223.1/NFPA 54*. -
Page 5: Air For Combustion And Ventilation
AIR FOR COMBUSTION AND VENTILATION Providing Adequate Ventilation AIR FOR COMBUSTION AND VENTILATION Unusually tight construction is defined as construction WARNING: This heater shall not be installed in a where: confined space or unusually tight construction un- a. walls and ceilings exposed to the outside atmosphere less provisions are provided for adequate combus- have a continuous water vapor retarder with a rating tion and ventilation air. - Page 6 AIR FOR COMBUSTION AND VENTILATION Determining Fresh-Air Flow For Heater Location Ventilation Air AIR FOR COMBUSTION AND VENTILATION Continued A. Rework worksheet, adding the space of an adjoining room. If the DETERMINING FRESH-AIR FLOW FOR extra space provides an unconfined space, remove door to adjoining HEATER LOCATION room or add ventilation grills between rooms.
-
Page 7: Installation
AIR FOR COMBUSTION AND VENTILATION Ventilation Air (Cont.) INSTALLATION Check Gas Type AIR FOR COMBUSTION AND INSTALLATION VENTILATION NOTICE: This heater is intended for use as supple- Continued mental heat. Use this heater along with your primary heating system. Do not install this heater as your Ventilation Air From Outdoors primary heat source. -
Page 8: Electrical Hookup
INSTALLATION Electrical Hookup Installation Clearances Installation Sequence Removing Fireplace Screen And Floor Assembly INSTALLATION Continued ELECTRICAL HOOKUP INSTALLATION SEQUENCE This fireplace normally operates under 120 VAC/60 Hz line volt- After unpacking fireplace (see Unpacking, page 4), we suggest that age. The electrical cord supplied with your fireplace is five feet in you install your fireplace system in the following sequence: length. - Page 9 INSTALLATION Removing Fireplace Screen And Floor Assembly (Cont.) Electrical Connections for Power Cord Relocating Wall Switch INSTALLATION Continued Hole in Floor Hole in Outer Flexible Gas Line Support Bracket Casing Bushings Power Cord Figure 7 - Routing Power Cord Screws RELOCATING WALL SWITCH Fireplace Floor Assembly...
- Page 10 INSTALLATION Relocating Wall Switch (Cont.) INSTALLATION Continued For Mantel Installation Mounting Wall Switch to Wall for Recessed Fireplace If fireplace is to be installed into a mantel, (see Conventional 7. Create three openings on wall according to Template 1, page Fireplace Installation, pages 18 and 19) the wall switch may be 45.
- Page 11 INSTALLATION Relocating Wall Switch (Cont.) Installing Variable Speed Blower Accessory INSTALLATION Continued 16. Position switch/plate assembly vertically over wall openings 13. Position switch/plate assembly vertically over opening with with decal lettering upright (see Figure 13). decal lettering upright. Make sure wires freely pass through wall without binding.
- Page 12 INSTALLATION Installing Variable Speed Blower Accessory (Cont.) INSTALLATION Continued Be certain that all wire terminals are securely attached to ter- 10. Peel off backing paper and stick supplied wiring diagram de- minals on blower motor and that the screw retaining the green cal near center of firebox bottom (Figure 17, page 13).
- Page 13 (see Figure 18). White White 120 Vac. 60 Hz. . 78 Amps 101584-05 DESA International, Bowling Green, KY Thermostatic Switch and Cover Assembly Figure 17 - Location of Wiring Diagram Decal 3" from Blower (VTGF33NR/VTGF33PR Shown) Operating the Blower Light your gas appliance with the blower off.
- Page 14 INSTALLATION Installing Thermostatic Blower Accessory (Cont.) INSTALLATION Continued 10. Place control knob provided on plastic control shaft of speed 13. Check to make sure that the power cord and all wires are com- control (see Figure 20). pletely clear of the blower wheel and that there are no other foreign objects in blower wheel.
-
Page 15: Installing Gas Piping To Fireplace Location
Black Green Blower Motor White 120 Vac. 60 Hz. .90 Amps DESA International, Bowling Green, KY Figure 23 - Location of Wiring Diagram Decal 3" from Blower (VTGF33NR/VTGF33PR Shown) For more information, visit www.desatech.com For more information, visit www.desatech.com 110149-01A... - Page 16 INSTALLATION Installing Gas Piping to Fireplace Location (Cont.) Connecting Fireplace To Gas Supply INSTALLATION Continued We recommend that you install a sediment trap in supply line as Installation Items Needed shown in Figure 25. Locate sediment trap where it is within reach for Before installing fireplace, make sure you have the items listed below.
-
Page 17: Connecting Fireplace To Gas Supply
INSTALLATION Connecting Fireplace To Gas Supply (Cont.) Checking Gas Connections INSTALLATION Continued CONNECTING FIREPLACE TO GAS SUPPLY CHECKING GAS CONNECTIONS Installation Items Needed WARNING: Test all gas piping and connections • 5/16" hex socket wrench or nut-driver for leaks after installing or servicing. Correct all leaks at once. -
Page 18: Conventional Fireplace Installation
INSTALLATION Checking Gas Connections (Cont.) Conventional Fireplace Installation INSTALLATION Continued CONVENTIONAL FIREPLACE INSTALLATION Pressure Testing Fireplace Gas Connections Conventional installation of fireplace involves installing fireplace Open equipment shutoff valve (see Figure 27). along with corner, face, or cabinet mantel with hearth base accesso- Open main gas valve located on or near gas meter for natural ries against a wall in your home. -
Page 19: Built-In Fireplace Installation
INSTALLATION Conventional Fireplace Installation (Cont.) Built-In Fireplace Installation INSTALLATION Continued BUILT-IN FIREPLACE INSTALLATION 11. Carefully insert fireplace into cabinet mantel (see Figure 33). Built-in installation of this fireplace involves installing fireplace Be careful not to scratch or damage hearth base, cabinet man- into a framed-in enclosure. - Page 20 INSTALLATION Built-In Fireplace Installation (Cont.) Assembling And Attaching Optional Brass Trim INSTALLATION Continued Wall board or facing material (above Mantel Shelf 8. Attach fireplace to wall studs using nails or wood screws firebox) may be of combustible material, 10" through holes in nailing flange (see Figure 36). including decorative 8"...
-
Page 21: Installing Hood
INSTALLATION Assembling And Attaching Optional Brass Trim (Cont.) Installing Hood Installing Logs (VTGF33NR/VTGF33PR) INSTALLATION Continued INSTALLING LOGS (VTGF33NR/VTGF33PR) Set Screws Adjusting Side Brass Top Brass Plate WARNING: Failure to position the parts in accor- Trim Trim dance with these diagrams or failure to use only parts specifically approved with this heater may result in property damage or personal injury. - Page 22 INSTALLATION Installing Logs (VTGF33NR/VTGF33PR) (Cont.) Installing Logs (CGEFP33PRA/CGEFP33NRA) INSTALLATION Continued 3. Locate the recesses on the back of the front log (#3). Fit these Rear recesses between the posts of the grate base (see Figure 47). Log (#3) Groove Crossover Locate the notches in the bottom of the crossover log (#4).
- Page 23 INSTALLATION Installing Logs (EFP33PRA/EFP33NRA) INSTALLATION Continued Middle Back Log (#2) Log (#1) INSTALLING LOGS (EFP33PRA/EFP33NRA) "U"- shaped WARNING: Failure to position the parts in accor- Cutout dance with these diagrams or failure to use only parts in Base specifically approved with this heater may result in property damage or personal injury.
-
Page 24: Operating Fireplace
INSTALLATION Installing Battery Into Remote Installing Screen OPERATING FIREPLACE For Your Safety Read Before Lighting INSTALLATION OPERATING FIREPLACE Continued FOR YOUR SAFETY READ INSTALLING BATTERY INTO REMOTE BEFORE LIGHTING Locate slot at bottom of remote control (see Figure 53). Firmly insert tool such as a small screwdriver, butter knife, or dime WARNING: If you do not follow these instructions into the slot and lift up to remove cover. -
Page 25: Operating Fireplace
OPERATING FIREPLACE Normal Lighting Instructions To Turn Off Gas To Appliance OPERATING FIREPLACE Continued Manual Ignitor Manual Ignitor Electrode NORMAL LIGHTING INSTRUCTIONS Electrode Automatic Automatic Pilot Pilot Ignitor Ignitor Burner Burner Electrode Electrode WARNING: You must operate this heater with the fireplace screen in place. -
Page 26: Optional Blower Operation
OPERATING FIREPLACE Manual Lighting Instructions for Electrical Power Outage To Turn Off Gas To Appliance Optional Blower Operation OPERATING FIREPLACE Continued Manual Ignition Bypass Switch Piezo Ignitor Gas Valve (Down is ON) MANUAL LIGHTING INSTRUCTIONS FOR ELECTRICAL POWER OUTAGE HI/LO MANUAL Button IGNITION... -
Page 27: Inspecting Burners
INSPECTING BURNERS Pilot Flame Pattern Main Burner Front Burner Flame Pattern (VTGF33 Series Only) INSPECTING BURNERS Check pilot flame pattern and burner flame patterns often. FRONT BURNER FLAME PATTERN (VTGF33 SERIES ONLY) PILOT FLAME PATTERN Figure 61 shows correct front burner flame pattern. Figure 62 shows Figure 59 shows a correct pilot flame pattern. -
Page 28: Cleaning And Maintenance
CLEANING AND MAINTENANCE Cleaning Burner Injector Holder Cleaning Pilot Air Inlet Hole Logs CLEANING AND MAINTENANCE Injector Holder Burner WARNING: Turn off fireplace and let cool before Tube Injector Holder cleaning. Ports/Slots CAUTION: You must keep control areas, burners, and circulating air passageways of fireplace clean. Burner Inspect these areas of fireplace before each use. -
Page 29: Troubleshooting
TROUBLESHOOTING TROUBLESHOOTING WARNING: Turn off heater CAUTION: Never use a wire, Note: For additional help, visit DESA and let cool before servicing. Only needle, or similar object to clean International’s technical service web site a qualified service person should ODS/pilot. This can damage ODS/ at www.desatech.com. - Page 30 TROUBLESHOOTING TROUBLESHOOTING Continued OBSERVED PROBLEM POSSIBLE CAUSE REMEDY Heater produces a whistling noise when 1. Turning control knob to HI position 1. Turn control knob to LO position and burner is lit when burner is cold let warm up for a minute 2.
- Page 31 TROUBLESHOOTING TROUBLESHOOTING Continued WARNING: If you smell gas • Shut off gas supply. • Do not try to light any appliance. • Do not touch any electrical switch; do not use any phone in your building. • Immediately call your gas supplier from a neighbor’s phone. Follow the gas supplier’s instructions.
-
Page 32: Specifications
If so, contact DESA International’s Technical Service Department at 1-866-672-6040. When calling please have your model and serial numbers of your heater ready. You can also visit DESA International’s technical service web site at www.desatech.com. For more information, visit www.desatech.com For more information, visit www.desatech.com... -
Page 33: Wiring Diagram
WIRING DIAGRAM WIRING DIAGRAM EFP33NRA/EFP33PRA AND CGEFP33NRA/CGEFP33PRA Note : For proper operation, the wires must be connected exactly as shown in wiring diagram. See page 35 for number key. VTGF33NR/VTGF33PR Note : For proper operation, the wires must be connected exactly as shown in wiring diagram. -
Page 34: Illustrated Parts Breakdown And Parts List
ILLUSTRATED PARTS BREAKDOWN Remote Control Log Base Assembly EFP33PRA/NRA and CGEFP33PRA/NRA ILLUSTRATED PARTS BREAKDOWN REMOTE CONTROL LOG BASE ASSEMBLY EFP33PRA/NRA AND CGEFP33PRA/NRA (CGEFP33PRA SHOWN) For more information, visit www.desatech.com For more information, visit www.desatech.com 110149-01A... - Page 35 PARTS LIST Remote Control Log Base Assembly EFP33PRA/NRA and CGEFP33PRA/NRA PARTS LIST PART NUMBER PART NUMBER EFP33 CGEFP33 DESCRIPTION QTY. This list contains replaceable 110089-01 110090-02 Middle Log (#1) parts used in your fireplace. 110089-02 110090-03 Back Log (#2) When ordering parts, follow the...
- Page 36 ILLUSTRATED PARTS BREAKDOWN Firebox EFP33PRA/NRA and CGEFP33PRA/NRA ILLUSTRATED PARTS BREAKDOWN FIREBOX EFP33PRA/NRA AND CGEFP33PRA/NRA For more information, visit www.desatech.com For more information, visit www.desatech.com 110149-01A...
- Page 37 PARTS LIST Firebox EFP33PRA/NRA and CGEFP33PRA/NRA PARTS LIST FIREBOX EFP33PRA/NRA AND CGEFP33PRA/NRA This list contains replaceable parts used in your fireplace. When ordering parts, follow the instructions listed under Replacement Parts on page 32 of this manual. PART NUMBER DESCRIPTION QTY.
- Page 38 ILLUSTRATED PARTS BREAKDOWN Remote Control Log Base Assembly VTGF33PR and VTGF33NR ILLUSTRATED PARTS BREAKDOWN REMOTE CONTROL LOG BASE ASSEMBLY VTGF33PR AND VTGF33NR (SHOWN) For more information, visit www.desatech.com For more information, visit www.desatech.com 110149-01A...
- Page 39 PARTS LIST Remote Control Log Base Assembly VTGF33PR and VTGF33NR PARTS LIST REMOTE CONTROL LOG BASE ASSEMBLY VTGF33PR AND VTGF33NR (SHOWN) This list contains replaceable parts used in your fireplace. When ordering parts, follow the instructions listed under Replacement Parts on page 32 of this manual. KEY PART KEY PART NUMBER...
- Page 40 ILLUSTRATED PARTS BREAKDOWN Firebox VTGF33NR and VTGF33PR ILLUSTRATED PARTS BREAKDOWN FIREBOX VTGF33NR AND VTGF33PR For more information, visit www.desatech.com For more information, visit www.desatech.com 110149-01A...
- Page 41 PARTS LIST Firebox VTGF33NR and VTGF33PR PARTS LIST FIREBOX VTGF33NR AND VTGF33PR This list contains replaceable parts used in your fireplace. When ordering parts, follow the instructions listed under Replacement Parts on page 32 of this manual. PART NUMBER DESCRIPTION QTY.
-
Page 42: Accessories
Purchase these fireplace accessories from your local dealer. If they can not supply these accessories, call DESA International at 1-866-672-6040 for information. You can also write to the ad- dress listed on the back page of this manual. - Page 43 ACCESSORIES ACCESSORIES QQQQ Continued QQQQ QQQQ QQQQ QQQQ QQ QQ QQ QQQQQ Mantel Trim QQQQQ Hearth Base Trim CABINET MANTEL ACCESSORY WITH FIREPLACE PERIMETER BRASS TRIM LAMINATE TRIM FOR HEARTH OR MANTEL GMC11F Series - Walnut Finished Hardwood Veneer G3002J Series - Jade Marble Laminate Mantel Trim GMC12U Series - Unfinished Hardwood Veneer, G3003J Series - Jade Marble Laminate Hearth Ready to Stain or Paint.
- Page 44 NOTES NOTES _______________________________________________________________________________________________ _______________________________________________________________________________________________ _______________________________________________________________________________________________ _______________________________________________________________________________________________ _______________________________________________________________________________________________ _______________________________________________________________________________________________ _______________________________________________________________________________________________ _______________________________________________________________________________________________ _______________________________________________________________________________________________ _______________________________________________________________________________________________ _______________________________________________________________________________________________ _______________________________________________________________________________________________ _______________________________________________________________________________________________ _______________________________________________________________________________________________ _______________________________________________________________________________________________ _______________________________________________________________________________________________ _______________________________________________________________________________________________ _______________________________________________________________________________________________ _______________________________________________________________________________________________ _______________________________________________________________________________________________ _______________________________________________________________________________________________ _______________________________________________________________________________________________ _______________________________________________________________________________________________ _______________________________________________________________________________________________ _______________________________________________________________________________________________ _______________________________________________________________________________________________ _______________________________________________________________________________________________ _______________________________________________________________________________________________ _______________________________________________________________________________________________ _______________________________________________________________________________________________ _______________________________________________________________________________________________ _______________________________________________________________________________________________ _______________________________________________________________________________________________ _______________________________________________________________________________________________ For more information, visit www.desatech.com For more information, visit www.desatech.com 110149-01A...
-
Page 45: Templates
TEMPLATES 3/8" Diameter 1/8" Diameter 2 Holes 2 Holes 3/4" 3/4" " " " " 3/8" 3/8" 3/16" Template 2 - Relocating Wall Switch to Side Wall of Template 1 - Relocating Wall Switch to Hollow Room Wall Mantel For more information, visit www.desatech.com For more information, visit www.desatech.com 110149-01A... - Page 46 THIS PAGE INTENTIONALLY LEFT BLANK For more information, visit www.desatech.com For more information, visit www.desatech.com 110149-01A...
-
Page 47: Owner's Registration Form
First Name: Last Name: Address: City: State: Zip: Country: Home Phone: E-Mail: Please answer the following questions to register your product with DESA International: Where will the product be used? Living/Family Room Office/Warehouse Utility Shed/Outbuilding Garage Bedroom Bathroom Other If you bought this product yourself, did you plan to purchase this type of product before going into the store? - Page 48 Postage Required 2701 Industrial Drive P.O. Box 90004 Bowling Green, KY 42102-9004 For more information, visit www.desatech.com For more information, visit www.desatech.com 110149-01A...
- Page 49 NOTES NOTES _______________________________________________________________________________________________ _______________________________________________________________________________________________ _______________________________________________________________________________________________ _______________________________________________________________________________________________ _______________________________________________________________________________________________ _______________________________________________________________________________________________ _______________________________________________________________________________________________ _______________________________________________________________________________________________ _______________________________________________________________________________________________ _______________________________________________________________________________________________ _______________________________________________________________________________________________ _______________________________________________________________________________________________ _______________________________________________________________________________________________ _______________________________________________________________________________________________ _______________________________________________________________________________________________ _______________________________________________________________________________________________ _______________________________________________________________________________________________ _______________________________________________________________________________________________ _______________________________________________________________________________________________ _______________________________________________________________________________________________ _______________________________________________________________________________________________ _______________________________________________________________________________________________ _______________________________________________________________________________________________ _______________________________________________________________________________________________ _______________________________________________________________________________________________ _______________________________________________________________________________________________ _______________________________________________________________________________________________ _______________________________________________________________________________________________ _______________________________________________________________________________________________ _______________________________________________________________________________________________ _______________________________________________________________________________________________ _______________________________________________________________________________________________ _______________________________________________________________________________________________ _______________________________________________________________________________________________ For more information, visit www.desatech.com For more information, visit www.desatech.com 110149-01A...
- Page 50 2701 Industrial Drive P.O. Box 90004 Bowling Green, KY 42102-9004 www.desatech.com 110149-01 110149 01 Rev. A NOT A UPC 04/02 For more information, visit www.desatech.com For more information, visit www.desatech.com 110149-01A...
Need help?
Do you have a question about the CGEFP33PRA and is the answer not in the manual?
Questions and answers