
Related Manuals for C. Crane CCRadio2


Summary of Contents for C. Crane CCRadio2
-
Page 1: Instruction Manual
INSTRUCTION MANUAL PLEASE READ ALL THE INSTRUCTIONS COMPLETELY BEFORE USE AND SAVE THIS MANUAL FOR FUTURE REFERENCE Ver. 1.1... - Page 2 Thanks! From all of us at C. Crane Copyright © 2008 by C. Crane Company, Inc., Fortuna, CA 95540 Phone: 1-800-522-8863 Web: ccrane.com All rights reserved. No part of this booklet may be reproduced, in any form or...
-
Page 3: Table Of Contents
Table of Contents Unpacking ................. Button Identification ............... Getting Started Powering Your Radio ..........Installing The Batteries ..........Display Panel ............. Setting The Clock ............Setting The Alarm 9-10 ..........Snooze Feature ............Sleep Timer ............... Radio Operation Tuning ................ Weather Alert System 12-13 ........ -
Page 4: Unpacking
Before Use Please read IMPORTANT SAFETY INSTRUCTIONS on pages 27 - 28 before use. It is important to read and understand all instructions. WARNING: TO PREVENT FIRE OR ELECTRIC SHOCK HAZARD, DO NOT EXPOSE THIS PRODUCT TO RAIN OR MOISTURE. CAUTION RISK OF ELECTRIC SHOCK DO NOT OPEN... -
Page 5: Button Identification
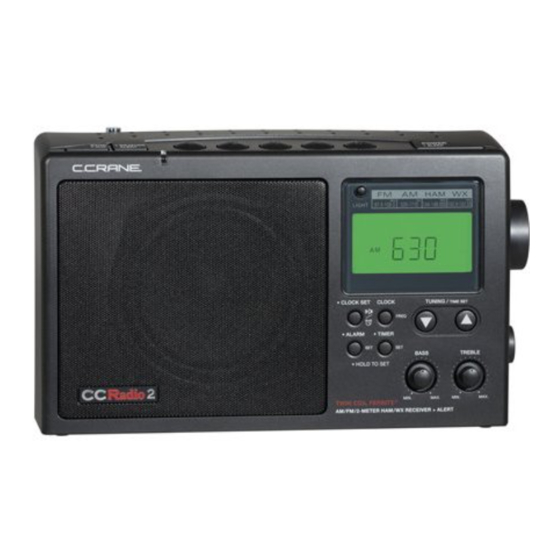
Button Identification • 10) Lock Switch Clock Set • • 11) Tuning Knob / Squelch Set Alarm Set • • Timer Set 12) Power or Sleep Timer 13) Display Light 4) Display Clock or Frequency 5) Bass Control 14) Telescopic Antenna 6) Treble Control 15) Memory (1-5) 7) Tuning / Time Set (Up/Down) -
Page 6: Getting Started
Getting Started POWERING YOUR RADIO Before powering your radio be sure to read the Safety Instructions on pages 27 and 28. The CCRadio 2 will run on (4) “D” size NiMH or alkaline batteries or on 120V AC house current using the included power cord. Batteries are optional. -
Page 7: Installing The Batteries
Getting Started INSTALLING THE BATTERIES 1) Position the radio face down on a soft surface to protect it. 2) Remove the battery compartment cover. 3) Insert the (4) “D” cell batteries into the compartment as indicated in the drawing below. Be sure the negative (-) end is against the spring. -
Page 8: Display Panel
Getting Started DISPLAY PANEL 1) Weather Alert Modes 8) Timer Active Indicator 9) Clock Seconds 2) Memory Location (1 - 5) 10) Frequency / Clock Display 3) Key Lock On/Off 11) Alarm Status and Type 4) Sleep Timer/Snooze Status 12) AM/PM Indicator 5) Battery Symbol 13) Indicates Band In Use 6) Battery Power Level Indicator... -
Page 9: Setting The Clock
Getting Started SETTING THE CLOCK Please read this entire section carefully before you start. Set the time with the radio off. You must go through the steps listed below without stopping for more than 15 seconds at any given time or you will have to start over. -
Page 10: Snooze Feature
Getting Started Notes on the Alarm You can also set the alarm time immediately after selecting the radio or buzzer alarm as described on page 9. To stop the alarm from going off every day, press and hold the Alarm Button until ALARM disappears from the display. -
Page 11: Radio Operation
Radio Operation TUNING The CCRadio 2 features four bands: AM / FM / 2-Meter Ham (VHF) and Weather. 1) Press the Power Button to turn on the radio. Manual Tuning 2) Select the band by pressing the Band Button. 3) A single press of the Up or Down Tuning Buttons will change the frequency up or down for AM, FM and Ham (VHF) bands, and channel up or down for Weather. -
Page 12: Weather Alert System
Radio Operation WEATHER ALERT SYSTEM The WEATHER ALERT modes on the CCRadio 2 can alert you to spe- cial weather related emergencies. During an emergency or weather- related hazard, NOAA issues an emergency tone that will set off an audible and/or visual alarm on the radio. NOTE: Hazard warnings are not available in all areas. - Page 13 Radio Operation This is WEATHER ALERT mode with flashing light only (no Alarm). If NOAA issues a weather related emergency, the radio will automatically alert you with a small flashing light near the top of the radio. The Alert light continues to flash until any button is pushed.
-
Page 14: 2-Meter Ham (Vhf)
Radio Operation 2-METER HAM (VHF) BAND (144 TO 148 MHZ) The 2-Meter Ham Band is a popular radio band used by amateur radio operators for civil defense. After a hurricane, earthquake or other calamity, 90% of emergency coordination at the local level takes place on this band. - Page 15 League (ARRL) toll free at 888-277-5289 or at arrl.org to find out what you need to learn and the nearest testing location. C. Crane salutes every Ham who has volunteered to be a part of emer- gency radio operations. CCRadio 2...
-
Page 16: Display Light
Radio Operation DISPLAY LIGHT When the radio is plugged into AC power, the display light will always Display Light on AC Power be on unless you turn it off. The special green LED bulbs last about 100,000 hours and use very little electrical energy. The display light has three light levels. -
Page 17: Audio & Recording Jacks
Radio Operation AUDIO & RECORDING JACKS The jacks on the back left side of the radio are for audio input (AUX IN), audio output (LINE OUT) and a timer activation switch RECORDING ACCESSORY AUX IN Jack Designed to VersaCorder work with the CCRadio 2 . -
Page 18: Setting The Timer
Radio Operation The red jack, labeled LINE OUT, is used to output the audio from the LINE OUT Jack CCRadio 2 to another device such as a recorder, your home stereo, or some other unit. To do this, you will need an 1/8" stereo patch cord. Note: The LINE OUT jack differs from a headphone jack because the volume level of a headphone jack varies depending on the volume of the radio. - Page 19 Radio Operation 2: T OFF TIME ET THE 1) Press the Timer/Set Button again until the word OFF, the hour digit and TIMER flash on the display. 2) Use the Tuning Up/Down Buttons to set the hour. Again, verify that the time is set correctly for AM or PM.
-
Page 20: Specifications
Specifications FM Band: 87.5 - 108 MHz Stereo FREQUENCY COVERAGE AM Band: 520 - 1710 kHz Ham (VHF): 144 - 148 MHz Channel 1: 162.400 MHz Channel 5: 162.500 MHz WEATHER BAND Channel 2: 162.425 MHz Channel 6: 162.525 MHz Channel 3: 162.450 MHz Channel 7: 162.550 MHz Channel 4: 162.475 MHz... - Page 21 Specifications 300 - 1000mV RMS (line level) input from external audio source. Do AUX IN JACK not overload. 300 - 1000mV RMS (line output) LINE OUT JACK Low impedance, transistor driven switch. Used for operation of external TIMER ACTIVATION SWITCH recording devices.
-
Page 22: Accessories
Accessories Check with your dealer for the following accessories: RECORDING DEVICES Dual speed tape recorder. Designed to work VersaCorder with CCRadio 2 with the Patch Cord below. Record up to 4 hours on one side of a cas- sette tape. Item #VC 3 x 1/8"... -
Page 23: Troubleshooting Guide
Troubleshooting Guide The CCRadio 2 will not turn on and none of the buttons work: The Lock Switch, located on the right side of the radio between the tuning and the volume knobs, is in the up position. Push the switch down to release the lock and resume normal operation of the radio. -
Page 24: Troubleshooting Guide
If you want an antenna that is pre-made, we recommend the FM Reflect Antenna by C. Crane on page 22 for details. Battery Power Level Indicator doesn’t show full charge when using rechargeable batteries: Rechargeable batteries will never show a full charge on your radioʼs... -
Page 25: Radio Noise Troubleshooting
Radio Noise Troubleshooting AM RADIO NOISE PROBLEMS AND POSSIBLE SOLUTIONS If you hear an annoying buzz when listening to AM radio, itʼs most likely radio noise. Here are some of the usual culprits: • Dimmer switch (even in an adjacent room). •... -
Page 26: Listening Tips
Where an outdoor antenna is not pos- sible, try the Twin Coil Ferrite AM Antenna by C. Crane. The antenna ® element can be placed on a window sill or mounted where a better sig- nal is available. -
Page 27: Safety Instructions
Safety Instructions READ BEFORE OPERATING EQUIPMENT SAVE THESE INSTRUCTIONS 1) Read and understand all safety and operating instructions before the radio is operated. 2) Retain Instructions: The safety and operating instructions should be retained for future reference. 3) Heed Warnings: All warnings on the appliance and in the operating instructions should be followed. - Page 28 Safety Instructions points or short out parts. This could cause a fire or electrical shock. 11) If the radio is left unattended and unused for long periods of time, unplug it from the wall outlet. This will prevent damage caused by lightning or power line surges.
-
Page 29: Personal Station Log
P ERSONAL S TATION L OG Station Time City Frequency Date Call Letters Please feel free to copy this page. CCRadio 2 Page 29... -
Page 30: 2-Meter Ham Frequency Log
2-METER HAM FREQUENCY L OG Time Frequency Location/Call Sign Date Please feel free to copy this page. Page 30 CCRadio 2... - Page 31 All of C. Craneʼs products must pass extensive testing to main- tain high quality standards. And as for the mysterious letter “C” in C. Crane, well, Bob and Sueʼs middle names both begin with the letter “C”, thus the name C. Crane.
- Page 32 Model: CCRadio FCC ID: BYG 014 THIS DEVICE COMPLIES WITH PART 15 OF THE FCC RULES. OPERATION IS SUBJECT TO THE FOLLOWING TWO CONDITIONS. 1) THIS DEVICE MAY NOT CAUSE HARMFUL INTERFERENCE, AND 2) THIS DEVICE MUST ACCEPT ANY INTERFERENCE RECEIVED, INCLUDING INTERFERENCE THAT MAY CAUSE UNDESIRED OPERATION.
Need help?
Do you have a question about the CCRadio2 and is the answer not in the manual?
Questions and answers
I see the display panel chart in. the instructions but where is it on the radio?