Table of Contents
Advertisement
Advertisement
Table of Contents

Related Manuals for Ozito ELM-300


Summary of Contents for Ozito ELM-300
-
Page 2: Specifications
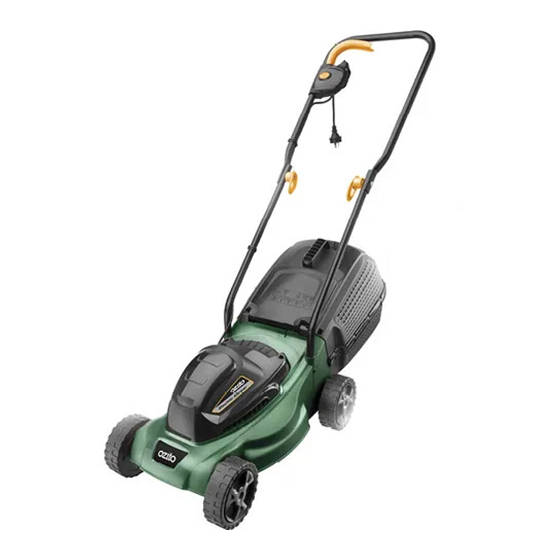
SPECIFICATIONS - MODEL NO. ELM-300 Motor: 1000W Input: 220-240V ~ 50Hz No load speed: 3600/min Cutting Diameter: 300mm Cutting Heights: 20mm, 40mm, 60mm Capacity of catcher: 28 Litre Weight (tool only): 7.0kg KNOW YOUR PRODUCT 1. Start/stop lever 7. Wheel hub 2. -
Page 3: Table Of Contents
TABLE OF CONTENTS SPECIFICATIONS ……………………………………….. Page 2 INTRODUCTION………………………………………… Page 4 ELECTRICAL SAFETY…………….……………………… Page 4 GENERAL SAFETY WARNINGS………………………… Page 5 ADDITIONAL SAFETY RULES FOR LAWN MOWERS…. Page 7 ASSEMBLY……………………………………………….. Page 9 OPERATION……………………………………………… Page 12 MAINTENANCE…………….…………………………… Page 14 SPARE PARTS …………….……………………………... Page 15 DESCRIPTION OF SYMBOLS …………………………. -
Page 4: Introduction
We aim to provide quality tools at an affordable price. We hope you will enjoy using this tool for many years. Your Electric Mower ELM-300 has been designed for small to medium size lawns and is intended for DIY use only. -
Page 5: General Safety Warnings
ELECTRICAL SAFETY (cont.) 5. Keep lead away from lawn mower; always work away from the power point mowing up and down never in circles. 6. Do not pull lead around sharp objects. 7. Always switch off at the mains before disconnecting any plug, cord or extension lead. 8. - Page 6 GENERAL (cont.) 16. Keep hands and feet away from the blade at all times and especially when switching on the motor. 17. Young children should be supervised to ensure that they do not play with the appliance. 18. No one is to operate this appliance without reading and understanding these operating instructions.
-
Page 7: Additional Safety Rules For Lawn Mowers
ADDITIONAL SAFETY RULES FOR LAWN MOWERS WARNING! If not used properly this lawn mower can be dangerous! This lawn mower can cause serious injury to the operator and others, the warnings and safety instructions must be followed to ensure reasonable safety and efficiency in using this lawn mower. - Page 8 ADDITIONAL SAFETY RULES FOR LAWN MOWERS (cont.) • Switch on the motor according to instructions and with feet well away from the blade(s). • Do not tilt the appliance when switching on the motor, except if the appliance has to be tilted for starting. In this case, do not tilt it more than absolutely necessary and lift only the part which is away from the operator.
-
Page 9: Assembly
ASSEMBLY Fitting the Wheels 1. Remove the body of the lawn mower from the packaging and place on a flat surface (Fig. 1). Fig. 1 The cutting height of the mower is determined by screwing the wheels in at the required height (Fig. - Page 10 ASSEMBLY (cont.) Fitting the Upper Handle to the Lower Handles 1. When you fit the upper handle (2) onto the lower handle you can decide the height of the handle Higher position by selecting the appropriate fastening hole on the Lower position lower handle (5).
- Page 11 ASSEMBLY (cont.) Fitting and removing the grass catcher The catcher must be attached to the two hooks on the mower (Fig. 9). Fig. 9 1. Lift up the catcher flap (4) with one hand and guide the catcher (9) with your other hand over the two hooks on the mower housing (Fig.
-
Page 12: Operation
PREPARATION 1. While using your lawn mower always wear substantial footwear and long trousers. 2. Make sure the lawn is clear of sticks, stones, wire and debris; they could be thrown by the blade. 3. Before using the lawn mower and after any impact, check for signs of wear or damage and repair as necessary. - Page 13 CUTTING HEIGHT ADJUSTMENT WARNING! Disconnect the mower from the power supply and ensure the blade has stopped coasting before adjusting the height. The cutting height of the mower is determined by screwing the wheels in at the required height. All wheels must be assembled at the same height position. 1.
-
Page 14: Maintenance
MAINTENANCE WARNING! Disconnect the mower from the power supply and ensure the blade has stopped coasting before removing and fitting the blade. Removing the blade (Fig. 11) CAUTION: ALWAYS HANDLE THE BLADE WITH CARE – SHARP EDGES COULD CAUSE SERIOUS INJURY. -
Page 15: Spare Parts
SPARE PARTS Limited spare parts are available subject to availability. Please contact your local Bunnings Special Orders Desk to order the required spare parts. Most common spare parts listed below Spare Part Part No. Wheel SPELM300-01 Blade & Bolt SPELM300-03 Grass Catcher SPELM300-11 DESCRIPTION OF SYMBOLS... -
Page 16: Pack Contents
Reuse of recycled material decreases pollution in the environment. Please recycle packaging where facilities exist. Check with your local council authority for recycling advice. PACK CONTENTS 1 x Electric mower ELM-300 2 x Catcher halves 2 x Handle securing bolts & knobs 4 x Wheel assembly... - Page 17 OZITO INDUSTRIES PTY LTD AUSTRALIA (Head Office) 1 - 23 Letcon Drive, Bangholme, Victoria, Australia 3175 Telephone: 1800 069 486 Facsimile: +61 3 9238 5588 Website: www.ozito.com.au Email: enquiries@ozito.com.au...
-
Page 18: Warranty
If the tool shows signs of damage or defects caused by or resulting from abuse, accidents or alterations. Failure to perform maintenance as set out within the instruction manual. • • If the tool is disassembled or tampered with in any way. OZITO Australia/New Zealand (Head Office) 1-23 Letcon Drive, Bangholme, Victoria, Australia 3175...
Need help?
Do you have a question about the ELM-300 and is the answer not in the manual?
Questions and answers