OHAUS Trooper Scale Instruction Manual
Hide thumbs
Also See for Trooper Scale:
- Instruction manual (104 pages) ,
- Instruction manual (112 pages) ,
- Service manual (46 pages)

Subscribe to Our Youtube Channel
Related Manuals for OHAUS Trooper Scale


Summary of Contents for OHAUS Trooper Scale
- Page 1 Ohaus Corporation 19A Chapin Road P.O. Box 2033 Pine Brook, NJ 07058-2033 USA www.ohaus.com INSTRUCTION MANUAL Trooper Scale...
- Page 2 Leerseite...
- Page 3 Ohaus Corporation, 19A Chapin Road, P.O. Box 2033, Pine Brook, New Jersey, 07058-2033, USA Declaration of Conformity We, Ohaus Corporation, declare under our sole responsibility that the instrument models listed below marked with “CE” - are in conformity with the directives and standards mentioned.
- Page 4 NOTE: THIS EQUIPMENT HAS BEEN TESTED AND FOUND TO COMPLY WITH THE LIMITS FOR A CLASS A DIGITAL DEVICE, PURSUANT TO PART 15 OF THE FCC RULES. THESE LIMITS ARE DESIGNED TO PROVIDE REASONABLE PROTECTION AGAINST HARMFUL INTERFERENCE WHEN THE EQUIP- MENT IS OPERATED IN A COMMERCIAL ENVIRONMENT.
-
Page 5: Table Of Contents
TABLE OF CONTENTS OVERVIEW OF CONTROLS AND DISPLAY FUNCTIONS ....................1 1. GETTING TO KNOW YOUR TROOPER SCALE ......................2 1.1 Introduction ................................2 1.1.1 Features ............................... 2 2. INSTALLATION ................................ 3 2.1 Unpacking and Checking ............................3 2.2 Selecting the Location .............................. 3 2.3 Connecting Power .............................. - Page 6 TABLE OF CONTENTS (Cont.) 5. CALIBRATION AND SEALING ..........................20 5.1 Legal for Trade (LFT) Operation and LFT Sealing ....................... 25 6. CARE AND MAINTENANCE............................. 26 6.1 Troubleshooting ..............................26 6.2 Error Codes List ..............................28 6.3 Service Information ..............................28 6.4 Replacement Parts ..............................
-
Page 7: Overview Of Controls And Display Functions
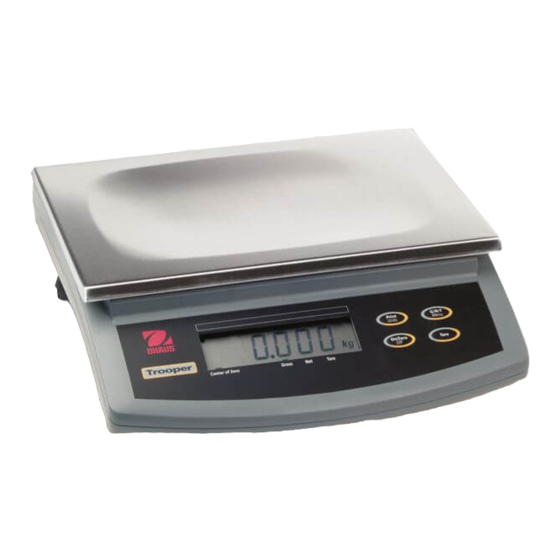
Trooper Scale OVERVIEW OF CONTROLS AND DISPLAY FUNCTIONS Designation Function Display LCD display, indicates weight, modes and setup information. Center of Zero LCD indicator prompt, indicates center of zero when within +/- 0.25d. Gross LCD indicator prompt, indicates gross weight. -
Page 8: Getting To Know Your Trooper Scale
The Trooper Scale operates from AC power and can also be powered by six Alkaline “C” batteries internally. A six digit LCD display is 1.0 inches/2.5 centimeters in height provides easy visibility when working at distances from the Scale. -
Page 9: Installation
(correct polarity). NOTE: It is recommended that when the Trooper Scale is operated from batteries, the Auto-Off Timer feature be turned on to extend battery life. When setting up the Scale, refer to Intial Setup, Readout menu, paragraph 4.4.4. -
Page 10: Leveling The Scale
3. OPERATION The Trooper Scale has been factory calibrated and is ready for operation. You can operate the scale at this point using the factory default settings. You can check the default menu settings on page 9. All bolded items on the menu are the factory default settings. -
Page 11: Turning On Scale
Trooper Scale 3. OPERATION (Cont.) 3.1 Turning On Scale Press and hold ON/ZERO/ OFF button until the LCD dis- play appears, then release ON/ZERO/ OFF button. The display momentarily displays segment check, the soft- Center Gross ware revision of the Scale and then goes into a weighing of Zero mode. -
Page 12: Gross/Net/Tare Recall Operation
Trooper Scale 3. OPERATION (Cont.) 3.5 Gross/Net/Tare Recall Operation When a container has been placed on the platform and tared, it's weight is stored in memory. Adding material to the container is shown as NET weight. The gross weight is Gross a combination of the tared weight and the material. -
Page 13: Rs232 Commands
Trooper Scale 3. OPERATION (Cont.) 3.7 RS232 Commands All communication is accomplished using standard ASCII format. Characters shown in the following table are acknowl- edged by the Scale. Invalid command response "ES" error indicates the Scale has not recognized the command. -
Page 14: Setup
4.1 Setup Protection The Trooper Scale is equipped with menus which permit certain functions to be locked out (not changed) during operation. If you intend to lock out changes to the setup selections you make, you will need to access the Lock Switch located on the main PC circuit board following the setup procedure. -
Page 15: Menu Structure
Trooper Scale 4.4.2 Menu Structure The following table illustrates the menu structure in the Trooper Scale. MAIN MENU SEt uP rEAd Print LOCSW Quit CALIBRATION * Reset * Reset N or Y SETUP Lock Legal for Trade to Factory Settings Yes... -
Page 16: Setup Menu
Trooper Scale 4.4.3 Setup Menu The Setup Menu is used to set up the Scale for the first time. Procedure With the Scale ON, press and hold the G/N/T/ MENU button until MENU is displayed. When you release G/N/ T/ MENU button, SETUP is displayed when the CALIBRA- TION Lock Switch (software) is in the locked position. - Page 17 Trooper Scale 4.4.3 Setup Menu (Cont.) Press PRINT/ UNITS button until desired capacity value is reached. Press G/N/T/ MENU button, Gd 0.1 is displayed. This is the graduation size. For available selections, press PRINT/ UNITS button until desired graduation value is reached.
-
Page 18: Readout Menu
Trooper Scale 4.4.4 Readout Menu The Readout menu is used to adapt the Scale to environmental conditions, set measuring units on/off, auto zero tracking, timer on/off, retain zero data and backlighting. Review all of the settings available before proceeding. Procedure... - Page 19 Trooper Scale 4.4.4 Readout Menu (Cont.) Procedure AVERAGING LEVEL (Cont.) Press G/N/T/ MENU button, AL LO is displayed. This is averaging level settings. Selections are: 'Lo' - Averaging level is low 'Hi' - Averaging level is high. Press PRINT/ UNITS button,and select LO or HI.
- Page 20 Trooper Scale 4.4.4 Readout Menu (Cont.) Procedure UNITS SELECTION Press G/N/T/ MENU button, Un OFF g is displayed. Press PRINT/ UNITS button, and select ON or OFF. OFF is the default setting. Press G/N/T/ MENU button, Un ON lb is displayed. This is unit pounds which can be turned ON or OFF.
- Page 21 Trooper Scale 4.4.4 Readout Menu (Cont.) AUTO POWER OFF Press G/N/T/ MENU button, AOtOFF is displayed. This is the Auto Off Timer. When set ON, the Scale will shut off automatically after 5 minutes has elapsed based on the condition that no button is pressed and the scale plat- form is stable during that period.
-
Page 22: Print Menu
Trooper Scale 4.4.5 Print Menu The Print menu provides data communication settings which can be entered. It contains 9 submenus: Reset, Baud rate, Parity Bit, Data Length, Stop Bits, Auto Print, Interval, Stable and Save. Procedure PRINT To select any of the items in the Print menu, proceed as follows: NOTE: If you have entered from the preceeding menu, disregard the first step. - Page 23 Trooper Scale 4.4.5 Print Menu Procedure (Cont.) DATA Press G/N/T/ MENU button, dAtA 7 is displayed. This is the data length. Press PRINT/ UNITS button, and select desired data length of 7 or 8. Default setting is 7. STOP BITS Press G/N/T/ MENU button, StOP 2 is displayed.
-
Page 24: Lockout Switch Menu
Trooper Scale 4.4.5 Print Menu INTERVAL - PRINTING (Cont.) Pressing the TARE button increments the digit from 1 to 0. When the desired number of seconds have been en- tered, press the G/N/T/ MENU button. Stb OFF is displayed. STABLE When set ON, allows only stable weight values to be printed. - Page 25 Trooper Scale 4.4.6 Lockout Switch Menu (Cont.) Procedure (Cont.) With the Scale ON, press and hold the G/N/T/ MENU but- ton until MENU is displayed. When you release the G/N/ T/ MENU button, CAL is displayed, then press PRINT/ UNITS button, until LOCSW is displayed.
-
Page 26: Calibration And Sealing
Trooper Scale 5. CALIBRATION AND SEALING Span calibration ensures that the Scale reads correctly within specifications. For best results, calibrate at full capacity. Calibration unit can be set to either kg or lb. NOTE: When the Scale is used in Legal for trade applications, the calibration menu is locked out and is not accessable. - Page 27 Trooper Scale 5. CALIBRATION AND SEALING (Cont.) Procedure (Cont.) TURNING SOFTWARE LOCK OFF Cal in kg: Span cal choices Linearity cal (fixed) TR3RS 1, 2, 3kg 2 & 3 kg TR6RS 2, 4, 6kg 4 & 6 kg TR15RS 5, 10, 15kg 10 &...
- Page 28 Trooper Scale 5. CALIBRATION AND SEALING (Cont.) Procedure (Cont.) SPAN CALIBRATION Place the indicated mass on the platform. Keep the plat- form stable during this period. The sample illustration indicates a 15kg scale. If at this point you are uncertain of the process or if the...
- Page 29 Trooper Scale 5. CALIBRATION AND SEALING (Cont.) Procedure TURNING CALIBRATION LOCK SWITCH ON To turn the software lock on: Press and hold the G/N/T/ MENU button until MENU ap- pears. Release it and SETuP appears. (if already in the main menu, skip to the next step).
- Page 30 Trooper Scale 5. CALIBRATION AND SEALING (Cont.) Procedure LINEARITY CALIBRATION As with span calibration, confirm that calibration is really required. If required, refer to page 20 and turn the Calibra- tion Lock Switch off. With the Scale ON, press and hold the button G/N/T/ MENU until MENU is displayed.
-
Page 31: Legal For Trade (Lft) Operation And Lft Sealing
The two screws are cross drilled and can accept a wire Bottom of Trooper seal. NOTICE: The Trooper Scale has been tested and found to comply with Class lll requirements of NIST Handbook 44. After the Scale has been tested and found to comply with... -
Page 32: Care And Maintenance
Trooper Scale 6 CARE AND MAINTENANCE To keep the Scale operating properly, the housing should be kept clean and free from foreign material. If necessary, a cloth dampened with a mild detergent may be used. 6.1 Troubleshooting SYMPTOM PROBABLE CAUSE(S) REMEDY Unit will not turn on. - Page 33 Trooper Scale 6 CARE AND MAINTENANCE (Cont.) 6.1 Troubleshooting (Cont.) PROBABLE CAUSE(S) SYMPTOM REMEDY Cannot display weight in desired Desired unit not set to ON in Readout Enable desired unit in Readout weighing unit. menu. See paragraph 4.4.4 menu. Conversion too large (typically in RS232 not working.
-
Page 34: Error Codes List
Scale must be recalibrated using the current settings. 6.3 Service Information If the Troubleshooting section does not resolve or describe your problem, you will need to contact an authorized Ohaus Service Agent. For Service assistance in the United States, please call Aftermarket, Ohaus Corporation toll-free at (800) 526-0659. - Page 35 Trooper Scale 6.5 Technical Data (Cont.) Standard Models TR3RS TR6RS TR15RS TR30RS Default Capacity X Readability (lb)* 6lb X 0.001lb 15lb X 0.002lb 30lb X 0.005lb 60lb X 0.01lb Default Capacity X Readability (kg)* 3kg X 0.0005kg 6kg X 0.001kg 15kg X 0.002kg...
- Page 36 Trooper Scale...
-
Page 37: Limited Warranty
Ohaus. In lieu of a properly returned warranty registration card, the warranty period shall begin on the date of shipment to the authorized dealer. - Page 38 Trooper Scale...
- Page 39 Leerseite...
- Page 40 Ohaus Corporation Representation in CIS Hatarhalom u 4 Sretensky Blv. 6/1, Office 6 1173 Budapest, 101000 Moscow, Russian Federation HUNGARY Tel: 9-011..+7 095 921 4897 Tel: 9-011..+36 1 253 07 04 With offices worldwide. www.ohaus.com P/N 80250912 © Ohaus Corporation 2000, all rights reserved.
Need help?
Do you have a question about the Trooper Scale and is the answer not in the manual?
Questions and answers