Table of Contents
Advertisement
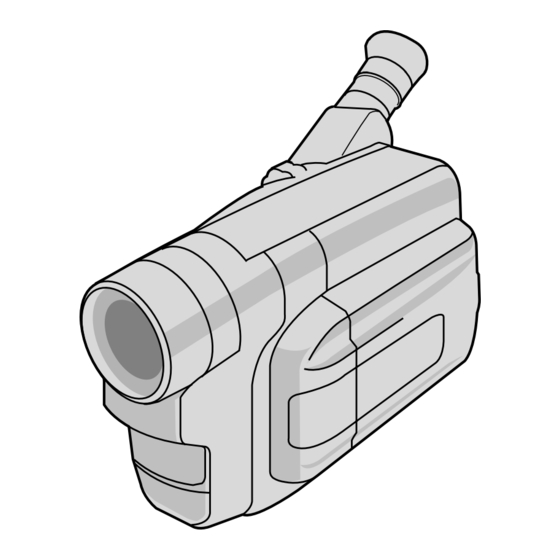
COMPACT VHS
CAMCORDER
GR-FXM65
INSTRUCTIONS
CONTENTS
Power ............................................. 8
Date/Time Settings ........................... 11
Recording Mode Setting ...................... 12
Tape Length Setting ........................... 12
Loading/Unloading A Cassette .............. 13
Grip Adjustment ............................... 14
Viewfinder Adjustment ....................... 14
Shoulder Strap Attachment .................. 15
Tripod Mounting ............................... 15
Basic Recording ................................ 16
Basic Shooting ................................. 20
Basic Features ................................. 24
Advanced Features ............................ 29
Basic Playback ................................. 44
Features ........................................ 45
Using The Cassette Adapter ................. 47
Basic Connections And Tape Dubbing ....... 48
Basic Playback ................................. 50
Connection ...................................... 51
Advanced Features ............................ 52
Random Assemble Editing .................... 60
Insert Editing (VIDEO) ........................ 64
Audio Dubbing ................................. 66
Controls, Connectors And Indicators ........ 70
Indications ...................................... 72
Terms ........................................... 74
8 - 15
16 - 19
20 - 23
24 - 43
44 - 47
48 - 49
50 - 57
58
67 - 69
70 - 73
76
77 - 79
80
LYT0285-001A
Advertisement
Table of Contents

Subscribe to Our Youtube Channel
Related Manuals for JVC GR-FXM65


Summary of Contents for JVC GR-FXM65
-
Page 1: Table Of Contents
COMPACT VHS CAMCORDER GR-FXM65 INSTRUCTIONS CONTENTS GETTING STARTED Power ... 8 Clock (Lithium) Battery Insertion/Removal ... 10 Date/Time Settings ... 11 Recording Mode Setting ... 12 Tape Length Setting ... 12 Loading/Unloading A Cassette ... 13 Grip Adjustment ... 14 Viewfinder Adjustment ... -
Page 2: Safety Precautions
Dear Customer, Thank you for purchasing the JVC Compact VHS camcorder. Before use, please read the safety information and precautions contained in the following pages to ensure safe use of this product. Using This Instruction Manual •All major sections and subsections are listed in the Table Of Contents ( •Notes appear after most subsections. -
Page 3: Some Do's And Don'ts On The Safe Use Of Equipment
The rating plate (serial number plate) of the AC Power Adapter/Charger is on its bottom. This camcorder is designed to be used with PAL- type colour television signals. It cannot be used for playback with a television of a different standard. -
Page 4: Major Features
Sports Nega/Posi 1/2000 sec. High Speed Shutter LCD Colour Monitor pg. 18) This camcorder is designed exclusively for the VHS-C video cassette. Only cassettes marked VHS-C can be used with this unit. HQ VHS is compatible with existing VHS equipment. -
Page 5: Provided Accessories
PROVIDED ACCESSORIES • AC Power Adapter/ Charger AA-V15EK •Cable Adapter •Lithium Battery CR2025 x 2 (for clock operation and remote control unit) ® (for Windows •Cassette Adapter C-P7U •Remote Control Unit RM-V709U •Editing cable •PC Connection Cable x 1 • Battery Pack BN-V12U •Shoulder Strap •DC Cord •... -
Page 6: Quick Operation
The image you shoot is recorded onto a video tape. SUPPLY POWER Hook on. BATTERY RELEASE Using the battery pack Hook its end to the camcorder ( battery pack in until it locks in place ( (Charging procedure, pg. 8) To remove the battery pack Slide BATTERY RELEASE and pull out the battery pack. - Page 7 QUICK OPERATION GUIDE (D.S.C.) A still image you shoot is stored in the camcorder's built-in memory. SUPPLY POWER Hook on. Push in. BATTERY RELEASE Using the battery pack Hook its end to the camcorder ( battery pack in until it locks in place ( (Charging procedure, pg.
-
Page 8: Getting Started
Failure to do so can result in a camcorder malfunction. Power This camcorder’s 3-way power supply system lets you choose To AC outlet the most appropriate source of power. NOTES: No function is available without power supply. -
Page 9: Using Ac Power
The CHARGE indicator may not light properly with a brand new battery pack, or with one that has been stored for an extended period. In this case, remove and reattach the battery pack and recharge it. The CHARGE indicator should blink during recharging. If it doesn’t, contact your nearest JVC dealer. To DC IN jack... -
Page 10: Clock (Lithium) Battery Insertion/Removal
See “SAFETY PRECAUTIONS” ( on safe handling of lithium batteries. To avoid losing the battery and/or battery holder, place the camcorder with the grip side up as shown in the illustration when inserting/removing the battery. (cont.) pg. 2) for information... -
Page 11: Date/Time Settings
“EXIT”, and press it. The Menu Screen reappears with the highlight bar on “RETURN”. CLOSE MENU SCREEN Press the Select Dial. NOTE: To display the date and time in the camcorder’s display and on a connected TV, see “Date/Time Insert” pg. 32). -
Page 12: Recording Mode Setting
System Select Switch MENU Button SP/LP Recording Mode Button Select Dial Power Switch Viewfinder Tape length indicator Recording mode indicator Display Menu Screen NEXT M . W . B . AUTO D . ZOOM TELE MACRO DATE TIME TAPE LENGTH PICTURE FINE SNAPSHOT... -
Page 13: Loading/Unloading A Cassette
Make sure the Erase Protection tab is in the position that allows recording. If not, slide the tab. Some cassettes have removable tabs. If the tab has been removed, cover the hole with adhesive tape. The cassette holder cannot be opened while the camcorder is in the record mode. -
Page 14: Grip Adjustment
Power Zoom Lever Recording Start/Stop Button Set “POWER” to “CAMERA” (“AUTO” or “PRO.”) PAUSE GETTING STARTED Grip Adjustment EXPAND LOOP Separate the Velcro strip. INSERT HAND Pass your right hand through the loop and grasp the grip. ADJUST STRAP LENGTH Adjust so that your thumb and fingers can easily operate the Recording Start/Stop Button and Power Zoom Lever. -
Page 15: Shoulder Strap Attachment
Then tighten the screw. CAUTION: When using a tripod, be sure to open and extend its legs fully to stabilize the camcorder. To prevent damage to the unit caused by falling over, do not use a small-sized tripod. , then fold it back and... -
Page 16: Video Recording
Set the System Select Switch to “VIDEO”, then set the Power Switch to “CAMERA” (“AUTO” or “PRO.”). •The power lamp lights and the camcorder enters the Record-Standby mode. •The scene you are aimed at appears on the viewfinder screen, with the word “PAUSE”... -
Page 17: Lcd Monitor/Viewfinder Indications
The LENS COVER warning blinks for about 5 seconds when the camcorder is turned on with the cover closed. While shooting, sound is not heard from the speaker. -
Page 18: Stop Recording
Set the System Select Switch to “VIDEO”, then set the Power Switch to “CAMERA” (“AUTO” or “PRO.”). •The power lamp lights and the camcorder enters the Record-Standby mode. •The scene you are aimed at appears in the LCD monitor, with the word “PAUSE” superimposed upon it. -
Page 19: Journalistic Shooting
Journalistic Shooting In some situations different angles of shooting may be required for more dramatic results. Interface Shooting The person you shoot can view himself/herself in the LCD monitor, and you can even shoot yourself while viewing your own image in the LCD monitor. NOTE: Self-recording The monitored image can be viewed on the LCD monitor... -
Page 20: Digital Still Camera (D.s.c.) Shooting
Open/Close Ring When shooting a still image, it is not recorded onto the tape, but it is stored in the camcorder's built-in memory in the selected Picture Mode. A stored still image data can be transferred to a PC, saved, and processed using a Paint... - Page 21 When the Power Switch is set to “AUTO”, it is not possible to select the Snapshot mode. You can use the Snapshot mode you selected in the “PRO.” mode. If a Snapshot is taken while the camcorder is in the WIDE mode ( pg. 35), the Snapshot image is recorded without the black bars at the top and bottom of the screen.
-
Page 22: Picture Mode Setting
FEATURE: PURPOSE: There are two image settings you can choose from when storing in the camcorder's memory: FINE and STANDARD. FINE allows you to shoot up to approx. 30 still images in a format based on JPEG (Joint Photographic Experts Group) format. Since the quality of image is better than “STANDARD”, “FINE”... - Page 23 To store the still images you shot, we recommend that you transfer them to a computer and save them on disk ( pg. 51), or transfer them to a VCR connected to the camcorder and record them onto a tape. When the Power Switch is set to “CAMERA” (“AUTO” or “PRO.”) and the LCD monitor is opened at an angle of 60 degrees or more, the LCD monitor switches on and the viewfinder switches off automatically to save power.
-
Page 24: Recording
This interesting feature lets you record two types of digital still images that look like photographs onto a tape, as well as keeping them in the camcorder’s built-in memory. It is a great way to spice up footage of events such as parties, weddings and graduations. - Page 25 51). The image data transferred to a Windows PC can also be further processed using Mr. Photo Gold. If a snapshot is taken while the camcorder is in the WIDE mode ( recorded without the black bars at the top and bottom of the screen.
- Page 26 Zoom in Display Approximate zoom ratio Power Zoom Lever RECORDING FEATURE: PURPOSE: To produce the zoom in/out effect, or an instantaneous change in image magnification. Digital circuitry extends the maximum magnification offered by optical zoom. This system is called Digital Zoom out Zoom.
-
Page 27: Picture Stabilizer
FEATURE: PURPOSE: To re-record certain segments. OPERATION: 1) Make sure the camcorder is in the Record–Standby mode. 2) Press and hold either RETAKE to reach the start point for new recording. Pressing “F” forwards the tape and pressing “R” reverses it. -
Page 28: Video Light
30 cm. between the video light and people or objects. Do not use near flammable or explosive materials. It is recommended that you consult your nearest JVC dealer for replacing the video light. RECORDING Basic Features (cont.) Video Light... -
Page 29: Advanced Features
RECORDING Advanced Features [Ex.: Fader] Fade in Display EFFECT After 2 sec. MOSAIC EFFECT MOSAIC FADER MOSAIC SHUTTER SLIDE (No indication) Power EFFECT Button Switch System Select Switch Recording Start/Stop Button Fade/Wipe These effects let you make pro-style scene transitions. Fade- or wipe-in works at recording start, and fade- or wipe-out works at recording end. -
Page 30: Programme Ae With Special Effects
Display P.AE After 2 sec. : SEPIA : SEPIA SEPIA SPORTS ND : ND EFFECT FG : TWILIGHT S1/2000 NEGA/POSI P.AE Button System Select Switch RECORDING Programme AE With Special Effects All you have to do to access any of the variety of shooting effects is press P.AE. - Page 31 Use together with Wide ( for the authentic look of a classic Hollywood movie. •When the Power Switch is set to “D.S.C.”, the scene is stored in black-and-white in the camcorder’s memory. SPORTS Sports High shutter speed clearly captures fast-moving action.
- Page 32 Even if you shoot with the date/time displayed during Digital Still Camera Shooting, they will not be recorded. AUTO DATE Your camcorder automatically records the date for about 5 seconds after recording is initiated in the following situations: • After changing the date.
-
Page 33: Instant Titles
TITLE DATE TIME DISP. RETURN CONGRATULATIONS Instant Titles The camcorder has eight preset titles in memory. You can superimpose one of them over a picture as shown in the illustration on left. SELECT OPERATION SYSTEM AND MODE Set the System Select Switch to “VIDEO”, and set the Power Switch to “PRO.”. -
Page 34: Using Menu For Detailed Adjustment
RECORDING Advanced Features (cont.) Using Menu For Detailed Adjustment This camcorder is equipped with an easy-to-use, on-screen menu system that simplifies many of the more detailed camcorder settings. SELECT OPERATION SYSTEM AND MODE The operation system depends on the function you wish to select. - Page 35 NORMAL TITLE* Allows you to superimpose one of eight preset titles ( DATE/TIME Makes the date/time settings appear in the camcorder or on a connected monitor DISP.* pg. 32). Menu Screen Available Using The MENU Button This Menu Screen cannot be accessed while recording.
- Page 36 INT. TIME Lapse recording ( TALLY LAMP* This number is necessary when connecting the camcorder to a device such as a computer JLIP ID NO. using the J terminal (JLIP). The numbers range from 01 to 99. Factory setting is 06.
-
Page 37: Exposure Control
System Select Switch Select Dial Power Switch Display Menu Screen FOCUS AUTO EXPOSURE AUTO WIDE S . LX TITLE DATE TIME DISP. RETURN EXPOSURE EXPOSURE Menu AUTO MANU EXIT Manual Exposure Screen Exposure control level counter To brighten the image –... -
Page 38: Auto Focus
RECORDING Advanced Features (cont.) Focusing AUTO FOCUS The camcorder’s Full Range AF system offers continuous shooting ability from close-up to infinity. However, correct focus may not be obtainable in the situations listed below (in these cases use manual focusing): •When two subjects overlap in the same scene. -
Page 39: Manual Focus
System Select Switch Select Dial Power Switch Display Menu Screen FOCUS AUTO EXPOSURE AUTO WIDE S . LX TITLE DATE TIME DISP. RETURN FOCUS FOCUS Menu AUTO MANU EXIT Manual Focus Screen MANUAL FOCUS NOTE: You should already have made the necessary viewfinder adjustments ( pg. -
Page 40: White Balance Adjustment
If the white balance is correct, all other colours will be accurately reproduced. The white balance is usually adjusted automatically. However, the more advanced camcorder operator would prefer to control this function manually and achieve a more professional colour/tint reproduction. -
Page 41: Enter Setting
White paper System Select Switch Select Dial Power Switch Display Menu Screen NEXT M . W . B . AUTO D . ZOOM TELE MACRO DATE TIME TAPE LENGTH PICTURE FINE SNAPSHOT FULL RETURN M.W.B. M.W.B. Menu AUTO : FINE : CLOUD : HALOGEN EXIT... - Page 42 Self-Timer You can set the delay between pressing the Recording Start/Stop button and the actual start of recording. If you secure the camcorder, you (or whoever is operating the camcorder) can enter the scene before recording starts. NOTE: Before performing the following steps, make sure that: The System Select Switch is set to “VIDEO”...
- Page 43 RELEASE ANIMATION MODE Set “REC TIME” in the Menu screen to “OFF”. NOTES: For best results, make sure the camcorder is secured when shooting in Animation or Time- Lapse mode. Fade- or wipe-in/out cannot be performed during Animation or Time-Lapse shooting.
-
Page 44: Video Playback
Press REW (2) to rewind, or FF (3) to fast-forward the tape during Stop mode. NOTES: The camcorder shuts off automatically after about 5 minutes in Stop mode. To turn on again, set the Power Switch to “POWER OFF”, then to “PLAY”. -
Page 45: Features
“AT” blinks. When Auto Tracking finishes, the indication disappears. NOTES: When noise bars appear during playback, the camcorder enters the Auto Tracking mode and “AT” is displayed. Manual Tracking may not work with tapes recorded on other VCRs or camcorders. -
Page 46: Counter Memory Function
Set to “VIDEO”. REW (2) Button FF (3) Button PLAY/PAUSE (4/6) Button STOP (5) Button COUNTER R/M Button VIDEO PLAYBACK Power Switch FEATURE: PURPOSE: To pause during playback. OPERATION: 1) Press PLAY/PAUSE (4/6) during playback. 2) To resume normal playback, press PLAY/PAUSE (4/6) again. -
Page 47: Using The Cassette Adapter
Using The Cassette Adapter Cassette Adapter Use this to play back a VHS-C video cassette recorded with this camcorder on a VHS VCR. It is fully compatible with any VHS video cassette recorder. The C-P7U adapter is battery powered and automatically performs tape loading and unloading. -
Page 48: Playback
These are some basic types of connections. When making connections, refer also to your VCR and TV instruction manuals. Basic Connections Use optional Video and Audio cables. Connector cover* Connection For Tape Dubbing Use optional Video and Audio cables. Connector cover* * When connecting the cables, open this cover. -
Page 49: Connect Equipment
CONNECT VCR OUTPUT TO TV INPUT Refer to your VCR’s instruction manual. SUPPLY POWER Turn on the camcorder, the VCR and the TV. SELECT MODE Set the VCR to its AUX input mode, and set the TV to its VIDEO mode. -
Page 50: Basic Playback
When viewing a playback picture on a connected TV, it may jitter slightly. You can also view the playback picture on the LCD monitor with it flipped over and retracted. To move the page back Basic Playback pg. 48, 49). Camcorder operation is... -
Page 51: Connection
Use the AC Power Adapter/Charger as the power supply instead of the battery pack. The still images stored in the camcorder’s memory are not automatically removed after being transferred to the PC. If you wish to remove those still images from the camcorder's memory, delete them ( ®... -
Page 52: D.s.c. Playback
DELETE RETURN Normal Screen D.S.C. PLAYBACK Using Menu For Detailed Adjustment This camcorder is equipped with an easy-to-use, on-screen menu system that simplifies many of the more detailed camcorder settings. SELECT OPERATION SYSTEM AND MODE Set the System Select Switch to “D.S.C.”, and set the Power Switch to “PLAY”. - Page 53 CAUTION: While “ENTER” is selected on the Delete Execute Menu and it is blinking, switching off the camcorder or removing the power supply unit (battery pack or AC Power Adapter/Charger) may cause the camcorder’s built-in memory to become corrupt. Never remove the power supply unit at this stage.
- Page 54 System Select Switch MENU Button Select Dial Display MENU Menu Screen INDEX SLIDE SHOW 1 SLIDE SHOW 2 PROTECT DELETE RETURN < > E X I T INDEX INDEX Menu Playback Screen D.S.C. PLAYBACK Index You can view all still images stored in memory six at a time.
- Page 55 System Select Switch MENU Button Select Dial Power Switch Display MENU Menu Screen INDEX SLIDE SHOW 1 SLIDE SHOW 2 PROTECT DELETE RETURN < > E X I T PROTECT PROTECT Menu < > E X I T PROTECT A padlock mark appears.
- Page 56 System Select Switch MENU Button Select Dial Display MENU Menu Screen INDEX SLIDE SHOW 1 SLIDE SHOW 2 PROTECT DELETE RETURN DELETE DELETE Menu SELECT In case of “ALL” EXIT < > NE X T DELETE In case of “SELECT” Delete Select Menu DELETE CANCEL...
- Page 57 FINE mode. If the remaining number of shots is not 30 in the FINE mode or 60 in the STANDARD mode when “ALL” is selected on the DELETE Menu, initialize the camcorder’s memory ( pg. 55) or pg.
-
Page 58: Using The Remote Control Unit
Retake (rewind)/Quick Review ( — — Functions same as snapshot button on the camcorder. ( pg. 20, 24) Functions the same as the Recording Start/Stop Button on the camcorder. Ineffective Zoom in and out ( pg. 26) — — —... -
Page 59: Self-Timer, Animation And Time-Lapse
Transmitted beam effective area Remote sensor When using the remote control, be sure to point it at the remote sensor. The illustration shows the approximate transmitted beam effective area for indoor use. The transmitted beam may not be effective or may cause incorrect operation outdoors or when the remote sensor is directly exposed to sunlight or powerful lighting. -
Page 60: Random Assemble Editing
VCR CTL VCR BRAND BUTTONS NAME (A) (B) PHILIPS IMPORTANT Although the MBR is compatible with JVC VCRs and those of many other makers, it may not work with yours or may offer limited functions. SANYO NOTES: SELECO, SHARP SONY... -
Page 61: Make Connections
CONNECT TO . . . JVC VCR EQUIPPED WITH REMOTE PAUSE TERMINAL Connect the editing cable to the Remote PAUSE terminal. JVC VCR NOT EQUIPPED WITH REMOTE Open the cover. PAUSE TERMINAL BUT EQUIPPED WITH R.A. EDIT CONNECTOR Connect the editing cable to the R.A.EDIT connector. - Page 62 Pressing ON/OFF clears all in- and out-points from memory. Leave a small margin for error around each in-point to ensure the scene is recorded in its entirety. Turning off the camcorder’s power erases all registered in- and out-points. (cont.)
- Page 63 Random Assemble Editing. The playback deck must be an R.A. Edit- capable JVC VCR. The recording deck can be... a VCR other than JVC, or a JVC VCR which has neither a Remote PAUSE nor an R.A. EDIT connector How to use: AV IN —...
-
Page 64: Insert Editing (Video)
Power Switch to “PLAY”. FIND EDIT-OUT POINT Play back the tape, locate the Edit Out point and press PAUSE on the camcorder or the remote control. RESET COUNTER Press and hold COUNTER R/M for more than 1 second to reset the tape counter, then press again for less than 1 second so that “M”... -
Page 65: Insert Editing (Insert A Still Image From The Built-In Memory Onto A Tape)
Insert Editing (Insert A Still Image From The Built-in Memory Onto A Tape) You can insert a still image stored in the camcorder's built- in memory into a previously recorded tape, replacing a section of the original recording with minimal picture distortion at the in- and out-points. -
Page 66: Audio Dubbing
Press and hold A. DUB, and without releasing A. DUB, press and release PAUSE. BEGIN AUDIO DUBBING Press PLAY. When the counter reaches “0:00:00”, Audio Dubbing stops automatically and the camcorder enters the Audio Dub-Standby mode. Microphone END AUDIO DUBBING Press STOP. NOTES: Do not press FF or REW during Audio Dub-Standby, or the edit points will not be accurate. -
Page 67: Troubleshooting
TROUBLESHOOTING If, after following the steps in the chart below, the problem still exists, please consult your JVC dealer. The camcorder is a microcomputer-controlled device. External noise and interference (from a TV, a radio, etc.) might prevent it from functioning properly. In such cases, first disconnect its power supply unit (battery pack, AC Power Adapter/Battery Charger, etc.) and clock battery;... -
Page 68: Tape Transport
Change the Switch position to “VIDEO” ( pg. 44). The video heads are dirty or worn out. Consult your nearest JVC dealer for head cleaning or replacement. This is normal. The Counter Memory Function has been activated pg. 46). - Page 69 (including ones for which you performed the “Protect” function) stored in the camcorder’s memory. If you wish to keep any of the still images that are stored in memory, before initialization first transfer them to a PC and save them. If image data is corrupt, transfer is impossible.
-
Page 70: Index
3 4 5 6 INDEX Controls, Connectors And Indicators &... -
Page 71: Other Parts
J Terminal [JLIP (Joint Level Interface Protocol) Random Assemble Editing ( such as a personal computer. For further details consult your nearest JVC dealer. is not possible if the VCR is not equipped with a J terminal. -
Page 72: Indications
30MIN MERRY CHRISTMAS 25. 12. 99 BRIGHT FINE 12 FADER NORM LENS COVER PAUSE INDEX TAPE END 22 : 50 : 00 INDEX & Indications... - Page 73 Appears if dirty heads are detected during pg. 16 recording. In such a case, use the optional pg. 27 Cleaning Cassette. If, after using it, the problems still exist, consult your nearest JVC dealer. pg. 42, 59 pg. 33 pg. 32 pg. 45 pg.
-
Page 74: Terms
Cassette Adapter ... pg. 47 Charge Marker ... pg. 9 Charging The Battery Pack ... pg. 8 Clean The Camcorder ... pg. 76 Clock (Lithium) Battery ... pg. 10 COM Port (RS-232C) ... pg. 51 Connection To A VCR/TV ... pg. 48 Connection To A Windows PC/Macintosh ... - Page 75 Padlock Mark ... pg. 55 Picture Mode Setting ... pg. 22 Picture Stabilizer ... pg. 27 Pin-Up Image ... pg. 21, 25 Playback (D.S.C.) ... pg. 50 Playback (VIDEO) ... pg. 44 Power Switch Position ... pg. 16 Printer Port ... pg. 51 Program AE With Special Effects ...
-
Page 76: User Maintenance
Close and lock the LCD monitor. Slide BATTERY RELEASE to remove the battery pack. Turn the LENS COVER Open/Close Ring to close the lens cover. Cleaning The Camcorder CLEAN EXTERIOR Wipe gently with a soft cloth. Remove. •Put cloth in diluted mild soap and wring it well to... -
Page 77: Cautions
•Do not use near flammable or explosive materials. •It is recommended that you consult your nearest JVC dealer for replacing the video light. General Battery Precautions •When the C-P6U or C-P7U (cassette adapter) is not functioning even when correctly operated, the battery is exhausted. -
Page 78: Main Unit
... vertically, in their original cases. Main Unit 1. For safety, DO NOT ..open the camcorder’s chassis..disassemble or modify the unit..short-circuit the terminals of the battery pack. Keep it away from metallic objects when not in use. -
Page 79: Lcd Monitor
A built-in head cleaner automatically cleans the video heads and head drum whenever a cassette is loaded and unloaded to reduce head clogging. Cleaning cassette TCC-2U is available from your JVC local dealer. -
Page 80: Specifications
• Active Carrying Bag CB-V7U • Remote Control Unit RM-V700U Some accessories are not available in some areas. Please consult your nearest JVC dealer for details on accessories and their availability. Specifications shown are for SP mode unless otherwise indicated. - Page 81 MEMO...
- Page 82 MEMO...
- Page 83 MEMO...
- Page 84 VICTOR COMPANY OF JAPAN, LIMITED Printed in Japan COPYRIGHT© 1999 VICTOR COMPANY OF JAPAN, LTD. 0499FOV...
Need help?
Do you have a question about the GR-FXM65 and is the answer not in the manual?
Questions and answers