Table of Contents
Advertisement
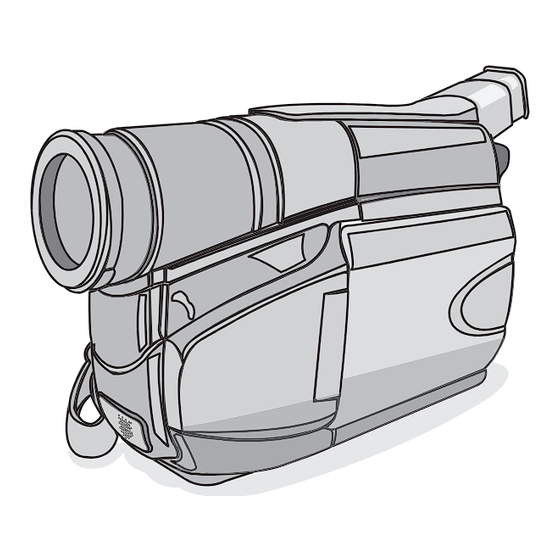
AUTOMATIC DEMONSTRATION
Automatic
Demonstration
place when "DEMO MODE" is set to
"ON" (factory-preset).
• Available when the Power Switch is set to
" " or " ".
• To cancel Automatic Demonstration, set
"DEMO MODE" to "OFF" (
PAL
takes
pg. 17).
COMPACT VHS CAMCORDER
GR-FXM42EK
CONTENTS
GETTING STARTED
RECORDING/PLAYBACK
BASIC FEATURES
MENU SETTINGS
TERMS
Dear Customer,
Thank you for purchasing the JVC Compact
VHS camcorder. Before use, please read
"SAFETY PRECAUTIONS" (
ensure safe use of this product.
6 ~ 10
11
11 ~ 13
14 ~ 17
22
pg. 3, 4) to
LYT1525-001A
Advertisement
Table of Contents

Related Manuals for JVC GR-FXM42EK


Summary of Contents for JVC GR-FXM42EK
- Page 1 GR-FXM42EK GETTING STARTED RECORDING/PLAYBACK BASIC FEATURES MENU SETTINGS TERMS Dear Customer, Thank you for purchasing the JVC Compact VHS camcorder. Before use, please read takes “SAFETY PRECAUTIONS” ( ensure safe use of this product. CONTENTS 6 ~ 10 11 ~ 13 14 ~ 17 pg.
-
Page 2: Provided Accessories
• Battery Packs BN-V12U, BN-V20U, BN- V400U • Compact VHS ( ) Cassettes EC-60/ 45/30 • Active Carrying Bag CB-V7U • Cassette Adapter C-P8U Some accessories are not available in some areas. Please consult your nearest JVC dealer for details on accessories and their availability. -
Page 3: Safety Precautions
However, live recording and LCD monitor / viewfinder playback are possible anywhere. • Use the JVC BN-V10U/ V12U/ V20U/ V400U battery packs and, to recharge them or to supply power to the camcorder from an AC outlet, use the provided multi-voltage AC Adapter. - Page 4 (Business users) If you wish to dispose of this product, please visit our web page www.jvc-europe.com to obtain information about the take-back of the product. [Other Countries outside the European Union] If you wish to dispose of this product, please do so in...
- Page 5 SOME DO’S AND DON’TS ON THE SAFE USE OF EQUIPMENT This equipment has been designed and manufactured to meet international safety standards but, like any electrical equipment, care must be taken if you are to obtain the best results and safety is to be assured. DO read the operating instructions before you attempt to use the equipment.
-
Page 6: During Recording
– – – – – – Refer to this diagram while reading the instructions. During shooting Keep the lens cap attached to the camcorder Cassette holder 90° 90° 180° LCD monitor < – – – pg. 18 for “Warning Indications”... - Page 7 1 • MENU Wheel [–, +]... • BRIGHT Wheel [–, +] ... • Speaker Volume Control [VOL.] ... • TRACKING Wheel [–, +]... 2 5- Second Recording Button... [5 SEC. REC] 3 Power Zoom Lever [T/W] ... 4 •Manual Focus Button [ FOCUS] ...
-
Page 8: Getting Started
To AC outlet AC Adapter Charging the Battery Pack 1) Hook the end of the battery pack to the camcorder and push the battery in until it locks in place. • If the battery pack is attached wrongly, a malfunction may occur. -
Page 9: Date/Time Settings
16) in SYSTEM MENU. • The date/time cannot be stored in memory if the built-in clock battery runs out. Consult an authorised JVC dealer for replacement, or set the date/time as necessary before you start shooting. D A T E... - Page 10 Some cassettes have removable tabs. If the tab has been removed, cover the hole with adhesive tape. • The cassette holder cannot be opened while the camcorder is in record mode or detached from power source. Cassette holder Erase protection tab...
-
Page 11: Basic Features
LCD monitor is closed and locked. Shooting while using the LCD monitor: Make sure the LCD monitor is fully open. The camcorder is in Record-Standby mode and “PAUSE” V is displayed. • The viewfinder and LCD monitor cannot be used simultaneously. - Page 12 TBC. Connections To A TV/VCR 1) Make sure all units are turned off. 2) Connect the camcorder to a TV or VCR. If using both TV and VCR, connect the VCR output to the TV input.
-
Page 13: Tape Dubbing
Audio Input Yellow to Video Input Tape Dubbing 1) Connect the camcorder and the VCR ( 12, “Connections To A TV/VCR”). Set the Power Switch # to “PLAY” while pressing down the Lock Button ", turn on the VCR’s power, and insert the appropriate cassettes in the camcorder and the VCR. -
Page 14: Menu Settings
MENU SETTINGS The Menu Screen cannot be accessed while recording. 1) Set the Power Switch # to “ ” while pressing down the Lock Button ". 2) Press the MENU Wheel 1 in. The TOP MENU Screen appears. Rotate the MENU Wheel 1 to select the desired menu or function and press it. -
Page 15: Camera Menu
NEGAPOSI: The colours of a picture are reversed. MOSAIC: Turns recorded scenes into a mosaic pattern. STRETCH: Doubles the width of the picture horizontally. FADE/WIPE Fade- or wipe-in works when recording begins, and fade-or wipe-out works when recording ends. OFF: To cancel the effect. FADER: Fades in/out to a black screen. -
Page 16: System Menu System Menu
BRIGHT Wheel 1 is released, the indicator soon disappears and adjustment is completed. DATE/TIME DISP. The date/time appears in the camcorder or on a connected monitor (set DATE/TIME in SYSTEM MENU first • The selected display will be recorded. If you do not want to record the display, select “OFF”... -
Page 17: System Menu
• “DEMO MODE” remains “ON” even if the camcorder power is turned off. • When a cassette is in the camcorder demonstration is not available. • If you do not detach the Lens Cap, you cannot see the actual changes of the Automatic Demonstration activated on the LCD monitor or viewfinder. -
Page 18: Warning Indications
Before consulting your JVC dealer, please check the following to see if you can correct the problem yourself. Vertical white lines appear when shooting a very bright object. • This sometimes occurs when the contrast between the background and the object is great. - Page 19 … vertically, in their original cases. Main Unit 1) For safety, DO NOT… Terminals … open the camcorder’s chassis. … disassemble or modify the unit. … short-circuit the terminals of the battery pack. Keep it away from metallic objects when not in use.
- Page 20 Serious malfunctioning If malfunctioning occurs, stop using the unit immediately and consult your local JVC dealer. For Your Maintenance 1) After Use 1 Turn off the camcorder. 2 Open the LCD monitor to an angle of over 60 degrees.
-
Page 21: Specifications
Camcorder General Format : VHS PAL standard Power source : DC 11 V Adapter) DC 6 V (Using battery pack) Power consumption Viewfinder on : 3.7 W LCD monitor on : 4.3 W Signal system : PAL-type Video recording system... - Page 22 Brighten The Image...pg. 14 Brighten The LCD Monitor ...pg. 11, 16 Cassette Adapter ...pg. 13 Charging The Battery Pack ...pg. 8 Clean The Camcorder ...pg. 20 Connection To a VCR/ TV...pg. 12 Counter Memory ...pg. 17 Darken The Image...pg. 14 Darken The LCD Monitor ...pg.
- Page 23 NOTE...
- Page 24 © 2005 Victor Company of Japan, Limited Printed in Malaysia 1205YDR-NF-VM...
Need help?
Do you have a question about the GR-FXM42EK and is the answer not in the manual?
Questions and answers
Как убрать защищённый режим Е04
To disable protected mode E04 on the JVC GR-FXM42EK:
1. Turn off the camcorder.
2. Remove the power supply (battery or adapter).
3. Wait a few minutes.
4. Reattach the power supply and turn the camcorder on again.
If the E04 warning remains after this, consult a JVC dealer.
This answer is automatically generated