
Related Manuals for Worldlawn WYZ 52


Summary of Contents for Worldlawn WYZ 52
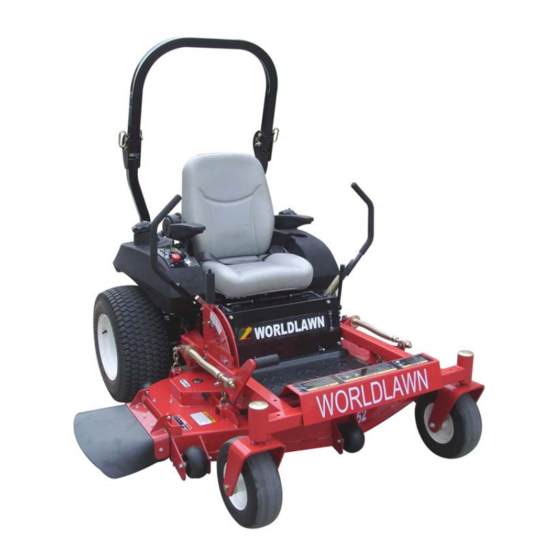
- Page 1 Operator’s Manual WYZ 52/60 Zero Turn Mower Worldlawn Power Equipment, Inc. 422 Turnbull Canyon Road, City of Industry, CA 91744 Toll Free Number:1-866-9-Mowers(1-866-966-9377)
- Page 2 OPERATOR’S MANUAL This manual contains assembly, operating, maintenance, adjustment and safety instructions for your WYZ52/ WYZ60 lawn mower. Before operating your mower, carefully read this manual in its entirety. By following the operating, maintenance, adjustment and safety instructions, you will prolong the life of your mower, maintain its maximum efficiency and promote safe operation.
-
Page 4: Table Of Contents
TABLE OF CONTENTS …………………………………………………………………………………… SAFETY ………………………………………………………………… Safety Alert Symbol ……………………………………………………………………………. Training …………………………………………………………………………. Preparation …………………………………………………………………………... Operation ……………………………………………………………... Maintenance & Storage ………………………………………………………………………... Safety Signs ………………………………………………………………………… SPECIFICATIONS 2.1 Model Number…………………………………………………………………… 2.2 Engine……………………………………………………………………………. 2.3 Fuel System………………………………………………………………………. 2.4 Electrical System…………………………………………………………………. 2.5. Operator Controls……………………………………………………………….. 2.6. Seat………………………………………………………………………………. 2.7 Hydrostatic Ground Drive System……………………………………………….. - Page 5 4.2 Pre-Start……………………………………………………………………………. 19 4.3 Mowing…………………………………………………………….……………… 4.4 Transporting…………………………………………….……………………….… MAINTENANCE & ADJUSTMENTS………………………………………………………..…….. 5.1 Periodic Maintenance……………………………………………………………… ADJUSTMENTS ……………………………………………………………..……………….. …………………………………………………………………….. 33 TROUBLE SHOOTING …………………………………………………………….…….. . HYDRAULIC DIAGRAM ELECTRICAL DIAGRAM…………………………………………………………………………… WARRANTY…………………………………………………………………………………………….
-
Page 6: Safety
This symbol means: Worldlawn Power Equipment, Inc. 1.3.2 The use of personal protective equipments, ATTENTION! BECOME ALERT! such as (but not limited to) protection for the eyes,... -
Page 7: Operation
· Always place gasoline containers on the ground away from your vehicle while filling. · Do not fill gasoline containers inside a vehicle or on a truck or trailer bed because interior carpets or POTENTIAL HAZARD plastic truck bed liners may insulate the container ·... - Page 8 configuration of the equipment, these factors are also NEVER carry passengers. DO not operate the mower dependent upon the awareness, concern, prudence, when children or others are in the area! and proper training of the personnel involved in the 1.4.3 When feasible, avoid operating the equipment in operation, transport, maintenance and the storage of wet grass.
- Page 9 Use extreme care with grass catchers or LOOK BEHIND YOU!! attachments. These can change the stability of the 1.4.7 Stop the blades when transporting the mower machine and cause loss of control. to and from the area to be mowed. 1.4.8.
-
Page 10: Maintenance & Storage
1.4.17 DO NOT mow with the discharge deflector 1.5.6. Keep the mower and fuel container in locked raised, removed, or altered unless there is a grass storage to prevent children from playing or tampering collection system or mulch kit in place and working with them. -
Page 11: Safety Signs
1.6.4 New safety signs may be obtained from your authorized equipment dealer or distributor or from 6. on the mower deck, LH Worldlawn Power Equipment, Inc. 1.6.5 Safety signs may be affixed by peeling off the backing to expose the adhesive surface. Apply only to clean, dry surface. - Page 12 10.on the mower deck 11. on the mower deck, LH 12. On the switch panel 13.On the switch panel 14.On the switch panel 8.on the lower roll bar 15.on the back of the fuel tank 9.Top left on the back of 7.On the front frame the front frame 16.On the front of the console, LH...
- Page 13 21..On the outer height adjustment plate 17. on the back of the fuel tank 22. Top of the console, LH and RH DANGER To avoid serious injury or death: Avoid blades unless engine and blades are stopped. 18. Rear of the engine deck, top right hand 23.
-
Page 14: Specifications
2.SPECIFICATIONS 2.1 MODEL NUMBER: WYZ5222KW-H WY5222KW-H H----Hydro-gear KH----Kohler KW----Kawasaki 2.2 ENGINE: 2.2.1 Engine specifications: See Your Engine Owner’s Manual 2.2.2 RPM: Full Speed:3600RPM(No Load) Idle:1500RPM 2.3 FUEL SYSTEM 2.3.1 Capacity: 10.5 gal(40L) 2.3.2 Type of Fuel: Regular unleaded gasoline, 87 octane or higher. 2.3.3. -
Page 15: Seat
. Separate levers, on each side of the console, control speed and direction of travel of the respective drive wheels. .Steering is controlled by varying the position of the levers relative to each other. .Moving motion control levers outward (in slots) lock the drive system in neutral. 2.5.2 PTO Switch: Engine electric clutch ( to drive belt)which engages mower blades. -
Page 16: Cutting Deck
Caster 13*5.00-6 Smooth 40psi(276kPa) Tires 2.9 CUTTING DECK 2.9.1 Cutting Width: WYZ52 deck WYZ60 deck 52.8in(1342mm) 60.9in(1546mm) 2.9.2 Discharge: Side 2.9.3 Blade Size:(3ea.) WYZ52 deck WYZ60 deck 18in(457mm) 20.5in(520mm) 2.9.4 Blade Spindles: Solid steel spindles with 25mm bearings. 2.9.5 Deck Drive: Electric clutch mounted on vertical engine shaft. Blades are driven by one “B” Section belt (w/self-tensioning idler)direct from the engine. -
Page 17: Torque Requirements
2.10.2 Overall Length: Roll Bar-up: :62.7in.(1952mm) Roll Bar-back: :84.3in.(2141mm) 2.10.3 Overall Height: Roll Bar-up: 70.7in.(1796mm) Roll-Bar-down: 51.7in.(1313mm) 2.10.4 Tread Width : Drive Wheels(center of center of tires):39in.(992mm) Front Casters (center of center of tires):37in.(940mm) 2.10.5 Wheel Base: 48.6in.(1235mm) 2.10.6 Overall Weight: WYZ52 is 1025Lbs (465 Kg) WYZ60 is 1080Lbs (490Kg) 2.11 TORQUE REQUIREMENTS Bolt Location... - Page 18 unit to fall, which could cause injury. HOW TO AVOID THE HAZARD · DO NOT rely solely on the mechanical or hydraulic jacks for support. Use adequate jack stands or equivalent support. 3.2.3 Remove the drive wheels from both sides of the unit. 3.2.4 Install the two lower roll bar tubes.
-
Page 19: Service Battery
FIG3. U – Shaped Bar Installation 3.3 SERVICE BATTERY. Battery posts, terminals, and related accessories contain lead compounds, chemicals known to cause cancer and reproductive harm. The machine is shipped with a filled lead acid battery without protection. 3.3.1 Unhook seat latch and tilt seat to gain access to the battery. POTENTIAL HAZARD ·Charging the battery may produce explosive gasses. -
Page 20: Check Tire Pressure
Voltage Reading Percent Charge Maximum Charger settings Charging Interval 12.6 or greater 100% 16Volts/7 amps No charging Required 12.4-12.6 75%-100% 16Volts/7 amps 30 Minutes 12.2-12.4 50%-75% 16Volts/7 amps 1 Hour 12.0-12.2 25%-50% 14.4Volts/4 amps 2 Hours 11.7-12.0 0-25% 14.4Volts/4 amps 3 Hours 11.7 or less 14.4Volts/4 amps... -
Page 21: Install Motion Control Levers
b) Remove four M8 nuts from the bottom of the seat. Retain for use later. c) Align the bolts on the bottom of the seat with the holes in the seat frame .Place seat on the top of the frame and secure with four nuts remove in step b. 3.6 INSTALL MOTION CONTROL LEVERS a) Loosen and remove the two bolts and washers which attach the motion control levers to the control arm shafts for shipping and the two bolts and washers which are screwed into the control arms shafts. -
Page 22: Service Hydraulic Oil
3.9. SERVICE HYDRAULIC OIL The machine is shipped with hydraulic oil in the reservoir. Run the machine for approximately 15 minutes to allow any extra air to purge out of the hydraulic system. Check hydraulic reservoir and if necessary fill the reservoir to the appropriate level with Mobil 1 SAE 15W-50 synthetic motor oil. - Page 23 slightly ahead of neutral. Pulling the levers back from the neutral position will cause the respective drive wheels to rotate in a reverse direction (when tension can be felt when moving into reverse from neutral). To turn to the left while backing, move the left lever forward toward neutral. To turn to the right while backing, move the right lever forward toward neutral.
-
Page 24: Pre-Start
“START” .Insert the key into switch and rotate clockwise to the “ON” position. Rotate clockwise to the next position to engage the starter (key must be held against spring pressure in this position) Brake must be engaged, motion control levers out (neutral lock position) and PTO switch “OFF” to start engine.(It is not necessary for the operator to be in the seat to start the engine) 4.1.9 Hour Meter: Locate on the right fuel tank. -
Page 25: Mowing
4.3 MOWING 4.3.1 Operate units with all roll bars in the raised and locked position and use seat belt; there is no rollover protection when the roll bar is down. If it is necessary to lower roll bar do not wear seat belt. Raise the roll bar as soon as clearance permits. -
Page 26: Transporting
The PTO clutch push-pull switch engages the cutting blades. Be sure that all persons are clear of mower deck and discharge area before engaging PTO. IMPORTANT: Operator must be in seat before the PTO can be engaged. Set throttle to “midway” position. Pull outward on the switch to the “ROTATE” position. Accelerate to full throttle to begin mowing. -
Page 27: Maintenance &Adjustments
HOW TO AVOID THE HAZARD · Use extreme caution when operating a unit on a ramp. · Use only a single, full width ramp: DO NOT use individual ramps for each side of the unit. · If individual ramps must be used, use enough ramps to create an unbroken ramp surface wider than the unit. - Page 28 POTENTIAL HAZARD Excessive debris can cause the engine and hydraulic system to overheat. · WHAT CAN HAPPEN Excessive debris around the engine cooling air intake and inside of the pump · compartment can create a fire hazard. HOW TO AVOID THE HAZARD Clean all debris from around the engine and hydraulic pumps daily.
- Page 29 POTENTIAL HAZARD · Raising the mower deck for service or maintenance relying solely on mechanical or hydraulic jacks could be dangerous. WHAT CAN HAPPEN · The mechanical or hydraulic jacks may not be enough support or may malfunction allowing the unit to fall, which could cause injury.
- Page 30 On Seat or Not. NOTE: If machine does not pass any of these tests, do not operate. Contact your authorized WORLDLAWN POWER EQUIPMENT SERVICE DEALER. IMPORTANT: It is essential that operator safety mechanisms be connected and in proper operating condition prior to use for mowing.
- Page 31 5.1.8 Check for loose hardware. Service Interval: Daily a) Stop engine, wait for all moving parts to stop , and remove key. b) Visually inspect machine for any loose hardware or any other possible problem. Tighten hardware or correct the problem before operating. 5.1.9 Service air cleaner.
- Page 32 b) Check tire pressure in drive tires. Inflate drive tires to 20psi (138kPa). c) Check tire pressure in Caster tires. Inflate caster tires to 40psi (276kPa). 5.1.13 Check condition of belts: Service Interval: 40hrs. Stop engine, wait for all moving parts to stop, and remove key. Check under engine deck to check pump drive belt.
- Page 33 One shaft is located under the console .The other is below and behind the seat. 5.1.18 Lubricate motion control bronze bushing: Service Interval: 160hrs. a) Stop engine, wait for all moving parts to stop, and remove key. b) Unhook seat latch and tilt seat up. c) Lubricate bronze bushings on flange bearing securing the motion control arm shafts with a light oil or a spray type lubricant.
-
Page 34: Adjustments
a) Torque the slotted nut to 169N.m. b) Check distance from bottom of slot in nut to inside edge of hole. .Two threads or less should be showing. c) If more than two threads are showing remove nut and install washer between hub and nut. d) Torque the slotted nut to 169N.m. - Page 35 e) Set anti-scalp rollers to top holes or remove them completely for this adjustment. f) Raise the deck to the highest lock position and take as much force as possible off of the two large deck lift springs by loosening the nuts at the front of each spring. See Figure 8. FIG 8 g) Lower the deck to the 1-1/2”...
- Page 36 b) Measure the length of the spring. Measurement should be 2.75” (70mm) between washers (see Figure 9). d) If adjustment is necessary, tighten the lock nut directly below the yoke and loosen the two nuts jammed together below the spring. Turn the nut directly below the washer until the correct measurement is obtained.
- Page 37 WHAT CAN HAPPEN ◆ Contact with moving parts or hot surface may cause personal injury. HOW TO AVOID THE HAZARD ◆ Keep fingers, hands, and clothing clear of rotating components and surfaces. POTENTIAL HAZARD ◆ Raise the mower deck for service or maintenance relying solely on mechanical or hydraulic jacks could be dangerous.
-
Page 38: Trouble Shooting
FIG 10.RH Pump Adjustment h) Bring the LH motion control lever into the neutral position. Adjust the LH pump control rod length by rotating the tracking adjustment knob in the appropriate direction until the wheels slightly creep in reverse. Move the motion control lever to the reverse position and while applying slight pressure to the lever allow the reverse indicator spring to bring the levers back to neutral. - Page 39 FIG12. Caster Adjustment 6.2 MOWER CUTS UNEVENLY. a) Check air pressure in tires; 20psi/drive, 40psi/penumatic casters. b) Check deck support chains. c) Check deck leveling (See Adjustments Section 5.2.2) Note: The front of the mower deck will be approximately 6 mm lower than the back of the mower deck;...
- Page 40 DIRT IN DIRTY FAULTY DIRTY IMPROPE ENGINE BLOCKED INCORRECT PROBLEM FUEL SPARK FUEL R FUEL OVERLOADED FUEL FILTER OIL LEVER LINE FILTER PLUG SCREEN Will × × × × × × Start Hard × × × × × × × starting Stops ×...
-
Page 41: Hydraulic Diagram
7、HYDRAULIC DIAGRAM... -
Page 42: Electrical Diagram
8、ELECRICAL DIAGRAM... -
Page 43: Warranty
During warranty of the Mower. period ,Worldlawn will repair or replace, at its option, This warranty does not extend to any Mower or part any Mower or part thereof which is found to be thereof which has been misused, neglected, damaged, defective in material or workmanship. - Page 44 Worldlawn Power Equipment, Inc 422 Turnbull Canyon Road, City of Industry, CA 91744 Phone:(626) 934-8552 Fax: (626) 934-8162 E-mail: worldlawnmower@adelphia.net Form NO. 52102-20080703...
Need help?
Do you have a question about the WYZ 52 and is the answer not in the manual?
Questions and answers
Blade hight adjustment