Table of Contents
Advertisement
Available languages
Available languages
Installation and Operating
NOTE TO EQUIPMENT OWNER:
Thank you very much for purchasing a Climette Airconditioner. Please read this Owner's
Information Manual carefully before installing and using this appliance and keep this manual
for future reference.
For your convenience, please record the model and serial numbers of your new equipment
in the spaces provided. This information, along with the installation data and dealer contact
information, will be helpful should your system require maintenance or service.
UNIT INFORMATION
Model # _____________________________________
Serial # ______________________________________
INSTALLATION INFORMATION
Date Installed ________________________________
Instructions
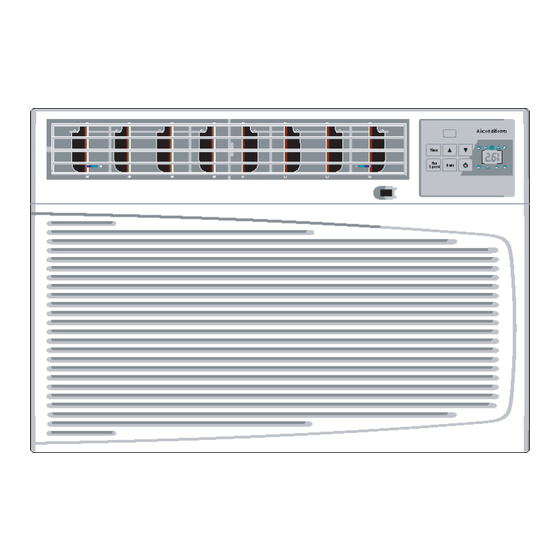
Fig. 1 --- Remote Control Unit
DEALERSHIP CONTACT INFORMATION
Company Name_______________________________
Address______________________________________
_____________________________________________
Phone Number _______________________________
Technician Name _____________________________
_____________________________________________
CA1516KR, CA1826KR, CA2326KR
Room Air Conditioner
Part Number 421 02 9120 00 - Printed 02/08
Advertisement
Chapters
Table of Contents

Related Manuals for Climette CA1516KR


Summary of Contents for Climette CA1516KR
-
Page 1: Installation And Operating
Instructions Fig. 1 --- Remote Control Unit NOTE TO EQUIPMENT OWNER: Thank you very much for purchasing a Climette Airconditioner. Please read this Owner’s Information Manual carefully before installing and using this appliance and keep this manual for future reference. -
Page 2: Table Of Contents
TABLE OF CONTENTS PAGE SAFETY CONSIDERATIONS ................. . . INTRODUCTION . -
Page 3: Safety Considerations
SAFETY CONSIDERATIONS highlight suggestions which will result in enhanced installation, reliability, or operation. Recognize safety information. This is the safety- -alert symbol INTRODUCTION When you see this symbol on the unit and in instructions or Thank you for choosing this room air conditioner to cool your manuals, be alert to the potential for personal injury. -
Page 4: Electrical Specifications
ELECTRICAL SPECIFICATIONS WARNING 1. All wiring must comply with local and national electrical codes and must be installed by a licenced electrician. If ELECTRICAL SHOCK HAZARD you have any questions regarding the following Failure to follow this warning could result in personal instructions, contact a licenced electrician. -
Page 5: Tips Before Installation
TIPS BEFORE INSTALLATION CAUTION UNIT OPERATION HAZARD Failure to follow this caution may result in damage to unit components. To avoid installation/operating difficulties, read the A06531 instructions thoroughly. Fig. 3 --- Power Supply Cord Your Room Air Conditioner unit is designed to be highly NOTE: Save the shipping carton and packing materials for efficient and save energy. -
Page 6: Installation Instructions
INSTALLATION INSTRUCTIONS Window Opening Requirements CAUTION MODEL SIZE 15---24K Cabinet Size PERSONAL INJURY/UNIT OPERATION HAZARD 22.8”/15.7”/24.1” 26.5”/18.5”/26.9” (W/H/D) Failure to follow this caution may result in personal injury Window Opening 27” --- 41” 30” --- 44” and/or damage to unit components. Width It is recommended to have someone assist you during the Window Opening... - Page 7 NOTE: For 18K to 24K models, the bottom channel has been (TOP VIEW) factory- -installed, and their shapes may differ from the others, but V-slot their functions are similar. Step 4 —Assembly of the side shutters (curtains) to the cabinet. A.
- Page 8 C. In very humid areas, the water removal may be excessive enough to overflow the unit or increase the noise of the air conditioner. If this occurs, you may wish to attach a drain hose (not included) to the drain plug allowing condensations to run off conveniently (see Fig.
-
Page 9: Storm Window Applications
STORM WINDOW APPLICATIONS If the window is blocked by a storm window and the storm window cannot be removed, a mounting board (field provided) will need to be added to the window sash. The air conditioner needs to be pitched downward to the back in order for condensate to drain properly. -
Page 10: Wall Installations
WALL INSTALLATION To install the room air conditioner in the wall, perform the following procedure: 1. Remove air conditioner from shipping box. Do not install window installation parts. 2. Determine the location for air conditioner. Make sure there is adequate clearance on the inside and outside of the wall. Ensure that the power cord will reach the available socket without an extension cord. -
Page 11: Masonry Construction
11. Caulk joints in wood frame as required. If wall thickness is 7- -in. or more, add aluminum flashing over bottom of frame opening to ensure no water can enter area between inner and outer wall. 12. Remove the chassis from the unit cabinet. CAUTION PERSONAL INJURY HAZARD Failure to follow this caution may result in personal injury. -
Page 12: Operating Instructions
OPERATING INSTRUCTIONS Electronic Control Panel Model Airc onditioner You can easily operate this air conditioner by pressing relevant button on the control panel as well as the remote control Button Tim er The air conditioner will be started when it is energized or will be stopped when it is in operation, if you press this button. -
Page 13: Power Button
Remote Control Power BUTTON The appliance will be started when it is energized or will be stopped when it is in operation, if you press this button. Power Timer Mode BUTTON Used to select the operation mode. Mode Power Saver BUTTONS Auto Used to set room temperature in Cooling... -
Page 14: Care And Maintenance
CARE AND MAINTENANCE CAUTION When servicing the air conditioner, be sure to turn the mode switch to the “OFF” position and disconnect the power cord from UNIT DAMAGE HAZARD the electrical outlet. Failure to follow this caution may result in unit damage CAUTION and/or improper operation. -
Page 15: Warranty
International Comfort Products, LLC Room Air Conditioner Limited Warranty Subject to the conditions and exclusions listed below International Comfort Products LLC (hereinafter referred to as “ ICP”) warrants this product against failures due to defects in materials and workmanship. TWO YEAR WARRANTY - ICP warrants to the initial purchaser of this product against failures due to defects in materials or workmanship under normal use and maintenance for a period of two years from the date of original purchase. - Page 16 6060 Burnside Court, Unit 1 ©2008 International Comfort Products, LLC Mississauga, ON L5T 2T5 A member of the United Technologies Corporation family. www.climette.ca Stock symbol UTX.
- Page 17 MOT D’ACCUEIL AU PROPRIÉTAIRE DE CET ÉQUIPEMENT : Nous vous remercions vivement pour votre achat de ce conditionneur d’air Climette. Veuillez lire avec attention ce guide avant d’installer et d’utiliser cet appareil, puis rangez- -le en lieu sûr pour consultation future.
- Page 18 TABLE DES MATIÈRES Page POUR VOTRE SÉCURITÉ ..................INTRODUCTION .
-
Page 19: Pour Votre Sécurité
POUR VOTRE SÉCURITÉ ou des dégâts matériels. REMARQUE donne des conseils visant à favoriser une meilleure installation, une plus grande fiabilité ou un Sachez reconnaître les symboles de sécurité et respectez leur infor- fonctionnement plus efficace. mation. Ceci est un symbole de sécurité . -
Page 20: Caractéristiques Électriques
CARACTÉRISTIQUES ÉLECTRIQUES MISE EN GARDE 1. Le câblage doit être conforme aux codes électriques national et local ; il doit en outre être confié à un électricien agréé. RISQUE D’ÉLECTROCUTION Prendre conseil auprès d’un électricien agréé pour toute question relative aux directives suivantes. Ne pas tenir compte de cette mise en garde pourrait entraîner des blessures corporelles, la mort ou des dégâts matériels. -
Page 21: Conseils Avant L'installation
CONSEILS AVANT L’INSTALLATION Par ailleurs, ce cordon ne contient aucune pièce réparable par l’utili- sateur. L’ouverture du boîtier, d’ailleurs résistant à ce genre de mani- ATTENTION pulation, rend nulle toute intervention au titre de garantie. RISQUE COMPROMETTRE FONCTIONNEMENT DE L’UNITÉ Ne pas tenir compte de cette mise en garde pourrait entraîner des dégâts matériels. -
Page 22: Directives D'installation
Auvent DIRECTIVES D’INSTALLATION 20 po ATTENTION min. (51 cm) BLESSURE CORPORELLE/RISQUE DE COMPROMETTRE LE FONCTIONNEMENT DE L’UNITÉ 12 po (76 cm) min. Ne pas tenir compte de cette mise en garde pourrait entraîner des blessures corporelles ou des dégâts matériels. Il est conseillé... - Page 23 IMPORTANT : Se faire aider sera alors utile. Cadre de volet Vis 1/4 po Volet droit A06538 Fig. 9 - - Pose des volets Étape 5—Pose des supports de montage et du premier joint Vis Philips côté droit Remarque : Comme nous l’avons déjà mentionné, les fenêtres ont A06535 différentes formes ;...
- Page 24 Étape 7—Pose des volets ATTENTION A. Glisser délicatement le conditionneur dans le boîtier (assistance conseillée). DANGER DE DÉGÂTS MATÉRIELS B. À l’aide des vis enlevées plus tôt, revisser le boîtier au condi- Ne pas tenir compte de cette mise en garde pourrait tionneur, de chaque côté.
- Page 25 Vis 3/4 po Joint Rail supérieur en forme de « L » Levier d'évacuation de l'air Vis de sûreté Serpentin A06546 A06533 Fig. 17 - - Vis de sûreté, détail Fig. 20 - - Levier d’évacuation de l’air INSTALLATION SUR UN CONTRECHÂSSIS Si la fenêtre est bloquée à...
-
Page 26: Installation Murale
INSTALLATION MURALE la partie extérieure du mur doit être élargie. Les évents latéraux et supérieurs ne doivent jamais être bouchés ou obstrués. Suivre la procédure suivante pour installer le conditionneur d’air dans un mur : 8. Après avoir construit le cadre, s’assurer que le conditionneur s’adapte parfaitement à... - Page 27 ATTENTION CLOUER LES CALES AUX MONTANTS BLESSURE CORPORELLE/RISQUE COMPROMETTRE LE FONCTIONNEMENT DE L’UNITÉ Ne pas tenir compte de cette mise en garde pourrait entraîner des blessures corporelles ou des dégâts matériels. Ne pas exercer de pression sur les commandes ou le serpentin lorsque l’on place le conditionneur.
-
Page 28: Maçonnerie
MAÇONNERIE Touche Timer (minuterie) Pour allumer (régler) ou éteindre la minuterie. L’installation suit la même procédure que celle de la section Installa- Quand le conditionneur est allumé, la minuterie peut être éteinte tion murale, à quelques exceptions près. Observer tous les codes lo- (OFF TIMER). - Page 29 Télécommande Touche d'alimentation Enfoncer cette touche pour allumer ou éteindre le conditionneur. Touche Mode Power Timer Pour sélectionner le mode de fonctionnement. Mode Power Save r Touches + - Permet de régler la température de la pièce en Auto Fan Spee d mode COOLING (refroidissement) ou de régler la minuterie (en mode TIMER).
-
Page 30: Entretien Et Maintenance
ENTRETIEN ET MAINTENANCE ATTENTION Toujours éteindre le conditionneur (mode OFF, arrêt) et le débran- cher avant d’en faire la maintenance ou l’entretien. DANGER DE DÉGÂTS MATÉRIELS ATTENTION Ne pas tenir compte de cette mise en garde pourrait entraîner des dégâts matériels. NE PAS oublier de remettre le filtre. - Page 31 Produits de confort international, LLC Garantie limitée du climatiseur individuel Sous réserve des conditions et des exclusions mentionnées ci-dessous, Produits de confort international, LLC (ci-après appelé « ICP »), garanti ce produit contre tout défaut de matière et de fabrication. GARANTIE DE DEUX ANS - ICP garantit, à...
- Page 32 ©2008 International Comfort Products, LLC A member of the United Technologies Corporation family. Stock symbol UTX. 6060 Burnside Court, Unit 1 ©2008 Produits de Confort International, LLC Mississauga, ON L5T 2T5 Un membre de la famille des corporations United Technologies. www.climette.ca Symbole boursier UTX.
Need help?
Do you have a question about the CA1516KR and is the answer not in the manual?
Questions and answers