Table of Contents
Advertisement
Quick Links
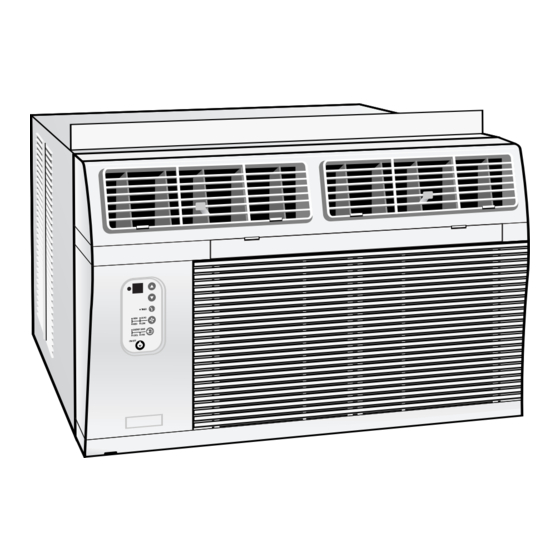
Room Air Conditioners for
Double-Hung Windows & Thru
the wall installation
TABLE OF CONTENTS
ENGLISH
Important Safety Instructions ............................ 1
Installation ............................................................2
Operation ............................................................7
Maintenance ........................................................8
How to Obtain Warranty Service or Parts........ 9
Keep these instructions for future reference
For additional questions please call
1-217-347-6459
Features and specifications subject to change without notice.
For Future Reference
Write down the model and serial numbers
The model and serial numbers can be found on the side of
the cabinet near the control panel. Use these numbers in
any correspondence or service calls concerning your air
conditioner.
Installation and Operating Instructions
Model Number
Serial Number
Date of Purchase
E
N
G
L
I
S
H
Advertisement
Table of Contents

Related Manuals for Climette CA3226FR


Summary of Contents for Climette CA3226FR
- Page 1 Installation and Operating Instructions Room Air Conditioners for Double-Hung Windows & Thru the wall installation TABLE OF CONTENTS ENGLISH Important Safety Instructions ......1 Installation ............2 Operation ............7 Maintenance ............8 How to Obtain Warranty Service or Parts..9 Keep these instructions for future reference For additional questions please call 1-217-347-6459 Features and specifications subject to change without notice.
-
Page 2: Power Cord With Arc Detection Device
Power Cord with Arc Detection Additional Safety Precautions Warning Device • Do not cut, alter or remove any of Electrical Shock Hazard expanded polystyrene The power cord supplied with this air (styrofoam) inside this • Plug unit only into conditioner is equipped with an Arc grounded electrical outlet. - Page 3 Installation Parts Tools Needed Blade-type screwdriver Knife Hammer Hex driver, ratchet or wrench Rule or tape measure Level CAUTION Use two or more people to move and install air conditioner. Failure to do so can result in injury. Cabinet Fasteners: Use caution when working around exposed sharp Sliders Hex head screw (6)
- Page 4 Installing Cabinet in Window (Flush Mount) 5. Loosely attach the sill bracket to the support bracket, using 1. Attach cabinet side seals to the existing holes in the cabinet the carriage bolt and flange nut (Fig. 6). using the six (6) screws supplied (Fig. 3). 6.
- Page 5 Installing the Window Filler Panels the filler panel flange (Fig. 13). 5. Pull the sliders out until the sliders contact the face of the 1. Measure distance “X” between the face of the window stop window stop molding (Fig. 14). molding and the side of the cabinet (Fig.
-
Page 6: Through-The-Wall Installation
Through-the-wall Installation This air conditioner is designed as a slide-out type chassis, making it possible to install it through-the-wall in both existing and new construction. We recommend that this type of installation be performed with professional assistance. • IMPORTANT: This appliance must be installed according to all applicable electrical and building codes and ordinances. - Page 7 Condensate Drain A condensate drain is provided to divert excess water when air conditioner is installed over a doorway or sidewalk. 1. Pry cap plug from the condensate drain (located on underside of bottom pan). Use a 3/8” pipe tap and fully thread the condensate drain (Fig.
- Page 8 Power Control The Power Control turns the unit on and off. Set Temperature/ Timer Display Shows the set temperature when the unit is in operation and hours when the timer is being set. THE TEMPERATURE DISPLAY ONLY SHOWS THE SET TEMPERATURE, NOT THE ACTUAL ROOM TEMPERATURE.
-
Page 9: Troubleshooting Guide
Directing Airflow Unit is engineered with adjustable louvers to direct discharge airflow. Louvers are manually adjusted by moving levers in direction of desired airflow (Fig. 21). Cleaning Air Filter EVERY TWO WEEKS: Clean the filter. 1. Turn unit off. 2. Remove the air filter by grasping the top corners and pulling it up and out of the unit (Fig. - Page 10 How to Obtain Warranty Service Service for your Room Air Conditioner will be provided by CareCo through its network of Authorized Independent Servicers nationwide. Note: Before calling for service, carefully read the "Installation and Operating Instructions" booklet. Then if you need service: 1.
Need help?
Do you have a question about the CA3226FR and is the answer not in the manual?
Questions and answers