
Related Manuals for SonicWALL PRO 4100


Summary of Contents for SonicWALL PRO 4100
- Page 1 COMPREHENSIVE INTERNET SECURITY ™ SSSSSSSSon i c WALL Security Ap p l i a n c e s SonicWALL PRO 4100 Getting Started Guide...
-
Page 2: Before You Begin
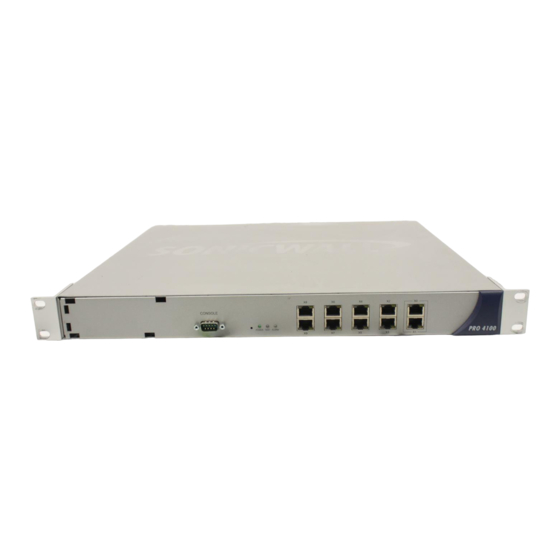
The SonicWALL PRO 4100 is an easy to deploy and manage solution with ten gigabit ports. It integrates SonicWALL’s Security Services for comprehensive unified threat management, including •... -
Page 3: Collecting Required Information
SonicWALL PRO 4100 Configuration Steps Collecting Required Information page 2 Connecting the WAN Port to the Internet page 4 Applying Power to the SonicWALL PRO 4100 page 4 Connecting the SonicWALL PRO 4100 page 5 Accessing the Management Interface page 6... -
Page 4: Other Information
Tunneling Proto- Password: Note: If you are not using one of the network configurations above, refer to the SonicOS Enhanced Administrator’s Guide. You can locate this guide on your SonicWALL Resource CD. Other Information SonicWALL Management Interface To access the SonicWALL PRO 4100 Web-based management interface. These are... - Page 5 SonicWALL PRO 4100. Applying Power to the SonicWALL PRO 4100 1. Plug the power cord into the SonicWALL PRO 4100 and into an appropriate power outlet. 2. Turn on the power switch on the rear of the appliance next to the power cord.
- Page 6 1. Connect one end of the provided red Crossover cable to the computer you are using to manage the SonicWALL PRO 4100. 2. Connect the other end of the cable to the X0 port on your SonicWALL PRO 4100. SonicWALL PRO 4100 Getting Started Guide...
-
Page 7: Accessing The Management Interface
Accessing the Management Interface The computer you use to manage the SonicWALL PRO 4100 must be set up to accept a dynamic IP address, or have an unused IP address on the 192.168.168.x/24 subnet, such as 192.168.168.20. - Page 8 • Some browsers may not launch the Setup Wizard automatically. In this case: a. log into SonicWALL PRO 4100 using “admin” as the user name and “password” as the password. b. Click the Wizards button on the System > Status page.
- Page 9 Note: Keep your new password in a safe place. If you lose your password, you will have to reset the SonicWALL security appliance to factory default settings and lose your configuration. For instructions on resetting your SonicWALL security appliance, refer to the SonicOS Enhanced Administrator’s Guide.
- Page 10 Confirm the selection or select the correct type of network connection for your network. Static IP Select Static IP if you want to give the SonicWALL PRO 4100 a specific, unchanging IP address. Go to “Static IP” on page 10 DHCP Select DHCP if your ISP assigns your computer a dynamic IP address.
- Page 11 WAN settings for the selection you made in the previous screen. Static IP The Setup Wizard screen should display: WAN Network Mode: NAT Enabled (Static IP) SonicWALL WAN IP Enter a single, static IP address. This must be in the Address address range assigned to you by your ISP.
- Page 12 PPPoE Password Enter the password for your Internet account. Inactivity Disconnect Check this box if you want the SonicWALL PRO 4100 to (minutes) disconnect from the Internet if there is no traffic for the number of minutes you enter.
- Page 13 6. LAN DHCP Settings - The LAN DHCP Settings screen allows you to select whether or not to use the DHCP server in the SonicWALL PRO 4100 to automatically distribute IP addressing information to computers and other network devices on your LAN.
-
Page 14: Testing Your Connection
If you can view the SonicWALL home page, you have configured your SonicWALL PRO 4100 correctly and can proceed to Procedure 8. 2. If you cannot view the SonicWALL home page, try a second URL. 3. If you still cannot view a Web page, try one of these solutions:... - Page 15 SonicWALL security appliance at mySonicWALL.com. Registering your SonicWALL security appliance provides the following benefits: • Try a FREE 30-day trial of SonicWALL Intrusion Prevention Service, Content Filtering Service, Gateway Anti-Virus, Anti-Spyware, and Network Anti-Virus • Activate SonicWALL security services •...
-
Page 16: Before You Register
Before You Register Make sure the DNS and Time settings on your SonicWALL PRO 4100 are correct when you register the device. Configure Time settings in the System > Time page. Configure DNS settings in the Edit Interface window from the Network > Interfaces page. - Page 17 Now you need to log into mySonicWALL.com to register your SonicWALL PRO 4100. Registering Your SonicWALL PRO 4100 1. If you are not logged into the SonicWALL PRO 4100 management interface, log in with the username admin and the administrative password you set in the Setup Wizard.
- Page 18 Click Continue on each page. 6. At the top of the Product Survey page, Enter a “friendly name” for your SonicWALL content security appliance in the Friendly Name field. The friendly name allows you to easily identify your SonicWALL content security appliance in your mySonicWALL.com account.
- Page 19 Security network with SonicWALL • The SonicOS Enhanced Administrator’s Services Security Services: Guide and the SonicWALL Security SonicWALL Gateway Anti- Service Administrator’s Guides are Virus, Anti-Spyware and available for each security service on the Intrusion Prevention Service SonicWALL Resource CD and at provides intelligent, real-time <http://www.sonicwall.com/support/...
- Page 20 • The VPN > Settings page • The VPN > Advanced page • The VPN > DHCP over VPN page • The VPN > L2TP Server page • The VPN Wizard SonicWALL PRO 4100 Getting Started Guide Page 19...
- Page 21 <http://www.sonicwall.com/support/isg/ SonicPoint 802.11a/b/g radios to swisg.html> provide secure mobility and • The SonicOS Enhanced Administrator’s wireless LAN connectivity for Guide available on the SonicWALL users on the network. Resource CD and at <http://www.sonicwall.com/support/ documentation.html> • The SonicOS online help. Click in the top right corner of the SonicPoint >...
- Page 22 4. Select Obtain an IP address automatically. 5. Click DNS at the top of the window. 6. Select Obtain DNS Server automatically. 7. Click OK, and then click OK again. 8. Restart the computer to apply the settings. SonicWALL PRO 4100 Getting Started Guide Page 21...
- Page 23 4. Type the appropriate subnet mask (for example, 255.255.255.0) in the Subnet Mask field. 5. Type the SonicWALL PRO 4100 LAN IP Address into the Default Gateway field. 6. Type the DNS IP address in the Preferred DNS Server field. If you have more than one address, type the second one in the Alternate DNS server field.
-
Page 24: Windows 2000
7. Type the appropriate subnet mask (for example, 255.255.255.0) in the Subnet Mask field. 8. Type the SonicWALL PRO 4100 LAN IP Address into the Default Gateway field. 9. If you have a DNS Server IP address from your ISP, enter it in the Preferred DNS Server field. -
Page 25: Glossary Of Networking Terms
Glossary of Networking Terms Default Gateway - A device on an internetwork that forwards packets to another network. DHCP - Dynamic Host Configuration Protocol allocates IP addresses to computers on the network automatically without assigning a computer a static (fixed) IP address. DNS - Domain Name System, a hierarchical naming system that resolves a domain name with its associated IP address. -
Page 26: Lithium Battery Warning
PRO 4100 Detailed regulatory information can be found in the electronic file, “SonicWALL_Products_Regulatory_Statement.pdf,” located on the SonicWALL Resource CD provided with the unit or on the SonicWALL Web site: <http:// www.sonicwall.com>. Lithium Battery Warning The Lithium Battery used in the SonicWALL Internet security appliance may not be replaced by the user. - Page 27 Mounting the SonicWALL PRO 4100 The SonicWALL PRO 4100 is designed to be mounted in a standard 19-inch rack mount cabinet. The following conditions are required for proper installation: • Use the mounting hardware recommended by the rack manufacturer and ensure that the rack is adequate for the application.
-
Page 28: Copyright Notice
Specifications and descriptions subject to change without notice. Trademarks SonicWALL is a registered trademark of SonicWALL, Inc. Microsoft Windows 98, Windows NT, Windows 2000, Windows XP, Windows Server 2003, Internet Explorer, and Active Directory are trademarks or registered trademarks of Microsoft Corporation. - Page 29 Notes Page 28...
- Page 30 F: 408.745.9300 © 2005 SonicWALL, I n c . SonicWALL is a registered trademark of SonicWALL, I n c . Other product and company names mentioned herein may be t rademarks and/ or registered trademarks of their respective companies. Specifications and descriptions subject to change with out notice.
Need help?
Do you have a question about the PRO 4100 and is the answer not in the manual?
Questions and answers