Sign In
Upload
Download
Table of Contents
Contents
Add to my manuals
Delete from my manuals
Share
URL of this page:
HTML Link:
Bookmark this page
Add
Manual will be automatically added to "My Manuals"
Print this page
×
Bookmark added
×
Added to my manuals
Manuals
Brands
Uniden Manuals
Car Navigation system
iGO50
Owner's manual
Uniden iGO50 Owner's Manual
In-car navigation
Hide thumbs
1
2
Table Of Contents
3
4
5
6
7
8
9
10
11
12
13
14
15
16
17
18
19
20
21
22
23
24
25
26
27
28
29
30
31
32
33
34
35
36
37
38
39
40
41
42
43
44
45
46
47
48
49
50
51
52
53
54
55
56
57
58
59
60
61
62
63
64
65
66
67
68
69
70
71
72
73
74
75
76
77
78
79
80
81
82
83
84
85
86
87
88
89
90
91
92
93
94
95
96
97
98
99
100
101
102
103
104
105
106
107
108
109
110
111
112
113
114
115
116
117
118
119
120
121
122
123
124
125
126
127
128
page
of
128
Go
/
128
Contents
Table of Contents
Bookmarks
Table of Contents
Table of Contents
What Do I Do First
Make Sure These Items Arrived in the Box
Plug It in
Hardware Keys
How Do I Put It in My Car
Safety Considerations
Attaching the Windshield Mount
Adjusting the Windshield Mount
Mount to the Windshield
Removing the Windshield Mount
1 Warnings and Safety Information
2 Getting Started
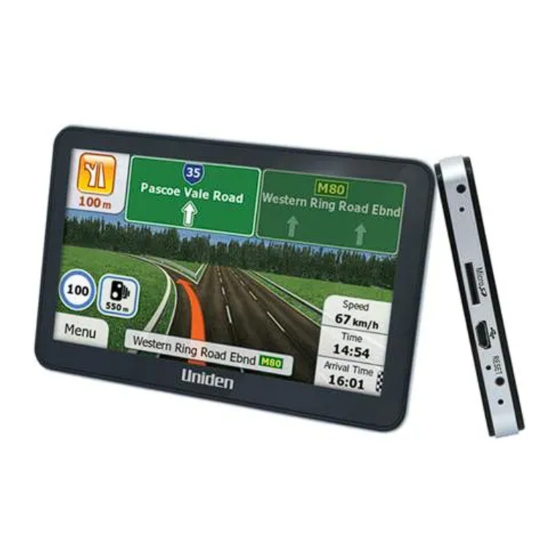
Startup Screen: the Map and Navigation Menu
Buttons and Other Controls on the Screen
Using Keyboards
Beyond Single Screen Tap
Map Screen
Navigating on the Map
Position Markers
Vehimarker and Lock-On-Road
Selected Map Location (Cursor) and Selected Map Object
Objects on the Map
Streets and Roads
Turn Preview and Next Street
Lane Information and Signposts
Junction View
Object Types
Elements of the Active Route
Manipulating the Map
Quick Menu
Checking the Details of the Current Position (Where am I?)
3 Navigating
Selecting the Destination of a Route
Entering an Address or Part of an Address
Entering an Address
Entering the Midpoint of a Street as the Destination
Selecting an Intersection as the Destination
Selecting a City/Town Centre as the Destination
Entering an Address with a Postal Code
Tips on Entering Addresses Quickly
Selecting the Destination from the Places of Interest
Quick Search for a Place of Interest
Searching for a Place of Interest Using Preset Categories
Searching for a Place of Interest by Category
Searching for a Place of Interest by Name
Selecting Nearby Assistance from 'Where am I
Selecting a Map Location as the Destination
Selecting the Destination from Your Favourites
Selecting the most Likely Destination (Smart History)
Selecting the Destination from the History
Entering the Coordinate of the Destination
Building the Route from the List of Destinations (Create Route)
Viewing the Entire Route on the Map
Checking Route Parameters and Accessing Route Related Functions
Modifying the Route
Selecting a New Destination When Already Having a Route: New Route, Waypoint of Final Destination
Setting a New Starting Position for the Route
Editing the List of Destinations (Edit Route)
Pausing the Active Route
Cancelling the Active Route
Checking Route Alternatives When Planning the Route
Changing the Route Planning Method (Route Alternatives)
Changing the Road Types Used in Route Planning
Saving a Location as a Favourite Destination
Saving a Location as an Alert Point
Editing an Alert Point
Watching the Simulation of the Route
4 Lorry Navigation
Setting up Lorry Parameters
Setting up Driving Time Alerts
5 Reference Guide
Concepts
Smart Zoom
Daytime and Night Colour Themes
Colour Theme in Tunnels
Route Calculation and Recalculation
Green Routing
Road Safety Cameras and Other Proximity Alerts Points
Speed Limit Warning
Battery and GPS Position Quality Indicators
More' Menu
Settings Menu
Sound and Warnings
Customise Quick Menu
Lorry Settings
Route Settings
Green Routing Settings
Map Settings
Visual Guidance Settings
Display Settings
Regional Settings
Trip Monitor Settings
Log Collection Settings
6 Glossary
7 End User Licence Agreement
8 Limited One Year Warranty
Advertisement
Quick Links
1
Startup Screen: the Map and Navigation Menu
Download this manual
iGO50
iGO43
iGO35
In-Car Navigation
For more exciting new products please visit our website:
Australia: www.uniden.com.au
New Zealand: www.uniden.co.nz
Table of
Contents
Previous
Page
Next
Page
1
2
3
4
5
Advertisement
Table of Contents
Need help?
Do you have a question about the iGO50 and is the answer not in the manual?
Ask a question
Questions and answers
Related Manuals for Uniden iGO50
Car Navigation system Uniden IGO500 Owner's Manual
(132 pages)
Car Navigation system Uniden iGO35 Owner's Manual
In-car navigation (128 pages)
Car Navigation system Uniden Maptrax GPS352 Owner's Manual
Uniden owner's manual gps navigation gps352 (35 pages)
Car Navigation system Uniden GNS8430 Owner's Manual
Uniden owner's manual car navigation system gns8430, gns8435 (120 pages)
Car Navigation system Uniden GNS 8365 Specifications
3.5” car navigation system with built-in warnings (2 pages)
Car Navigation system Uniden Trax430 Owner's Manual
Trax430 in-car navigation (120 pages)
Car Navigation system Uniden GPS 501 Brochure & Specs
Uniden car navigation systems brochure (7 pages)
Car Navigation system Uniden GNS8350 Owner's Manual
Uniden owner's manual car navigation system gns8350 (46 pages)
Car Navigation system Uniden TRAX4310 Owner's Manual
In-car navigation (112 pages)
Car Navigation system Uniden GNS8400 Owner's Manual
Uniden owner's manual car navigation system gns8400 (46 pages)
Car Navigation system Uniden GNS8431 Owner's Manual
Uniden car navigation system owner's manual (76 pages)
Car Navigation system Uniden TRAX4300 Owner's Manual
In-car navigation (78 pages)
Car Navigation system Uniden GNS8600 Owner's Manual
Quick start guide (40 pages)
Car Navigation system Uniden GNS8361 Quick Start Manual
Owner’s manual (76 pages)
This manual is also suitable for:
Igo43
Igo35
Table of Contents
Print
Rename the bookmark
Delete bookmark?
Delete from my manuals?
Login
Sign In
OR
Sign in with Facebook
Sign in with Google
Upload manual
Upload from disk
Upload from URL


Need help?
Do you have a question about the iGO50 and is the answer not in the manual?
Questions and answers