Table of Contents
Advertisement
Available languages
Available languages
OPERATOR'S MANUAL • MAnUAL DEL USUArIo
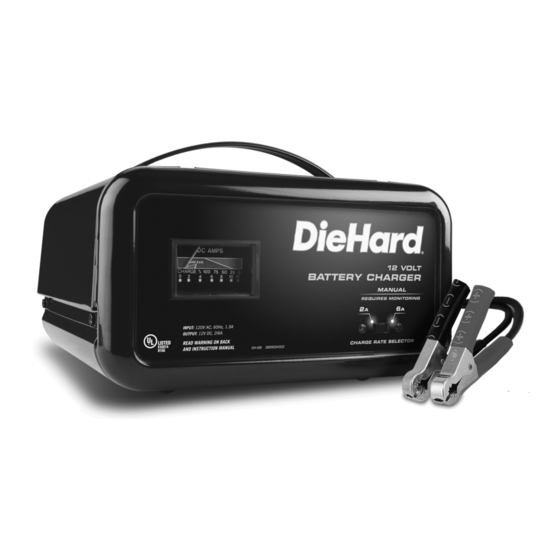
Manual Battery Charger
Cargador de Batería Manual
Model / Modelo: DH-6M
Read all Safety Rules and Operating Instructions,
and follow them with each use of this product.
ATENCIÓN
Lea todas las Instrucciones de Operación y Reglas de Seguridad,
así mismo aplíquelas a cada uso del producto.
Sears Brands Management Corporation, Hoffman Estates, IL 60179 U.S.A.
00-99-001049/0510
Advertisement
Table of Contents

Related Manuals for DieHard DH-6M


Summary of Contents for DieHard DH-6M
- Page 1 OPERATOR’S MANUAL • MAnUAL DEL USUArIo Manual Battery Charger Cargador de Batería Manual Model / Modelo: DH-6M Read all Safety Rules and Operating Instructions, and follow them with each use of this product. ATENCIÓN Lea todas las Instrucciones de Operación y Reglas de Seguridad, así...
-
Page 3: Table Of Contents
1 year from the date of purchase, return it to any DieHard outlet in the United States for free replacement. This warranty gives you specific legal rights, and you may also have other rights which vary from state to state. - Page 4 Cuando se opere o maneje con las debidas precauciones de acuerdo a las instrucciones, si el DieHard falla en alguno de sus componentes de fabricación durante el 1 año contados a partir de la fecha de compra, regresarlo al autoservicio diehard en los estados unidos para reemplazar el aparato sin costo alguno.
- Page 5 IMPorTAnT: rEAD AnD SAVE THIS SAfETY AnD InSTrUCTIon MAnUAL. SAVE THESE InSTrUCTIonS – The DH-6M charger offers a wide range of features to accommodate your needs. This manual will show you how to use your charger safely and effectively. Please read, understand and follow these instructions and precautions carefully, as this manual contains important safety and operating instructions.
-
Page 6: Important Safety Instructions
IMPorTAnT SAfETY InSTrUCTIonS - SAVE THESE InSTrUCTIonS - This manual contains important safety and operating instructions rISK of ELECTrIC SHoCK or fIrE. Keep out of reach of children. Do not expose the charger to rain or snow. Use only recommended attachments. Use of an attachment not recommended or sold by the battery charger manufacturer may result in a risk of fire, electric shock or injury to persons or damage to property. -
Page 7: Personal Precautions
1.12 This charger employs parts, such as switches and circuit breakers, that tend to produce arcs and sparks. If used in a garage, locate this charger 18 inches or more above floor level. PErSonAL PrECAUTIonS rISK of EXPLoSIVE gASES. NEVER smoke or allow a spark or flame in the vicinity of a battery or engine. Remove personal metal items such as rings, bracelets, necklaces and watches when working with a lead-acid battery. -
Page 8: Charger Location
Clean the battery terminals before charging the battery. During cleaning, keep airborne corrosion from coming into contact with your eyes, nose and mouth. Use baking soda and water to neutralize the battery acid and help eliminate airborne corrosion. Do not touch your eyes, nose or mouth. Add distilled water to each cell until the battery acid reaches the level specified by the battery manufacturer. -
Page 9: Follow These Steps When Battery Is Installed In Vehicle
foLLoW THESE STEPS WHEn BATTErY IS InSTALLED In VEHICLE A SPArK nEAr THE BATTErY MAY CAUSE A BATTErY EXPLoSIon. To rEDUCE THE rISK of A SPArK nEAr THE BATTErY: nEgATIVE groUnDED SYSTEM Position the AC and DC cables to reduce the risk of damage by the hood, door and moving or hot engine parts. -
Page 10: Follow These Steps When Battery Is Outside Vehicle
foLLoW THESE STEPS WHEn BATTErY IS oUTSIDE VEHICLE A SPArK nEAr THE BATTErY MAY CAUSE A BATTErY EXPLoSIon. To rEDUCE THE rISK of A SPArK nEAr THE BATTErY: Check the polarity of the battery posts. The POSITIVE (POS, P, +) battery post usually has a larger diameter than the NEGATIVE (NEG, N, -) post. -
Page 11: Assembly Instructions
Never alter the AC cord or plug provided – if it does not fit the outlet, have a proper grounded outlet installed by a qualified electrician. An improper connection can result in a risk of an electric shock or electrocution. noTE: Pursuant to Canadian Regulations, use of an adapter plug is not allowed in Canada. -
Page 12: Operating Instructions
The charger does not have an ON/OFF switch. The On and Off commands are controlled by plugging the DH-6M into a 120V AC electrical wall outlet only after the battery connections have been made. -
Page 13: Maintenance Instructions
CHArgE rATE/ CHArgIng TIME BATTErY SIZE/rATIng 2 AMP 6 AMP Motorcycle, 6 - 12 AH 2 - 4 hrs 45 min - 1 ¼ hrs SMALL garden, BATTERIES 12 - 32 AH 4 - 10 hrs 1¼ – 3½ hrs tractor, etc. -
Page 14: Troubleshooting
TroUBLESHooTIng ProBLEM PoSSIBLE CAUSE rEASon/SoLUTIon No reading on the ammeter. Charger is not plugged in. Plug the charger into an AC outlet. No power at the receptacle. Check for open fuse or circuit breaker supplying AC outlet. Clips are not making a good Check for poor connection connection to the battery. -
Page 15: Before Returning For Repairs
ProBLEM PoSSIBLE CAUSE rEASon/SoLUTIon The charger is making an Circuit breaker is cycling. The settings may be wrong. audible clicking sound. Check the charger settings. Battery is defective. Have the battery checked. Shorted battery cables or Circuit breaker cycles when clips. - Page 16 IMPorTAnTE: LEA Y gUArDE ESTE MAnUAL DE InSTrUCCIonES Y SEgUrIDAD. gUArDE ESTAS InSTrUCCIonES: El DH-6M cargador ofrece una amplia gama de características para satisfacer sus necesidades. Este manual le mostrará cómo utilizar su cargador en forma segura y efectiva. Por favor, lea, comprenda y siga estas instrucciones y precauciones cuidadosamente, ya que este manual contiene instrucciones operativas y de seguridad de importancia.
-
Page 17: Instrucciones Importantes De Seguridad
InSTrUCCIonES IMPorTAnTES DE SEgUrIDAD - gUArDE ESTAS InSTrUCCIonES - Este manual contiene instrucciones operativas y de seguridad de importancia EL rIESgo DE DESCArgA ELÉCTrICA o InCEnDIo Manténgase alejado de los niños. No exponga el cargador a la lluvia o a la nieve. Utilice solamente accesorios recomendados. -
Page 18: Precauciones Personales
rIESgo DE gASES EXPLoSIVoS. 1.10 RESULTA PELIGROSO TRABAJAR EN FORMA CERCANA A UNA BATERÍA DE PLOMO. LAS BATERÍAS GENERAN GASES EXPLOSIVOS DURANTE SU NORMAL FUNCIONAMIENTO. POR ESTE MOTIVO, RESULTA DE SUMA IMPORTANCIA qUE SIGA LAS INSTRUCCIONES CADA VEZ qUE UTILIZA EL CARGADOR. -
Page 19: Preparación Para La Carga
2.10 Si el ácido de la batería tiene contacto con su piel o su ropa, lave de inmediato el área afectada con agua y jabón. En caso de que ingrese ácido en un ojo, sumerja el mismo de inmediato bajo agua potable corriente por al menos 10 minutos y obtenga atención médica en forma inmediata. -
Page 20: Ubicación Del Cargador
UBICACIÓn DEL CArgADor rIESgo DE ConTACTo Con EL ÁCIDo DE LA BATErÍA. Ubique el cargador a la mayor distancia posible de la batería como lo permitan los cables de CC. Nunca ubique el cargador directamente por encima de la batería que se carga; los gases de la batería corroerán y dañarán el cargador. -
Page 21: Siga Estos Pasos Cuando La Batería Se Encuentre Fuera Del Vehículo
Ubique los cables de C.A. y C.C. para reducir el riesgo de daños a la cubierta, a la puerta y a las piezas móviles o calientes del motor. NOTA: Si es necesario cerrar el cofre durante el proceso de carga, asegúrese que el cofre no toque parte metálica de la batería o pele los cables. -
Page 22: Conexiones A Tierra Y Energía De Ca
Sujete al menos un cable aislado de batería de 24 pulgadas (61 cm) de largo con calibre 6 según el Calibre americano de cables (AWG, por sus siglas en inglés) al borne NEGATIVO (NEG, N, -) de la batería. Conecte el gancho POSITIVO (ROJO) del cargador al borne POSITIVO (POS, P, +) de la batería. -
Page 23: Características/Panel De Control
CArACTErÍSTICAS/PAnEL DE ConTroL Amperímetro Interruptor de selección del índice de cargah Amperímetro El amperímetro indica la cantidad de corriente, medida en amperios, es decir la corriente consumida por la batería. A medida que la batería se carga, consume menos corriente del cargador. Correspondientemente el medidor mostrará... -
Page 24: Instrucciones De Operación
El cargador carece de interruptor para encendido y apagado. Los controles para encendido y apagado se controlan conectando DH-6M en el tomacorriente de 120V C.C. y sólo después de que las conexiones de la batería se han realizado. -
Page 25: Instrucciones De Mantenimiento
InSTrUCCIonES DE MAnTEnIMIEnTo 13.1 Después de usar y antes de realizar mantenimiento, desenchufe y desconecte el cargador de la batería (ver secciones 6, 7 y 8). 13.2 Utilice un paño seco para limpiar la corrosión de toda la batería y otra suciedad o aceite de los terminales, cables y carcasa del cargador. - Page 26 ProBLEM PoSSIBLE CAUSE rEASon/SoLUTIon La lectura en el La batería se encuentra Continúe con la carga de la amperímetro permanece extremadamente batería por dos horas más. elevada. descargada. Si persiste algún problema, haga revisar la batería. Tensión de batería errónea. Verifique que esté...
-
Page 27: Antes De Devolver A Reparaciones
ProBLEM PoSSIBLE CAUSE rEASon/SoLUTIon Se escucha un sonido seco El disyuntor se resetea. Las configuraciones podrían en el cargador (“clic”). ser erróneas. Verifique las configuraciones del cargador. Batería defectuosa. Haga revisar la batería. Cables o ganchos de la El disyuntor se resetea batería en cortocircuito.
Need help?
Do you have a question about the DH-6M and is the answer not in the manual?
Questions and answers