Table of Contents
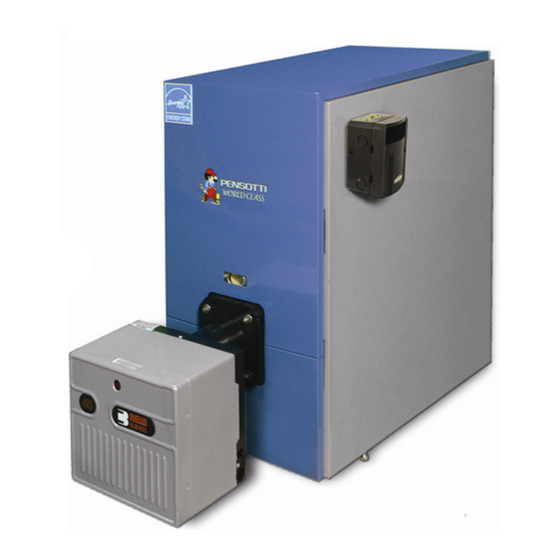
Advertisement
TABLE OF CONTENTS
WARRANTY INFORMATION
GENERAL INSTRUCTIONS 1
6
WIRING 9
CONDENSATION 13
MAINTENANCE & TESTING-SERVICEMAN 24
CLEANING FUEL SYSTEM & BURNER 25
0
4
7
20
20
22
24
24
25
25
26
9-1-2009
Advertisement
Table of Contents

Related Manuals for PENSOTTI DK2-3


Summary of Contents for PENSOTTI DK2-3
-
Page 1: Table Of Contents
TABLE OF CONTENTS WARRANTY INFORMATION GENERAL INSTRUCTIONS 1 STEPS PRIOR TO INSTALLATION 1 RECEIVING SHIPMENT 1 CLEARANCES FOR SERVICE & COMBUSTIBLE MATERIALS 2 COMBUSTION AIR & VENTILATION 2 AIR FOR COMBUSTION 2 AIR FOR VENTILATION 2 COMBUSTION AIR SUPPLY WITH NO BAROMETRIC DAMPER 3 BOILER LOCATION &... -
Page 2: Steps Prior To Installation
“AMERICA’S BEST HEATING VALUE” Like all Pensotti Boilers’ offerings, the Quatech Series boiler is a high efficiency residential heating appliance constructed of the finest materials and designed for use with carefully tested and selected controls. The Quatech was designed to operate most efficiently when properly sized to accommodate your specific heating needs. -
Page 3: Clearances For Service & Combustible Materials
This manual is presented in a sequence that allows for an orderly trouble free installation. We suggest that you follow the instructions in order eliminate potential hazards. Prior to system installation there should be an inspection of the chimney or proposed vent system to determine that the condition is acceptable. -
Page 4: Combustion Air Supply With No Barometric Damper
If there is no accessible source of air for combustion and ventilation available within the building, combustion air ducts may be installed to convey the air. Those ducts used to convey air must have areas of at least 35sq.in per gallon of oil burned per hour for vertical ducts and 70sq.in per gallon of oil burned per hour for horizontal ducts. -
Page 5: Jacket Assembly
JACKET ASSEMBLY AND CONTROL INSTALLATION 9-1-2009... - Page 6 Upon completion of the jacket assembly the control unit can be mounted on the side of the boiler. The boiler is now ready for piping and connection to the fuel system, heating and domestic hot water, thermostat, and 110 Volt 60 cycle AC current. 9-1-2009...
-
Page 7: Piping
Taco SR503 or equivalent. For special control systems such as outdoor reset, multiple zones, multiple boiler installations, unit heaters, radiant heating etc. consult the respective manufacturers manual or contact Pensotti North America. 9-1-2009... -
Page 8: Piping Install Diagrams
9-1-2009... - Page 9 9-1-2009...
-
Page 10: Wiring
WARNING A proper burner harness must be used to avoid energizing of the burner with the mounting plate open. Otherwise severe burns to personnel may develop. WIRING All external wiring must be performed in compliance with existing electrical codes within the local jurisdiction. - Page 11 The Quatech boiler should be equipped with a burner that includes a 15 second pre-purge control. This will insure smooth quiet starts and optimum operating performance. The use of a post purge is recommended with mechanical draft systems. Figure 5, figure 6, figure 7, and figure 8, show wiring diagrams for use of the Honeywell L7248 and the Carlin 90000B high limit controller along with installation for a powerventer application and the wiring of a priority indirect with a Taco SR503 or equivalent.
- Page 12 9-1-2009...
-
Page 13: Venting Requirements
CAUTION Oil fired units must always be connected to flues with proper draft. VENTING REQUIREMENTS All venting of the Quatech Series Boilers shall be done in accordance with national, state, and local codes, and be in conformity with NFPA 31. In addition design of the chimney connectors, chimneys, power venting systems and direct vent systems should also conform to State and local codes and be in accordance with good and accepted industry practice. -
Page 14: Condensation
If the masonry, brick, block chimney, or tile chimney liner is in poor condition a new chimney liner rated for oil may have to be installed. In the event the condition still exists after installation of a new liner consult Pensotti North America. Roof Clearances Standard roof clearances apply. -
Page 15: Power Venter Applications
The terminating vent hood and the inlet air hood are to be placed on the same wall surface on the same wall opposite the prevailing wind. All combustion air to the burner is to be supplied from outside of the building. The vent hood must be placed at least 12in. -
Page 16: Direct Vent Applications
DIRECT VENT APPLICATIONS DIRECT VENTING IS TO BE USED FOR OIL APPLICATIONS ONLY. THE USE IS LIMITED TO THREE, FOUR, AND FIVE SECTION BOILERS. ONLY Z FLEX DIRECT VENT KITS ARE APPROVED FOR USE WITH THIS SERIES OF BOILERS. ONLY RIELLO BF SERIES BURNERS MAY BE USED. - Page 17 -Maximum will thickness should not exceed 14 inches. Contact Pensotti Boilers for options if your wall is thicker than 14 inches. -The Pensotti-Z Flex system is designed for single appliance use only. It is not designed for common venting unless specific approval is obtained.
-
Page 18: Installing The Joint Assembly
JOINT ASSEMBLY INSTRUCTIONS Figures 12 and 13 below provide a visual representation of the joint assembly. Follow the instructions below the figures. Apply Z Flex Sealant -Loosen the gear clamps attached to the adapter sleeve and slide the adapter over the vent pipe. -Pull the corrugated inner tube out of the vent pipe for easy access for adapter insertion. -
Page 19: Installing The Outside Terminal
INSTALLING THE OUTSIDE TERMINAL Figures 14 and 15 show the installation of the outside terminal. Follow the instruction below the figures to successfully complete this task. FIGURE 14 FIGURE 15 Determine the terminal location. Cut an 8 1/4 in diameter hole through the wall. This is slightly larger than the O.D. of the terminal. -
Page 20: Connections To The Outside Terminal
CONNECTIONS TO THE OUTSIDE TERMINAL FIGURES 16 and 17 Provide an illustration of the steps outlined below to connect to the outside terminal. Follow the steps outlined here to accomplish this task. Apply z flex sealant Figure 17 Slide the inner section over the vent pipe. Connect the terminal adapter to the vent pipe directed in the joint assembly section of this manual Apply a bead of sealant around the terminal flue collar. -
Page 21: Connection To The Appilance
CONNECTING TO THE APPLIANCE The following series of figures, 18, 19, 20, & 21 provide a pictorial view of the appliance connection. Follow the steps below to accomplish this task. Connect the appliance adapter to the vent pipe as shown in the joint assembly section. Apply sealant around the appliance flue collar. -
Page 22: Z Flex Components
The beaded end of the air intake clamp should go first over the burner adapter. The Pensotti Quatech Direct vent system does not require a vacuum relief valve or a post purge control on the Riello BF Series burner per UL 726 test criteria. -
Page 23: Fuel System
Never Burn Gasoline, Waste Oil, or Crankcase Oil in this appliance. DANGER FUEL SYSTEM The fuel system piping must comply with the pump manufacturers’ specifications which are included with the burner. In addition all fuel system piping must comply with local codes and ordinances. -
Page 24: Quatech Boiler Series Specifications
1.10 X 60⁰ W DK2-6 40 F5 1.35 X 45⁰ B DK2-7 40 F10 1.50 X 45⁰ B DK2-8 40 F10 PENSOTTI HEALINE DIRECT VENT SERIES / RIELLO BF SPECIFICATIONS Appliance Pump Pressure Turbulator Air Gate Burner Model Nozzle Size Model... -
Page 25: Start Up Procedure
Do not operate if any controls have been submerged. WARNING Contact a qualified technician for inspection prior to use. START UP PROCEDURE Prior to start up make sure the service switch is in the OFF position Check all fittings and wiring. Insure that the boiler and the entire heating system are completely filled with water and that all air has been purged from the system resulting that proper system pressure is achieved. -
Page 26: Cleaning Boiler Sections
Check the primary control safety features in accordance with the manufacturers recommendations outlined in the instructions furnished with the control and burner assemblies. The following tests should be performed: 1) Safe start safety check 2) Ignition failure 3) Flame failure 4) Power failure. In the event the boiler is equipped with a low water cut off the cut off should be tested in accordance with the manufacturers recommendations. -
Page 27: Parts List & Boiler Diagram
PARTS LIST AND BOILER DIAGRAM 9-1-2009... - Page 28 Number PART NAME Number PART NAME DK2 FRONT SECTION QUATECH PNA - POCKET FOR SENSING BULBS DK2 INTERMEDIATE SECTION TAPPING WITH AIR RELIEF VALVE DK2 REAR SECTION REAR CASING NIPPLE SPECIAL PIN FOR CASING ASSEMBLY STAYBOLTS FIBRE-GLASS ROPE DIA. 10 BODY INSULATION HINGE PIN FRONT DOOR (MONOBLOCK)
- Page 29 9-1-2009...
Need help?
Do you have a question about the DK2-3 and is the answer not in the manual?
Questions and answers