Aztech HW550-3G User Manual
3g mobile broadband plus 4-port wireless-n router
Hide thumbs
Also See for HW550-3G:
- Configuration manual (9 pages) ,
- Step-by-step manual (5 pages) ,
- Easy start manual (2 pages)
Table of Contents
Advertisement
Advertisement
Table of Contents

Related Manuals for Aztech HW550-3G


![Wireless Router Aztech [17:34:06] ?????????? ???????: HomePlug AV 200Mbps 4-Port Wireless-N Router User Manual](https://static-data2.manualslib.com/product-images/f6d/552196/60x60/aztech-17-34-06-homeplug-av-200mbps-4-port-wireless-n-router-wireless-router.jpg)


Summary of Contents for Aztech HW550-3G
- Page 1 HW550-3G 3G Mobile Broadband plus 4-Port Wireless-N Router...
-
Page 2: Table Of Contents
User Manual Table of Contents About the Product ..........................4 Features............................5 Requirements ..........................6 Package Content..........................7 Device Design ..........................8 Getting Started ..........................11 Plan Your Network......................12 Remove or Disable Conflicts...................13 Installing your Router......................14 Connecting to the Internet .....................15 WPS (Wi-Fi Protected Setup)..................19 Connect/Disconnect Button ...................19 About the Web User Interface ....................20 Basic Mode............................21 Home..........................21... - Page 3 User Manual Password........................45 Regulatory Compliance Notices....................46 Page 3 of 46...
-
Page 4: About The Product
Easy to install and Use By connecting a HSDPA USB modem into USB port of HW550-3G, Internet access can be accessed and shared virtually anywhere within a wire or wireless broadband network. You can also directly connect Ethernet-based devices to its built-in 4-port full-duplex 10/100 switch. -
Page 5: Features
User Manual Features 2-in-1 dual function Router - HSPA support for 3G mobile broadband plus 4-port wireless N router Support HSDPA/HSUPA (3.5G) USB modem connection - to offer a network connection with full mobility Converts single user 3G USB modem into a multiple users ready WiFi Router - to share the mobile Internet connection with your family, friends and colleagues Support IEEE802.11b/g and 11n (draft 2.0) wireless standard - data transfer rate reaches up to 300Mbps... -
Page 6: Requirements
User Manual Requirements Your computer must meet the following minimum requirements. Internet Explorer 7 and above or Mozilla 3.0.5 CD-ROM Drive Ethernet network adapter Page 6 of 46... -
Page 7: Package Content
User Manual Package Content The package should contain the following items: • HW550 3G • CD Content • 12.0V, 1A Power Adapter (Model SWM11-12120) • Quick Start Guide If any of the items is missing please contact the dealer from whom the equipment was purchased. Page 7 of 46... -
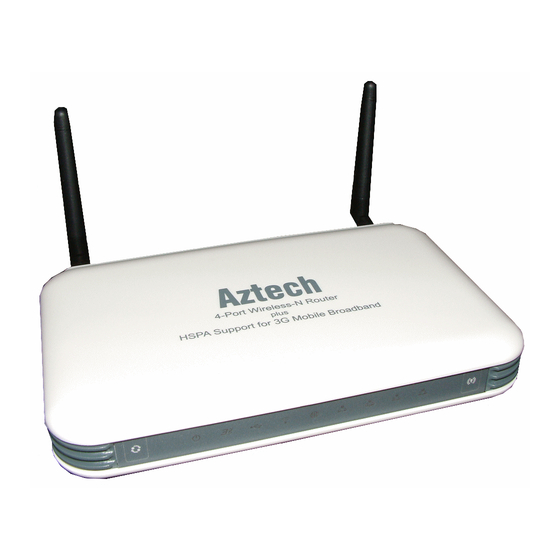
Page 8: Device Design
User Manual Device Design Front Panel B B B B C C C C F F F F G G G G H H H H D D D D E E E E A A A A Behavior Description UMTS 3.5G Connect/Disconnect Easy Connect and Disconnect to your 3.5G broadband. -
Page 9: Back Panel
User Manual Connected to a Modem No Modem connection Connected to an Active Ethernet Device Ethernet 1-4 No Ethernet Connection Blinking Transmitting/Receiving Data Press for two seconds (or until the LED blinks) to start WPS pairing. Wireless client must be WPS-enabled and must be pressed within 3 minutes. - Page 10 User Manual Label Description Ethernet Port 1-4 Connecting with computers/devices using an Ethernet cable Connect to a modem using an Ethernet cable Reset Press for 3 seconds to reset to the Factory Default. USB Port Connect to a 3G USB modem stick, USB storage, printer and alike. Power Jack Use 12V 1.0A Power Adapter Antenna 1 and 2...
-
Page 11: Getting Started
User Manual Getting Started Plan your Network You may need to check Remove/Disable some setting or disable some application before Conflicts installation. Connect the modem, Setup the Router computer, and power adaptor to the router. Open a browser to access Connect to the the Web User Interface and then use Setup Wizard to... -
Page 12: Plan Your Network
User Manual Plan Your Network 1. Using a 3G USB Modem Stick 2. Using a DSL/Cable modem WAN Port Page 12 of 46... -
Page 13: Remove Or Disable Conflicts
User Manual Remove or Disable Conflicts To make sure the router installation moves on smoothly, you need to remove or disable conflicts that may interfere the installation. Probable conflicts may include: • Internet sharing applications • Proxy software • Security software •... -
Page 14: Installing Your Router
User Manual 7. To close the Local Area Connection Properties dialog box, click OK. Configuring Internet Properties To set the Internet Properties: 1. Click the Start button, and then click Run. This opens the Run dialog box. 2. Type in inetcpl.cpl, and then click Ok. This opens the Internet Properties. 3. -
Page 15: Connecting To The Internet
User Manual Using a DSL or Cable Modem If you choose to use a DSL or Cable modem you are required to have the following: DSL or cable modem Active Internet Account 1. Connect your DSL or Cable modem to the router’s WAN port using an Ethernet cable. 2. - Page 16 User Manual 5. Select the Language and Time zone from the drop down box then click Next to continue. 6. Select the Internet Connection type then click Next to Continue. If you choose UMTS (3G), you are required to have the following: USB Modem Stick Broadband data SIM card If you choose WAN, you are required to have the following:...
- Page 17 User Manual 7. UMTS 3G connection Please connect your USB modem stick to HW550-3G and make sure that your data SIM card is properly inserted to the modem. Access Point Settings – Choose between List and Manual. List List will provide the APN set by...
- Page 18 Static IP – select this if your ISP provides you the IP address, Subnet mask, Gateway and DNS server addresses. DHCP - if you select this your HW550-3G will automatically get an IP address from the DHCP server or from your ISP.
-
Page 19: Wps (Wi-Fi Protected Setup)
User Manual WPS (Wi-Fi Protected Setup) WPS button allows you to activate Wi-Fi Protected Setup (WPS). When you press the WPS button it automatically detects and connects wireless clients into the wireless network by broadcasting the wireless network settings from your Access Point to you wireless device/s. To setup WPS: 1. -
Page 20: About The Web User Interface
User Manual About the Web User Interface To Access the Web User Interface When you router is already setup open your Web Browser and on the Address bar type in http://192.168.2.1 Username: admin admin admin admin Password: admin admin admin admin The WEB GUI includes the following settings for your router: •... -
Page 21: Basic Mode
This pane will show you the lists of the clients that are connected to your HW550-3G. Storage This pane will show you the status of the mass storages that is connected to your HW550-3G. Select the Read/Write option on the drop down menu to have an access on your shared mass storage files. -
Page 22: Printer
Printers using the USB port come with a software installation CD for installing the printer drivers and applications. The drivers for the printers must be installed on the computer first to prepare it to use the printer when it’s connected to the HW550-3G. Refer to the printer’s documentation on how to install the drivers. - Page 23 User Manual 2. Click on the File Menu File Menu > Add Printer Add Printer. File Menu File Menu Add Printer Add Printer 3. Click on Next Next Next Next on the Add Printer Wizard page. Page 23 of 46...
- Page 24 User Manual 4. Choose Local Printer attached to this computer Local Printer attached to this computer Local Printer attached to this computer Local Printer attached to this computer and click Next Next Next Next, on the Local or Network Printer page.
- Page 25 User Manual 7. Enter your HW550-3G’s Default Gateway IP address 192.168.2.1 192.168.2.1 192.168.2.1 192.168.2.1 then click Next Next Next Next. 8. Under Additional Port Information Required choose Custom Custom Custom then click Next Custom Next Next Next 9. Once the computer detects the printer on the Print Server, it will ask for the printer manufacturer...
- Page 26 User Manual 10. Choose Keep existing driver (recommended) Keep existing driver (recommended) Keep existing driver (recommended) Keep existing driver (recommended) then click Next Next Next until you reach Completing the Add Next Completing the Add Completing the Add Completing the Add Printer Wizard Printer Wizard Printer Wizard...
- Page 27 User Manual 3. Click on Add a Printer Add a Printer. Add a Printer Add a Printer 4. Click on Add a local printer Add a local printer Add a local printer Add a local printer then click Next Next Next Next.
- Page 28 Create a new port a new port Standard TCP/IP port Standard TCP/IP port Next Next 6. Enter the Default Gateway IP address of your HW550-3G router 192.168.2.1 192.168.2.1 192.168.2.1 192.168.2.1 then click Next Next Next. Next Page 28 of 46...
- Page 29 User Manual 7. Under Additional Port Information Required window, select Custom then click Next Next Next Next. 8. Once the computer detects the printer on the Print Server, it will ask for the printer manufacturer and model, a list of printers will be shown, select the your printer from the list and click OK Page 29 of 46...
- Page 30 User Manual 9. Select Use the driver that is currently installed then click Next Next Next Next. 10. To print a test page click on Print a test page on the confirmation screen, click Finish Finish Finish to complete Finish the installation.
- Page 31 User Manual 11. If Printing was unsuccessful right click on the Printer’s icon then select Properties Properties. Properties Properties 12. Under printer’s Properties click Port Tab and tick the IP address (192.168.2.1) that was set on previous settings then click Apply Apply Apply Apply.
-
Page 32: Wizard
Note: Scanning, Faxing and Photocopying functions on Multifunction printers are currently not supported on Note: Note: the HW550-3G, Print function is the only feature that will work on these printers type when connected to the HW550-3G. Wizard This section will guide you on how to configure your HW550-3G to have an Internet connection. - Page 33 User Manual Language and Time Zone Select the Language and Time zone from the drop down box then click Next to continue. Internet Connection Type Select the Internet Connection type then click Next to Continue. If you choose UMTS (3.5G), you are required to have the following: 1.
- Page 34 User Manual • Connect Manually – you need to press the Connect button each time Internet connection is required. • Always connected – Internet connection is always ON. You need to manually press the disconnect button when Internet connection is not required. WAN connection On this section you can choose your Internet connection type from Static IP, PPPoE and DHCP.
- Page 35 User Manual a.) Wireless Enabled - Uncheck the box to disable your wireless connection. b.) Broadcast SSID Enabled - Uncheck the box to hide your HW550-3G wireless network name. c.) SSID - this is your HW550-3G wireless network name. d.) WPA Enabled - tick the box if your want to enable your wireless security. This will ensure wireless security on your network.
-
Page 36: Quick Setup
Internet connection. Language and Time Zone This pane displays the time that you set on your HW550-3G. Configure the settings then click the Apply button for the changes to take effect. UMTS (3.5G)/WAN This pane displays the Internet connection type of your HW550-3G. -
Page 37: Advanced Page
Router Subnet Mask – this is the router’s subnet mask. • DHCP Enabled- Your HW550-3G has a built in DHCP server. Your HW550-3G will automatically assign an IP address to all the computers that will connect to your network. Check the TCP/IP settings of your computer and make sure to set it on “Obtain an IP automatically”. -
Page 38: Internet
User Manual Internet This section allows you to choose the Internet connection type that you would like to use. UMTS (3G) 1. Access Point Settings –Choose between List and Manual. List List List List will provide the APN set by your Internet Service Provider. -
Page 39: Wireless
SSID- this is your HW550-3G wireless network name. • Broadcast SSID- Uncheck the box to hide your HW550-3G wireless network name. • Wireless Mode – select the wireless connection mode on the drop down menu list. By default it is set to mixed mode. -
Page 40: Security
Select this if you want your wireless security to be disabled, it is advisable to Enable your wireless security to avoid unauthorized access to your network via wireless. • Set the WEP key on the required field. This is the password that your HW550-3G will require to connect to it via wireless. WEP default key You may choose from Hex to ASCII key format for your WEP key. -
Page 41: Filtering
User Manual Filtering This section allows you to configure MAC filtering, IP filtering and URL filtering. By default HW550- 3G will block all the MAC Addresses, IP Addresses and URL from accessing the specific rule/port set on the router. MAC Address Filtering This section enables both Port and MAC filtering. -
Page 42: Ddns (Dynamic Dns)
User Manual DDNS (Dynamic DNS) DDNS allows you to assign a fixed domain and host name to a dynamic Internet IP addresses. 2. Choose your DDNS service provider from the drop down box. 3. Enter the username of your DDNS account. 4. -
Page 43: Settings
User Manual Settings This section allows you to Back up, Save and Restore to factory default the router’s configuration. Backup Click the ‘Backup’ button to save the current settings of your router. If you will change the current configuration of your HW500-3G it is recommended that you backup the router’s current settings. Restore Click the browse button and select the saved configuration setting of the router then click ‘Restore’. -
Page 44: Reboot
User Manual Reboot Click the ‘Reboot’ button to reboot the device Page 44 of 46... - Page 45 User Manual Password This section allows you to change the default password setting of the router to access the Web GUI. Enter the new password then click apply. Page 45 of 46...
-
Page 46: Regulatory Compliance Notices
User Manual Regulatory Compliance Notices European Regulations The product has been designed, tested and manufactured according to the European R&TTE directive 1999/5/EC. Page 46 of 46...
Need help?
Do you have a question about the HW550-3G and is the answer not in the manual?
Questions and answers