Aztech DSL5018EN User Manual
4-port adsl 2/2+ 150 mbps wireless-n modem router
Hide thumbs
Also See for DSL5018EN:
- Easy start manual (2 pages) ,
- User manual (40 pages) ,
- User manual (43 pages)
Table of Contents
Advertisement
Advertisement
Table of Contents

Related Manuals for Aztech DSL5018EN


![Wireless Router Aztech [17:34:06] ?????????? ???????: HomePlug AV 200Mbps 4-Port Wireless-N Router User Manual](https://static-data2.manualslib.com/product-images/f6d/552196/60x60/aztech-17-34-06-homeplug-av-200mbps-4-port-wireless-n-router-wireless-router.jpg)


Summary of Contents for Aztech DSL5018EN
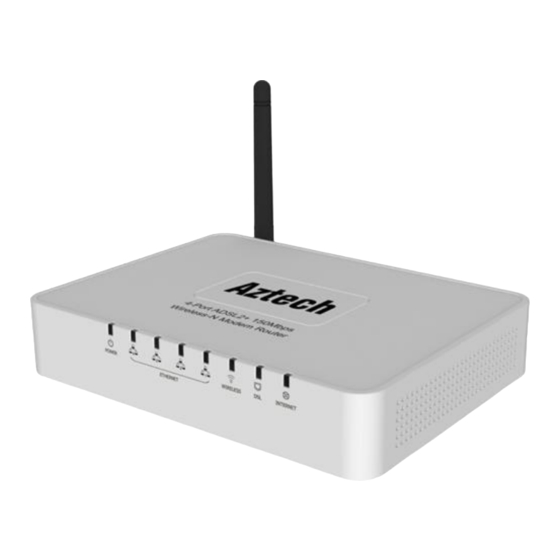
- Page 1 Aztech DSL5018EN 4-Port ADSL 2/2+ 150 MbpsWireless-N Modem Router V1.0...
- Page 2 © COPYRIGHT 2013 ALL RIGHTS RESERVED No part of this document may be reproduced, republished, or retransmitted in any form or by any means whatsoever, whether electronically or mechanically, including, but not limited to, by way of photocopying, recording, information recording, or through retrieval systems without the express written permission.
-
Page 3: Table Of Contents
CONTENTS About the Device ......................1 Minimum System Requirements .................. 1 Package Contents ......................1 Device Design ........................ 2 Front Panel ..........................2 Back Panel ..........................3 Getting Started ....................... 4 Planning Your Network ......................5 Remove or Disable Conflicts ....................6 Setup the Device ........................ - Page 4 Application> ACL ........................... 25 Application> Filter ..........................26 Application> Routing ..........................27 Application> NAT........................... 28 Application> QoS ........................... 29 Application> Port Mapping ........................30 Application> Parental..........................31 Application> Firewall ..........................32 Advanced- System ......................... 32 System>Information..........................33 System> Time Zone ..........................33 System>...
-
Page 5: About The Device
Ralink chipsets solution that fully complies with ADSL2/ADSL2+ standard. The Aztech DSL5018EN supports 1T1R MIMO technology with PHY rate up to 150Mbps. Targeted the residential and SOHO users that desires high quality triple play services, it is the... -
Page 6: Device Design
U s e r M a n u a l Device Design Front Panel LABEL ICON ACTION DESCRIPTION No power is supplied to the device Steady green 1. POWER Connected to an AC power supply Steady red Error on the device No Ethernet connection Steady green 2. -
Page 7: Back Panel
U s e r M a n u a l Back Panel LABEL DESCRIPTION 1. 12VDC 12V 1.0A DC Input port 2. ON/OFF Power ON/OFF button 3. ETHERNET Connecting computers and other Ethernet devices (RJ45) 4. USB Connecting USB storage or printer 5. -
Page 8: Getting Started
U s e r M a n u a l Getting Started Setting up the device is easy. The flowchart below provides an outline of the steps needed to complete the installation. Brief descriptions appear beside each step. Detailed instructions are provided in the subsequent pages. -
Page 9: Planning Your Network
U s e r M a n u a l Planning Your Network Before moving ahead to setup your network, it is a good idea to draw out a network diagram to help identify your network devices and plan out how to connect these devices. The illustration below is an example of a network diagram. -
Page 10: Remove Or Disable Conflicts
U s e r M a n u a l Remove or Disable Conflicts To ensure that the router installation moves on smoothly, you need to remove or disable conflicts that may interfere with the installation. Probable conflicts may include: ... -
Page 11: Setup The Device
U s e r M a n u a l Configuring Internet Properties To set the Internet Properties: Select Start > Run. This opens the Run dialog box. Enter control inetcpl.cpl and then click OK. This opens Internet Properties. Click Connections tab. In the Dial-up and Virtual Private Network settings pane, select ‘Never dial a connection’. -
Page 12: The Web User Interface (Gui)
U s e r M a n u a l To setup a telephone on the POTS Splitter (DSL Microfilter): Locate the phone jack in your house. Insert the POTS Splitter into the phone jack. Plug one end of the telephone cable from the POTS Splitter’s TEL port and then plug the other end into the telephone. -
Page 13: Connecting To The Internet
U s e r M a n u a l Connecting to the Internet You can use the web user interface to setup your Internet connection. Connecting using Quick Setup Launch the web browser. Input 192.168.1.1 on the address bar and press enter. Input ‘admin’... - Page 14 U s e r M a n u a l Under WAN Connection Select Connection Type Input VPI and VCI on the required field. (Note: Please refer to your Internet Service Provider for the information needed on the required field). Under Wireless Tick WLAN Enabled box to enable the wireless interface.
-
Page 15: Basic Mode
U s e r M a n u a l Basic Mode Basic Mode displays pages with information about the device and its current configuration. Basic – Home This section of the web user interface displays information about of the Internet, LAN, Wireless Connection, Local Network, Storage and Printer status. -
Page 16: Basic -Wizard
U s e r M a n u a l Basic -Wizard This section of the web user interface guides user to setup their device to access the Internet and set wireless connection. -
Page 17: Basic - Quick Setup
U s e r M a n u a l Basic – Quick Setup This section of the web user interface displays allows user to configure Time and Date WAN and Wireless connection. WAN Connection. Allows user to set the WAN connection type. Connection Type. -
Page 18: Advanced Mode
U s e r M a n u a l Advanced Mode The Advanced Mode page can be accessed from the Basic page by clicking on Advanced Mode. Advanced Mode – Network The initial page will show all the settings of your existing WAN connection configured on the router. - Page 19 U s e r M a n u a l...
- Page 20 U s e r M a n u a l To add a WAN interface: Select an available Virtual Circuit from the drop-down box Enter VPI/VCI settings (provided by your ISP) Input QoS settings (provided by your ISP) Select the IPv4/IPv6 version Select the WAN Connection Type For PPP enter PPP Username and Password (provided by your ISP) Bridge Interface should be deactivated.
-
Page 21: Network>Lan
U s e r M a n u a l Network>LAN Configure the DSL Router IP Address and Subnet Mask for LAN interface. You may also configure the DHCP server and Public IP Pass Through settings of your router. This page also displays the DHCP Client list connected to the modem/router. -
Page 22: Network>Dhcp Reservation
U s e r M a n u a l Network>DHCP Reservation Allows you to reserve an IP address for a specific device connected to the modem/router. Network> Ethernet Media Type Allows you to change the speed at which the Ethernet Ports should operate on. Click Apply for the settings to take effect. -
Page 23: Network> Adsl
U s e r M a n u a l Network> ADSL Allows you to select the ADSL Mode and Type required by their Internet Service Provider. Network> SNMP Allows you to configure SNMP settings, type the SNMP information on the required field and click Apply for the settings to take effect. -
Page 24: Network> Cwmp
U s e r M a n u a l Network> CWMP Allows the Internet Service Provider to manage the device via remotely. Input the information on the required field and click apply for the settings to take effect. Network> IPv6RD Allows Internet service Provider to configure IPv6 settings. -
Page 25: Advanced - Wireless
U s e r M a n u a l Advanced – Wireless This page allows user to change the default configuration of the Wireless LAN connection set on the modem. -
Page 26: Wireless> Basic
U s e r M a n u a l Wireless> Basic Allows you to change the default Wireless Configuration set on the device. Access Point settings allows you to Enable or Disable the wireless interface. 11.n settings allows you to change the wireless channel bandwidth. -
Page 27: Wireless> Security
U s e r M a n u a l Wireless> Security This page allows you to change the default Wireless Security set on the modem. This also allows you to enable/disable the WPS feature, click Apply for the settings to take effect. -
Page 28: Wireless> Mac Address Filter
U s e r M a n u a l Wireless> MAC Address Filter This page allows you to control which wireless clients will be Allowed or Denied access connection to the modem by entering the MAC address of the wireless client to the Access control list. -
Page 29: Application > Ddns
U s e r M a n u a l Application > DDNS This page allows you to set a static host name with a Dynamic IP address. Input the information on the required box click Save for the settings to take effect. Application>... -
Page 30: Application> Filter
U s e r M a n u a l Application> Filter This page allows you to set the IP, MAC, URL and Application filtering on the device. Select Filter type from the drop down box and input the information on the required field click Set for the settings to take effect. -
Page 31: Application> Routing
U s e r M a n u a l Application> Routing This page will list the routing table information. This allows you to Add/Edit/Drop the static route. Click Add Route and input the information on the required field then click Apply for the settings to take effect. -
Page 32: Application> Nat
U s e r M a n u a l Application> NAT Allows user to configure DMZ, Port Forwarding and Port Triggering applications. DMZ. This feature allows you to set a host between a private local network and the public network. This feature allows outside users from getting direct access to your local network. -
Page 33: Application> Qos
U s e r M a n u a l Application> QoS Quality of Service or QoS provides different priority to different applications, users, or data flows, to guarantee a certain level of performance. For example, QoS is important for real- time streaming multimedia applications such as voice over IP, online games and IPTV to provide fixed bit rate and prevent delay. -
Page 34: Application> Port Mapping
U s e r M a n u a l Application> Port Mapping This page feature allows ATM PVCs to be permanently routed to a physical interface on the device. -
Page 35: Application> Parental
U s e r M a n u a l Application> Parental This page allows you to block access to specific URL or MAC address on a specific day and time. Select Activated and Blocking Type then input the information on the required field and click Apply for the settings to take effect. -
Page 36: Application> Firewall
U s e r M a n u a l Application> Firewall This page allows you to enable or disable Firewall and SPI feature set on the modem. Advanced- System Allows you to Back-up, Restore settings and do Firmware upgrade on the modem. -
Page 37: System>Information
U s e r M a n u a l System>Information Displays detailed information of the modem’s Firmware version, LAN/WLAN MAC Address and System Uptime. System> Time Zone Allows you to set the time used by the device for scheduling services. -
Page 38: System> Upnp
U s e r M a n u a l System> UPnP Allows you to enable/disable UPnP application set on the modem. System> Settings Allows you to Save and Restore modem’s configuration. Back-up. Click Backup button to save romfile.cfg on your computer. This will serve as your modem’s back-up configuration file. -
Page 39: System> Firmware
U s e r M a n u a l System> Firmware Allows you to change the firmware saved on the modem. System> Password This page allows you to change the password set on the modem to access the Web User Interface. -
Page 40: Advanced - Status
U s e r M a n u a l Advanced – Status Displays the status of the modem. Status> Statistic Provides statistical information of LAN, ADSL and WLAN interface. -
Page 41: Status> Adsl Status
U s e r M a n u a l Status> ADSL Status Displays detailed information of the ADSL quality. Status> System Log Displays the modem’s system log. -
Page 42: Status> Diagnostics
U s e r M a n u a l Status> Diagnostics Displays the test results for the connectivity of the physical later and protocol for ADSL, ATM, WLAN/LAN port and LAN connection, click Start test to start the test. Status>... -
Page 43: Modem Care Tips
U s e r M a n u a l Modem Care Tips Do not deface the modem. Do not use any power adapters with the modem other than the supplied adapter as it may damage the device rendering it unusable. Do not let the modem get wet, when water gets in contact with the modem, the internal components can corrode which breaks down the modem.
Need help?
Do you have a question about the DSL5018EN and is the answer not in the manual?
Questions and answers