Table of Contents
Advertisement
Advertisement
Table of Contents

Subscribe to Our Youtube Channel
Related Manuals for John Lewis JLWM 1410


Summary of Contents for John Lewis JLWM 1410
- Page 1 JLWM 1410 1400 spin washing machine Instruction manual...
-
Page 2: Safety Information
These warnings have been provided in the interest of safety. You MUST read them carefully before installing or using the appliance. If you are unsure of the meanings of these warnings contact the John Lewis branch from which you purchased the appliance. -
Page 3: Installation
• Wash small items such as socks, laces, washable belts etc in a washing bag or pillow case as it is possible for such items to slip down between the tub and the inner drum. • Do not use your washing machine to wash articles with whalebones, material without hems or torn material. -
Page 4: Child Safety
• The users should always check that they have not left their gas lighters (disposable or otherwise) in their clothing. • Never tumble dry items that have had contact with chemicals such as dry cleaning fluid. These are of a volatile nature and could cause an explosion. -
Page 5: Table Of Contents
Contents Operating instructions Safety information General safety Installation Child safety Product description Detergent dispenser drawer Control panel «On/Off» / «Reset» programme button (2) 9 Programme selector buttons (3) Temperature button (5) Spin (6) Options - Prewash/Stain/Intensive/Easy Iron (7) Extra Rinse (8) Quick (9) Start Pause (10) Door lock light (11) - Page 6 Cancel a programme or switch the appliance How to interrupt a programme How to open the door during the cycle of a programme End of programme Helpful hints and tips Washing programmes Technical data Consumption values Care and cleaning Descaling External cleaning Washing drum Door seal...
-
Page 7: Product Description
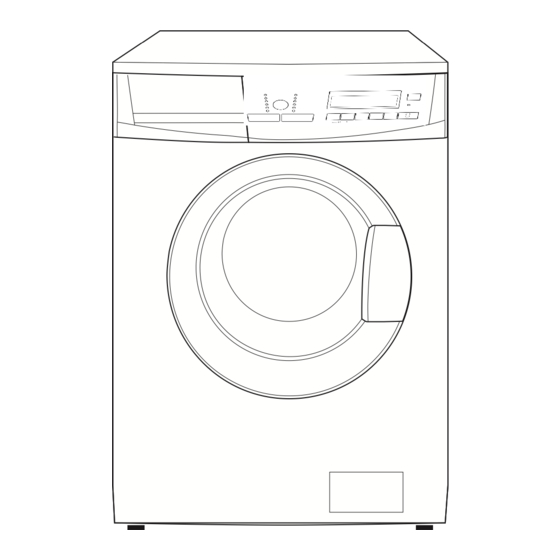
Product description Detergent dispenser drawer Control panel Door opening handle Rating plate Drain pump Adjustable feet... -
Page 8: Detergent Dispenser Drawer
Detergent dispenser drawer Compartment for detergent used for prewash and soak phase or for stain remover used during the stain action phase (if available). The prewash and soak detergent is added at the beginning of the wash programme. The stain remover is added during the stain action phase. -
Page 9: Control Panel
Control panel Below is a picture of the control panel. It shows the programme selector dial as well as the buttons and pilot lights. These are presented by relevant numbers on the following pages. Detergent dispenser drawer On/Off and Reset button Programme selector buttons Display Temperature button... -
Page 10: Temperature Button
machine proposes a temperature and automatically selects the maximum spin value provided for the programme you have chosen. You can change these values by operating buttons 5 and 6. The duration of the selected washing programme is shown on the display (4.6). Important! If you press one of these buttons while a programme is running, the red pilot light of button 10 blinks three times... -
Page 11: Door Lock Light
Door lock light (11) The light Door lock shows if you can open the door: • light on: the door cannot be opened. The machine in working or has stopped with water left in the tub. • light off: the door can be opened. The programme is finished or the water has been emptied out. - Page 12 4.4 Extra rinse symbol: it illuminates when the option is enabled. 4.5 Cycle duration calculating symbol: when selecting the «proportional» programmes, the display shows the washing duration of the maximum recommended load. After the button 10 has been pressed, on the display the «Wash time» (4.7) starts blinking and the animated symbol appears to indicate that the appliance is calculating the laundry amount and the real duration.
-
Page 13: First Use
First use • Ensure that the electrical and water connections comply with the installation instructions. • Remove the polystyrene block and any material from the drum. • Before the first wash, run a cotton cycle at the highest temperature without any laundry in the machine, to remove any manufacturing residue from the drum and tub. -
Page 14: Daily Use
Daily use Load the laundry Open the door by carefully pulling the door handle outwards. Place the laundry in the drum, one item at a time, shaking them out as much as possible. Close the door. Measure out the detergent Measure out the detergent and the fabric softener Pull out the dispenser drawer until it stops. -
Page 15: Select The Desired Temperature And Spin Speed
Select the desired temperature and spin speed Press button 5 button repeatedly in order to set the temperature and button 6to change the spin speed from the one proposed by the washing machine. The button 6 allows you also to choose «No Spin»... -
Page 16: Programme Correction
flashes 3 times and the message Err is displayed for a few seconds. Important! You must set the washing machine to Pause before you make any change in the programme in progress. Programme correction As long as the wash programme has not been started yet, the programme selection can still be changed. -
Page 17: End Of Programme
When you close the door to restart the programme select the previous programme by pressing the buttons 3, repeat the options previously selected and press the button 10. End of programme The pilot light of the button 10 goes out. «0»... -
Page 18: Removing Stains
Before loading the laundry Never wash whites and coloureds together. Whites may lose their «whiteness» in the wash. New coloured items may run in the first wash; they should therefore be washed separately the first time. Make sure that no metal objects are left in the laundry (e.g. -
Page 19: Degrees Of Water Hardness
• liquid detergents, preferably for low temperature wash programmes (60°C max) for all types of fabric, or special for woollens only. The detergent and any additives must be placed in the appropriate compartments of the dispenser drawer before starting the wash programme. -
Page 20: Washing Programmes
Washing programmes Programme - Maximum and Minimum Temperature - Cycle Description - Maximum Spin Speed - Maximum Fabrics Load - Type of Laundry Cottons 95° - Cold Main wash - Rinses Maximum spin speed at 1400 rpm Max. load 7 kg - Reduced load 3.5 kg White cotton (heavily or normally soiled items). - Page 21 Programme - Maximum and Minimum Temperature - Cycle Description - Maximum Spin Speed - Maximum Fabrics Load - Type of Laundry Delicates 40° - Cold Main wash - Rinses Maximum spin speed 700 rpm Max. load kg 3.5 - Reduced load kg 1.5 Delicate fabrics: acrylics, viscose, polyester.
- Page 22 Programme - Maximum and Minimum Temperature - Cycle Description - Maximum Spin Speed - Maximum Fabrics Load - Type of Laundry Drain Draining of water Max. load 7 kg For emptying out the water of the last rinse in programmes with the set option, which ends with water left in the tub.
-
Page 23: Technical Data
Programme - Maximum and Minimum Temperature - Cycle Description - Maximum Spin Speed - Maximum Fabrics Load - Type of Laundry For cancelling the programme which is running or to switch the machine off . 1) Cycle time duration, energy and water consumptions are proportional to the amount of load. 2) «Stain»... - Page 24 Programme Wool/ Handwash 30 °C 1) Refer to the display for the programme time. 2) The consumption information shown in this chart is indicative. It can vary depending on the quantity and the type of laundry, on the temperature of the water supply and on the ambient temperature. Standard programmes for the Energy Label consumption values...
-
Page 25: Care And Cleaning
Care and cleaning You must DISCONNECT the appliance from the electricity supply, before you can carry out any cleaning or maintenance work. Descaling The water we use normally contains lime. It is a good idea to periodically use a water softening powder in the machine. -
Page 26: Cleaning The Drawer Recess
Cleaning the drawer recess Having removed the drawer, use a small brush to clean the recess, ensuring that all washing powder residue is removed from the upper and lower part of the recess. Replace the drawer and run the rinse programme without any clothes in the drum. - Page 27 • the appliance makes an unusual noise during draining due to objects such as safety pins, coins etc. blocking the pump. • a problem with water draining is detected (see chapter “What to do if...” for more details). Warning! Before opening the pump door, switch the appliance off and remove the mains plug from the socket.
-
Page 28: Cleaning The Water Inlet Filters
Put the cap back on the emergency emptying hose and place the latter back in its seat. 10. Replace the filter into the pump by inserting it correctly into the special guides. Screw the pump cover firmly by turning it clockwise. 11. -
Page 29: Emergency Emptying Out
Clean the filter in the valve with a stiff brush or with the piece of cloth. Screw the hose back to the machine and make sure the connection is tight. Turn on the water tap. Emergency emptying out If the water is not discharged, proceed as follows to empty out the machine: •... -
Page 30: Installation
Installation Unpacking All transit bolts and packing must be removed before using the appliance. You are advised to keep all transit devices so that they can be refitted if the machine ever has to be transported again. After removing all the packaging, carefully lay machine on it’s back to remove the polystyrene base from the bottom. -
Page 31: Positioning And Levelling
Open the porthole and remove the polystyrene block fitted on the door seal. Fill the smaller upper hole and the two large ones with the corresponding plastic plug caps supplied in the bag containing the instruction booklet. Positioning and levelling Install the machine on a flat hard floor. -
Page 32: Water Inlet
of connectors are available from good hardware stores and plumbers merchants to suit most domestic plumbing. Any alteration to your existing plumbing must be carried out by a competent person, or qualified plumber. Water inlet An inlet hose is supplied and can been found inside the machine drum. -
Page 33: Water Drainage
Warning! Installation should comply with local water authority and building regulations’ requirements. The appliance must be connected to a cold water supply. A minimum water pressure of 0.05 MPa (0.5 bar) is required for safe operation of the appliance. If you cannot make the cold water connection direct from the rising mains, you may be able to operate the appliance from your cold water... -
Page 34: Special Conditions
If the outlet spigot has not been used before, remove any blanking plug that may be in place. Push the drain hose onto the spigot and secure with a clip, ensure a loop is formed in the drain hose (see diagram) to prevent waste from the sink entering the appliance. -
Page 35: Electrical Connection
RAINWATER ‘RUN-OFF’ SURFACE WATER DRAINS & SEWERS UNTREATED DISCHARGE Electrical connection Any electrical work required to install this appliance should be carried out by a qualified electrician or competent person. SHOWER SINK BATH WASHING MACHINE DISHWASHER RIVER TOILET BIDET FOUL DRAIN FOUL SEWERS SEWAGE TREATMENT... -
Page 36: Permanent Connection
Important! Information on the electrical connection is given on the rating plate on the inner edge of the appliance door. The appliance is supplied with a 13 amp plug fitted. In the event of having to change the fuse in the plug supplied, a 13 amp ASTA approved (BS1363/A) fuse must be used. -
Page 37: What To Do If
What to do if… Certain problems are due to lack of simple maintenance or oversights, which can be solved easily without calling out an engineer. Before contacting your local Service Centre, please carry out the checks listed below. Important! if you call out an engineer to a fault listed below, or to repair a fault caused by incorrect use or installation, a charge will be made even if the appliance is under... - Page 38 Problem The machine does not fill: The machine does not empty and/or does not spin: The machine fills than empties out immediately: There is water on the floor: Possible cause/Solution The water tap is closed (E10). • Open the water tap. The inlet hose is squashed or kinked (E10).
- Page 39 Problem Unsatisfactory washing results: The door will not open: The machine vibrates / The machine is noisy: Spinning starts late or the machine does not spin: The machine makes an unusual noise: No water is visible in the drum: Possible cause/Solution Too little detergent or unsuitable detergent has been used.
-
Page 40: Repairs - After Sales Service
Problem The display shows the alarm code EFO: Repairs - After Sales Service Repairs - After Sales Service Your appliance comes with a three year warranty. If it is not working correctly; consult the fault finding guides within this instruction book ("What to do if ..."). -
Page 41: Environment Concerns
Contact your local John Lewis Branch. Environment concerns The symbol on the product or on its packaging indicates that this product may not be treated as household waste. Instead it should be taken to the appropriate collection point for the recycling of electrical and electronic equipment. - Page 44 John Lewis Partnership 171 Victoria Street London SW1E 5NN www.johnlewis.com 132945871-A-092011...
Need help?
Do you have a question about the JLWM 1410 and is the answer not in the manual?
Questions and answers