Table of Contents
Advertisement
Advertisement
Table of Contents

Related Manuals for John Lewis jlwm1413


Summary of Contents for John Lewis jlwm1413
- Page 1 Washing Machine JLWM 1413 User Manual...
-
Page 2: Table Of Contents
Contents Filling the detergent and additives Safety information Check the position of the flap Children and vulnerable people safety Setting a programme General Safety Starting a programme without the delay start Safety instructions Installation Behaviour of the appliance Electrical Connection Starting a programme with the delay start Water connection Cancelling the delay start... -
Page 4: Safety Information
Safety information Before the installation and use of the appliance, carefully read the supplied instructions. The manufacturer is not responsible if an incorrect installation and use causes injuries and damages. Always keep the instructions with the appliance for future reference. Children and vulnerable people safety This appliance can be used by children aged from 8 years and above •... - Page 5 If the supply cord is damaged, it must be replaced by the • manufacturer, its Authorised Service Centre or similarly qualified persons in order to avoid a hazard. Before maintenance, deactivate the appliance and disconnect the • mains plug from the mains socket. Do not use water spray and steam to clean the appliance.
-
Page 6: Safety Instructions
Safety instructions • Do not touch the mains cable or the mains plug Installation with wet hands. • Do not pull the mains cable to disconnect the • Remove all the packaging and the transit bolts. appliance. Always pull the mains plug. •... -
Page 7: Disposal
Disposal Warning! Risk of injury or suffocation. • Disconnect the appliance from the mains supply. • Cut off the mains cable and discard it. • Remove the door catch to prevent children and pets to get closed in the appliance. Washing Machine User Manual... -
Page 8: Product Description
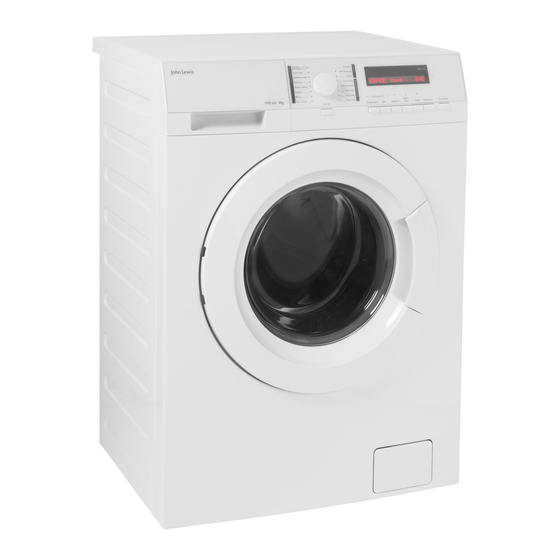
Product description Appliance overview 1. Worktop 2. Detergent dispenser 3. Control panel 4. Door handle 5. Rating plate 6. Drain pump filter 7. Feet for the appliance level Accessories Spanner To remove the transit bolts. Plastic hose guide To connect the drain hose on the edge of a sink. Plastic caps To close the holes on the rear side of the cabinet after the removal of the transit bolts. -
Page 9: Fixing Plate Kit (4055171146)
thick under the appliance, secured to at least 2 floor beams with screws, the wood panel must extend beyond the front feet. If possible install the appliance in one of the corners of the room, where the floor is more stable. -
Page 10: Control Panel
Control panel Control panel description 1. On/Off button 7. Extra rinse button 2. Programme knob 8. Intensive button 3. Display 9. Spin button 4. Start/Pause button 10. Temperature button 5. Delay start button 6. Quick button Display Washing Machine User Manual... - Page 11 Temperature area: Temperature indicator Cold water indicator. Spin area: Spin speed indicator No Spin indicator Rinse Hold indicator 1) Only available for Spin/Drain programme. Display indicators: Washing phase Rinses phase Spin phase Child safety lock Door locked You cannot open the appliance door when the symbol is on. You can open the door only when the symbol goes off.
-
Page 12: Programmes
Programmes Programme Chart Programme Maximum load Programme description Temperature Maximum spin (Type of load and soil level) range speed Washing programmes Cottons 8 kg White cotton and coloured cotton. Normal soil and light 95°C - Cold 1400 rpm soil. Cottons with Prewash 8 kg White cotton and coloured cotton. - Page 13 Programme Maximum load Programme description Temperature Maximum spin (Type of load and soil level) range speed Heavy cotton 8 kg Items in denim and jersey. Also for dark coloured items. 60°C - Cold 1200 rpm Intensive 5 kg Quick washing programme for white/fast colour cot- 60°C - 40°C 1200 rpm tons and mixed fabrics with light soil level.
- Page 14 Programme Inten- Extra Delay Spin Quick start sive rinse Delicates ■ ■ ■ ■ ■ ■ Wool/Silk ■ ■ ■ Spin/Drain ■ ■ ■ Rinse ■ ■ ■ ■ Lingerie ■ ■ ■ ■ Heavy cotton ■ ■ ■ ■ Intensive ■...
-
Page 15: Consumption Values
Consumption values The data of this table are approximate. Different causes can change the data: the quantity and type of laundry, the water and ambient temperature. At programme start the display shows the duration programme for the maximum load capacity. During the washing phase the programme duration is automatically calculated and can be greatly reduced if the laundry load is lower than the maximum load capaci- ty (e.g. - Page 16 Off Mode (W) Left On Mode (W) The information given in the chart above are in compliance with the EU Commission regulation 1015/2010 im- plementing directive 2009/125/EC. Washing Machine User Manual...
-
Page 17: Settings
Settings Acoustic signals The acoustic signals operate when: • You activate the appliance. • You deactivate the appliance. • You press the buttons. • The programme is completed. • The appliance has a malfunction. To deactivate/activate the acoustic signals, press Intensive and Extra rinse at the same time for 6 seconds. -
Page 18: Options
Options Programme knob Intensive Turn this knob to set a programme. The related Set this option to add the stain phase to a programme indicator comes on. programme. Use this option for laundry with hard stains to Start/Pause remove. When you set this option, put the stain remover Press button Start/Pause to start or interrupt a programme. -
Page 19: Temperature
Temperature Set this option to change the default temperature. Indicator = cold water. The display shows the set temperature. Washing Machine User Manual... -
Page 20: Daily Use
Daily Use Before first use 1. Put 2 litre of water in the detergent compartment for washing phase. This activates the drain system. 2. Put a small quantity of detergent in the compartment for washing phase. 3. Set and start a programme for cotton at the highest temperature without laundry. -
Page 21: Check The Position Of The Flap
4. To use liquid detergent, turn the flap down. Compartment for liquid additives (fabric conditioner, starch). Maximum level for quantity of liquid additives. Flap for powder or liquid detergent. Always obey the instructions that you find on the packaging of the detergent products. -
Page 22: Starting A Programme Without The Delay Start
Starting a programme without 1. Press button Start/Pause to set the appliance to pause. the delay start The related indicator flashes. 2. Press button Delay start repeatedly until the Press button Start/Pause to start the programme. display shows . The relevant indicator stops to flash and stays 3. -
Page 23: End Of Cycle
The programme or the delay start continues. The appliance drains and spins automatically after End of cycle approximately18 hours. When the programme has finished, the AUTO Stand-by option appliance stops automatically. The acoustic signal operates (if it is active). The AUTO Stand-by option automatically deactivates the appliance to decrease the energy In the display comes on and the door locked... -
Page 24: Hints And Tips
Hints and tips Special stain removers are available. Use the Warning! Refer to Safety special stain remover that is applicable to the chapters. type of stain and fabric. Detergents and additives The laundry load • Only use detergents and additives specially •... -
Page 25: Water Hardness
Water hardness If the water hardness in your area is high or moderate, we recommend that you use a water softener for washing machines. In areas where the water hardness is soft it is not necessary to use a water softener. To know the water hardness in your area, contact your local water authority. -
Page 26: Care And Cleaning
Care and cleaning Maintenance wash Warning! Refer to Safety chapters. With the low temperature programmes it is possible that some detergent stays in the drum. Make regularly a maintenance wash. To do this: External cleaning • Remove the laundry from the drum. Clean the appliance only with soap and warm •... -
Page 27: Cleaning The Detergent Dispenser
Cleaning the detergent dispenser Cleaning the drain filter Warning! Do not clean the drain filter if the water in the appliance is hot. Washing Machine User Manual... - Page 28 Washing Machine User Manual...
-
Page 29: Cleaning The Inlet Hose And The Valve Filter
Cleaning the inlet hose and the valve filter Washing Machine User Manual... -
Page 30: Emergency Drain
45° 20° Emergency drain Warning! Make sure that the temperature is more than 0 Because of a malfunction, the appliance cannot °C before you use the drain the water. appliance again. The If this occurs, do steps (1) through (9) of manufacturer is not 'Cleaning the drain filter'. -
Page 31: Troubleshooting
Troubleshooting • - The appliance does not drain the Warning! Refer to Safety water. chapters. • - The appliance door is open or not closed correctly. Please check the door! Introduction • - The mains supply is unstable. Wait until the mains supply is stable. - Page 32 Problem Possible solution Make sure that the filter of the inlet hose and the filter of the valve are not clogged. Refer to “Care and cleaning”. Make sure that the inlet hose has no kinks or bends. Make sure that the connection of the water inlet hose is correct. The appliance does not fill with Make sure that the drain hose is in the correct position.
- Page 33 Problem Possible solution The appliance makes an unusu- Make sure the levelling of the appliance is correct. Refer to 'Installation'. al noise. Make sure that the packaging and/or the transit bolts are removed. Refer to 'Installation'. Add more laundry in the drum. The load may be too small. The cycle is shorter than the The appliance calculates a new time according to the laundry load.
-
Page 34: Emergency Door Opening
Emergency door opening In case of power failure or appliance failure the appliance door remains locked. The washing programme continues, when the power is restored. If the door remains locked in case of failure, it is possible to open it using the emergency unlock feature. -
Page 35: Technical Data
Technical Data Dimension Width/ Height/ Depth/ Total 600 mm/850 mm/ 522 mm/ 540 mm depth Electrical connection Voltage 230-240 V Overall power 2200 W Fuse 13 A Frequency 50 Hz Level of protection against ingress of solid particles and moisture IPX4 ensured by the protective cover, except where the low voltage equipment has no protection against moisture... -
Page 36: Repairs - After Sales Service
John Lewis, Oxford Street 020 7629 7711 information contained within this instruction Peter Jones, Sloane Square 020 7730 3434 manual, the next step is to contact John Lewis technical support on: John Lewis, Brent Cross 020 8202 6535 0844 871 7771... - Page 37 John Lewis electrical appliances are also available in Waitrose Food and Home John Lewis, Stratford (Opening 2011) Canary Wharf 020 7719 0300 John Lewis at home, Swindon 01793 733180 Cheltenham 01242 241425 John Lewis, Trafford 0161 491 4040 Rushden 01933 355099...
-
Page 38: Environmental Concerns
ENVIRONMENTAL CONCERNS Recycle the materials with the symbol . Put the packaging in applicable containers to recycle it. Help protect the environment and human health and to recycle waste of electrical and electronic appliances. Do not dispose appliances marked with the symbol with the household waste. - Page 39 Washing Machine User Manual...
- Page 40 132906800-A-162014 ( Subject to change without notice. )
Need help?
Do you have a question about the jlwm1413 and is the answer not in the manual?
Questions and answers