Onkyo Integra TX-DS898 Instruction Manual
Onkyo integra tx-ds898 av receiver instruction manual
Hide thumbs
Also See for Integra TX-DS898:
- Instruction manual (72 pages) ,
- Service manual (32 pages) ,
- Brochure & specs (28 pages)
Table of Contents
Advertisement
Quick Links
AV Receiver
TX-DS898
Instruction Manual
Thank you for purchasing the Onkyo AV Receiver.
Please read this manual thoroughly before making
connections and plugging in the unit. Following the
instructions in this manual will enable you to obtain
optimum performance and listening enjoyment from
your new AV Receiver. Please retain this manual for
future reference.
Contents
Appendix
2
8
29
61
85
Advertisement
Table of Contents
Troubleshooting

Related Manuals for Onkyo Integra TX-DS898


Summary of Contents for Onkyo Integra TX-DS898
- Page 1 TX-DS898 Facilities and connections Instruction Manual Setup and operation Thank you for purchasing the Onkyo AV Receiver. Remote controller Please read this manual thoroughly before making connections and plugging in the unit. Following the instructions in this manual will enable you to obtain optimum performance and listening enjoyment from your new AV Receiver.
-
Page 2: Before Using Important Safeguards
WARNING: WARNING AVIS TO REDUCE THE RISK OF FIRE OR ELECTRIC SHOCK, RISK OF ELECTRIC SHOCK RISQUE DE CHOC ELECTRIQUE DO NOT OPEN NE PAS OUVRIR DO NOT EXPOSE THIS APPLIANCE TO RAIN OR MOISTURE. The lightning flash with arrowhead symbol, within an equilateral triangle, is intended to alert the user to the presence of uninsulated CAUTION: “dangerous voltage”... -
Page 3: Precautions
The fuse is located inside the chassis and is not user-serviceable. If power proper grounding and, in particular, specifies that the cable ground does not come on, contact your Onkyo authorized service station. shall be connected to the grounding system of the building, as close to the point of cable entry as practical. -
Page 4: Table Of Contents
Connecting the AM antenna cable ......... 26 Performing a TP scan ............. 52 Connecting the included antennas ......... 26 Enjoying music or videos with the TX-DS898 ... 53 Connecting an FM outdoor antenna ....... 27 Basic operation ............... 53 Connecting an AM outdoor antenna ......27 Temporarily turning off the sound ........ - Page 5 Enjoying music in the remote zone ....58 3. Labeling Buttons and Menu Items ......75 Playing music using the buttons on the TX-DS898 ..58 Labeling a button ............75 Selecting an input source using the remote controller .. 58 Labeling a menu item .............
-
Page 6: Features
“DTS,” “DTS-ES Extended Surround” and “Neo:6” are trademarks of Digital Theater Systems, Inc. Supplied accessories The following accessories may be available Check that the following accessories are supplied with the TX-DS898. depending on the area which it was purchased. Conversion plug × 1 AM loop antenna × 1 FM indoor antenna ×... -
Page 7: Before Using This Unit
STANDBY indicator lights up when the unit receives a signal from controller. the remote controller. 2. Insert 4 AA batteries (included in package) as Remote control sensor indicated on the bottom of the battery compartment. TX-DS898 3. Slide the battery cover back on. STANDBY indicator 30˚ 30˚ Approx. 5 m Notes: •... -
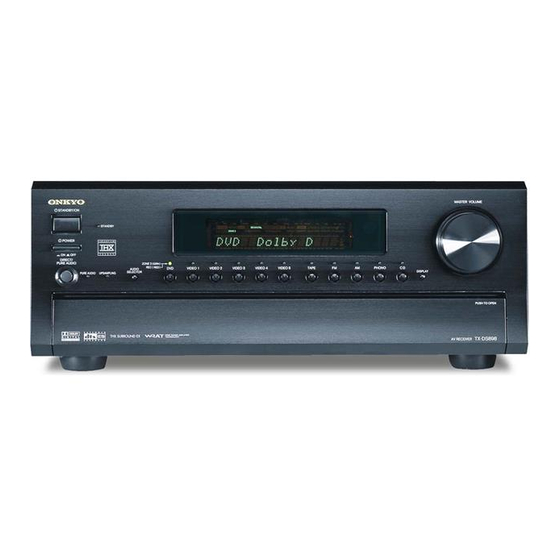
Page 8: Front Panel Facilities
Front panel facilities Here is an explanation of the controls and displays on the front panel of the TX-DS898. Front panel MASTER VOLUME STANDBY/ON STANDBY POWER ZONE VIDEO VIDEO VIDEO VIDEO VIDEO TAPE PHONO AUDIO SELECTOR DISPL AY PURE AUDIO... - Page 9 REC OUT/ZONE 2/OFF buttons [58-60] return the TX-DS898 to the standby state. These buttons allow you to use the TX-DS898 to output to a remote zone (Zone 2) or to another component for recording purposes (Rec STANDBY indicator [7, 28] Out).
- Page 10 SETUP button [30] Press to bring up the Setup menu. The OSD menu will appear on the TV monitor as well as the front display on the TX-DS898. TUNING / buttons [49] Use these buttons to change the tuner frequency.
-
Page 11: Remote Controller
Input Selector buttons Select an input source. CD: CD, DVD: DVD, Tuner: FM/AM, Phono: PHONO, Tape1: TAPE, Tape2: Not used with the TX-DS898, Video1: VIDEO 1, Video2:VIDEO 2, Video3:VIDEO 3, Video4:VIDEO 4, Video5: VIDEO 5 Audio Sel button For selecting the audio input signal. The setting changes from “Auto”... - Page 12 Sets the sleep function. dts: When the input source is a digital source, this button works as The Sleep button enables you to set the TX-DS898 to turn off the same for the Surr button. When the input source is Analog/PCM, automatically after a specified time period.
- Page 13 For activating the function of the remote zone (Zone 2). Input Selector buttons Selects an input source. CD: CD, DVD: DVD, Tuner: FM/AM, Phono: PHONO, Tape1: TAPE, Tape2: Not used with the TX-DS898, Video1: VIDEO 1, Video2: VIDEO 2, Video3: VIDEO 3, Video4: VIDEO 4, Video5: VIDEO 5...
-
Page 14: Rear Panel Facilities
DIGITAL PRE OUT COMPONENT AUDIO VIDEO S VIDEO OUTPUT VIDEO MODEL NO. ANTENNA FRONT SPEAKERS SURR SPEAKERS FRONT TX-DS898 OUTPUT MONITOR CAUTION: SPEAKER CENTER IMPEDANCE 4 OHMS MIN. OR ZONE 2 6 OHMS MIN. /SPEAKER COAX SURR INSTRUCTION... - Page 15 TX-DS898. By doing this, you can use the STANDBY/ ANTENNA ON button on the TX-DS898 to turn on and off the connected These jacks are for connecting the FM indoor antenna and AM loop devices as well.
- Page 16 TX-DS898. The other one can be used to daisy chain with another component. 12V TRIGGER/ZONE 2 terminal When the TX-DS898 is in the ZONE 2 mode, this terminal outputs at 12 V/100 mA. IR IN/OUT If the TX-DS898 is located inside a rack or cabinet that will not...
- Page 17 By connecting a DVD player, MPEG decoder, or other component that has a multi channel port, you can playback the audio with 5.1 channel or 7.1 channel output. So, be sure to prepare a cable that can properly connect the TX-DS898 to the peripheral device. L (white) Front output...
-
Page 18: Connections
Analog audio output Digital audio output (optical) L (white) With the initial settings of the TX-DS898, the CD input source is Connecting your audio components set for digital input at the OPTICAL 1 jack. If the digital connection is made at a different jack, this must be Below is an example of how you can connect your audio changed at the Setup menu: Input Setup →... -
Page 19: Connecting Your Video Components
Below is an example of how you can connect your video to the DVD S VIDEO IN terminal with an S video cable. If it does components to the TX-DS898. Refer to the diagram above for the not have an S video output terminal, connect its video output following connection examples. - Page 20 (composite) on the video cassette recorder to the on the TX-DS898 and video input terminal to the VIDEO 2 OUT VIDEO 1 IN jacks on the TX-DS898 and video input terminal to the jacks. If there is an S video input/output terminal on the device, VIDEO 1 OUT jacks.
- Page 21 VIDEO 5 IN terminal using an RCA-type video connection VIDEO 3 (or 4) IN audio jacks on the TX-DS898. Make sure that cable. You do not need to connect to both the S VIDEO 5 IN and you properly connect the left channel to the L jack and the right VIDEO 5 IN terminals.
-
Page 22: Connecting Speakers
Connecting speakers Before connecting the speakers, place them correctly by consulting Surround back speakers the instruction manuals that came with them. • Place these speakers behind the listener so that the angle For surround playback, the configuration and placement of your between each speaker and the listener is approximately 30 speakers are very important. -
Page 23: Connecting Speakers
Connect only speakers with an impedance between 4 and 16 Ω to 2. Twist wire ends very tight. the TX-DS898. If the impedance of even one speaker is between 4 and 6 Ω, be sure to set the speaker impedance setting 3. -
Page 24: Connecting The Remote Zone (Zone 2) Speakers
Powered Zone 2 setting in the Setup menu (See page 32). Main Room VIDEO AUDIO S VIDEO MONITOR ZONE 2 Right (red) TX-DS898 Left (white) Note: The ZONE 2 OUT terminals of the TX-DS898 are of a fixed output level. -
Page 25: Operating Components Not Reached By The Remote Controller Signals (Ir In/Out)
IR IN terminal is output to the IR OUT terminal. The signal input from the remote sensor on the front of the TX-DS898 will not be output to the IR OUT terminal. TX-DS898... -
Page 26: Connecting Antennas
Connecting antennas To use the tuner of TX-DS898, it is necessary to prepare the supplied Connecting the included antennas FM and AM antennas. Connecting the FM indoor antenna: • Adjustment and placement of the FM and AM antennas for The FM indoor antenna is for indoor use only. During use, extend the... -
Page 27: Connecting An Fm Outdoor Antenna
15mm 5/8" Wire A Note: Slit C If you are using the TX-DS898 worldwide model in a region where AM frequencies are delineated by 10-kHz steps, be sure to set the AM Freq Step Setup setting accordingly (see page 31). -
Page 28: Connecting The Power
(same condition after step 2 below). pressed. By changing the display, if an Onkyo MD recorder z- • Before you plug in the TX-DS898, confirm that all connections connected, the z system functions will become enabled. have been made properly. -
Page 29: Setup Menus
When making the various settings required to configure your TX-DS898 optimally, you can either use the OSD menu that appears on your television monitor or you can use the display on the front of the TX-DS898. The OSD menu is a settings menu that is displayed on your TV monitor. -
Page 30: Navigating Through The Setup Menu
DS898 as shown below. 2. Using the cursor buttons, select the menu that you want to enter. Button on remote controller Button on TX-DS898 3. Press the ENTER button to enter the selected menu. SETUP The screen for that menu appears. Setup SETUP 4. -
Page 31: Hardware Setup
9 kHz, and this needs only to be changed if you are using Before you change this setting, be sure to first lower the volume at the TX-DS898 in a 10-kHz region. the TX-DS898 to the minimum level. -
Page 32: Speaker Setup
1. Speaker Setup menu 1-1. Speaker Config sub-menu After you have installed the TX-DS898, connected all the Here you will enter which speakers are connected and the size of components, and determined the speaker layout, it is now time to each speaker. -
Page 33: Speaker Distance Sub-Menu
1 and 30 feet in 0.5-feet intervals (0.3 to 9 listening position. This is important for the timing of the acoustics to meters in 0.15-meter intervals). create the proper sound space that the TX-DS898 and today’s sound systems are able to produce. Note:... -
Page 34: Level Calibration Sub-Menu
15 and 12 decibels in 1-decibel intervals. Calibrating the speaker levels (1) When this sub-menu is entered, the TX-DS898 will emit a pink noise from the front left speaker. At this time, the Master volume automatically increases to the reference level (0dB). Remember the level of this noise and then press the cursor button. -
Page 35: Bass Peak Level (Bass Peak Level Manager*) Sub-Menu
Speaker Setup a. Bass Peak Level Limiter 1-4. Bass Peak Level (Bass Peak Level Manager*) sub-menu On: Select to set the bass peak level. When “On” is selected, the Peak Level setting appears below. Setting the bass peak level is important to keep your subwoofer from Off: Select to turn off the bass peak level limiting function. -
Page 36: Input Setup
This menu allows you to setup the various input sources available The settings made in this sub-menu are valid for the input source that with the TX-DS898. Each input source may have a great number of is currently selected with the input source buttons at the front panel... -
Page 37: Multichannel Setup Sub-Menu
In such cases, try playing the source in the “DTS” VIDEO 5 selected. • The DTS indicator on the TX-DS898 lights while a DTS source Note: is played. When playback finishes and the DTS signal When playing a device that is actually connected to the MULTI... -
Page 38: Video Setup Sub-Menu
Input Setup b. Component Video 2-3. Video Setup sub-menu If a component is connected to the one of the COMPONENT VIDEO inputs (1 or 2), then that input must be set here. Advanced Menu The default settings are given below. 2.Input Setup Input source selected Component video input... -
Page 39: Character Input Sub-Menu
When switching input sources, you may find that the output level for Yes: Select to display the name you enter when the input source different components or input sources connected to the TX-DS898 is is selected. different even though the main volume setting is the same. Under No: Select to display the default name. -
Page 40: Listening Mode Preset Sub-Menu
Dolby Digital and DTS. The 5.1- channel digital surround format enables you to individually record and play five With the TX-DS898, you can set a different listening mode for each full-range (20 Hz to 20 kHz) channels (left and right front, different signal type that comes from each input source. - Page 41 Input Setup Input source signals Listening Modes a. Analog/PCM Mono Analog sources consist of LP records, FM and AM broadcasts, This mode is for playing old movies whose sound is recorded in cassette tapes, and the such. PCM (Pulse Code Modulation) is one monaural or playing left and right channels separately in the movies form of digital audio signals and is recorded directly onto compact which contains the different language signals recorded into...
- Page 42 Input Setup DTS Neo:6 Mono Movie This mode is for 6.1 channel playback of 2 channel sources such as This mode is suitable for playing back monaural recording such as PCM or analog sources. All 6 channel outputs are wide frequency old movie soundtracks.
-
Page 43: Audio Adjust
Audio Adjust 3-2. Surround Speakers 3. Audio Adjust Setup menu This setting allows you to decide which speakers to output to when Set the various parameters for the sound signals. surround back speakers are connected and you are playing back a 5.1-channel source. - Page 44 Center, c. Surr L/R, d. Surr Back channels are mixed and the mixed signal is used for monaural Besides level and delay adjustments, the TX-DS898 provides the sound input channel. ability to change or adjust the relative speaker position to fine tune Left/Right: You will need to select either left or right when the soundfield for the listener.
- Page 45 Audio Adjust a) Listening angle a) Surr Mode (Analog/PCM) The listening angle is the angle subtended by the front left and right Changes the surround mode for 2-channel analog/PCM input speakers as seen from the listener. The setting of 20 and 40 degrees signals.
- Page 46 Short, Middle, Long Middle This parameter is only enabled for the THX listening mode. Also, this is set to “On” when the TX-DS898 is turned on. a) Front Effect b) Decoder Some live recordings contain acoustic reverberation. When you play Select the decoding mode for THX processes.
-
Page 47: Preference
For the relative volume display method, this can be set between –∞ and +18 decibels. If you do not mind having the TX-DS898 turned on with its current volume setting, set this to “Last.”... -
Page 48: Headphones Level Setup Sub-Menu
TV Format 4.Preference The default setting is “Auto,” which means that the television format is detected and automatically set by the TX-DS898. However, if you 4-2.HeadphoneLevel Setup know the correct format, you can use this setting to choose either PAL or NTSC so that no time is wasted on detection. -
Page 49: Listening To Radio Broadcasts
DIGITAL FM MODE TUNING One of the features of the TX-DS898 that is most frequently used is Listening to a stereo radio station (FM mode) its ability to play FM and AM broadcast radio stations. The TX- DS898 provides a number of listening modes perfect for listening to... -
Page 50: Presetting A Radio Station
Listening to Radio Broadcasts – FM AM CONT MUTE LIGHT CH + / – MASTER VOLUME STANDBY/ON – STANDBY POWER VIDEO 1 VIDEO 2 VIDEO 3 VIDEO 4 VIDEO 5 TAPE PHONO AUDIO SELECTOR DISPL AY PURE AUDIO UPSAMPLING PHONES VIDEO /VIDEO CAM INPUT REC OUT... -
Page 51: Listening To Rds Broadcasts
DS898 may not be exactly the same as the ones broadcast by the radio station. Also, unusual characters may appear on the display Pop music (POP M): if the TX-DS898 receives characters that cannot be displayed Popular commercial music, usually from past or present sales charts correctly. This is not a malfunction. -
Page 52: Displaying Radio Text (Rt)
If the station you are currently tuned into is broadcasting RT signals, station of the program type you selected. It they will be displayed in the front display on the TX-DS898. If the will then stop briefly at that station before station does not, this function will be ignored. -
Page 53: Enjoying Music Or Videos With The Tx-Ds898
VIDEO AUDIO PHONES Though the TX-DS898 is often used to listen to the radio, it does not Temporarily turning off the sound show you its true ability until it is used to play music or watch videos, DVDs, and the like. The TX-DS898 has the latest in state-of- To turn off the sound momentarily, such as when interrupted by a the-art features to play back today’s acoustic technologies with the... -
Page 54: Changing The Listening Mode
Enjoying music or videos with the TX-DS898 Listening mode buttons Input source buttons – CONT MUTE LIGHT MASTER VOLUME STANDBY/ON – Listening STANDBY mode POWER buttons ZONE AUDIO VIDEO 1 VIDEO 2 VIDEO 3 VIDEO 4 VIDEO 5 TAPE PHONO... -
Page 55: Switching The Display
Then tap the down scroll button twice to display the third operation menu (Dim, Sleep, CH Sel, and +/–) or tap The Sleep button enables you to set the TX-DS898 to turn off the down scroll button to display the next operation menu (Display). -
Page 56: Changing The Audio Mode
TX-DS898 Remote controller MASTER VOLUME Auto (automatic detection): With this setting, the TX-DS898 automatically detects whether the input signal is digital or analog. When a digital signal is not input, then the analog signal is played. Multich (Multichannel): Select this setting to play back the input from the component connected to the MULTI CHANNEL INPUT port. -
Page 57: Entering Names For Input Sources And Tuner Stations
Enjoying music or videos with the TX-DS898 MASTER VOLUME STANDBY/ON STANDBY POWER ZONE AUDIO VIDEO VIDEO VIDEO VIDEO VIDEO TAPE PHONO SELECTOR DISPL AY PURE AUDIO UPSAMPLING VIDEO /VIDEO CAM INPUT PHONES REC OUT ZONE STEREO SURROUND DIMMER FM MODE... -
Page 58: Enjoying Music In The Remote Zone
Playing music using the buttons on the TX-DS898 Selecting an input source using the remote controller 1. Press the Zone 2 button on the TX-DS898. When using the remote controller, select Zone 2 in the Home menu 2. Select a source. -
Page 59: Recording A Source
Recording a source Input source buttons MASTER VOLUME STANDBY/ON STANDBY POWER ZONE VIDEO 1 VIDEO 2 VIDEO 3 VIDEO 4 VIDEO 5 TAPE PHONO AUDIO SELECTOR DISPL AY PURE AUDIO UPSAMPLING VIDEO /VIDEO CAM INPUT PHONES REC OUT ZONE STEREO SURROUND DIMMER FM MODE MEMORY... -
Page 60: Recording The Video From One Source And The Audio From Another
Recording a source Recording the video from one source and the audio from another You can add the sound from one source to the video of another source to make your own video recordings. Below is an example of recording the sound from a compact disc player connected to CD IN and the video from a video camera connected to VIDEO 5 IN to video cassette tape in a video cassette recorder connected to the VIDEO 1 OUT jack. -
Page 61: Remote Controller
Fresh out of the box, the remote controller is already set up to work battery compartment. with popular components made by Onkyo. Programming the remote controller is easy: Add components to the Device menu as necessary. Then, program the commands to the remote controller for the components. -
Page 62: Quick Reference
Quick reference 8. Mode menu Customize the remote controller (see below) – CONT MUTE LIGHT – 9. Device menu Open a component’s control panels 1. Sending eye (IR transmitter)/Learning eye Send commands to devices 10. Scroll button For learning commands from other remote controllers Display previous control panel 2. -
Page 63: Introduction
Introduction Sending eye/Learning eye Direct-access buttons Serial port Contrast dial Touchscreen Left/Right buttons Backlight button Reset button 1. Intelligent Remote Controller The intelligent remote controller can be used for all devices that understand infrared remote controller signals. It’s easy-to-use touchscreen and its intuitive interface makes it a perfect remote Battery cover controller for every user. -
Page 64: Left And Right Buttons
Introduction 1. Home: to go to the Home menu Left and Right buttons 2. Macro menu: to open stored list of commands The Left and Right buttons change function depending on the device the remote controller is controlling. Labels displayed above them on the touchscreen show their current function. -
Page 65: Charging The Remote Controller
Introduction 2. Charging the Remote Controller AA batteries 1. Slide the battery cover off the back of the remote controller. 2. Insert 4 AA batteries (included in package) as indicated on the bottom of the battery compartment. 3. Slide the battery cover back on. After a few seconds, the remote controller starts up automatically and beeps twice to indicate that it is ready to use. -
Page 66: Getting Started
The brand selection screen appears. 4. If you selected CD player, DVD player or CD recorder, select Onkyo or Onkyo-x other than Onkyo-1 from the brand list. If you selected MD player, select Onkyo-5. To reset the RC codes settings back to the one for the device using connection, follow these steps. -
Page 67: Defining Brands By Selecting
Getting Started Defining brands by selecting 2. Select “Yes” to define the brand of the device to operate. A list of brands and their corresponding RC codes are pre-installed The remote controller switches to Brand mode. Follow the in the remote controller’s memory. instructions as described below. - Page 68 Getting Started To enter a space, tap the lower left corner of the keyboard. When Notes: the keyboard is zoomed in, tap the empty key. • The code sets are ranked. The first code set in the list is used After you have typed the character, the keyboard is zoomed out.
-
Page 69: Defining Brands By Searching
Getting Started Defining brands by searching 6. Tap OK when the device reacts. You can use Search mode to find the matching RC codes for your Notes: device when • Even when the device is responding to the current code set, it is •... -
Page 70: Select A Device
These buttons are preprogrammed to work with popular devices made by Onkyo. If you have devices of other The Device menu pops up. You can scroll through this menu manufacturers that do not respond to your remote controller, you can... -
Page 71: Operate A Device
Getting Started 4. Operate a Device Using the Left and Right button You operate devices using three kinds of buttons: The Left and Right buttons change function depending on the device the remote controller is operating. The current function is displayed I Touchscreen buttons on the touchscreen right above the button. - Page 72 Getting Started First setup panel Setting Function Adjusting Battery Shows the battery level. Clock Turns the clock display on or off and lets Tap the clock repeatedly. you set 12 or 24h time display. Time Sets the clock. Tap the time button and use the Left and Right button.
-
Page 73: Getting The Maximum Out Of It
2. Programming Buttons The remote controller is preprogrammed to work with all equipment You can program the remote controller commands by transmitting that recognizes NEC infrared codes. This includes all Onkyo infrared signals from your existing remote controls to the remote devices. -
Page 74: Programming Control Panel Buttons
Getting the Maximum out of it Programming control panel buttons Programming direct-access and Left/Right Buttons 1. Navigate to the control panel buttons you want to program. Direct-access and Left/Right buttons can be programmed with a global function or with functions per device. Buttons with global 2. -
Page 75: Labeling Buttons And Menu Items
Getting the Maximum out of it Note: 3. Labeling Buttons and Menu Items You can zoom out again without tapping a character by pressing the Right button (labeled Zoom). The following elements can be labeled: control panel buttons, Device menu items, macros, macro groups and Left/Right buttons. •... -
Page 76: Adding And Moving Devices
Getting the Maximum out of it 4. Adding and Moving Devices Moving menu items You can change the order of Device menu items and Macro menu Adding devices items. Changes you make in the Device menu are automatically updated in the Home menu. If you have a device that is not provided in the Device menu, you can 1. -
Page 77: Delete And Restore
Getting the Maximum out of it 5. Delete and restore Restore After you deleted a control panel button or a menu item, the button or Delete item is no longer visible in Use mode but remains in the remote controller’s memory. This allows you to restore it in Edit mode. You can delete control panel buttons and functions associated with a Actions associated with direct-access or a Left/Right buttons cannot direct-access or a Left/Right button. -
Page 78: Recording Macros And Setting Timers
Getting the Maximum out of it 6. Recording Macros and Setting Timers Editing macros A macro enables you to send a sequence of IR commands using one You can edit any macro you have recorded. single button. 1. Open the macro group that contains the macro. By setting a time, you can activate a device at the time you prefer. -
Page 79: Setting Timers
Getting the Maximum out of it Setting timers Editing timers To activate a device at the time you set. You can edit any timer you have set. 1. Tap the Macro menu button. 1. Open the timer group that contains the timer. 2. -
Page 80: Chadedit
Getting the Maximum out of it 7. ChadEdit System requirements I PC If you want to personalize your remote controller even more, beyond its standard programming features, ChadEdit is the tool for you to I Windows 95/98/Me, Windows NT 4.0/2000, Windows XP use. -
Page 81: Troubleshooting
Buttons are not sending the correct commands • If one of the following error messages occurs, please contact your dealer or the Onkyo customer service: • Check whether the button is programmed globally or per device • Can not open configuration file (see page 74). -
Page 82: Faq
Can I program a button to execute more than one How do I revert to the original configuration? command? Reverting to the original configuration restores the remote controller’s devices and commands to its state when you purchased No, you can not. However, you can create a macro to execute a it. -
Page 83: Overview Of Symbols
Overview of Symbols :Pause :Page number up :Stop :Page number down :Normal run; normal speed :Page enlargement :Normal run; normal speed :TV and text mixed :Fast run; fast speed :1st or 2nd language :Fast run; fast speed :Last view; previous program :Slow run;... -
Page 84: Specifications
Specifications Hardware High-resolution (320 x 240) liquid crystal display (LCD) with contrast control Large touchscreen Seven programmable direct-access buttons Backlighting for LCD and direct-access buttons Infrared sending and learning eyes 3-wire (RS232) serial port connector Software Dynamic, animated interface Editable macros (up to 255 commands per macro) Total number of devices and macros limited only by memory Database with RC codes to operate different brands Infrared (IR) -
Page 85: Troubleshooting Guide
• Turntable motor is not properly grounded. © Check for proper ground connection. try to operate the controls on the front panel of the TX-DS898 to make sure that it is not due to a malfunction (or worn out batteries) in •... -
Page 86: Video And Audio
Audio. DS898 turned on and then press the STANDBY/ON button. © See page 46. “CLEAR” appears in the front display and the TX-DS898 enters Parameter cannot be set for Front Effect etc. the standby state. • Parameter may not be able to be set depending on the listening mode. -
Page 87: Specifications
Specifications AMPLIFIER SECTION TUNER SECTION Continuous Average Power output (FTC) All channels: 110 watts per channel min. RMS at Tuning Range: 87.5 — 108.0 MHz (50 kHz steps) 8 ohms, 2 channels driven from 20 Usable Sensitivity Hz to 20 kHz with no more than Mono: 11.2 dBf, 1.0 µV (75 ohms IHF) 0.08% total harmonic distortion. -
Page 88: Onkyo Europe Electronics Gmbh
18 Park Way, Upper Saddle River, N.J. 07458, U.S.A. Tel: 201-785-2600 Fax: 201-785-2650 http://www.onkyousa.com ONKYO EUROPE ELECTRONICS GmbH Industriestrasse 20, 82110 Germering, GERMANY Tel: 089-849-320 Fax: 089-849-3265 E-mail: info@onkyo.de ONKYO CHINA LIMITED Units 2102-2107, Metroplaza Tower I, 223 Hing Fong Road, Kwai Chung, HOMEPAGE http://www.onkyo.co.jp/...
Need help?
Do you have a question about the Integra TX-DS898 and is the answer not in the manual?
Questions and answers