SMA WINDY BOY 3300 Installation Manual
Wind power inverter
Hide thumbs
Also See for WINDY BOY 3300:
- User manual (2 pages) ,
- User manual (24 pages) ,
- Installation manual (80 pages)

Subscribe to Our Youtube Channel
Related Manuals for SMA WINDY BOY 3300


Summary of Contents for SMA WINDY BOY 3300
- Page 1 Wind Power Inverter WINDY BOY 3300 / 3800 Installation Guide WB33_38-IEN101830 | IME-WB3800 | Version 3.0...
-
Page 3: Table Of Contents
SMA Solar Technology AG Table of Contents Table of Contents Notes on this Guide ....... 7 Validity . - Page 4 Table of Contents SMA Solar Technology AG Connecting the Small Wind Turbine System (DC) ..28 5.5.1 Conditions for the DC Connection ....... . 28 5.5.2...
- Page 5 11.1 Windy Boy 3300 ........63 11.2...
- Page 6 Table of Contents SMA Solar Technology AG WB33_38-IEN101830 Installation Guide...
-
Page 7: Notes On This Guide
You will find further information on special topics such as designing a line circuit breaker or the description of the operating parameters in the download area at www.SMA.de/en. Refer to the user manual for detailed information on operating the inverter. -
Page 8: Symbols Used
Notes on this Guide SMA Solar Technology AG 1.4 Symbols Used The following types of safety precautions and general information are used in this guide: DANGER! "DANGER" indicates a hazardous situation which, if not avoided, will result in death or serious injury. -
Page 9: Safety
Also use appropriate protective measures to ensure that the maximum permissible input voltage of the inverter is not exceeded. SMA Solar Technology AG offers you the corresponding components, such as the Windy Boy Protection Box (overvoltage protection for wind power inverters including the rectifier). -
Page 10: Safety Precautions
Problems while performing the described activities If you have problems while performing any of the activities described in this guide, contact SMA Solar Technology AG (see section 13 ”Contact” (page 70)). 2.3 Explanation of Symbols This section contains an explanation of all symbols found on the inverter and type label. -
Page 11: Symbols On The Type Label
SMA Solar Technology AG Safety 2.3.2 Symbols on the Type Label Symbol Explanation Beware of dangerous electrical voltage. The inverter operates at high voltages. All work on the inverter may be carried out by qualified personnel only. Beware of hot surface. -
Page 12: Unpacking
Unpacking SMA Solar Technology AG 3 Unpacking 3.1 Scope of Delivery Check the delivery for completeness and for any visible external damage. Contact your dealer if anything is damaged or missing. Object Quantity Description Inverter Wall mounting bracket Air grills (1x left, 1x right) -
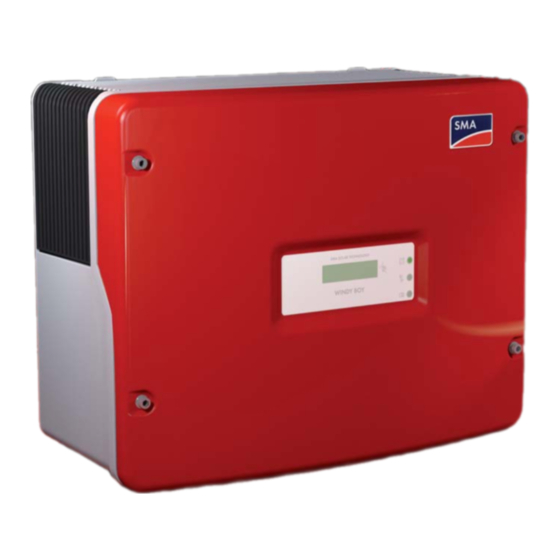
Page 13: Identifying The Inverter
SMA Solar Technology AG Unpacking 3.2 Identifying the Inverter You can identify the inverter using the type label. The type label is on the right side of the enclosure. On the type label you will find the type (Type/Model) and the serial number (Serial No.) of the inverter. -
Page 14: Mounting The Device
Mounting the Device SMA Solar Technology AG 4 Mounting the Device 4.1 Safety DANGER! Danger to life due to fire or explosion. Despite careful construction, electrical devices can cause fires. • Do not mount the inverter on flammable construction materials. • Do not mount the inverter in areas where highly flammable materials are stored. -
Page 15: Selecting The Mounting Location
SMA Solar Technology AG Mounting the Device 4.2 Selecting the Mounting Location Observe the following conditions during mounting: • The installation method and mounting location must be suitable for the inverter's weight and dimensions. • Mount on a solid surface. • The mounting location must at all times be clear and have safe access without the use of additional aids such as scaffolding or lifting platforms. - Page 16 Mounting the Device SMA Solar Technology AG • Observe the minimum clearances to walls, other inverters or objects as shown in the diagram in order to guarantee sufficient heat dissipation. Multiple inverters installed in areas with high ambient temperatures If necessary, increase the clearances between the individual inverters. In addition, make sure there is enough ventilation to ensure sufficient cooling of the inverters.
-
Page 17: Mounting The Inverter With The Wall Mounting Bracket
SMA Solar Technology AG Mounting the Device 4.3 Mounting the Inverter with the Wall Mounting Bracket CAUTION! Risk of injury due to the heavy weight of the inverter. • Note that the inverter weighs approx. 38 kg. 1. Use the wall mounting bracket as a drilling template and mark the positions of the drill holes. - Page 18 Mounting the Device SMA Solar Technology AG 3. Attach the wall mounting bracket to the wall using appropriate screws and washers. 4. Mount the inverter with the upper fastening plates on the wall mounting bracket so that both plates on the upper edge of the bracket pass through the cutouts on the inverter.
- Page 19 SMA Solar Technology AG Mounting the Device 6. Secure the inverter in position by screwing the supplied M6 contact screw, located on the underside of the enclosure. Use the contact washers provided with the toothing against the enclosure. Tighten the screw with a torque of approx.
-
Page 20: Electrical Connection
Electrical Connection SMA Solar Technology AG 5 Electrical Connection 5.1 Safety NOTICE! Electrostatic discharges can damage the inverter. Internal components of the inverter can be irreparably damaged by static discharge. • Before you touch a component inside the inverter, ground yourself by touching a grounded object. -
Page 21: Interior View
SMA Solar Technology AG Electrical Connection 5.2.2 Interior View The following figure shows the various components and connection areas of the open inverter. Object Description Socket and connection area for communication Jumper slot for fan test Tab for grounding the cable shield with line-conducted communication... -
Page 22: Connection To The Public Grid (Ac)
Electrical Connection SMA Solar Technology AG 5.3 Connection to the Public Grid (AC) Connection requirements of the utility operator Always observe the connection requirements of the utility operator. Cable Sizing The cable cross-section should be dimensioned so output losses do not exceed 1 % at nominal power. - Page 23 The maximum permissible rating is located in section 11 ”Technical Data” (page 63). Detailed information and examples for the design of a line circuit breaker can be found in the Technical Information "Line Circuit Breaker" in the SMA Solar Technology AG download area at www.SMA.de/en. DANGER! Danger to life due to fire.
-
Page 24: Connecting The Inverter To The Public Grid (Ac)
1. Check that the grid voltage is within the permissible voltage range. The exact operating range of the inverter is specified in the operating parameters. The corresponding document is located in the download area at www.SMA.de/en, in the "Technical Description" category of the respective inverter. - Page 25 SMA Solar Technology AG Electrical Connection 5. Thread the threaded sleeve (C) with the sealing ring over the AC cable. 6. Bend the AC cable. The bend radius must be at least four times the cable diameter. 7. Shorten the cable.
- Page 26 Electrical Connection SMA Solar Technology AG 14. Screw the clamping nut (E) tightly onto the threaded sleeve (C). The clamping nut serves to seal and relieve strain. ☑ The AC connection socket has been screwed together. 15. Close the socket element with the provided protective cap, if it is not immediately connected to the inverter.
-
Page 27: Setting The Display Language
SMA Solar Technology AG Electrical Connection 5.4 Setting the Display Language You can set the language of the display using the switches on the underside of the display assembly inside the inverter. Procedure 1. Open the inverter as described in section 7.2 ”Opening the Inverter” (page 44). -
Page 28: Connecting The Small Wind Turbine System (Dc)
Electrical Connection SMA Solar Technology AG 5.5 Connecting the Small Wind Turbine System (DC) 5.5.1 Conditions for the DC Connection • The connection cables of the small wind turbine system must be equipped with plug connectors. You will find the necessary PV connector for DC connection in the delivery. -
Page 29: Assembling The Pv Connector
SMA Solar Technology AG Electrical Connection 5.5.2 Assembling the PV connector The connection cables of the small wind turbine system must be equipped with the PV connectors provided for connecting the inverter. To assemble the PV connectors, proceed as detailed below. Ensure the plug connectors have the correct polarity. - Page 30 Electrical Connection SMA Solar Technology AG Result Action ☑ If the conductors are not visible in the • Loosen the clamping clip using a hollow cavity, the cable is not in the correct screwdriver. position. • Remove cable and start again from step 1.
-
Page 31: Opening The Pv Connector
SMA Solar Technology AG Electrical Connection 5.5.3 Opening the PV connector 1. Screw the threaded joint off. 2. To release the plug connector, slot a screwdriver into the side catch mechanism and lever out. 3. Carefully pull the PV connector apart. -
Page 32: Connecting The Small Wind Turbine System (Dc)
Electrical Connection SMA Solar Technology AG 5.5.4 Connecting the Small Wind Turbine System (DC) DANGER! Danger to life due to high voltages in the inverter. • Before connecting the small wind turbine system, ensure that the small wind turbine system is stopped. 1. Check the DC plug connectors for correct polarity and connect them to the inverter. To release the DC connectors see section 7.2 ”Opening the Inverter”... -
Page 33: Communication
Changing Grid-Relevant and Country Parameters To change grid-relevant parameters, you need a personal access code - the so-called SMA Grid Guard Code. The application form for the personal access code is located in the download area at www.SMA.de/en, in the "Certificate" category for each inverter. -
Page 34: Setting Off-Grid Operation
Electrical Connection SMA Solar Technology AG 5.7.2 Setting Off-Grid Operation To operate the inverter in an off-grid system with Sunny Island, you must set the inverter via the "Default" parameter to off-grid ("OFF-Grid") operation. You have several possibilities to set the inverter to off-grid operation: •... -
Page 35: Polynomial Characteristic Curve
• KI-Wind-Reg • T-Stop A description of the operating parameters is available in the download area at www.SMA.de/en in the category "Technical Description" of the respective inverter. The inverter regulates its output power according to the generator voltage. The following illustration shows the function of a typical polynomial characteristic curve of a WB 3300 / WB 3800. -
Page 36: Commissioning
Commissioning SMA Solar Technology AG 6 Commissioning Self test in accordance with DK 5940, Ed. 2.2 for initial commissioning (applies to Italy only) The Italian DK 5940 standard prescribes that an inverter can only operate on the public grid after the disconnection times for overvoltage, undervoltage, minimum frequency and maximum frequency have been checked. -
Page 37: Self-Test In Accordance With Dk 5940, Ed
SMA Solar Technology AG Commissioning 6.2 Self-Test in accordance with DK 5940, Ed. 2.2 (Applies to Italy Only) 6.2.1 Starting the Self-Test by Tapping You can start testing the disconnection times by tapping on the enclosure lid. A prerequisite here is that the country configuration of the inverter has been set to Italy (IT/DK5940) or "trimmed". Proceed as follows for checking the disconnection times: 1. - Page 38 Commissioning SMA Solar Technology AG Overvoltage Test The inverter begins with the overvoltage test. During the test sequence, the voltage limit applied is shown in the display of the inverter. The voltage limit is reduced successively until the disconnection threshold is reached and the inverter disconnects from the grid.
- Page 39 SMA Solar Technology AG Commissioning Undervoltage Test After the overvoltage test, the inverter performs the undervoltage test. During the test sequence, the current calibration value of the voltage limit applied is shown in the display of the inverter. The voltage limit is increased successively until the disconnection threshold is reached and the inverter disconnects from the grid.
-
Page 40: Maximum Frequency
Commissioning SMA Solar Technology AG Maximum Frequency In the third step, the inverter tests the maximum frequency. During the test sequence, the frequency limit applied is shown in the display of the inverter. The frequency limit is reduced successively until the disconnection threshold is reached and the inverter disconnects from the grid. - Page 41 SMA Solar Technology AG Commissioning Minimum Frequency In the last step, the inverter tests the minimum frequency. During the test sequence, the frequency limit applied is shown in the display of the inverter. The frequency limit is increased successively until the disconnection threshold is reached and the inverter disconnects from the grid.
-
Page 42: Operating Conditions Of The Inverter
Commissioning SMA Solar Technology AG 6.3 Operating Conditions of the Inverter Startup Procedure If the inverter has enough voltage and power, the startup process is displayed by means of simultaneous lighting of the three LEDs on the inverter. As soon as the DC input voltage reaches the value defined in the parameter "Vpv-Start", the inverter starts a number of self-tests and measurement processes and synchronizes with the grid. -
Page 43: Opening And Closing
SMA Solar Technology AG Opening and Closing 7 Opening and Closing 7.1 Safety DANGER! Electric shock due to high voltages in the inverter. This can result in death or serious burns. Observe the following before opening the inverter: • Ensure the AC side is not live. -
Page 44: Opening The Inverter
Opening and Closing SMA Solar Technology AG 7.2 Opening the Inverter 1. Disconnect the line circuit breaker and secure against re-connection. 2. Stop the small wind turbine system and make sure that it will not restart. 3. Using a current probe, ensure that there is no current to all DC cables. -
Page 45: Closing The Inverter
SMA Solar Technology AG Opening and Closing DANGER! Danger to life due to high voltages in the inverter. The capacitors in the inverter require 15 minutes to discharge. • Wait 15 minutes before opening the inverter. 8. Loosen the screws of the enclosure lid. - Page 46 Opening and Closing SMA Solar Technology AG 4. Connect the AC plug. 5. Switch on the line circuit breaker. 6. Check whether the inverter's display and LED display indicate normal operating mode (see section 6 ”Commissioning” (page 36)). ☑ The inverter is now closed and in operation.
-
Page 47: Maintenance And Cleaning
SMA Solar Technology AG Maintenance and Cleaning 8 Maintenance and Cleaning Check for correct inverter operation at regular intervals. Impurities such as dust or airborne blossoms can cause heat concentration that can lead to yield losses. Also check the inverter and the cables for visible external damage. -
Page 48: Checking The Fan
• Plug the provided jumper into the sequential control system board. Setting Parameters 1. Request the installer password from the SMA Serviceline (contact: see page 70). 2. Set the "Fan‑Test" parameter to "1" in the installer mode. 3. Check the air-flow of the fan. - Page 49 SMA Solar Technology AG Maintenance and Cleaning Plugging the Jumper The inverter recognizes the jumper only after the system has been restarted (i.e. all LEDs must have gone out before a restart). 1. Open the inverter as described in section 7.2 ”Opening the Inverter” (page 44).
-
Page 50: Cleaning The Air Grills
Maintenance and Cleaning SMA Solar Technology AG 8.1.3 Cleaning the Air Grills There are air grills on either side of the inverter. The inverter sucks air in from underneath through the fan and blows it out again on the upper left side via the air grills. For optimal heat dissipation of the inverter, you only have to clean the left air grill. -
Page 51: Troubleshooting
Do not try to carry out repairs other than those described here. Instead, use the SMA Solar Technology AG 24-hour replacement service (the inverter will be ready for dispatch within 24 hours and sent to a forwarding agency) and repair service. -
Page 52: Error Messages
"ACVtgRPro" for voltage quality monitoring. – If the grid voltage is continually within the acceptable range and this error is still displayed, contact the SMA Serviceline. Bfr-Srr Internal measurement comparison fault or hardware defect. • If this fault occurs often, contact the SMA Serviceline. - Page 53 AC grid is greater than specified. • Check the system design and grid conditions. K1-Close Fault during relay test. K1-Open • Contact the SMA Serviceline if this problem occurs often or several times in succession. Installation Guide WB33_38-IEN101830...
- Page 54 Message Description / Remedy MSD-Fac Internal measurement comparison fault or hardware defect. MSD-Vac • If this fault occurs often, contact the SMA Serviceline. MSD-Timeout MSD-Zac Offset The "Offset" operating condition is a normal operating condition that occurs prior to grid monitoring.
- Page 55 5.5.4 ”Connecting the Small Wind Turbine System (DC)” (page 32). If the message occurs again, disconnect the inverter again and contact the SMA Serviceline. Watchdog Internal disturbance during program operation. Watchdog Srr • If this fault occurs often, contact the SMA Serviceline. Installation Guide WB33_38-IEN101830...
- Page 56 • Check the grid impedance and the AC connection on the inverter. Use a cable with an adequate cross-sectional area (= low impedance), observing the advice on this matter in section 5.3 ”Connection to the Public Grid (AC)” (page 22). • If this fault recurs, please contact the SMA Serviceline. WB33_38-IEN101830 Installation Guide...
-
Page 57: Red Led Is Glowing Continuously
SMA Solar Technology AG Troubleshooting 9.3 Red LED is Glowing Continuously If the red LED of the status display is continuously on during operation, there is either a ground fault in the system or at least one of the varistors for the overvoltage protection is defective. - Page 58 Troubleshooting SMA Solar Technology AG 3. Unlock all DC connectors using a screwdriver: – Insert a screwdriver into one of the side slits (1). – Lever the screwdriver upward (2) and pull out the plug connector (3). 4. Remove the AC connection socket from the inverter.
-
Page 59: Checking The Functioning Of The Varistors
B and C. Result Action There is a conducting connection. There is probably a different fault in the inverter. 1. Close the inverter as described in section 7.3 ”Closing the Inverter” (page 45). 2. Contact the SMA Serviceline. Installation Guide WB33_38-IEN101830... - Page 60 If you did not receive an extractor tool together with the replacement varistors for the servicing of the terminals, contact SMA Solar Technology AG. As an alternative, the individual terminal contacts can be operated using a 3.5 mm wide screwdriver.
-
Page 61: Decommissioning
SMA Solar Technology AG Decommissioning 10 Decommissioning 10.1 Dismantling the Inverter 1. Open the enclosure lid as described in section 7.2 ”Opening the Inverter” (page 44). 2. Remove all cables from the inverter. 3. Close the inverter with the 4 screws and the corresponding lock washers. -
Page 62: Packing The Inverter
Dispose of the inverter at the end of its service life in accordance with the disposal regulations for electronic waste which apply at the installation site at that time. Alternatively, send it back to SMA Solar Technology AG with shipping paid by sender, and labeled "ZUR ENTSORGUNG" ("FOR DISPOSAL") (see section 13 ”Contact” (page 70)). -
Page 63: Technical Data
SMA Solar Technology AG Technical Data 11 Technical Data 11.1 Windy Boy 3300 DC Input Turbine control Polynomial characteristic curve Nominal power 3,500 W DC, nom Maximum power 3,820 W DC, max Recommended generator power at 2,500 full- 3,100 W DC, 2500... -
Page 64: Mechanical Data
Technical Data SMA Solar Technology AG AC Output Nominal power 3,300 W AC, nom Maximum power 3,600 W AC, max Nominal current 14.5 A AC, nom Maximum output current 18 A AC max Maximum permissible fuse protection 25 A Harmonic distortion of grid current at <... -
Page 65: Climatic Conditions
SMA Solar Technology AG Technical Data Climatic Conditions Operating temperature range − 25 °C … +60 °C Relative air humidity (permissible) 0 % … 100 % Maximum operating altitude above mean sea 2,000 m level General Data Protection rating *... -
Page 66: Windy Boy 3800
Technical Data SMA Solar Technology AG 11.2 Windy Boy 3800 DC Input Turbine control Polynomial characteristic curve Nominal power 4,040 W DC, nom Maximum power 4,040 W DC, max Recommended generator power at 2,500 full- 3,600 W DC, 2500 load hours per year... - Page 67 SMA Solar Technology AG Technical Data AC Output Nominal power 3,800 W AC, nom Maximum power 3,800 W AC, max Nominal current 16.5 A AC, nom Maximum output current 18 A AC, max Maximum permissible fuse protection 25 A Harmonic distortion of grid current at <...
- Page 68 Technical Data SMA Solar Technology AG Climatic conditions Operating temperature range − 25 °C … +60 °C Relative air humidity (permissible) 0 % … 100 % Maximum operating altitude above mean sea 2,000 m level General Data Protection rating *...
-
Page 69: Accessories
SMA Solar Technology AG Accessories 12 Accessories You will find the corresponding accessories and replacement parts for your inverter in the following overview. If required, you can order these from SMA Solar Technology AG or your dealer. Designation Brief description SMA order number... -
Page 70: Contact
Contact SMA Solar Technology AG 13 Contact If you have technical problems concerning our products, contact the SMA Serviceline. We require the following information in order to provide you with the necessary assistance: • Inverter type • Inverter serial number • Type of connected small wind turbine system •... -
Page 71: Exclusion Of Liability
The use of supplied software produced by SMA Solar Technology AG is subject to the following conditions: • SMA Solar Technology AG rejects any liability for direct or indirect damages arising from the use of software developed by SMA Solar Technology AG. This also applies to the provision or non-provision of support activities.
Need help?
Do you have a question about the WINDY BOY 3300 and is the answer not in the manual?
Questions and answers