Table of Contents
Advertisement
Advertisement
Table of Contents

Related Manuals for Baumatic BRB2713


Summary of Contents for Baumatic BRB2713
- Page 1 BRB2713/BRB2616 Built-in combi fridge/freezer...
- Page 2 USER MANUAL FOR YOUR BAUMATIC BRB2713/BRB2616 Built-in combi fridge/freezer NOTE : This User Instruction Manual contains important information, including safety & installation points, which will enable you to get the most out of your appliance. Please keep it in a safe place so that it is easily available for future reference, for you or any person not familiar with the operation of the appliance.
-
Page 3: Table Of Contents
17-18 Freezing fresh food (BRB2713) Freezing fresh food (BRB2616) Tips on freezing 19-20 Making ice cubes Freezing using the super frost setting (BRB2713) 20-21 Warning alarm (BRB2713) 21-22 Cleaning and maintenance 22-26 The defrost drain hole Defrosting the... -
Page 4: Environmental Note
Environmental note Note : Before discarding an old appliance, switch off and disconnect it from the power supply. Cut off and render any plug useless. Cut the cable off directly behind the appliance to prevent misuse. This should be undertaken by a competent person. Disable the door lock to make sure that children cannot get stuck inside the appliance. -
Page 5: Important Safety Information
Important safety information Your safety is of the utmost importance to Baumatic. Please make sure that you read this instruction booklet before attempting to install or use the appliance. If you are unsure of any of the information contained in this booklet, please contact the Baumatic Advice Line. - Page 6 Do not place electrical devices inside of the appliance, such as mixers and electric ice cream makers. Service You should not attempt to repair the appliance yourself, as this could cause injury or a more serious malfunction. If you require a service call then please contact the Baumatic Service Department.
-
Page 7: Specifications Of Your Brb2713 Fridge Freezer
Specifications of your BRB2713 fridge freezer Dimensions of appliance Height: 1773 mm Width: 540 mm Depth: 544 mm Dimensions of aperture* Height: 1776 mm – 1782 mm Width: 560 mm Depth: 550 mm o Automatic defrost (fridge section only) o Adjustable thermostat... -
Page 8: Specifications Of Your Brb2616 Fridge Freezer
Specifications of your BRB2616 fridge freezer Dimensions of appliance Height: 1773 mm Width: 540 mm Depth: 544 mm Dimensions of aperture* Height: 1776 mm – 1782 mm Width: 560 mm Depth: 550 mm o Automatic defrost (fridge section only) o Adjustable thermostat o Egg rack o Butter compartment o Bottle rack... -
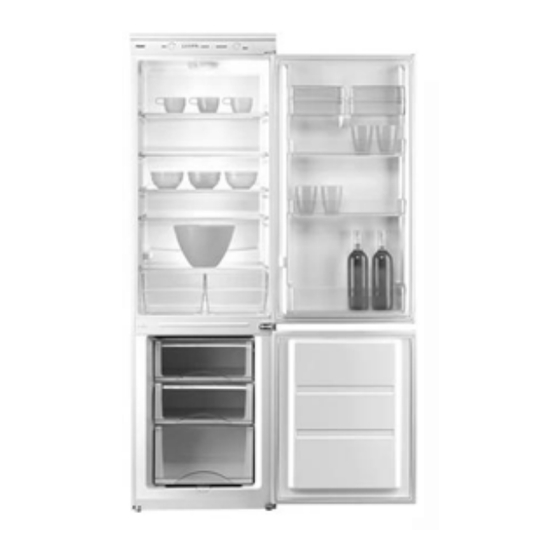
Page 9: Description Of Your Brb2713 Fridge Freezer
The rating plate will indicate the ambient temperature range that your appliance will function correctly within. Description of the BRB2713 fridge freezer 1. Control panel 6. Fridge door upper shelf 2. Fridge light cover 3. - Page 10 Control panel (BRB2713) A) Power indicator neon (green) B) Fridge thermostat dial C) Freezer temperature indicator (orange) D) Warning alarm neon (red) E) Warning alarm off button F) Super frost indicator neon (yellow) G) Super frost on/off button H) Freezer thermostat dial...
-
Page 11: Description Of Your Brb2616 Fridge Freezer
Description of the BRB2616 fridge freezer 1. Safety glass shelves (x 4) 2. Salad crisper drawers 3. Freezer drawers 4. Fridge door upper shelf cover 5. Fridge door shelf 6. Thermostat dial 7. Fridge light 8. Bottle shelf... -
Page 12: Description Of The Product Features
IMPORTANT: IT IS IMPORTANT THAT NONE OF THE SHELVES THAT SIT IN THE DOOR ARE OVERLOADED, AS THIS WILL DRASTICALLY REDUCE THEIR WORKING LIFE. 6) Freezer compartment freezer section, with a net capacity of 60 litres (BRB2713) or 100 litres (BRB2616). -
Page 13: Using Your Baumatic Combi Fridge Freezer
Using your Baumatic combi fridge freezer Before switching on o Make sure that it has been installed by a suitably qualified person, as per the information contained in Baumatic’s installation instructions. o After delivery, wait for eight hours before connecting the appliance to your mains supply. -
Page 14: Switching On The Appliance And Setting The Thermostat
Switching on the appliance and setting the thermostat (BRB2713) You switch on your appliance by connecting it to your mains supply and setting the thermostat. The thermostat dials are located on the control panel, which can be found at the top of the fridge freezer. -
Page 15: Switching On The Appliance And Setting The Thermostat
o If the thermostat dials are set to a higher setting (shown opposite), your fridge and freezer sections will work harder to maintain a lower temperature. There is no need to run your appliance on the higher settings and the dials should be set in the position shown on the previous page. -
Page 16: Arranging And Storing Food In The Fridge Section
o IMPORTANT: The ambient temperature of the room, the temperature of food and the amount of food that has been placed in the fridge freezer and how often the door is opened, will all affect the temperature being maintained by the appliance. o On the maximum setting (position <7>), your fridge freezer will work harder to maintain a lower temperature. -
Page 17: The Freezer Compartment
o Meat should be wrapped in polythene bags and then placed on the glass shelf above the salad drawers. (Meat should only be stored in this manner for one or two days at the most). o Cold dishes/cooked food should be covered and can be placed on any shelf. -
Page 18: Freezing Fresh Food (Brb2713)
12 hours. You should minimise the number of times that you open the doors of the appliance during this period of time. Freezing fresh food (BRB2713) o To freeze the maximum quantity of fresh food specified on the rating plate, you should you should follow the “Freezing using the super frost setting”... -
Page 19: Freezing Fresh Food (Brb2616)
Freezing fresh food (BRB2616) o To freeze the maximum quantity of fresh food specified on the rating plate, you should turn the thermostat dial to position <7>, a few hours prior to attempting freezing. o For smaller quantities of fresh food, you should turn the thermostat dial to position <7>, 1 hour prior to freezing. -
Page 20: Making Ice Cubes
(as shown in the drawing below) to dispense the ice. Freezing using the super frost setting (BRB2713) o If you are freezing the maximum amount of fresh food that can be frozen in a 24 hour period, then it should be switched on a few hours prior to freezing. -
Page 21: Warning Alarm (Brb2713)
It could also cause the fridge and freezer section to freeze over. Warning alarm (BRB2713) Your appliance is equipped with temperature sensors in the fridge and freezer sections. -
Page 22: Cleaning And Maintenance
Or if the thermostat dials have been turned clockwise to a colder setting. o If the warning alarm neon (red) stays lit for a prolonged period, then you should contact the Baumatic Service Department. Cleaning and maintenance WARNING: PLEASE ENSURE THAT YOUR... -
Page 23: The Defrost Drain Hole
The defrost drain hole o Defrosting occurs automatically in the refrigerator compartment during operation. The defrost water is collected by the evaporating tray and evaporates automatically. o The drain hole should be cleaned periodically with the drain hole cleaner. This will prevent water from collecting in the bottom of the refrigerator, instead of flowing down the defrost drainage channel and drain hole. - Page 24 The day before you defrost, you should turn the thermostat dial to its maximum setting (BRB2616) or switch on the super frost setting (BRB2713). This will make sure that the food contained in the freezer section is frozen properly.
-
Page 25: Replacing The Light Bulb (Brb2713)
With dry hands, reconnect your appliance to your mains supply. You should turn the thermostat dial to its maximum setting (BRB2616) or switch on the super frost setting (BRB2713) for 24 hours. o You should not attempt to freeze fresh food inside the freezer compartment until this 24 hour time period has elapsed. -
Page 26: Replacing The Light Bulb (Brb2616)
o There is an interior light in the top of the refrigerator section. o Remove the bulb housing cover, by gently pulling the clip away from its slot. Then slide the cover off, removing the lugs on the cover from the bulb housing. o Change the present light bulb with a new one. -
Page 27: Installation
Installation IMPORTANT: Before installation and usage read all the instructions and make sure that the voltage (V) and the frequency (Hz) indicated on the rating plate are exactly the same as the voltage and frequency in your home. The rating plate can be found on the front left edge of the inside of the refrigerator. -
Page 28: Positioning
Positioning o It is advisable that your appliance is only installed in a location where the ambient temperature of the room, corresponds with the climate classification that is stated on the rating plate of your appliance. Your appliance may not function correctly if the ambient temperature falls outside of the following ranges. -
Page 29: Reversing The Doors Of Your Appliance
Reversing the doors of your appliance The doors of your fridge freezer can be set to open from the left or the right. If you want the doors to be hinged on the left hand side and opening from the right hand side, you will need to follow the door reversal process. - Page 30 b) Remove the hinge cover by lifting it off from the position shown in the photo opposite. c) Unscrew the two screws and then remove the top hinge. d) Remove the refrigerator door by lifting it upwards and away from the middle hinge.
- Page 31 e) Unscrew the two screws and remove the central hinge. f) Remove the freezer door by lifting it upwards and away from the lower hinge. g) Unscrew the two screws and remove the lower hinge.
- Page 32 h) Refit the lower hinge on the opposite side. o IMPORTANT: The position of the hinge pin must be changed from the right hole to the left hole (correct position shown in the photograph opposite). i) Remove the screw cap by using the bladed screwdriver.
- Page 33 k) Refit the freezer door. o Reinstall the middle door hinge on the opposite side from its original position. o IMPORTANT: The hinge pin should be fixed in the position shown in the photograph opposite. l) Refit the refrigerator door and install the new door hinge bracket (part of the fixing kit).
- Page 34 m) Refit the upper support bracket. IMPORTANT: Check that both the upper and lower doors open and shut correctly, without fouling, after you have completed the door reversal process. After the door has been reversed, you should check the door seal of the fridge and freezer door. Neither seal should be creased or crushed;...
-
Page 35: Aperture Dimensions And Ventilation Requirements
o If either seal is not adhering to the cabinet properly, then you should either:- 1. Use a warm damp cloth and manipulate the seal until it does adhere to the cabinet properly, all the way around the door. 2. Use a hair dryer on its lowest heat setting and lightly heat the areas of the door seal that are not adhering correctly. - Page 36 2) The height of the aperture needs to be exactly 1780 o If necessary, you should utilise extra filler shelves to fill any additional space that you have in the aperture. 3) IMPORTANT: The appliance aperture MUST have a minimum of 200 cm²...
-
Page 37: Installing Your Fridge Freezer
Installing your fridge freezer a) Install the appliance towards the left hand side of the housing unit, leaving a gap of approximately 5 mm. b) Fix the appliance to the top shelf of the housing unit. o IMPORTANT: This will help to keep the appliance vertically parallel with the décor doors. - Page 38 d) Fix the appliance into position. e) Trim the side gasket to an appropriate size and then insert it into the 5 mm gap that you left in step 4. f) Remove the screw caps and the screw.
- Page 39 g) Fix the bracket that is supplied with the fixing kit into position. h) Fix the flat bracket that is supplied with the fixing kit, on the opposite side of the appliance. It should be inserted behind the central hinge. i) The flat bracket can be inserted behind the central hinge without taking the hinge apart.
- Page 40 j) Install the slider guides on the edge of the appliance doors (there are 2 slider guides per door). o Insert the sliders into the slider guides. o Mark the distance from the front edge of the furniture door, to the edge of the slider. This measurement should be approximately 20 mm.
-
Page 41: Troubleshooting
Troubleshooting IMPORTANT: If your fridge freezer appears not to be operating properly, before contacting the Baumatic Service Department, please refer to the checklist below. My fridge freezer does not appear to be working/there is no power to my appliance. o Check that the plug is fully inserted into the power socket. - Page 42 Or any installation other than the one specified by Baumatic Ltd. has been completed. Please refer to the conditions of guarantee that appear on the...
-
Page 43: Contact Details
Czech Republic Baumatic CR spol s.r.o. Amperova 495 United Kingdom 46215, Librec Baumatic Ltd., Czech Republic Baumatic Buildings, 6 Bennet Road, +420 800 185 263 Reading, Berkshire RG2 0QX www.baumatic.cz United Kingdom Slovak Republic Sales Telephone Baumatic Slovakia, s.r.o. (0118) 933 6900...
Need help?
Do you have a question about the BRB2713 and is the answer not in the manual?
Questions and answers