Baumatic BR221.3A Instruction Manual
Double door fridge/freezer
Hide thumbs
Also See for BR221.3A:
- Instruction manual (32 pages) ,
- Instruction manual (29 pages) ,
- Instruction manual (36 pages)
Table of Contents
Advertisement
Quick Links
Advertisement
Table of Contents

Related Manuals for Baumatic BR221.3A


Summary of Contents for Baumatic BR221.3A
- Page 1 BR221.3A Double door fridge/freezer Get user manuals: See SafeManuals.com...
- Page 2 USER MANUAL FOR YOUR BAUMATIC BR221.3A Double door fridge/ freezer NOTE : This User Instructio anual contains important information, including safety & installation points, which will enable you to get the most out of your appliance. Please keep it in a safe place so that it is easily available for future reference, for you or any person not familiar wi the operation of the appliance.
-
Page 3: Table Of Contents
Specifications of your double door fridge freezer Descripti of the appliance Description of the product features Using yo r Baumatic double door fridge freezer Before sw tching on During fi t use Turning o the appliance and setting the thermostat Arra... -
Page 4: Environmental Note
nvironmental note Note : Before discarding an old appliance, switch off and disconnect it from the power supply. Cut off and render any plug useless. Cut the cable off directly behind the appliance to prevent misuse. This should be undertaken by a competent person. Disable the door lock to make sure that children cannot get stuck inside the appliance. -
Page 5: Important Safety Information
Important safety information Your safety is of the utmost importance to Baumatic. Please make sure that you read this instruction booklet before attempting to install or use the appliance. If you are unsure of any of the information contained in this booklet, please contact the Baumatic Technical Department. - Page 6 Child safety o Packaging material should be kept away from children. o Children should not be allowed to touch the controls or play with the appliance. Gene ral safety Do not pull on the power supply cable to rem ove the plug from your mains supply socket.
-
Page 7: Specifications Of Your Double Door Fridge Freezer
Specifications of your double door fridge freezer ngratulations on purchasing a Baumatic double d oor fridge ez r o Automatic defrost (fridge section only) Adjustable thermostat Egg rack o Butter compartment o Bottle rack 2 General racks 3 Safety glass shelves... -
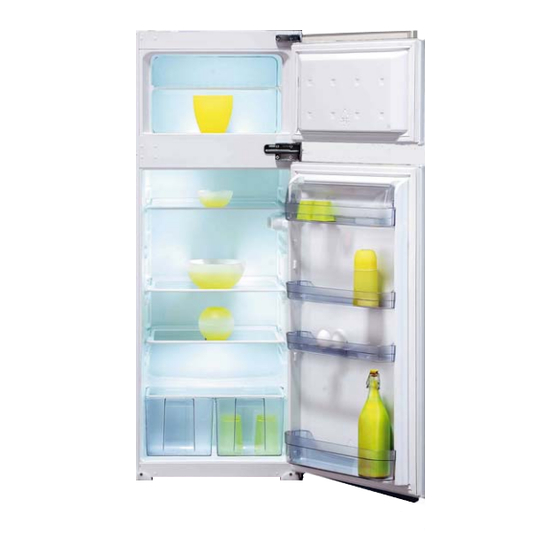
Page 8: Description Of The Appliance
Description of the appliance 1. Refrigerator shelf 10. Butter shelf . Crisper cover 11. Butter shelf cover 3. Crisper 12. Ice scraper 4. Adjustable feet 5. Thermostat control 6. Freezer compartment 7. Egg shelf 8. Bottle shelf 9. Middle shelf Get user manuals: See SafeManuals.com... -
Page 9: Description Of The Product Features
Description of the product features 1) Shelves o The shelves may be placed in any of the guide slots within the interior of the appliance. They are protected from sliding out. o To remove a shelf: Take off all of the items that are stored on the shelf that you want to remove. -
Page 10: Using Yo R Baumatic Double Door Fridge Freezer U
Using your Baumatic double door fridge freezer fo e switching on Make sure that it has been installed by a suitably qualified person, as per the information contained in Baumatic’s installation instructions. o After delivery, wait for eight hours before connecting the appliance to your mains supply. -
Page 11: Turning O The Appliance And Setting The Thermostat N
urning on the appliance and setting the thermostat You s witch on your appliance by connecting it to your mains supply and setting the thermostat. The ther mostat is located on the upper igh h t and side of the inside of the cabinet, next to the interior light. The thermostat automatically regulates the temper ature inside the refrigerator, depending on what number yo... -
Page 12: Arra Nging And Storing Food In The Fridge Section
rranging and storing food in the fridge section o Warm food or evaporating liquids should not be stored in your refrigerator, as this will increase the humidity inside of the appliance. o All foods should be wrapped or covered, this is particularly important if the food has a strong flavour. -
Page 13: T He Freezer Compartment
freezer compartment he freezer compartment is suitable for storing and freezing food. o The freezer compartment temperature must have already reached -18 degrees centigrade (or lower) before you attempt store food that is already frozen or freezing fresh fo o The freezer compartment is only able to freeze a certain quantity of food at one time. -
Page 14: Tips On Freezing
Tips on freezing o Freezer bags, polythene wraps, aluminium foil (extra thick) special cans for frozen foods are suitable packaging for storing frozen goods in. o Tape, rubber bands or plastic clips are suitable for sealing bags and wrappings. o Before sealing a suitable bag, you should compress the air out of it, as this will help the food to freeze more easily. -
Page 15: Cleaning And Maintenance
Cleaning and maintenance WARN ING: PLEASE ENSURE THAT YOUR APPLIANCE IS DISCONNECTED FROM YOUR MAINS SUPPLY BEFO ATTEMPTING TO CLEAN IT. Do not clean the appliance by p ouring water onto it or spraying water over it. o The refriger tor a nd freezer com partment should be cleaned periodically, using a solution of bicarbonate... -
Page 16: Defrostin G The Freezer Compartment
o The evaporating tray and defrost water drain hole should be cleaned pe riodically with the defrost drain plu g. This will prevent water from collecting in the bottom of the refrigerator, instead of flowing down the defrost drainage channel and drain hole. o You can also pour a small amount of water down the drain hole to clean inside of it. -
Page 17: Replacing The Light Bulb
do this will result in immediate ice build when the appliance is turned back on. With dry hands, reconnect your appliance to your mains sup ply. Set the thermostat knob to position <5> for a 24 hour period, before returning it to the normal setting of between <3> and <4>. -
Page 18: Installation
nstallation IMPORTANT: Before installation and usage, read all the instructions and make sure that th voltage (V) and the frequency (Hz) indicated o the rating plate are exactly the same as the voltage and frequency in your home. The rating plate can be found on the front left edge of the inside of the refrigerator. -
Page 19: Positioning
Positioning o It is advisa ble that your appliance is only installed in a location where the ambient temperature of the room, corresponds wi the climate classification that is stated on the rating plate of your appliance. Your appliance may not function correctly if the ambient temperature falls outside of the following ranges. -
Page 20: Aperture And Appliance Dimensions
perture and appliance dimensions ) Figure 2 shows the aperture size that you will need to be able to stall your appliance. o The appliance must be stood on a level floor. You can use the leveling feet to take into account any minor unevenness in the floor. -
Page 21: Installing Your Fridge Freezer
nstalling your fridge freezer If you need the appliance door to open from the other side, then please reverse the door before commencing the installation process. (See Reversing the door section). 4) Insert the top fixing bar (a) into the slot on the top of the appliance. - Page 22 6) Align the front feet of the appliance, with the f ro nt edge of the kitchen unit. Fix the fro nt feet into position using the Ø4 x 1 7 fixing screws (e). 7) S crew the top fixing bar to the underneath o f the kitchen unit using the Ø4 x 17 fixing...
- Page 23 Using the Ø4 x 17 fixing screws (e), secu e the central support bracket (g) to the a ppliance and t hen to the kitchen cabinet. a) Fit the door guides (d) to the appliance doors but do not secure em at this stage.
- Page 24 o Using a pencil, mark where the edge of the appliance door meets with the furniture door. From the edge of the furniture door, using a pencil you should mark a distance, which is the thickness of the cabinet wall + 10 mm.
-
Page 25: Reversing The Door Of Your Appliance
eversing the door of your appliance Caution! Aft er unscrewing any of the fixing hinges, hold the door to prevent it from falling and causing damage. Any parts that you remove from the appliance whilst reversing the door, should be retained for later us o Remove the upper hinge cover from both sides of the appliance. - Page 26 Tilt the appliance backward at a maximum angle of 35°. Unscrew the leg support screws (C) - left and right, and remove the leg support cover (D). Then place it on the opposite side. Unscrew, remove an d then replace the position of the en d switch (E) and decorative peg (F) (for models wi th forced door closing system).
-
Page 27: Troubleshooting
IMPORTANT: If your fridge freezer appears not to be operating properly, before contacting t he Baumatic Service Department, please refer to the checklist below. My fridg e freezer does not appear to be wo rking/there is no p ower to my appliance. -
Page 28: Baumatic Ltd. Conditions Of Guarantee
* In addition, your appliance is covered by a 5 year parts warranty. Baumatic Ltd will provide free of cha ge the parts required to repair the appliance, only if they are fitted by a Baumatic engineer, for any de ct that arises due to faulty materials or workmanship within a period of 5 years from t he original purchase date. -
Page 29: Cont Act D Etails
Headquarters Baumatic Ltd. Baumatic Buildings, 6 Bennet Road, Reading, Berkshire RG2 0QX, United Kingdom Sales Telephone +44 118 933 6900 Sales Fax +44 118 931 0035 Service Telephone +44 118 933 6911 Service Fax +44 118 986 9124 Spares Telephone... - Page 30 Get user manuals: See SafeManuals.com...
- Page 31 Get user manuals: See SafeManuals.com...
- Page 32 Get user manuals: See SafeManuals.com...
Need help?
Do you have a question about the BR221.3A and is the answer not in the manual?
Questions and answers