Table of Contents
Advertisement
Advertisement
Table of Contents

Related Manuals for Lorex L19WD Series


Summary of Contents for Lorex L19WD Series
-
Page 1: Instruction Manual
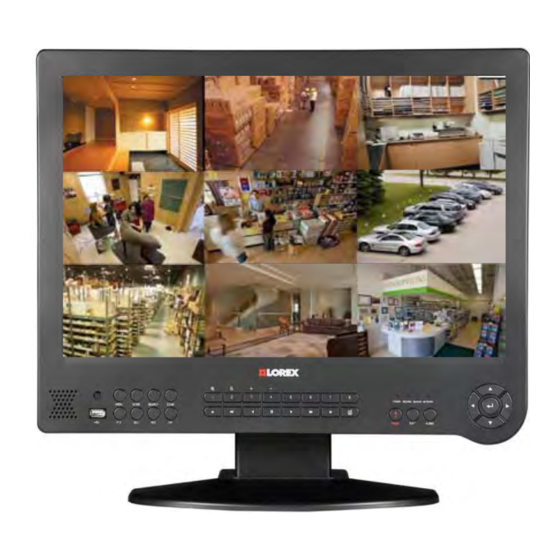
19” WIDESCREEN LCD MONITOR WITH INTEGRATED DIGITAL VIDEO RECORDER Instruction Manual English Version 4.0 French and Spanish manuals available on included software CD and online at www.lorexcctv.com MODELS: L19WD Series www.lorexcctv.com Copyright © 2009 Lorex Technology Inc. - Page 2 Thank you for purchasing this product. Lorex is committed to providing our customers with a high quality, reliable security solution. This manual refers to the following models: • L19WD800 Series (8-channel): L19WD843, L19WD804321, L19WD804321F, L19WD804321P • L19WD1600 Series (16-channel): L19WD1600501, L19WD1608501, L19WD1616501 Lorex may introduce new model numbers for the above series.
- Page 3 B E F O R E Y O U S T A R T THIS PRODUCT MAY REQUIRE PROFESSIONAL INSTALLATION LOREX IS COMMITTED TO FULFILLING YOUR SECURITY NEEDS • We have developed user friendly products and documentation. Please read the Quick Start Guide and User Manual before you install this product.
- Page 4 ESTE PRODUCTO PUEDE EXIGIR UNA CE PRODUIT POURRAIT EXIGER UNE INSTALACIÓN PROFESIONAL INSTALLATION PROFESSIONNELLE LOREX S’ENGAGE À SATISFAIRE LOREX SE COMPROMETE A SATISFACER VOS BESOINS SÉCURITAIRES SUS NECESIDADES EN SEGURIDAD • Veuillez lire le guide de démarrage rapide et le •...
- Page 5 NEED HELP? CONTACT US FIRST DO NOT RETURN THIS PRODUCT TO THE STORE Please make sure to register your product at www.lorexcctv.com to receive product updates and information EASy WAyS TO CONTACT US: Online: Pr oduc t Suppo r t i s a v a i l a b l e 24/ 7 i n c l u di ng p r o du ct in for m a ti o n, us e r m a nu a l s , qu i c k s ta r t u p gu i de s a n d F A Q ’...
-
Page 6: Necesita Ayuda
Commentaires des clients info@lorexcorp.com info@lorexcorp.com Por Teléfono: Par Téléphone: L’AméRiqUE dU NORd: 1-888-425-6739 (1-888-42-lorex) NORTE AméRiCA: 1-888-425-6739 (1-888-42-lorex) mEXiCO: 1-800-514-6739 mEXiCO: 1-800-514-6739 iNTERNACiONAL: +800-425-6739-0 iNTERNATiONAL: +800-425-6739-0 (Ejemplo: desde el Reino Unido, marque el 00 en lugar del +) (Exemple: À... -
Page 7: Important Safeguards
L19WD Series Important Safeguards In addition to the careful attention devoted to quality standards in the manufacturing process of your video product, safety is a major factor in the design of every instrument. However, safety is your responsibility too. This sheet lists important information that will help to assure your enjoyment and proper use of the video product and accessory equipment. - Page 8 12. Attachments - Do not use attachments unless recommended by the video product 19. Cleaning - Unplug the video product from the manufacturer as they may cause a hazard. wall outlet before cleaning. Do not use liquid cleaners or aerosol cleaners. Use a damp cloth for cleaning.
-
Page 9: General Precautions
L19WD Series General Precautions 1. All warnings and instructions of this manual should be followed 2. Remove the plug from the outlet before cleaning. Do not use liquid aerosol detergents. Use a water dampened cloth for cleaning 3. Do not use this unit in humid or wet places 4. - Page 10 L19WD Series Features • High resolution 19” LCD widescreen monitor with integrated digital video recorder • Built-in Pentaplex Digital Video Recorder: View, Record, Playback, Back Up & Remotely Control the system simultaneously • Real-Time Recording: 240/480 FPS @ CIF Resolution (8/16ch) •...
-
Page 11: Table Of Contents
How do I setup my DDNS account? (cont’d.)..................60 How do I enable DDNS on my system? ....................61 How do I setup the Lorex Client Software? ..................... 62 Lorex Client 7.0 & Lorex Message Master....................64 About Lorex Client 7.0..........................64 System Requirements.......................... - Page 12 Getting Started Lorex Client Main Menu ..........................67 Setting up the Lorex Client ........................68 Lorex Remote Viewer..........................69 Configuring Remote Viewer ........................70 Stream..............................70 Two-Way Audio............................ 70 Using the Main Key ..........................70 Using PTZ controls ..........................71 Search Options............................
-
Page 13: Getting Started
L19WD Series Getting Started The system comes with the following components: 1 X INTEGRATED LCD DVR 1 X POWER ADAPTER 1 X REMOTE SYSTEM WITH PRE-INSTALLED 1 X POWER ADAPTER CABLE CONTROL HDD* 1 X COMBINED 1 X ETHERNET 1 X MOUSE HARDWARE &... -
Page 14: Basic Setup
Basic Setup Basic Setup Make the following connections prior to starting the system for the first time. Connect the cameras to the monitor Front Panel Please see the Camera Installation section of this manual for details. ATTENTION: Test the cameras prior to permanently mounting them by temporarily connecting the cameras and cables to your system. - Page 15 L19WD Series Front Panel 8-channel model 1. IR Sensor: Receives the infrared signal from the remote control. 2. Function Buttons: The left set of function buttons consist of the following: • Menu: Press to enter the System Main Menu; press and hold to power off the monitor.
- Page 16 Front Panel (cont’d). Front Panel (cont’d). 3. Numeric Keypad and Playback Buttons (cont’d): • In Playback Mode, jump to start of recording • Slow motion speeds in Forward Playback: 1/4, 1/8, 1/16, and 1/32; Increase playback speed in Reverse Playback: 2X, 4X, 16X, and 32X. •...
-
Page 17: Rear Panel
L19WD Series Rear Panel Ethernet Port: Connects the System to a router or switch for networking purposes. PS/2 Mouse: Dedicated connection for a PS/2 mouse. 6-pin DIN Camera Inputs*: Channels 1~4 for 6-pin DIN cameras. Cameras with 6-pin DIN connectors draw power from the system; additional power adaptors are not required. -
Page 18: Camera Installation
Camera Installation Camera Installation Before you install a camera*, carefully plan where and how it will be positioned, and where you will route the cable that connects the camera to the DVR. Installation Warnings • Select a location for the camera that provides a clear view of the area you want to monitor, which is free from dust, and is not in line-of-sight to a strong light source or direct sunlight. -
Page 19: Connecting Din Cameras
L19WD Series Connecting DIN Cameras Connect the female end of the extension cable (not included) to the camera. Note: Ensure that the arrows on the DIN Camera Cable and the DIN Extension Ca ble point together when connecting the ca ble. -
Page 20: Connecting Bnc Cameras
Connecting BNC Cameras Connecting BNC Cameras 1. Connect the extension cable to the Camera and system: A. Connect the Barrel Power connector to a power adaptor. B. Connect the BNC connector to an available BNC Port on the DVR. C. Connect the Male Power connector to the Camera. -
Page 21: Mouse Control
L19WD Series Mouse Control This system has been designed to use a PS/2 mouse or remote control as its primary methods of navigation and configuration. Connect the mouse to the PS/2 port located on the rear panel before powering on the system. Once the system has started up it will recognize the mouse. -
Page 22: Function Bar
Mouse Control Function Bar When using the mouse, the Function Bar is the primary on-screen tool for accessing and changing system settings and configurations. To open the Function Bar: Remote Control: Mouse: • Move the cursor over the bottom of the •... -
Page 23: Function Icons
L19WD Series Function Icons Icon Description DISPLAY: Switches between Full-Screen, Quad, and split-screen views. CHANNEL: Click to view any channel in Full-Screen mode. AUDIO: Select an audio channel from 1~4; click OFF to turn off audio. FREEZE: Freezes the image. Press ESC to cancel Freeze Mode. -
Page 24: Remote Control
Remote Control Remote Control Listed below is a quick reference for the Remote Control. REC: Press REC to start Panic recording on the DVR. MENU: Press to open the System Main Menu. DVR 1-6: Select DVR ID for controlling multiple systems. –... -
Page 25: Menu Navigation Control & Tips
L19WD Series Menu Navigation Control & Tips Using the Navigation Icons Use the Navigation Icons when navigating the system menus. • HOME: Click while in any menu to return to the System Main Menu. • BACK: Click to return to the previous menu. -
Page 26: System Main Menu
System Main Menu System Main Menu 5. RECORD 1. CONFIGURATION 6. BACKUP/UPGRADE 2. DISPLAY 7. NETWORK 3. HDD MANAGEMENT 8. LANGUAGE 4. CAMERA To open the System Main Menu: Mouse: • From the Function Bar, click Remote Control: • Press the button. -
Page 27: System Control Panel Icons
L19WD Series System Control Panel Icons Icon Description CONFIGURATION: Set Date/Time, Passwords, User Authority, Audio, System Information, and restore factory defaults. DISPLAY: Change display settings, adjust resolution, and enable DID Mode (Digital Information Display). HDD MANAGEMENT: Format hard disk and enable/disable disk overwrite. -
Page 28: Starting The System
Starting the System Starting the System Once you have made all connections to the system and powered it on, you must login to the system and set the date and time. Note: By default, the primary user of the system is the ADMIN (administrator). The ADMIN has full access and authority to the system. -
Page 29: Setting The Date And Time
L19WD Series Setting the Date and Time ATTENTION: You must set the date and time prior to setting a recording schedule on the system. See Using the System: Record for more details on setting a recording schedule. To set the date and time: Mouse: 1. -
Page 30: Time Stamp
Starting the System Time Stamp When you change the date and time after recording video data. A pop-up window appears informing you that the recorded video before the time change will keep the original time stamp. The same applies for changes to Daylight Savings Time (DST). Turning the monitor off (Screen Saver) •... - Page 31 L19WD Series Turning the monitor off (cont’d.) The monitor can also be set into Screen Saver mode: 1. From the System Control Panel click and then click VGA. 2. Under Screen Saver, select ON. 3. Enter the SCREEN OFF time and SCREEN ON time.
-
Page 32: Display Modes
Display Modes Display Modes The system features the following modes: • • Live Mode Playback Mode • • Full-Screen, Quad, & Search Mode Split-Screen views Live Mode 1. Live: Displays the Live view of each camera. Available in Full-Screen, Quad, and Split- Screen views. -
Page 33: Full-Screen, Quad, & Split Views
7. Audio: Shows the active audio channels or the mute internal speaker. Full-Screen, Quad, & Split Views The L19WD Series has several display views available: Full-Screen, Quad-View, and Split- Screen Views. You can easily change the display view through the system’s three input methods: mouse, remote control, and front panel. -
Page 34: Playback
Display Modes Playback View recorded video on the system through Playback mode. To open Playback mode: Mouse: Remote Control: ► 1. While in Live Mode, move the 1. Press the button. cursor over the bottom of the 2. Enter your username and screen. -
Page 35: Search Mode
L19WD Series Search Mode Search the system for recorded video by date / time, event, and bookmarks. To open the Search Menu: Mouse: 1. Press the button. 1. From the Function Bar, click 2. Use the navigation buttons to enter your username and 2. - Page 36 Using the System BOOKMARK Setting Bookmarks Search for recorded video data according You can set bookmarks in recorded video to Bookmarks. data to mark unique moments of activity or interest for future reference. To search video data by bookmark: To set bookmarks: 1.
-
Page 37: Using The System
L19WD Series Using the System You can now begin to explore the main menu of your system. Configuration Open the Configuration menu from the System Control Panel to adjust various system settings. BUZZER PASSWORD SETUP Select the boxes to turn system beep, Set passwords for the various users of the alarms, and buzzer sounds on/off. - Page 38 Using the System The system has a total of ten users: USER AUTHORITY If many people will be operating the User Default Password system, the system administrator (ADMIN) can set restrictions on which system ADMIN [leave blank] options users can access. MANAGER1 Note: By default, ADMIN has access to all system options.
- Page 39 • STOP BIT: Bit that indicates that a piece of information has just been transmitted. 1. Select 1-6 to assign a specific • PARITY: Can help detect errors in L19WD series unit to the remote transmission. control. • FLOW CONTROL: Assign control of signal 2.
- Page 40 • DDNS Domain Name: Domain name used ◄► 2. Press to select the buttons, then with the Lorex Client Software to let you view your system remotely over the Internet press OK to check. from another PC. Click OK to save your settings, or click •...
- Page 41 L19WD Series FACTORY DEFAULT Reset factory defaults on System, Channel Data, PTZ, Network, or Record data. Note: Resetting factory defaults will not erase recorded data from your hard disk. To reset factory defaults: • Select the box, SELECT ALL, to reset all settings •...
-
Page 42: Display
Using the System Display Open the Display menu from the System Control Panel to set graphical displays during Live view and Playback, and edit settings for the Digital Information Display (DID). DISPLAY SETUP INTERVAL Select the boxes to turn graphical displays in Set the time intervals for Sequence Mode Live mode and Playback on/off. - Page 43 For example, if you want the port for the system to communicate with monitor to automatically turn off at 11 PM, Lorex Message Master. You set the port to enter 23:00. whichever port you want using the Virtual Keyboard.
- Page 44 CD) allows you to edit text and convert images instantly. For details on 4. Open the System Main Menu (login using Lorex Message Master, see page 93. required). 5. From the System Main Menu, click and then click DIGITAL INFORMATION DISPLAY.
-
Page 45: Hdd Management
L19WD Series HDD Management Format the hard disk, view HDD info, and set disk Overwrite on and off. HDD SETUP OVERWRITE Use Clear HDD to format the hard disk. Overwrite determines how data is This erases all recorded video data from maintained when the hard disk is full. -
Page 46: Camera
Using the System Camera Rename camera channels, adjust color, set motion sensitivity, and configure PTZ cameras (not included). CAMERA TITLE COLOR ADJUSTMENT Use the sliders to adjust Brightness, Contrast, Use the Virtual Keyboard to rename Saturation, and Hue for each camera. individual camera channels. - Page 47 L19WD Series CAMERA SETUP ALARM View the type of cameras (NTSC/PAL) or if Configure settings for an external Alarm there is no camera connected (icon of a Sensor. grey camera). Disable Record if you want to use a camera only for observation.
- Page 48 Using the System Press ◄► to select the DWELL TIME text MOTION field and press ▲▼ to increase or Set the Motion Sensitivity for each camera decrease the Dwell Time. channel. Use Motion Cell Setup to apply motion detection to only a certain area of the Click OK to save your settings, or click image.
- Page 49 L19WD Series EVENT POPUP Configure settings for PTZ cameras (not Set notifications for motion or alarm included). events. • CHANNEL: The channel for the connect • CHANNEL: Select the channel for the PTZ camera Event popup • PROTOCOL: The model of PTZ camera •...
- Page 50 Using the System Record Configure Record settings and set recording and holiday schedules. RECORD SETUP SCHEDULE Configure Record settings, including image Set scheduled recording cameras for quality, frames-per-second, and pre-alarm groups of cameras. Apply any of the five recording. recording modes by day and hour. Use the drop-down menus to change the following settings: Motion: System only records if moti...
- Page 51 L19WD Series Schedule (cont’d) Holiday To set a recording schedule: Set the system to record when you are away on holiday or for national holidays. Mouse: 1. Click the ◄► to select a group of Note: Holiday records according to the channels (number varies depending on Sunday recording schedule.
-
Page 52: Backup / Upgrade
Upgrade system firmware and backup data to a USB flash drive (up to 8GB). If you need to backup a larger amount of data, it is recommended to use the Backup feature in Lorex Client. For more details, see page 66. UPGRADE... -
Page 53: Network
L19WD Series Network Configure network settings and enable Lorex DDNS for remote viewing and email notification. ETHERNET CONNECTION Make sure you have connected your Configure the settings DHCP (Dynamic system to your network via the Network Host Configuration Protocol) settings. This port on the rear panel. - Page 54 80. Use the Virtual www.lorexddns.net and register for the Keyboard to change the value of the web free Lorex DDNS service. port. You will receive a confirmation email containing your Username, Password, and Domain name. See Appendix 3 for Click OK to save your settings or more details.
- Page 55 To enable Email Notification using Lorex DDNS: Note: By default, the DEFAULT SERVER box is selected in order to use the Lorex DDNS server. 1. Enter the subject heading for the notification in the TITLE field. 2. Enter the email address to send the outgoing email notification (i.e.
- Page 56 Using the System To enable Email Notification using your own email provider: 1. Deselect the DEFAULT SERVER box to use your own email provider. 2. Select the EMAIL NOTIFICATION box. 3. Enter your ISP’s SMTP server information, along with your username and password for your email account.
-
Page 57: Language
L19WD Series Language Set the menu language for the system. Set the system language to English, French, or Spanish. To change the system language: 1. Select English, French, or Spanish. 2. Click OK to save your settings or CANCEL to exit without saving. -
Page 58: Setting Up Remote Viewing
What do you need? • An integrated LCD / DVR system • A computer with the installed Lorex Client Software (refer to the Lorex Client Software Guide for installation instructions) • A router (no included) connected to a High-Speed Cable or DSL modem (for remote viewing of... -
Page 59: Networking Checklist
• High-Speed Internet • Router • Ethernet cable (provided with the system) • PC with Lorex Client Software installed 2. I have turned off the system and performed the following: • Connected the Ethernet cable to the back of the system •... - Page 60 Note: A success message should appear; if not, check your connections and DDNS account information. 7. I have configured the Lorex Client Software: If you are connecting from within your network (i.e. the System and PC are both inside your house), you only need to enter the IP Address of your system into when configuring the Client software If you are connecting from outside your network (i.e.
-
Page 61: How Do I Find My Ip And Mac Addresses
L19WD Series How do I find my IP and MAC addresses? The IP and MAC address of your system are necessary for DDNS setup. DDNS allows you to view and control your system from a remote location. To find your IP and MAC addresses: •... -
Page 62: How Do I Enable Port Forwarding
Setting Up Remote Viewing How do I enable Port Forwarding? You need to enable port forwarding on your router to allow for external communications with your system for the following port: • PORT 5000 Computers, DVRs, and other devices inside your network can only communicate directly with each other within the internal network. -
Page 63: How Do I Setup My Ddns Account
L19WD Series How do I setup my DDNS account? Lorex offers a free DDNS service for use with your system. A DDNS account allows you to set up a URL (website address) that points back to your Local Network. To setup your free Lorex DDNS account: 1. -
Page 64: How Do I Setup My Ddns Account? (Cont'd.)
Setting Up Remote Viewing How do I setup my DDNS account? (cont’d.) Your Account information will be sent to you Service Provider: dns1.lorexddns.net at the email Address you used in Step 2. User Name: tomsmith1 Domain Name: tomsmith Password: (your password) You will need this information for remote access to your System. -
Page 65: How Do I Enable Ddns On My System
1. Open the System Main Menu and click and then click DDNS. 2. Select the DDNS box in the top-left corner. From the Lorex DDNS confirmation email, enter your Domain, User ID, and User Password using the Virtual Keyboard 3. Click OK to test the status of the DDNS connection. -
Page 66: How Do I Setup The Lorex Client Software
Setting Up Remote Viewing How do I setup the Lorex Client Software? Note: The following pages are a Quick Setup for Lorex Client. Please refer to “Lorex Client & Message Master” on page 64 for complete information on using the Lorex Client. - Page 67 L19WD Series Setting up the Lorex Client You need to setup and configure the Lorex Client in order to use the Remote Viewing function of your system. Make sure you have completed the free Lorex DDNS setup before using Lorex Client.
-
Page 68: Lorex Client 7.0 & Lorex Message Master
LOREX CLIENT 7.0 & LOREX MESSAGE MASTER About Lorex Client 7.0 The Lorex Client 7.0 software package allows you to access your system from a remote location and perform the following: • View live video • Search and playback recorded data •... -
Page 69: System Requirements
L19WD Series System Requirements Lorex Client 7.0 requires the following: Minimum system requirements: Description Requirement Windows Vista (32-bit) Operating system Windows XP Professional Windows XP Home Edition Processor Pentium IV 1.5 GHz (or equivalent) Memory 512 MB RAM 50 MB installation required... -
Page 70: Installing Lorex Client 7.0
4. Once the installation finishes, click Finish to complete the installation and exit the wizard. Note: You should restart you system after installing the Lorex Client software. Save your work and close all application windows prior to restarting your system. -
Page 71: Lorex Client Main Menu
L19WD Series Lorex Client Main Menu The Lorex Client software allows you to perform multiple functions from a remote location over the Internet or local area network (LAN). Figure 2.0 Lorex Client Main Window 1. CLIENT SETUP: Configure the Client software to connect to your system. -
Page 72: Setting Up The Lorex Client
Lorex Client Main Menu Setting up the Lorex Client You must setup and configure Lorex Client in order to use the Remote Viewing function of the software. Use Client Setup to register your system’s DDNS URL or IP address (LAN connection). -
Page 73: Lorex Remote Viewer
L19WD Series Lorex Remote Viewer Use Lorex Remote Viewer to monitor and control your system from a computer in a local or remote location. Many of the changes you make in the Remote Viewer will be mirrored on your system. -
Page 74: Configuring Remote Viewer
Lorex Remote Viewer • SEARCH: Search for recorded data on the Remote System according to Date/Time, Event, and Bookmark. See Figures 16~18. • MAIN KEY: Click to open a floating window with advanced controls. See Using the Main Key. •... -
Page 75: Using Ptz Controls
L19WD Series Using the Main Key The Main Key contains advanced controls when using the Remote Viewer. 1. Channels: Click the numbers to view the camera channels in full-screen. 2. Display Modes: Change the display in the main screen to Quad or Split-Screen views 3. -
Page 76: Search Options
Lorex Remote Viewer Search Options Use the Search function in Remote Viewer to search for recorded data on the system according to Percent/Date, Event List, and Bookmark List. Note: Search is unavailable if your system is in DID mode. Figure 10.0 Search menu 1. -
Page 77: Search By Percent/Date
L19WD Series Search by Percent/Date Search recorded data on the system hard drive according to date / time or percentage of hard drive space. Figure 11.0 Percent/Date search To search by date: 1. Click SEARCH to open the Search Menu. By default, the Search main window is the Percent/Date Menu. -
Page 78: Search By Event List
Lorex Remote Viewer Search by Event List Search for recorded data on the system according to Motion and Alarm events. Figure 13.0 Event List search To search by Event List: 1. From the Search main window, click EVENT LIST. «»... -
Page 79: Search By Bookmark List
L19WD Series Search by Bookmark List Search recorded data on the System according to Bookmarks. Note: If you do not see any bookmarks in the list, there are no bookmarks saved on your system. For details on setting bookmarks, see “Setting Bookmarks” on page 32. -
Page 80: Lorex Client Backup
Lorex Client Backup Lorex Client Backup Lorex Backup lets you archive recorded video data from your system to your computer. You can then view archived data using Lorex Player. Figure 17.0 Lorex Client Backup Main Window 1. Backup Information: Enter the Remote System’s connection information including: •... -
Page 81: Using Lorex Backup
Figure 18.0 Backup menu To use Lorex Backup: 1. From the Lorex Client main window, click BACKUP. The Lorex Backup main menu opens. 2. Click CONNECT TEST to test the status of the system connection. You should see a “Success Connect Test” message. - Page 82 Figure 19.0 Enter Backup Time Information Note: Wait until the backup process has completely finished. Lorex Backup saves recorded data as an HM4 file. When you have completed backing up your data, you can view the data using the Lorex Player.
-
Page 83: Lorex Player
Once you have archived video data to your computer using Backup (or using a USB flash drive), use Lorex Player to playback this saved video data. Save, edit, and print screen captures from your archived video. You can also convert the archived video files to AVI format, for greater flexibility among media players. -
Page 84: Using Lorex Player
Figure 21.0 Lorex Player main window To view archived video data: 1. From the Lorex Client main window, click PLAYER. 2. Click HIGH SPEED PC or LOW SPEED PC depending on your system. HIGH SPEED PC displays all recorded channels at once; LOW SPEED PC displays up to four channels at once. -
Page 85: Taking A Screen Capture
L19WD Series Taking a Screen Capture Once you have opened an archived video file, you can save, edit, and print a screen capture of a segment of the video file. To take a screen capture: 1. Click OPEN and select an HM4 file. -
Page 86: Using The Edit Toolbar
Lorex Player Using the Edit toolbar Use the Edit toolbar to adjust the image prior to saving the file as an AVI. Figure 22.0 Edit toolbar Contrast: Increase contrast. Decrease contrast. Brightness: Increase brightness. Figure 22.1 Click Edit to cancel Decrease brightness. -
Page 87: Converting Archived Video Files To Avi
L19WD Series Converting Archived Video Files to AVI You can convert an archived video file as a full-screen AVI file, which allows you to view the data on different media players (e.g. Windows Media Player™, VLC™). Note: The DivX™ or Xvid codecs are required in order to view AVI files in Windows Media Player™. -
Page 88: Remote Setup
7. Password tab: Manage passwords for all user profiles on the system. Note: You must be logged in to Lorex Client as the ADMIN in order to manage passwords. 8. Connect/Disconnect: Click Connect to connect to your system; click Disconnect to disconnect to disconnect from your system. -
Page 89: Opening Remote Setup
To open Remote Setup: 1. Open Lorex Client. 2. From the Lorex Client main window, click REMOTE SETUP. The Remote Setup window opens. Your system’s IP address, Port number, and User ID (by default, admin) are in the text fields (see figure 24.1). -
Page 90: Camera Setup
Remote Setup Camera Setup You can set Record or Covert settings for each camera on your system. Figure 25.0 Camera Setup To configure Camera settings: 1. Click the Camera tab at the top of the window. 2. Click the CHANNEL drop-down menu to select a group of cameras. 3. -
Page 91: Alarm Setup
L19WD Series Alarm Setup Set and configure Alarm settings for your System. Figure 26.0 Alarm Setup To configure Alarm settings: 1. Click the Alarm tab at the top of the window. 2. Select the individual camera from the CHANNEL drop-down menu. -
Page 92: Buzzer Setup
Remote Setup Buzzer Setup Adjust settings for the Buzzer sounds of your System. Figure 27.0 Buzzer Setup To adjust Buzzer settings: 1. Click the Buzzer tab at the top of the window. 2. Select the boxes to turn the Buzzer sounds of the system ON/OFF: •... -
Page 93: Date/Time Setup
L19WD Series Date/Time Setup Set the date, time, and time zone for the System. Figure 28.0 Date/Time Setup To adjust the Date and Time: 1. Click the Date/Time tab at the top of the window. ▲▼ 2. Click to select the Year; click the drop-down menu to select the Month. -
Page 94: Event Popup Setup
Remote Setup Event Popup Setup Configure Event popup notifications for the System. Figure 29.0 Event Popup Setup To change Event Popup settings: 1. Click the Event Popup tab at the top of the window. 2. Select the individual camera from the CHANNEL drop-down menu. 3. -
Page 95: Interval Setup
L19WD Series Interval Setup Set the time intervals for Sequence Mode (SEQ), Picture-In-Picture (PIP), and Spot Monitor. Figure 30.0 Interval Setup To change Interval settings: 1. Click the Interval tab at the top of the window. ▲▼ 2. Under SWITCHING INTERVAL, click to adjust the interval time for SEQUENCE, PIP (Picture-in-Picture), and SPOT MONITOR. -
Page 96: Password Setup
Remote Setup Password Setup Set the passwords for the various users of the System. You can have ten users for the System (including Admin). Figure 31.0 Password Setup To change user passwords: 1. Click the Password tab at the top of the window. 2. -
Page 97: Lorex Message Master
L19WD Series Lorex Message Master Lorex Message Master allows you to display a slide show of digital images and text on your system. You can customize the text and images for advertising your business, or as a screen saver. Using Lorex Message Master Use the Lorex Message Master client included on the system’s software CD to control and... -
Page 98: Did Setup
3. File Transmitter – Select image files to use on the system as a slide show. To launch Lorex Message Master: 1. From the Software CD, double-click LOREXMESSAGEMASTER.exe. The Lorex Message Master icon appears on your desktop. 2. Enter the IP address of your system, user ID, password, DID port, and then click CONNECT. -
Page 99: Text Transmitter
L19WD Series Text Transmitter Figure 33.0 Text Transmitter To customize text: 1. Click the TEXT TRANSMITTER tab. 2. Click the drop-down menus to select the font and font size for the text. 3. Under Transparent, click YES or NO. •... -
Page 100: File Transmitter
File Transmitter Recommended image resolution for JPEG files: NTSC 720x480 / 1440x960 720x576 / 1440x1152 If you transfer a JPEG file that does not conform to the recommended image resolution, it may not fit in the full screen. Figure 34.0 File Transmitter To send image files to the system: 1. -
Page 101: Converter
L19WD Series Converter If the image files you wish to send to the system are larger than 1.2MB, you can convert them to a smaller size using the built-in Converter. Figure 35.0 File Transmitter Figure 35.1 Conversion window To convert images: 1. -
Page 102: Appendix A: System Specifications
Appendix A: System Specifications Appendix A: System Specifications Monitor Description Requirement 19” Widescreen LCD Resolution 1400x900 8-ch: Real time: 240/200 FPS (NTSC/PAL) Monitor Display 16-ch: Real Time: 480/400 FPS (NTSC/PAL) Image Size 1.5 KB (352x240) Video inputs 1Vp-p, CVBS, 75ohms, BNC (16-ch) / 8 BNC, 4 DIN (8-ch) 8-ch: 2 x line-in, RCA Audio inputs 16-ch: 4 x line-in, RCA... - Page 103 L19WD Series System Specifications (cont’d.) Dimensions Monitor Back Panel 8-channel 16-channel...
-
Page 104: Appendix B: Listen-In Audio
Appendix B: Listen-In Audio Appendix B: Listen-In Audio Listen-in audio allows you to listen to live audio on the System one channel at a time.* Connecting Audio Cameras DIN only: Connect up to four 6-pin DIN camera to channels 1~4. In the Audio menu, assign audio recording to one of these four DIN cameras. -
Page 105: Appendix C: Setting Up Motion Recording
L19WD Series Appendix C: Setting Up Motion Recording When you first power on the system, it automatically starts recording in continuous mode. You may wish to change this setting to better suit your security needs. One option is to have the cameras only record when they detect motion. - Page 106 Appendix C: Setting Up Motion Recording Using the Motion Cells You can further configure Motion Detection to have the system record only when movement is detected in a specific area of the camera image. Use this feature to mask certain areas, such as windows and doors.
-
Page 107: Appendix D: Using The Storage Calculator
L19WD Series Appendix D: Using the Storage Calculator Use the Storage Calculator included on the Software CD to determine the amount of recording time available on your Hard Disk, according the System Record Settings. To use the Storage Calculator: Double-click Storage Calc.exe Under Camera, select NTSC or PAL. -
Page 108: Appendix E: Replacing The Hard Drive
Appendix E: Replacing the Hard Drive Appendix E: Replacing the Hard Drive The system comes with a pre-installed, security grade, SATA hard drive. You can expand your system’s storage capacity by replacing the built-in HDD with a larger SATA hard drive (maximum 1000 GB*). -
Page 109: Appendix F: Connecting A Spot-Out Monitor
Interval menu. This is useful for a monitor in public view: you can make people aware that they are being watched. You can also use the spot-out monitor to display announcements or advertising. See the Lorex Client Software Manual for more details. To change time intervals: 1. -
Page 110: Appendix G: Connecting Motion / Alarm Device
Appendix G: Connecting Motion / Alarm Device Appendix G: Connecting Motion / Alarm Device You can enable Motion Detection and Alarm control from the System Main Menu. You can also connect additional motion sensor devices to the system (i.e. motion sensors, door/window sensors). -
Page 111: Appendix H: Connecting Ptz Cameras
L19WD Series Appendix H: Connecting PTZ Cameras You can connect PTZ cameras (not included) to the PTZ Control Block on the rear panel of the system. You can configure the PTZ cameras in the Camera Menu of the system. Additional PTZ cameras are available at www.lorexcctv.com... -
Page 112: Appendix I: Full Connectivity Diagram
Appendix I: Full Connectivity Diagram Appendix I: Full Connectivity Diagram The following diagram outlines the slate of connections available for the system: *Not included with the system. †Configuration varies by model. PC for Remote ROUTER* Access* MOUSE (PS/2) POWER DC12V ETHERNET PS/2 ALARM IN... -
Page 113: Appendix J: Managing Users
L19WD Series Appendix J: Managing Users There are three types of users available on the system: ADMIN, MANAGER, and USER. There are 10 user profiles available on the system: ADMIN, MANAGER1~3, and USER1~6. Note: For a list of default password, see page 39. -
Page 114: Frequently Asked Questions
Q. I want to backup more than 8GB of data, how can I do this if I can only connect a USB flash drive to the system? A. You need to use the Lorex Client software included on the software CD. Use the included Ethernet cable to connect your system to your network router or switch. Use the Backup function in Lorex Client to backup recorded video data from your system to your computer. - Page 115 For more details on using the Digital Information Display, see page 39. Q: How do I put images on my system to use with the DID? A: You can load images to your system using Lorex Message Master included on the software CD. Images should be no larger than 1.2 MB.
- Page 118 SEE HEAR PROTECT Enhance your security with genuine Lorex Cameras, Digital Video Recorders, Integrated Systems and Accessories. Order whatever you need at www.lorexcctv.com or call 1-888-42-LOREX (1-888-425-6739) Restaurant Warehouse Office Convenience Store CVC6998HR CVC6993R CNC1020 VQ1536HR PROTECT EVERYTHING Day Care...
Need help?
Do you have a question about the L19WD Series and is the answer not in the manual?
Questions and answers