Table of Contents
Advertisement
TALEA - ODEA
TALEA - ODEA
SERVICE
SERVICE
MANUAL
MANUAL
Revision 04 December 2012
Revision 04 December 2012
All parts of this document are the property of Saeco International Group. All rights reserved. The manufac-
turer shall not accept responsibility for possible errors or omissions in this document. Any reproduction or use by
third parties is prohibited without the prior written approval of the manufacturer or through an agreement clause.
Saeco International Group
Rev. 04 December 2012
Talea / Odea - Line
Advertisement
Table of Contents

Related Manuals for Saeco TALEA


Summary of Contents for Saeco TALEA
- Page 1 Revision 04 December 2012 Revision 04 December 2012 All parts of this document are the property of Saeco International Group. All rights reserved. The manufac- turer shall not accept responsibility for possible errors or omissions in this document. Any reproduction or use by third parties is prohibited without the prior written approval of the manufacturer or through an agreement clause.
-
Page 2: Table Of Contents
3.1.5 Talea Touch Use, cleaning, maintenance Messages - Troubleshooting Functional principles 4.1.1 Odea Go water system 4.1.2 Talea, Odea Giro water system Solenoid valve, multi-way valve Hot water / steam faucet Coffee cycle Brewing unit’s gear mechanism Temperature sensor (control) - Page 3 Milk Island Service modality 5.1.1 Test mode - Talea Giro and Odea 5.1.2 Special function mode - Talea Giro and Odea 5.2.1 Test mode - Talea Ring and Ring Plus 5.2.2 Diagnosis menu - Talea Ring and Ring Plus 5.3.1 Test mode - Talea Touch 5.3.2 Diagnosis menu - Talea Touch...
- Page 4 Water system diagrams Odea Go Odea Giro Plus, Giro Talea Wiring diagrams Odea Go Odea Giro Talea Giro Plus Talea Ring Talea Ring Plus Talea Touch Plus Saeco International Group nternational Group Talea / Odea - Line Talea / Odea - Line...
-
Page 5: Introduction
CHAPTER 1 INTRODUCTION Saeco International Group nternational Group Talea / Odea - Line Talea / Odea - Line... -
Page 6: Documents Required
TALEA / ODEA - LINE 01 INTRODUCTION Documents required The following documents are needed for repair work: • Instruction booklet for the related model • Technical documentation for specifi c model (diagrams, exploded view, sympton cure and service manual). Tools and resources... -
Page 7: Service Policy
01 INTRODUCTION TALEA / ODEA - LINE For IN WARRANTY repairs is mandatory to use the single components (not the assembly) avail- able in the exploded views of the coffee machines or of the specifi c components. If you fi nd the information “SEE THE EXPLODED VIEW E..”... -
Page 8: External Appliance Components
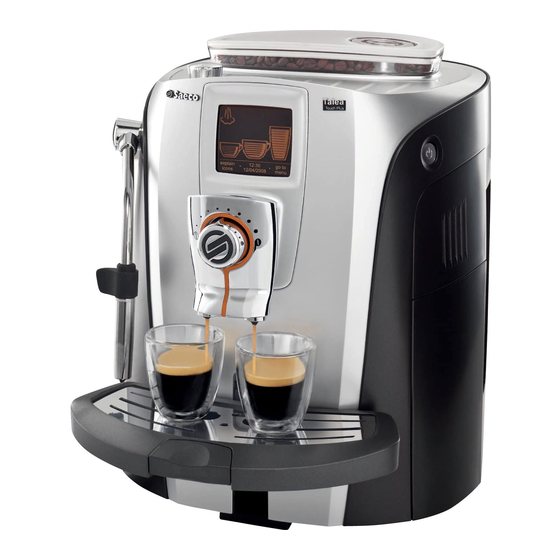
TALEA / ODEA - LINE 01 INTRODUCTION 1.6.1. External appliance components Coffee bean hopper Coffee bean hopper Cup warming surface Funnel for ground Control panel coffee Main switch Saeco Brewing System SBS Service door Dispensing head Dreg drawer Drip tray + grill... -
Page 9: Internal Appliance Components
01 INTRODUCTION TALEA / ODEA - LINE 1.6.2. Internal appliance components Boiler Pump Unblocking fi lter Flowmetre Control board Power board Coffee grinder Multi-way valve (not odea Go) Electrical cup lift’s motor *Touch/Ring Plus only Page 4 / 4 Saeco International Group... - Page 10 CHAPTER 2 TECHNICAL SPECIFICATIONS Saeco International Group Talea / Odea - Line...
-
Page 11: Technical Specifi Cations
2 safety thermostats, can resist 175°C Power output of stainless boiler: 1300 W - to dispense coffee, hot water and steam Electrical cup lift Stepping motor 24VDC *Talea Touch and Ring Plus only Tank water level and Capacitive sensor residual water tray sensor Gear motor:... -
Page 12: 2.2. Specifi Cation For The Measurement Of The Coffee Products Temperature
02 TECHNICAL SPECIFICATIONS TALEA / ODEA - LINE 2.2. Specifi cation for the measurement of the coffee products temperature. The temperature is infl uenced by the fl ow from the dispenser and stratifi cation of temperatures in the glass. In order to consider these phenomena and to introduce measures that allow comparisons in con-... -
Page 13: Operating
CHAPTER 3 OPERATING Saeco International Group Talea / Odea - Line... -
Page 14: User Interfaces
TALEA / ODEA - LINE 03 OPERATING 3.1. User interfaces 3.1.1 Odea Go “Appliance ready” LED: • Permanently on: The appliance is ready for use. • Flashing: The appliance has to fi nish the heating-up phase. “Empty dreg drawer” LED: •... -
Page 15: Odea Giro,Talea Giro
03 OPERATING TALEA / ODEA - LINE 3.1.2 Odea Giro,Talea Giro “Appliance ready” LED: • Permanently on: The appliance is ready for use. • Flashing: The appliance has to fi nish the heating-up phase. “Empty dreg drawer” LED: • Permanently on: Empty the dreg drawer. The appliance must be switched on for this procedure. -
Page 16: Talea Giro Plus
TALEA / ODEA - LINE 03 OPERATING 3.1.3 Talea Giro Plus “Appliance ready” LED: • Permanently on: The appliance is ready for use. • Flashing: The appliance has fi nished the heating-up phase. “Empty dreg drawer” LED: • Permanently on: empty the dreg drawer. The appliance must be switched on for this procedure. -
Page 17: Talea Ring, Ring Plus
TALEA / ODEA - LINE 03 OPERATING 3.1.4 Talea Ring, Ring Plus Activate steam function Go to ..aroma customer coffee time menu Coffee start key Coffee product Press once for 1 coffee Press twice for 2 coffees selection Press down longer =... - Page 18 03 OPERATING TALEA / ODEA - LINE Main menu levels Dosage quantity 1 beverage settings Temperature Prebrewing Language Water hardness Acoustic signal / alarm 2 machine settings Filter alarm Rinsing Cup warmer (Ring Plus) Time setting (Ring Plus) Aqua Prima...
-
Page 21: Talea Touch
TALEA / ODEA - LINE 03 OPERATING 3.1.5 Talea Touch To start: Press the “go to menu” key Beverage programming: Keep the relevant beverage key pressed show 8:30 go to text 24/06/06 menu Scroll if menu point has several pages... - Page 22 03 OPERATING TALEA / ODEA - LINE Example, water hardness setting 1. main menu beverage machine settings settings In the fi rst main menu, select “machine settings” time/date maintenance setting settings 1.2 machine settings alert and language & acoustic display setting Press the “water settings”...
-
Page 25: Use, Cleaning, Maintenance
TALEA / ODEA - LINE 03 OPERATING Use, cleaning and maintenance Using the machine Insert the limescale fi lter If available Fill water tank Fill bean hopper Turn on the appliance Carry out machine settings (machines Determine and set water hardness, activate limescale with display only) fi... -
Page 26: Messages - Troubleshooting
03 OPERATING TALEA / ODEA - LINE Messages - troubleshooting DISPLAY MESSAGE SHOWN INSTRUCTIONS FOR TROUBLESHOOTING Turn machine off and on to solve the problem Turn the appliance off and then back on after 30 seconds to resolve the fault. -
Page 27: Functional Principles
CHAPTER 4 FUNCTIONAL PRINCIPLES Saeco International Group Talea / Odea - Line... -
Page 28: Odea Go Water System
TALEA / ODEA - LINE 04 FUNCTIONAL PRINCIPLES 4.1.1 Odea Go water system Hot water / Boiler steam valve Water tank Overpressure Flowmetre Pump valve Valve pin Brewing unit Odea Go • Conventional water system • Flowmetre - cup capacity / ventilation display •... -
Page 29: Talea, Odea Giro Water System
04 FUNCTIONAL PRINCIPLES TALEA / ODEA - LINE 4.1.2 Talea, Odea Giro water system Boiler Hot water / steam valve Talea series only Water tank Pump Flowmetre Overpressure valve (steam pipe) Milk Island Two-way valve Electrical valve Valve pressure Coffee valve reduction approx. -
Page 30: Solenoid Valve, Multi-Way Valve
TALEA / ODEA - LINE 04 FUNCTIONAL PRINCIPLES 4.2. Solenoid valve / multi-way valve to hot water / steam valve Ventilation: After the appliance is switched on, the electric Silikonschlauch from boiler valve opens, the pump is activated and the appliance is ventilated automatically. -
Page 31: Hot Water / Steam Faucet
04 FUNCTIONAL PRINCIPLES TALEA / ODEA - LINE to hot water / steam valve Pipe system pressure reduction: The electrical valve opens to reduce the pressure in the pipe system: Silikonschlauch from boiler Each time hot water or steam is used Each time milk is frothed with the Milk Island. -
Page 32: Coffee Cycle
TALEA / ODEA - LINE 04 FUNCTIONAL PRINCIPLES 4.4. Coffee cycle Main switch ON START STOP Timing Pulse Coffee grinder (Dosage) approx. 45 Heating secs Pump activity (fl owmetre pulses) Pump according to cup capacity Gearing motor / brewing unit... -
Page 33: Brewing Unit's Gear Mechanism
04 FUNCTIONAL PRINCIPLES TALEA / ODEA - LINE 4.5. Brewing unit’s gear mechanism With 2 microswitches The gear is powered by a direct current motor that engages in the smaller double toothed gear using the worm gear drive. The brewing... -
Page 34: Sbs
TALEA / ODEA - LINE 04 FUNCTIONAL PRINCIPLES 4.7. SBS - Saeco Brewing System - principle Controlling the fl ow speed that then infl uences the contact time between the coffee and water, changes the extraction and therefore the taste intensity and strength of the coffee. -
Page 35: Coffee Grinder
04 FUNCTIONAL PRINCIPLES TALEA / ODEA - LINE 4.8. Coffee grinder Ceramic coffee grinder The coffee grinder is driven by a direct current motor (1) using a worm gear (2). The worm (2) drives a plastic gear wheel (3) where the lower ceramic disc (4) and the copper pre-draw worm (5) is driven at the bottom. -
Page 36: Autodose (Automatic Dosing Quantity Control)
Talea Touch ≥ V.01.08.14 Talea Ring Plus / Ring ≥ V.02.00.08 Talea Giro e Odea Giro / Go ≥ V01.02.01 Function: The coffee machine adjusts automatically the average coffee dose with an algorithm based on three informations that it detects via the electronic board: 1. -
Page 37: Water Level Detection Of Fresh Water Tank
04 FUNCTIONAL PRINCIPLES TALEA / ODEA - LINE 4.11. Water level detection of fresh water tank “Low water” message (water reserve) Function: The water level is monitored using a capacitive sen- sor. This is fi tted on the side of the machine at the Fresh water height level of the lower third of the water tank. -
Page 38: Water Level Detection Of Residual Water Tray
TALEA / ODEA - LINE 04 FUNCTIONAL PRINCIPLES 4.13. Water level detection of residual water tray “Empty residual water tray” message Function: The residual water level is monitored using a capacitive sensor. The sensor is positioned approx. half way up the upper edge of the residual water tray. -
Page 39: Descaling Request
ODEA GO Function: Only one electric function is used with appliances in ODEA GIRO the Odea and Talea series (without display). When changing the electronics, the dip-switch posi- tion must be checked and altered if necessary. TALEA GIRO Page 12 / 14... -
Page 40: Cup Lift
TALEA / ODEA - LINE 04 FUNCTIONAL PRINCIPLES 4.17. Cup lift Electrical cup lift (Talea Touch and Ring Plus only) Operation: The cup lift is activated via two capacitive sensors located on the front part of the cup holder. The lower sensor (1) activates the upwards function. - Page 41 04 FUNCTIONAL PRINCIPLES TALEA / ODEA - LINE Electrical connection to the machine Hydraulic connection Pushbutton for connecting on the appliance for the and disconnecting the Milk incoming steam supply Island to/from the machine Escaping steam Clamp for fi xing the...
-
Page 42: Service Modality
CHAPTER 5 SERVICE MODALITY Saeco International Group Talea / Odea - Line... -
Page 43: Test Mode - Talea Giro And Odea
TALEA / ODEA - LINE 05 SERVICE MODALITY 5.1.1. Test mode - Talea Giro and Odea • Press the hot water key (steam key on the Odea Go) and turn the appliance on at the same time. Keep the hot water key or the steam key pressed until all four LEDs fl ash in the follow-... -
Page 44: Special Function Mode - Talea Giro And Odea
05 SERVICE MODALITY TALEA / ODEA - LINE 5.1.2. Special function mode - Talea Giro and Odea • Press the start key and turn the appliance on at the same time. Keep the start key pressed until all four LEDs fl ash in the following sequence... -
Page 45: Test Mode - Talea Ring And Ring Plus
TALEA / ODEA - LINE 05 SERVICE MODALITY 5.2.1 Test mode - Talea Ring and Ring Plus Getting started with test mode: • Turn on the appliance. • Keep the menu key pressed for approx. EXIT 2 seconds until "Cancel" appears in the display. - Page 46 05 SERVICE MODALITY TALEA / ODEA - LINE Function level/display Function Display/description *Test* M3 Test: El.valve/Adjust,Test Dosage quantity/Pump Flowmeter *Test* M3 xx yy Menu Elctronic valve z: Ev Brew (the electro valve opens) z (8) 8: Sensor bean cover (closed)
- Page 47 TALEA / ODEA - LINE 05 SERVICE MODALITY Function level/display Function Display/description *Test* M7 Adjustment: LCD backlight *Test* M7 time Coffee Adjustment (ring) xx: 0 - 100 LCD backlight xx% *Test* M8 Autotest *Test* M8 time Coffee Autotest • Gearing mechanism test •...
-
Page 48: Diagnosis Menu - Talea Ring And Ring Plus
05 SERVICE MODALITY TALEA / ODEA - LINE 5.2.2. Diagnosis menu - Talea Ring and Ring Plus Getting started: • Keep the menu key pressed for approx. 2 seconds until “Cancel” appears in the display. • Then press the menu key, steam key, aroma and hot water key in that order. - Page 49 TALEA / ODEA - LINE 05 SERVICE MODALITY Menu Address Parameters Comment Errors List Error memory (20) List Clear all No/Yes Reset error memory 4.1(2,3).1 Product Qty Stored number of pulses for the (pulses)165 cup capacity 4.1(2,3).2 Aroma Aroma setting (1 mild, 2 medium, 4.1 Espresso Settings...
- Page 50 05 SERVICE MODALITY TALEA / ODEA - LINE Menu Address Parameters Comment 5.12 Grounds Limit 5 -25 Dreg stop (number of cycles until the message “Empty dreg drawer” appears 5.13 Grounds Left 1 - 13 Number of remaining uses until N°...
-
Page 51: Test Mode - Talea Touch
TALEA / ODEA - LINE 05 SERVICE MODALITY 5.3.1 Test mode - Talea Touch Getting started with test mode: • Turn on the appliance (wait for hourglass to appear). • Within 3 seconds, type in an X in the corner of the display in the sequence shown (beginning at the bottom right). - Page 52 05 SERVICE MODALITY TALEA / ODEA - LINE Function group t.2 - Heater t.2 - heating unit next boiler_temp (C°) Temperature recorded by the boiler_temp (C°) =79.8 temperature sensor. cup heater: Cup warmer heats up Continuous-fl ow heater heats up...
- Page 53 TALEA / ODEA - LINE 05 SERVICE MODALITY Function group t.5 - Cup lift t.5 - cup lift next upper_switch: ON - Microswitch cup lift (top end position) upper_switch = OFF lower_switch: ON - Microswitch cup lift (bottom end lower_switch...
- Page 54 05 SERVICE MODALITY TALEA / ODEA - LINE Function group t.8 - Let steam out t.8 - steam out next boiler_temp (C°) current boiler temperature boiler_temp (C°): start: Starts the steam out procedure no function no function start Function group t.8 - Let steam out t.8 - steam out...
-
Page 59: Error Messages
TALEA / ODEA - LINE 05 SERVICE MODALITY 5.4. Error messages Function group M3: Error log The following will be displayed at this program level: • the last 20 faults • date when the fault occurred CODE BRIEF DESCRIPTION DESCRIPTION / POSSIBLE FAULT... -
Page 60: Standard Controls
CHAPTER 6 STANDARD CONTROLS Saeco International Group nternational Group Talea / Odea - Line Talea / Odea - Line... -
Page 61: Repair Plan
TALEA / ODEA - LINE 06 STANDARD CONTROLS 6.1. Repair plan Action Visual check (transport damage) Recording the appliance data Functional check / fault analysis Opening the appliance Visual check (leaks) Checking the mechanical procedure (functional test) Repairing the faults occurred Checking the modifi... -
Page 62: Final Control
06 STANDARD CONTROLS TALEA / ODEA - LINE 6.3. Final control Test Procedure Resources Specifi cation Tolerance 2-3 cups with the Measuring Cup capacity Same amount Espresso setting beaker 2-3 cups with the Measuring Cup capacity Same amount Coffee setting... -
Page 63: Disassembly
CHAPTER 7 DISASSEMBLY Saeco International Group nternational Group Talea / Odea - Line Talea / Odea - Line... -
Page 64: Sbs / Dispenser
TALEA / ODEA - LINE 07 DISASSEMBLY 7.1. SBS / dispenser To disassemble the SBS Fig.1 • Remove the SBS rotary knob. Fig.2 Unscrew the fi xing screw. • • Remove the bracket of the SBS rotary knob. Fig.3 •... - Page 65 07 DISASSEMBLY TALEA / ODEA - LINE To disassemble the right side part Fig. 1 • Remove the screw shown. Fig. 2 • Remove the screw shown (not with Odea). Fig. 3 • Remove the screws shown. To disassemble the left side part Fig.
-
Page 66: Electronics
TALEA / ODEA - LINE 07 DISASSEMBLY 7.3. Electronics To disassemble the control board Fig. 1 • Remove the screws shown. • Fold the board to the back. Fig. 2 • Loosen the plug contact. Fig. 3 • Remove the screws shown. -
Page 67: Gear Motor Device
07 DISASSEMBLY TALEA / ODEA - LINE 7.5. Gear motor device To disassemble the gears Fig. 1 • Remove the screws shown. • Remove the gear cover. Caution: The sensor of the residual water tray is fi tted to the gear cover (unplug). -
Page 68: Boiler
TALEA / ODEA - LINE 07 DISASSEMBLY 7.6. Boiler To disassemble the boiler Fig. 1 • Remove the screws shown. Fig. 2 Remove the screw shown. Release the hook and fold the unit upwards. Fig. 3 Loosen the cable tie. -
Page 69: Solenoid Valve / Multi-Way Valve
07 DISASSEMBLY TALEA / ODEA - LINE 7.7. Solenoid valve / multi-way valve To disassemble the solenoid valve / multi-way valve Fig. 1 • Remove the screws shown. • Loosen the coffee dispenser bracket. Fig. 2 / 3 • Loosen the boiler pin. -
Page 70: Pump
TALEA / ODEA - LINE 07 DISASSEMBLY 7.8. Pump To disassemble the pump Fig. 1 • Remove the pump and the pump bracket from the guide. Fig. 2 • Remove the connecting bracket. Fig. 3 • Loosen the hose clamp and remove the hose. - Page 71 07 DISASSEMBLY TALEA / ODEA - LINE To replace the hoses Fig. 1 • To open the clamp, place the pliers at the front. Fig. 2 • Use pliers to squeeze the clamp. Page 8 / 13 Saeco International Group...
-
Page 72: Coffee Grinder
TALEA / ODEA - LINE 07 DISASSEMBLY 7.10. Coffee grinder To disassemble the coffee grinder Fig. 1 • Remove the screws shown. • Loosen the motor mounting bracket (A). • Remove the cover. Fig. 2 Loosen the cable tie. Fig. 3 •... -
Page 73: Grinders
07 DISASSEMBLY TALEA / ODEA - LINE 7.11. Grinders To disassemble/adjust the grinding disc Fig. 1 • Press against the grinding level setting axis and then turn the grinding disc support anticlockwise until it stops, then remove it. Fig. 2 Turn the grinding disc anticlockwise out of the support. -
Page 74: Adjustment Of Coffee Grinder
TALEA / ODEA - LINE 07 DISASSEMBLY 7.12. Adjustment of coffee grinder To adjust the coffee grinder Fig. 1 • Insert the centre piece with the fl ag (A) into the recess (B). Fig. 2 • Turn clockwise for a coarser setting and anticlockwise for a fi... -
Page 75: Cup Lift
07 DISASSEMBLY TALEA / ODEA - LINE 7.13. Cup lift To disassemble the electrical cup lift Fig. 1 • Remove the screws shown. • Loosen the motor mounting bracket (A). • Remove the cover. Fig. 2 Loosen the cable tie. - Page 76 TALEA / ODEA - LINE 07 DISASSEMBLY To disassemble the electrical cup lift Fig. 1 • Remove the screws shown. Fig. 2 • Remove the securing clips. • Loosen the sensor cable. • Unhinge the cup lift. Saeco International Group...
-
Page 77: Notes
CHAPTER 8 NOTES Saeco International Group Talea / Odea - Line... - Page 78 TALEA / ODEA - LINE 08 NOTES Saeco International Group Page 1 / 2...
- Page 79 08 NOTES TALEA / ODEA - LINE Page 2 / 2 Saeco International Group...
-
Page 80: Water System Diagrams
CHAPTER 9 WATER SYSTEM DIAGRAMS Saeco International Group Talea / Odea - Line... -
Page 81: Odea Go
Odea Go Flow meter Lined-faced silicone tube Steam Water tank Steam/water dispensing Silicone tube Silicone tube Boiler 1300 W Pump Lined-faced silicone tube Lined-faced silicone tube Pipe fi tting of water drain Safety valve 18 - 20 Water draining... - Page 82 licone tube Hot water/steam faucet Lined-faced silicone tube Coffee dispensing Brewing unit Dispensing valve Boiler‘s pin aced silicone tube Pipe fi tting of Boiler‘s pin...
-
Page 83: Odea Giro Plus,Giro
Odea Giro Plus,Giro Flow meter Lined-faced silicone tube Steam Lined-f Water tank Steam/water dispensing Silicone tube Boiler 1300 W Silicone tube Lined-faced silicone tube Pump Lined-faced si Water draining... - Page 84 aced silicone tube Hot water/steam faucet Lined-faced silicone tube Coffee dispensing Brewing unit Dispensing valve Lined-faced silicone tube Boiler‘s pin Dispensing coffee valve 3-5 bar Safety valve 18 - 20 Water Pipe fi tting of draining Drain valve water drain...
-
Page 85: Talea
Talea Flow meter Lined-faced silicone tube Steam Lined-faced si Water tank Steam/water Silicone tube dispensing Silicone tube Boiler 1300 W Silicone tube Lined-faced silicone tube Pump Lined-faced silicone tube Water draining... - Page 86 Pipe fi tting of Hot water/steam faucet water drain licone tube Water draining Pipe fi tting with safety valve 3bar Silicone tube Steam for milk aced silicone tube Lined-faced silicone tube Coffee dispensing Brewing unit SBS valve licone tube Boiler‘s pin Dispensing coffee valve 3-5 bar Safety valve 18 - 20 Pipe fi...
- Page 87 CHAPTER 10 WIRING DIAGRAMS Saeco Internationa Group Talea / Odea - Line...
- Page 88 Odea Go...
- Page 90 Odea Giro...
- Page 92 Talea Giro Plus...
- Page 94 Talea Ring...
- Page 96 Talea Ring plus...
- Page 98 Talea Touch Plus...