
Subscribe to Our Youtube Channel
Related Manuals for Gaggenau BS 270/271 1.1


Summary of Contents for Gaggenau BS 270/271 1.1
-
Page 1: Steam Oven
Gaggenau Instruction Manual Steam Oven BS 270/271 1.1 BS 274/275 1.1 BS 280/281 1.1... -
Page 3: Table Of Contents
Table of Contents Safety Notes Timer Calling up the Timer Menu Timer Stopwatch Cooking Time Duration Cooking Time End Operating for the First Time Extended Timer Avoiding Damage to the Appliance and the Setting the Program Cabinet Steam Oven and Cabinet Fronts Memory Recipes Avoiding Damage to the Oven Interior Calling up the Memory Menu... -
Page 4: Safety Notes
m Important safety information Read these instructions carefully. Only then Risk of fire! will you be able to operate your appliance Combustible items stored in the cooking ▯ safely and correctly. Retain the instruction compartment may catch fire. Never store manual and installation instructions for future combustible items in the cooking use or for subsequent owners. - Page 5 Risk of scalding! When you open the appliance door, hot ▯ steam can escape. Steam may not be visible, depending on its temperature. When opening, do not stand too close to the appliance. Open the appliance door carefully. Keep children away. Risk of scalding! Hot liquid may spill over the sides of ▯...
-
Page 6: Operating For The First Time
Before operating the appliance fit the included For regular care of the stainless steel interior grease filter to the inside left wall. First remove the we recommend the Gaggenau oven care left shelf: product. Please observe the notes in the –... -
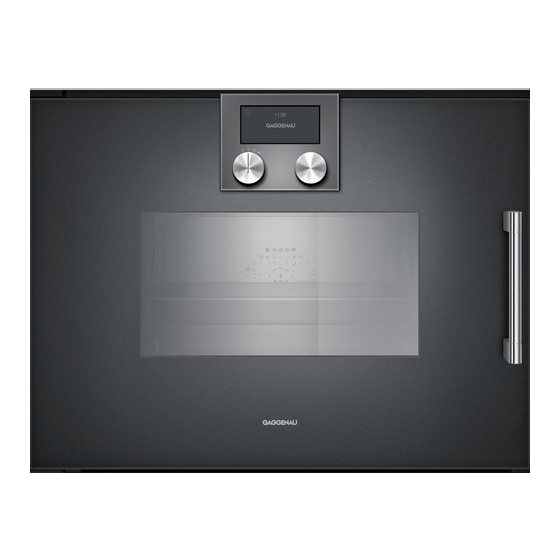
Page 7: Features Of Your New Steam Oven
Features of your New Steam Oven Steam Oven This manual applies to different models. The pictures of this manual The models BS 270/271/280/281 show the model BS 274/275. feature display and controls on the bottom front. The operation is identical for all models. -
Page 8: Display And Controls
Display and Controls Display Touch keys In the top part of the display The keys on the left and is the status bar or a call up right beside the display menu. The lower part shows are touch sensitive. The the different settings. -
Page 9: Accessories
Accessories As standard, your appliance comes with the following accessories: • Stainless steel cooking insert GN 2/3, 40 mm deep • Stainless steel cooking insert GN 2/3, perforated, 40 mm deep • Wire rack • Meat probe • Water supply hose (3 m) •... -
Page 10: Heating Modes
Heating Modes Display Heating mode Moisture 100 % Steaming at 100 °C - 120 °C: fish, vegetables, side temperature 30 - 230 °C dishes. The food is completely surrounded by steam. Steam baking at 120 - 230 °C: puff pastry, bread, bread rolls. -
Page 11: First Settings After Installation
First Settings after Installation When your new steam oven has been connected, the first settings menu appears on the display. You can set the • time format, • language, • clock, • date, • temperature unit, • water hardness. Note The first settings menu appears only after the appliance has been connected or if the appliance is without electricity for several days. -
Page 12: Setting The Date
Setting the Date Using the menu key select the date function Using the keys enter day, month, year. Use the arrow key bottom right to change from 0709 day/month/year. Temperature Unit °C or °F Using the menu key select the temperature unit function . -
Page 13: Calibration
Calibration The boiling point depends on the air pressure. The higher the altitude, the lower the air pressure, and also the boiling point. During the first steaming after installation, the appliance calibrates the boiling point. During calibration, the appliance is adjusted to the pressure of the altitude where the appliance is installed. -
Page 14: Activating The Steam Oven
Refer to the chapter basic settings if you want to change the standby screen. • To protect the display, GAGGENAU will not be shown on the screen between 23.00 and 6.00 o’clock if the oven is on standby. •... -
Page 15: Setting The Steam Oven
Setting the Steam Oven The main operations of your steam oven are easily set using the knobs. Using the right knob you can set the temperature. To switch on the light in the oven, turn the temperature knob one position to the right. Temperature range: Steaming, hot air, grilling, grilling with hot air, grilling with humidity... -
Page 16: Grilling
Grilling Operation Noises The grilling temperature is controlled by switching The appliance rinses when you switch it on. the grill heater on and off at regular intervals. This For technical reasons the fan may be louder means that the red, glowing heat is not constantly depending on the temperature and heating mode. -
Page 17: Misting
Misting Misting brings additional steam to the oven interior. You can add moisture to food while cooking (e.g. bread, bread rolls). 13.30 Misting is only possible with the “Hot air” function (0% moisture) or with 30% moisture. Touch the key as long as you want to add steam, up to 8 seconds. -
Page 18: Meat Probe
Core Temperature Probe The core temperature probe enables you to cook your meat exactly as you want it. Using the core temperature probe, during the cooking process you can measure the core temperature of the interior of the food you are preparing exactly between 1 °C and 99 °C. -
Page 19: Cleaning
Note Recommended Temperature Values Pull the meat probe from the socket if you want to Beef end the programming. Roast beef / fillet of beef / entrecôte blood rare 45-47 °C If you program meat probe and timer simultaneously, rare 50-52 °C the program that reaches the entered value first will medium-rare... -
Page 20: Cooking Table
Cooking Table Important Notes • If you use only one level, place the cooking • insert on the second level from the bottom. The cooking times given are only a • recommendation. The effective cooking time You can use simultaneously up to three levels depends on the quality of the food, its (level 2, 3 and 4 from the bottom) for steaming, temperature, the amount and the size of the... - Page 21 Dish Cooking Temperature Moisture Cooking time insert in °C in % in minutes Vegetable tureen perforated/wire rack 100 40-50 Carrots, sliced perforated 10-15 Potatoes, peeled and quartered perforated 20-35 Kohlrabi, sliced perforated 15-25 Leeks, sliced perforated 5-10 Stuffed Peppers* unperforated 180-200 80-100 15-20...
- Page 22 Dish Cooking Temperature Moisture Cooking time insert in °C in % in minutes Lobster, boiled, separated, perforated 70-80 10-12 regenerate Carp, whole, in stock 1.5 kg perforated 90-100 40-50 Salmon fillet, 300 g each perforated 90-100 12-15 Salmon, whole, 2.5 kg perforated 70-80 Mussels, 1.5 kg**...
- Page 23 Dish Cooking Temperature Moisture Cooking time insert in °C in % in minutes Rolled sole, stuffed, 150 g each perforated 12-15 Turbot, 300 g each perforated 80-90 12-16 Bass, 150 g each perforated 80-90 15-20 Pike-perch, 250 g each unperforated 80-90 12-15 Meat...
- Page 24 Dish Cooking Temperature Moisture Cooking time insert in °C in % in minutes Beef roast, 1.5 kg, well-done wire rack, unperforated 1) 210-230 15-20 2) 140-160 30-60** 60-90 Roast beef, medium rare, 1 kg unperforated 160-180 0-30 40-60 Pork roast, 1.5 kg (collar or shoulder), wire rack, 1) 210-230 15-20 well-done...
-
Page 25: Side Dishes
Poultry • The cooking times given are only a recommendation and depend on the temperature of the food before roasting. For precise control use the meat probe. Do not insert the tip of the meat probe in the middle (hollow) but between the belly and the thigh. Refer to the chapter “Meat Probe” for further tips and the temperature table. - Page 26 Dish Cooking Temperature Moisture Cooking time insert in °C in % in minutes Lentils (250 g + 500 ml water) unperforated 25-35 Fresh pasta, cooled perforated Fresh pasta, with filling, cooled perforated 5-10 Pre-soaked white beans unperforated 55-65 (250 g + 1 l water) Dessert Dish Cooking...
-
Page 27: Cakes And Pastries
Dish Cooking Temperature Moisture Cooking time insert in °C in % in minutes Semolina dumplings unperforated 90-95 8-10 Lasagne unperforated 170-190 0-60 40-60 Soufflé soufflé dishes / wire rack 175-200 12-20 Cakes and Pastries • In the steam oven you can only bake on one single level. Place the unperforated cooking insert on the second level from below. - Page 28 Dish Cooking Temperature Moisture Cooking time insert in °C in % in minutes Brioche (500 g flour) unperforated 160-170 60-80 25-35 Muffins wire rack, muffin tin 170-180 0-30 20-30 Macaroons unperforated 150-160 15-20 Biscuits unperforated 150-175 10-20 Quiche / fruit tart flan tin 190-210 45-60...
- Page 29 Grilling • Insert the dish on levels 1 to 3 from below when grilling. • Use the different levels for the desired grilling effect. On level 1 from below the grilling effect will be lighter, on level 3 it will be stronger. •...
- Page 30 Dough Proofing • Raising yeast dough and other dough mixtures without drying out. Do not cover the bowl. Select the “Dough Proofing” heating mode. • The raising time is a rough value. Leave the dough until it has doubled in size. Dish Cooking insert Temperature...
-
Page 31: Extracting Juice
Preserving • Cook the fruit or vegetables immediately after buying or picking. A prolonged storage will reduce the vitamins and might lead to fermenting. • Only use good quality fruit and vegetables. • Check and clean the preserving jars, rubber seals and clamps. •... -
Page 32: Preparing Yogurt
Preparing Yogurt • Heat pasteurised milk on the hob to 90 °C to avoid damaging the yogurt bacteria. You do not need to heat up long-life milk. (Note: the time needed for maturing will be lengthened if you use cold milk to produce the yogurt). -
Page 33: Timer
Timer Using the timer menu you can set the following: timer stopwatch cooking time duration (not during stand-by) cooking time end (not during stand-by) Calling up the Timer Menu Touch the key beside the symbol to call up the timer menu. If the appliance is on standby, touch any key. -
Page 34: Stopwatch
Stopwatch The stopwatch will count the elapsed time up to 90 minutes. The pause function pauses the stopwatch. The stopwatch runs independently of all other settings of the appliance. Starting the Stopwatch Call up the timer menu. Using select the stopwatch function Start using the key. -
Page 35: Cooking Time Duration
Cooking Time Duration If you set a cooking time duration for your meal, the appliance switches off automatically after the selected time. This enables you to leave the kitchen while the meal is being prepared. You can select a cooking time between 1 minute and 23 hours 59 minutes. -
Page 36: Cooking Time End
Cooking Time End You can program a cooking time end. Example: it is 13:30. The meal will take 40 minutes to cook and must be ready at 15:30. Set the cooking time duration and set the cooking time end to 15:30. The electronics will calculate the start time. -
Page 37: Extended Timer
Extended Timer This function keeps the steam oven at a temperature of 85 °C in the hot air mode. You can keep food warm 24 to 74 hours, without switching the oven on or off. Please note that food which can easily go off should not stay in the oven too long. -
Page 38: Memory Recipes
Memory Recipes Using the memory recipes, you can store the settings for a meal and call them up at any time. It is possible to store six memory recipes. You may set and store a total of five different steps for a meal. -
Page 39: Starting A Memory Recipe
Starting a Memory Recipe Turn the temperature knob one position to the left. Turn the function knob one position to the left to “memory recipes”. 00:10 00:50 00:30 00:20 00:40 Use the menu keys to select the desired 100% 0% §30% recipe slot. -
Page 40: Child Lock
Child Lock The steam oven has a child lock. It prevents the oven being turned on unintentionally. Supposition: You have to make the child lock available in the basic settings. See chapter basic settings. Activating the Child Lock Supposition: The temperature knob is in the OFF position. Touch any key. -
Page 41: Safety Deactivation
Safety Deactivation For your protection the appliance has a safety deactivation. The safety deactivation switches off the heat if the oven is left on for more than 12 hours 13:30 without the controls being touched. Exception: The extended timer has been programmed. Three dashes appear on the display. -
Page 42: Changing The Basic Settings
Changing the Basic Settings Your appliance has several basic settings. You can customize these settings: Turn the temperature knob one position to the right to the light position. • Call up the basic settings menu with the key. • Use the top keys to move between the settings. -
Page 43: Basic Settings
• In 8 levels The display contrast depends on the viewing angle. Standby screen • Gaggenau with clock / clock and date / clock The selected screen appears briefly. Extended timer • Extended timer key not available / available Reset all parameters to the factory setting •... - Page 44 Exhibition mode The setting “exhibition mode not active” must be selected and must not be changed. The appliance does not heat up during exhibition mode You can only change this setting 3 minutes after the appliance has been connected to the electricity. Temperature unit •...
- Page 45 Water filter • Filter available / filter not available Only select “filter available” if the Brita WF 040-020 descaling sytem has been installed. Reset the descaling / filter capacity symbol • No / yes Immediately confirm a reset with the key.
-
Page 46: Care And Manual Cleaning
Please observe the included instructions for use of the product. For regular care of the stainless steel oven interior we recommend the Gaggenau oven care product which is available through our after sales service or your specialist dealer (order number 667 027). -
Page 47: Glass Front
Racks Glass Front You can take the racks out for easier cleaning. Clean the glass front with a soft cloth and glass Undo the knurled nuts and pull out the racks to the cleaner. Do not wipe the glass front with a soaking front. -
Page 48: Cleaning Function
Cleaning Function Stubborn soiling can be loosened using the cleaning function and may then be removed more easily. The cleaning function takes approx. 34 minutes. Leave the oven to cool down completely before cleaning. Take all accessories out of the oven interior. -
Page 49: Drying Function
Drying Function Use the drying function after cleaning to dry the oven interior. You can also dry the oven interior after steaming using the drying function. How to Proceed Turn the function knob two positions to the left. Turn the temperature knob to the left to the special functions. -
Page 50: Changing The Filter Cartridge
Changing the Filter Cartridge If you have installed the Brita descaling system WF 040-020 between the water supply and the appliance, change the filter cartridge regularly. 13.30 Set the option “filter available” in the basic settings. The appliance calculates the capacity of the filter cartridge depending on the entered water hardness and the use. -
Page 51: Descaling
Descaling To keep your appliance in good working order, you have to descale the side plate regularly, if no Brita descaling sytem WF 040-020 has been installed in the water supply. Descale the oven when the descaling symbol appears on the display. 13.30 Leave the oven to cool down completely before descaling! -
Page 52: Trouble Shooting
For technical reasons the lamp cover cannot be removed. Lamp must only be replaced by Gaggenau after-sales service. Important! Do not remove the lamp cover. Non compliance with these recommendations results in the warranty coverage becoming invalid. -
Page 53: Power Cut
Power Cut The appliance bridges a power cut of up to 5 minutes. The operation continues. 13:30 After a longer power cut the appliance will switch off the operation. The symbol appears on the display and three dashes instead of the temperature. -
Page 54: Troubleshooting
Troubleshooting Problem Possible cause Solution There is no steam visible in Water steam above 100°C is invisible. This is normal the oven. A lot of steam escapes from the The appliance is calibrating or heating up This is normal ventilation slots on the top. or the operating mode has been changed. - Page 56 Gaggenau Hausgeräte GmbH Carl-Wery-Straße 34 D-81739 München www.gaggenau.com...
Need help?
Do you have a question about the BS 270/271 1.1 and is the answer not in the manual?
Questions and answers