Advertisement
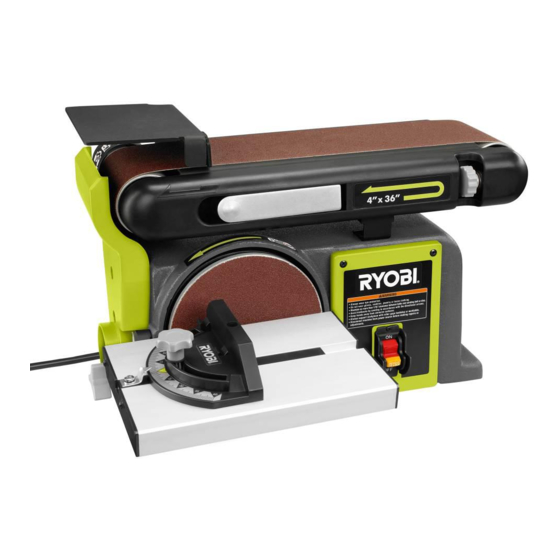
THANK YOU FOR BUYING A RYOBI BENCHTOP BELT/DISC SANDER.
Your new Belt/Disc Sander has been engineered and manufactured to Ryobi's high standards for dependability, ease of
operation, and operator safety. Properly cared for, it will give you years of rugged, trouble-free performance.
CAUTION
: Carefully read through this entire operator's manual before using your new machine.
Pay close attention to the Rules for Safe Operation, Warnings, and Cautions. If you use your machine properly and only for
what it is intended, you will enjoy years of safe, reliable service.
Please fill out and return the Warranty Registration Card so we can be of future service to you.
Thank you again for buying Ryobi tools.
SAVE THIS MANUAL FOR FUTURE REFERENCE
OPERATOR'S MANUAL
BELT/DISC SANDER
MODEL BD4600
1
Advertisement
Table of Contents

Summary of Contents for Ryobi BD4600
- Page 1 THANK YOU FOR BUYING A RYOBI BENCHTOP BELT/DISC SANDER. Your new Belt/Disc Sander has been engineered and manufactured to Ryobi's high standards for dependability, ease of operation, and operator safety. Properly cared for, it will give you years of rugged, trouble-free performance.
-
Page 2: Table Of Contents
TABLE OF CONTENTS I Product Specifications ..............................2 I Rules for Safe Operation .............................. 3-5 I Electrical ....................................6 I Unpacking and Loose Parts ..............................7 I Features ....................................8 I Assembly ..................................9-10 I Adjustments ................................... 11 I Operation .................................. 12-13 I Maintenance .................................. 14 I Parts Ordering/Service .............................. -
Page 3: Rules For Safe Operation
RULES FOR SAFE OPERATION I PROTECT YOUR HEARING. Wear hearing protection Safe operation of this power tool requires that you read and understand this operator's manual and all labels affixed to during extended periods of operation. the tool. Safety is a combination of common sense, staying I SECURE WORK. - Page 4 I ALL REPAIRS, WHETHER ELECTRICAL OR Some dust created by power sanding, sawing, grinding, MECHANICAL, should be made at a Ryobi Authorized drilling, and other construction activities contains Service Center. Use only Ryobi identical replacement parts. chemicals known to cause cancer, birth defects or I SAVE THESE INSTRUCTIONS.
- Page 5 For Do not attempt to operate this tool until you have read service we suggest you return the tool to your nearest RYOBI thoroughly and understand completely all instructions, AUTHORIZED SERVICE CENTER for repair. When servic- safety rules, etc.
-
Page 6: I Electrical
ELECTRICAL EXTENSION CORDS ELECTRICAL CONNECTION Your Ryobi Belt/Disc Sander is powered by a precision built Use only 3-wire extension cords that have 3-prong ground- electric motor. It should be connected to a power supply ing plugs and 3-pole receptacles that accept the tool's plug. -
Page 7: I Unpacking And Loose Parts
UNPACKING Your belt/disc sander has been shipped completely WARNING: assembled except for the sanding disc, disc guard, miter gauge, work support, and worktable. Do not allow familiarity with your belt/disc sander to make I Carefully remove all parts from the shipping carton. you careless. -
Page 8: I Features
FEATURES SANDING DISC KNOW YOUR BELT/DISC SANDER See Figure 3. A round sanding disc located on the side of the belt/disc sander. Before attempting to use your belt/disc sander, familiarize yourself with all the operating and safety requirements. SWITCH AND SWITCH KEY BEVEL GAUGE Your disc/belt sander has an easy access power switch. -
Page 9: I Assembly
ASSEMBLY INSTALLING SANDING DISC AND DISC GUARD See Figure 4. SANDING DISC WARNING: DISC GUARD Do not connect to power supply until assembly is complete. Failure to comply could result in accidental starting and possible serious injury. I Remove the backing from the sanding disc. I Align perimeter of sanding disc with plate and press firmly PHILLIPS HEAD into position. - Page 10 ASSEMBLY ASSEMBLING WORK SUPPORT See Figure 8. I Place the work support over the holes in the side of the tool housing. WORK SUPPORT I Using a hex key, fasten in place with the washers and socket head screws. SOCKET HEAD MOUNTING BELT/DISC SANDER TO WORK- SCREWS...
-
Page 11: I Adjustments
ADJUSTMENTS WARNING: Before performing any adjustment, make sure the belt/ disc sander is unplugged from the power supply and the switch is in the OFF position. Failure to heed this warning could result in serious personal injury. TRACKING KNOB ADJUSTING THE BELT TRACKING See Figure 11. -
Page 12: I Operation
OPERATION BEVEL SANDING 1/16 IN OR See Figure 14. LESS The worktable can be tilted from 0° to 45° for bevel sanding. To tilt the worktable: TABLE I Loosen the table lock knob by turning it counterclockwise. LOCK I Set worktable to desired angle. KNOB Note: Position the worktable not further than 1/16 in. - Page 13 OPERATION SURFACE SANDING ON THE SANDING BELT WORKPIECE See Figure 17. WORK SUPPORT I Hold the workpiece firmly, keeping fingers away from the sanding belt. I Keep the end pressed firmly against the work support moving work evenly across the sanding belt. Note: Use extra caution when sanding very thin pieces and when sanding extra long pieces, remove the work support.
-
Page 14: I Maintenance
MAINTENANCE WARNING: HEX HEAD SET SCREW When servicing use only identical Ryobi replacement parts. Use of any other parts may create a hazard or cause product damage. WARNING: To avoid serious personal injury make sure the belt/disc sander is turned OFF and the cord is unplugged from the... - Page 15 NOTES NOTES...
-
Page 16: I Parts Ordering/Service
Ryobi Authorized Service Center. Be sure to provide all pertinent facts when you call or visit. Please call 1-800-525-2579 for your nearest Ryobi Authorized Service Center. You can also check our web site at www.ryobitools.com for a complete list of Authorized Service Centers.


Need help?
Do you have a question about the BD4600 and is the answer not in the manual?
Questions and answers