Table of Contents
Advertisement
1
2
3
4
5
6
AM/FM
PRESET
SEARCH
ST/MONO AUTO
SD
MUTE
STOP/DEL
PBC
PREV
NEXT
B-SCAN F-SCAN
FOLDER
RECORD
MIN
MAX
MIN
MAX
MIN
MAX
GAIN
GAIN
GAIN
MIC
EFFECT ON
MIC
EFFECT ON
MIC
EFFECT ON
LINE
EFFECT OFF
LINE
EFFECT OFF
LINE
EFFECT OFF
CH 1 CH 2 CH 3 CH 4
HERO-REC
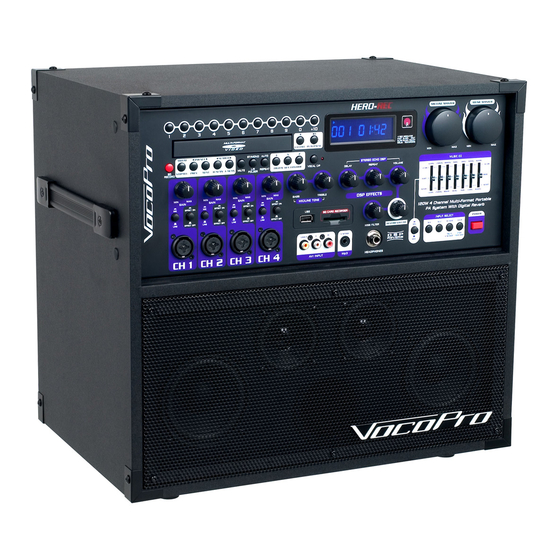
120W 4-Channel Multi-Format
Portable P.A. System with Digital Recorder
o
w
n
e
r
HERO-REC
7
8
9
0
+10
REC INDICATOR
FAST BLINK: WAIT
EJECT
PLAY/PAUSE
SLOW BLINK: READY
SOLID: RECORDING
#
STEREO ECHO DSP
L/R
REP EAT
DIGITAL KEY CONTROL
VOCAL C/P
DELAY
REPEAT
VOLUME
MIN
MAX
GAIN
BASS
TREBLE
DSP EFFECTS
MIC/ LINE TONE
MIC
EFFECT ON
USB
SD CARD RECORDER
LINE
EFFECT OFF
HISS FILTER
REVERB VOLUME
VIDEO
L
R
LAPTOP
D S P
REVERB
AV1 INPUT
Mp3
HEADPHONES
'
s
m
a
MIC/LINE MASTER
MUSIC MASTER
MIN
MAX
MIN
MAX
MUSIC EQ
60Hz
200Hz 400Hz
1KHz
3KHz
6KHz
16KHz
+12dB
+12dB
0dB
0dB
-12dB
-12dB
60Hz
200Hz 400Hz
1KHz
3KHz
6KHz
16KHz
120W 4 Channel Multi-Format Portable
PA System With Digital Reverb
INPUT SELECT
POWER
AV1
AV2
TUNER
DVD
ON
Mp3
USB
OFF
LAPTOP
SD CARD
n
u
a
l
EJECT
MUTE
RECORD
TUNER
Mp3
DVD/USB
AV1
AV2
LAPTOP
SD CARD
MIC/LINE
MUSIC
MASTER
MASTER
PROGRAM
SETUP
ENTER
MENU
VOCAL C/P
PLAY/
AUTO
AM / F M
ST/MONO
PAUSE
REPEAT
S TO P
L/R/FOLDER
SEARCH
PRESET
B-SCAN
F-SCAN
PREV
NEXT
1
2
3
P / N
4
5
6
+10
7
8
9
0
AUDIO
ANGLE
PBC
A-B
SLOW
STEP
TITLE
MODE
SUB-T
OSD
KEY CONTROL
HERO-REC
Advertisement
Table of Contents

Subscribe to Our Youtube Channel
Related Manuals for VocoPro Hero-Rec


Summary of Contents for VocoPro Hero-Rec
- Page 1 HERO-REC MIC/LINE MASTER MUSIC MASTER EJECT MUTE RECORD TUNER REC INDICATOR DVD/USB LAPTOP SD CARD FAST BLINK: WAIT EJECT PLAY/PAUSE SLOW BLINK: READY SOLID: RECORDING MIC/LINE MUSIC MASTER MASTER AM/FM PRESET SEARCH ST/MONO AUTO PROGRAM SETUP ENTER STEREO ECHO DSP...
-
Page 3: Table Of Contents
Table of Contents Important Safety Instructions ������������������������������������ 4 Listening for a Lifetime ��������������������������������������������� 5 Welcome ��������������������������������������������������������������� 6 Features ���������������������������������������������������������������� 7 Getting Started ������������������������������������������������������� 8 Getting Connected ���������������������������������������������� 9-15 Descriptions and Functions Front Panel ��������������������������������������������������� 16-19 Rear Panel �������������������������������������������������������� 20 Remote Control ��������������������������������������������� 21-22 Basic Operations ����������������������������������������������... -
Page 4: Important Safety Instructions
Important Safety Instructions Protect the power cord from being walked on CAUTION or pinched particularly at the plugs, convenience receptacles, and at the point RISK OF SHOCK where they exit from the apparatus. CAUTION: To reduce the risk of electric Only use attachments/accessories specified shock, do not remove cover (or back). -
Page 5: Listening For A Lifetime
Now itʼs time to consider how you can maximize the fun and excitement your equipment offers. VocoPro and the Electronic Industries Associationʼs Consumer Electronics Group want you to get the most out of your equipment by playing it at a safe level. One that lets the sound come through loud and clear without annoying blaring or distortion and, most importantly, without affecting your sensitive hearing. -
Page 6: Welcome
And while you're there don't forget to check out our Club VocoPro for Karaoke news and events, chat rooms, club directories and even a KJ Service directory! We look forward to hearing you sound like a PRO, with VocoPro, the singer’s ultimate choice. FOR YOUR RECORDS Please record the model number and serial number below, for easy reference, in case of loss or theft. -
Page 7: Features
For playtime, take it to a backyard party to play movies and music, or connect a gaming console for quick fun� For work time, the HERO-REC makes a great P �A� for the office or classroom� You can also easily connect your laptop to boost your presentation with big sound�... -
Page 8: Getting Started
Volume 1 Returns and Warranty In the unlikely event that the HERO-REC would need to be shipped for repair, it is recommended that you keep all the product packaging and receipt� For detailed warranty information, please visit www�vocopro�com/warranty_extended�html� To find a... -
Page 9: Getting Connected
Getting Connected The HERO-REC is an all-in-one unit, but has plenty of connections to incorporate it into any setup� The diagram below shows some optional connections� MIXER TV/MONITOR RECEIVER/AMP BALANCED AUDIO OUTPUT OUTPUT AV2 INPUT FM/ANT AM/ANT INPUT INPUT DVD OUT... - Page 10 Getting Connected The HERO-REC can be connected to an Mp3 player or computer using the 1/8” input on the front panel. To connect a Laptop/Mp3 player, see your Laptop/Mp3 player instructions on connecting to a 1/8” input. To connect a computer, use a 1/8”...
-
Page 11: Audio Output Connections
Using either the yellow RCA plug from the included RCA patch cable or a separate RCA patch cable, connect one end to the RCA VIDEO OUTPUT jack on the HERO-REC and connect the other end to the VIDEO INPUT jack on our TV or monitor device� Both VIDEO OUTPUTS can be connected simultaneously�... - Page 12 Using 3 appropriate Component Video cables (usually color coded red, blue and green), connect a set of plugs to the COMPONENT VIDEO OUT jacks (Y-U/Pb-V/Pr) on the HERO-REC and plug the other set of plugs to the COMPONENT VIDEO IN jacks (Y-U/Pb-V/Pr) on your television� On some TVs, the component video in- put jacks may be labeled differently (i�e�...
- Page 13 S-VIDEO OPTICAL V/Pb -OR- Connecting to a TV or monitor with S-Video� Using an S-Video cable, connect one end to the HERO-REC’s S-VIDEO OUTPUT jack and connect the other end to the S-VIDEO IN jack on your television� U/Pb VIDEO...
- Page 14 MICROPHONE until it locks into place� Then connect the XLR “male” jack at the other end of the cable into channels 1-4 XLR jacks on the HERO-REC. It should be obvious which sides of your XLR cable are male and female as there is only one possible connec- tion�...
- Page 15 AC DEVICE CONNECTIONS The HERO-REC has an AC power outlet on the rear panel to provide power to a connecting device� NOTE: A device with a power consumption rating over 200W should not be connected as that exceeds the allowable power feed.
-
Page 16: Descriptions And Functions
13. 1/8” Mp3 Player/Laptop Input - Use this jack to attach a Mp3 player, laptop or other media device with a 1/8” connector� 14. ¼” Headphone Jack - Use this jack to attach headphones to the HERO-REC� Note: Plugging in headphones will switch off the on-board speakers�... - Page 17 Descriptions and Functions cont� HERO-RV EJECT PLAY/PAUSE AM/FM PRESET SEARCH ST /MONO AUTO STEREO ECHO DSP L /R FOLDER R EP EAT STOP/DEL PREV NEXT B-SCAN F-SCAN MUTE DIGITAL KEY CONTROL VOCAL C/P DELAY REPEAT VOLUME RECORD 7 8 9 GAIN GAIN GAIN...
- Page 18 EJECT PLAY/PAUSE Descriptions and Functions cont� STOP PREV NEXT B-SCAN F-SCAN MUTE L / R R EP EAT AM / FM PRESET SEARCH ST/ MONO AUTO DIGITAL KEY CONTROL VOCAL C/P GAIN GAIN GAIN GAIN BASS TREBLE MIC / LINE TONE EFFECT ON EFFECT ON EFFECT ON...
- Page 19 HERO-REC MIC/LINE MASTER MUSIC MASTER Descriptions and Functions cont� EJECT PLAY/PAUSE STEREO ECHO DSP MUSIC EQ DIGITAL KEY CONTROL VOCAL C/P DELAY REPEAT VOLUME 60Hz 200Hz 400Hz 1KHz 3KHz 6KHz 16KHz +12dB +12dB BASS TREBLE -12dB -12dB DSP EFFECTS MIC/LINE TONE...
-
Page 20: Rear Panel
8. Fuse Cover - Remove to access the fuse� Note: Replace only with type listed on back panel� 9. L/R XLR Balanced Audio Output - Use these outputs to connect the HERO-REC to an external system, such as an in-house system at a club�... -
Page 21: Remote Control
(sharp): will raise the key of the music� 15. Record - Use this button to record to SD card� Press once to put the HERO-REC in record mode� Press again to begin recording once the “REC” indicator starts blinking slowly. - Page 22 KEY CONTROL DVD disc� 27. OSD Button - Use this button to show/hide the on-screen HERO-REC display, and cycle through the time display modes� 28. Subtitle Button - Use this button to switch between available subtitles on a DVD� Note: Not all DVDs have subtitles available�...
-
Page 23: Basic Operations
There are two blink speeds for the REC icon: Fast blink: The SD card is being prepared for recording Slow blink: The SD recorder is ready to record NOTE: Larger capacity SD cards take longer to prepare for recording HERO-REC MIC/LINE MASTER MUSIC MASTER STEREO ECHO DSP... - Page 24 Basic Operations 5� Once the channels are mixed, use the master level controls to increase or decrease the overall recording level� Note: If you are doing late night recording or find that the speaker output is too loud while recording, you can connect headphones to mute the speaker output�...
- Page 25 1� Plug a USB jumpdrive or SD card into the reader menu, and press enter to begin playback, or press slots on the front panel of the HERO-REC� play on the remote control� 2� Use the input select buttons to switch to either the USB or SD port�...
- Page 26 HERO-REC� To remove a wireless module: 2� Power on the HERO-REC� 1� Turn the HERO-REC OFF, and unplug the power cable. 3� Select Tuner using the Input Select Buttons� The display screen should display “Tuner”.
-
Page 27: Setup Menu
Rating: G, PG, PG13, R, NC-17 This setting controls what rating of DVD movie can be watched on the HERO-REC� To change this setting, the password must be set to unlocked�... -
Page 28: Audio Setup
Setup Menu Audio Setup Audio Out: SPDIF/OFF, SPDIF/RAW, SPDIF/PCM SPDIF/OFF: Select to disable SPDIF output� SPDIF/RAW: Select when connecting to a 5�1 channel digital amplifier (DTS/Dolby Movie�)� SPDIF/PCM: Select when connecting to a 2-channel digital amplifier (Audio CD�)� Key: -6 to +6 This menu item functions the same as the Digital Key Control buttons on the front panel�... -
Page 29: Troubleshooting
Make sure the input selector is set to USB or SD� Make sure the card or drive is formatted with FAT or FAT32� NTFS format cannot be read by the HERO-REC� If you are playing a VOB file from an SD card or jumpdrive, it may not function as VOB file playback is not supported�... -
Page 30: Notes
Notes... - Page 31 Notes...
- Page 32 HERO-REC Owner’s Manual © VocoPro 2012 v1�2029 www�vocopro�com...
Need help?
Do you have a question about the Hero-Rec and is the answer not in the manual?
Questions and answers