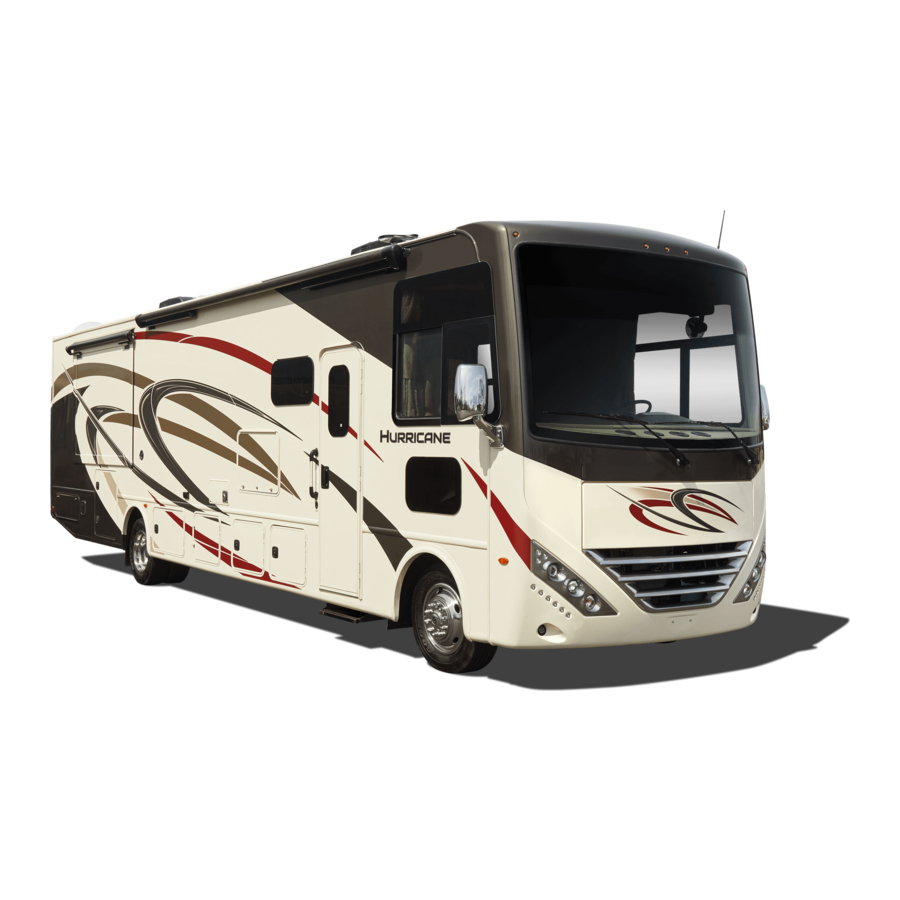
Thor Motor Coach Class C Owner's Manual

Thor Motor Coach Class C Owner's Manual

Hide thumbs Also See for Class C:
Table of Contents

Advertisement

Quick Links

Advertisement

Table of Contents
loading

Summary of Contents for Thor Motor Coach Class C

  • Page 2: Table Of Contents

    TaBLE oF CoNTENTS Thor MoTor CoaCh LIMITED WarraNTY ................4 ACKNOWLEDGEMENT OF RECEIPT OF WARRANTY ............7 GENEraL INForMaTIoN ......................10 DISCLAIMER ............................11 SYMBOLS ............................. 11 MANUFACTURER’S WARRANTIES ..................... 12 VENDOR CONTACT INFORMATION ....................12 MOTOR HOME LOAD LIMITS ......................13 VEHICLE WEIGHING PROCEDURES ....................
  • Page 3 POWER CONVERTER.......................... 61 GROUND FAULT CIRCUIT INTERRUPTER ..................61 12 VOLT SYSTEM FUSES ........................62 CIRCUIT BREAKERS..........................62 CLASS A AND CLASS C - SYSTEM PANELS ..................63 CHASSIS ALTERNATOR ........................64 GENERATOR ............................65 WaTEr SYSTEMS........................... 6.6. FRESH WATER SYSTEM ........................66 MONITOR PANEL ..........................
  • Page 5: Thor Motor Coach Limited Warranty

    WhaT ThE PErIoD oF CoVEraGE IS: This Limited Warranty provided by Thor Motor Coach Inc.® (“Warrantor”) covers those components, assemblies and systems of your new motor home not excluded under the section “What is Not Covered”, when sold by an authorized dealer. The duration of the limited warranty ends twelve (12) months after you first take delivery of the motor home from an authorized dealership or after the odometer reaches 15,000 miles, whichever occurs first.
  • Page 6 (regardless of state of purchase) or who are stationed in California at the time of application to this program, may utilize the CAP-RV program. THIS WARRANTY GIVES YOU SPECIFIC LEGAL RIGHTS. YOU MAY ALSO HAVE OTHER RIGHTS, WHICH VARY FROM STATE TO STATE. Julian Date: 101510 Thor MoTor CoaCh...
  • Page 7: Acknowledgement Of Receipt Of Warranty

    WHAT THE PERIOD OF COVERAGE IS: This Limited Warranty provided by Thor Motor Coach Inc.® (“Warrantor”) covers those components, assemblies and systems of your new motor home not excluded under the section “What is Not Covered”, when sold by an authorized dealer.
  • Page 8: Acknowledgement Of Receipt Of Warranty

    DATE Dealer is to ensure this form is properly completed and returned to Thor Motor Coach within fifteen (15) days after delivery. Return this page to: Thor Motor Coach, 701 C.R. 15, Elkhart, Indiana 46517 • E-mail: Registrations@TMCRV.com • Fax: 574-294-3618...
  • Page 9 Warranty and Product Information THIS PAGE IS INTENTIONALLY LEFT BLANK Thor MoTor CoaCh...
  • Page 10 For owner's Notes Thor MoTor CoaCh...
  • Page 11: General Information

    CONGRATULATIONS! Congratulations on your recent purchase of a Thor Motor Coach Recreational Vehicle. We sincerely thank you for choosing Thor Motor Coach, and we would like you to know that your satisfaction is of great importance to us. In the next coming weeks you will receive a courtesy call by our Concierge Connection, your personal service advocate.
  • Page 12: Symbols

    WarNING indicates a hazardous situation which, if not avoided, could result in death or serious injury. CAUTION CaUTIoN indicates a hazardous situation which, if not avoided, may result in minor or moderate injury. NoTICE indicates a hazardous situation which, if not avoided, may result NOTICE in property damage. Thor MoTor CoaCh...
  • Page 13: Manufacturers Warranties

    Transmission 800-392-3673 Manchester Tank Thetford 800-524-2303 www.Ford.com 800-877-8265 800-521-3032 www.mantank.com www.allisontransmission.com www.thetford.com Freightliner aSa Electronics 800-385-4357 Michelin Thor Motor Coach Inc. 800-688-3135 www.freightlinerchassis.com 800-847-3435 (877)855-2867 www.asaelectronics.com www.michelin.com www.thormotorcoach.com atwood Mobile Products, Inc. 800-353-3867 Mor/ryde TriMark Corp. www.gmfleet.com 800-825-4328 574-293-1581 800-431-8616 www.atwoodmobile.com...
  • Page 14: Motor Home Load Limits

    The Thor Motor Coach Motor Home WEIGHT SPECIFICATIONS yellow label concisely states the occupant and cargo carrying capacity of your motor home ( per the requirements of 49 CFR part 571.120 as issued by the National Highway Traffic Safety Administration - NHTSA).
  • Page 15: Vehicle Weighing Procedures

    1b, and 1c), but this time, use only one side of the scale. To calculate the opposite side of the vehicle wheel position weight, subtract this side's weights from the weights recorded in steps 1a, 1b, and 1c. Thor MoTor CoaCh...
  • Page 16: Weight Terms

    Note: Association. Used with permission. ( http://www.rma.org/tire_safety/ ) For improved accuracy, Thor Motor Coach recommends using a segmented 4-pad scale, when possible, to determine individual wheel weights. The corner weights should not exceed half of the respective Gross Axle Weight Rating (GAWR) or the maximum load rating for the tire or set of dual tires at the rear, whichever is less.
  • Page 17: Identification And Safety

    However, NHTSA cannot become involved in individual problems between you, your dealer, or Thor Motor Coach. To contact NhTSa, you may either call the Auto Safety Hot line toll-free at 1-888-327-4236 (TTY: 1-800- 424-9153);...
  • Page 18: Motor Home Serial Number Decal And Data Plates

    80% of its volume as liquid Propane. An 80% automatic shut-off valve is installed on the Propane gas tank which will automatically prevent further filling when the gas volume has reached 80% of tank capacity. Thor MoTor CoaCh...
  • Page 19: Fire Safety

    Do NoT STorE ProPaNE CoNTaINErS INSIDE ThE MoTor hoME. Propane containers are equipped with safety devices which relieve excessive pressure by discharging gas to the atmosphere. Failure to comply could result in explosion resulting in death or serious injury. Thor MoTor CoaCh...
  • Page 20: Fire Extinguisher

    Class B: Flammable liquids such as grease, cooking oils, gasoline, or kerosene Class C: Electrical fires started from live electrical wires, from short circuits motors or switches The fire extinguisher, which is located by the entry door of the motor home, is a chemical type suitable for extinguishing small fires of the class B or C type.
  • Page 21: Testing Procedure

    Vomiting, Weakness, Sleepiness, Muscular Twitching, and Throbbing in Temples. If anyone in the motor home experiences any of these symptoms, shut off the engine, and immediately go outside into fresh air. Get medical attention as soon as possible. Thor MoTor CoaCh...
  • Page 22: Propane Gas Detector

    TEST: This test procedure should be repeated every week or every time the motor home is taken on a trip. Note: Refer to the detector manufacturer if you have any questions about the Propane Gas Detector. Thor MoTor CoaCh...
  • Page 23: About The Propane Gas Detector

    LP Gas Detector. See your Thor Motor Coach Dealer or a qualified Propane Service Center should service be required. If they are not familiar with this product, have them call the detector manufacturer for assistance. If service is not available in your area, call MTI Industries.
  • Page 24: Chemical Sensitivity

    USE a SEaT BELT oN MorE ThaN oNE PErSoN. Pilot and co-pilot seats must be locked in a forward facing position with seat belts fastened while the motor home is in motion. Avoid seat rotation while in transit. Thor MoTor CoaCh...
  • Page 25: Child Restraints

    Replace if necessary. A qualified service technician should inspect all safety belt assemblies after a collision. Thor Motor Coach recommends that all safety belt assemblies used in vehicles involved in a collision be replaced.
  • Page 26: Egress Window

    Damage to the motor home, towed vehicle or towing device will result. Note: Thor Motor Coach accepts no responsibility for damage to the chassis and other components resulting from towing loads greater than its designated class specifications. Also consider the gross combined weight rating of the motor home before towing a trailer or vehicle.
  • Page 27: Chassis

    Regular visual inspections can help detect minor adjustments and needed maintenance. All other components of the chassis should be inspected regularly per the schedules set by the chassis manufacturer. Thor MoTor CoaCh...
  • Page 28: Fueling The Motor Home

    When this inertia switch has been tripped, it is necessary to manually reset it before the motor home can be restarted and moved. Review your chassis owner’s manual for the location of the switch and instructions for resetting. Thor MoTor CoaCh...
  • Page 29: Travel Preparation

    Also idle engine long enough to check cooling system and alternator operation. Be sure to turn on headlights and climate controls to see if alternator handles the additional drain on the electrical system (should not show discharge). Note: Refer to the Chassis Manufacturer’s Owner’s Manual for more information. Thor MoTor CoaCh...
  • Page 30: Pre-Trip Checklist

    Check operation of stove and refrigerator. • Check that you have proper paperwork such as owners registration card, vehicle registration, proof of insurance, and valid driver’s license. • When preparing for your trip, always consider vehicle weight when loading the motor home. Thor MoTor CoaCh...
  • Page 31: Controls And Operations

    Depress and hold the bottom of the switch to prime the generator prior to starting. Note: Refer to the generator operations manual for detailed information regarding the proper usage, and service procedure for the generator. START PRIME STOP Thor MoTor CoaCh...
  • Page 32: Windshield Fans

    This feature is designed to be used momentarily to start the engine. DO NOT hold the switch down for extended periods of time, overheating will occur causing serious electrical failure and damage to electrical components. Porch Light PORCH LIGHT Controls the exterior light on the door side of the motor home Thor MoTor CoaCh...
  • Page 33: Ceiling Light

    FOG LIGHTS: Headlights must be illuminated, then pull the control knob out to illuminate the fog lights. Panel Light Dimmer Control Wheel To increase or decrease the level of light intensity for the dash panel, rotate the control wheel up to increase, or down to decrease. Thor MoTor CoaCh...
  • Page 34: Steering Wheel Adjustment

    HAZARD FLASHER CONTROL The hazard flasher control button is located on the steering column just behind the steering wheel. To activate your hazard flashers, press the button. To turn off the hazard flashers, press the button again. Thor MoTor CoaCh...
  • Page 35: Rear Vision System

    Rear Vision Systems vary within our motor homes. The Class C motor home ( except for Sprinters) come equipped with a dash radio with a motorized video screen that pops up and displays the back up camera image.
  • Page 36: Dash Radio

    Press MUTE again to restore the audio output to the previous level. AUDIO: Press the AUDIO button (4) to access Audio Mode and select a source for playback. You may press and hold the AUDIO button to enter the “Audio Setup” menu. Thor MoTor CoaCh...
  • Page 37 FaDEr: Use the volume control to adjust the Fader between the rear and front speakers from 12L (full left) to 12F (full front). VoLUME LEVEL: Use the volume control to adjust the volume level from 0 to 46. Thor MoTor CoaCh...
  • Page 38: Automatic Hydraulic Power Levelers

    Refer to manufacturer’s operations manual before operating. The automatic hydraulic power leveling system allows quick and easy leveling of the motor home from the driver’s seat by utilizing the system touch panel. The following instructions are general operating instructions. Thor MoTor CoaCh...
  • Page 39: Automatic Leveling And Retraction Procedure

    Zero point, or level position has been preset at the factory. However, if you want to change the setting refer to the automatic hydraulic levelers owner's manual for detailed information regarding the proper procedures to do this. TUrN oN PoWEr PrESS aUTo-LEVEL ToUCh PaD rETraCTING ThE JaCKS Thor MoTor CoaCh...
  • Page 40: Emergency Retraction Procedure

    To retract your jack(s) run the drill in the counter-clockwise direction. To extend your jack(s), run the drill in the clockwise direction. When manual override is complete, return the cartridge valve(s) to the normal positions. Reinstall power cables and plastic cap on motor. Thor MoTor CoaCh...
  • Page 41 CoNTroLS aND oPEraTIoNS hydraulic Pump Function Wiring Thor MoTor CoaCh...
  • Page 42: Slide Outs

    Install the room locking devices if equipped. If the room will not retract, refer to the “Manual Retract Procedure”. Electric Slide out - Manual room retraction Procedure Note: Please consult Thor Motor Coach for information regarding this procedure. Thor MoTor CoaCh...
  • Page 43 NOTICE DO NOT MOVE THE MOTOR HOME UNLESS THE MOTORS ARE PLUGGED IN. If you are unable to move the room after following the above procedure, then both motors will need to be disengaged. Thor MoTor CoaCh...
  • Page 44: Windows

    It is important to be lying on the bed, in your normal sleep position, when checking Note: or making changes to your Sleep Number®. Note: The coach must be plugged into the Shore Power or Inverter Power supplied if equipped, for the sleep number bed to function. Thor MoTor CoaCh...
  • Page 45: Elevated Beds And Electric Bed Lift Systems

    No more than one person should be in an elevated bunk bed at once and make sure you follow the weight restrictions posted on the warning label near the bunk beds. No more than two people should be in a front cab over bed ( only available on Class C motor homes). Thor MoTor CoaCh...
  • Page 46: Furniture

    Lift the seat base up until the seat and back rest from a “V” shape. • Push back and down on the seat base. • Position the seat belts for use. • Replace the back rest cushions. Thor MoTor CoaCh...
  • Page 47: Space Saver Sofa

    Do not fold the air mattress up in the sofa. Damage will occur. Barrel Chair The barrel chair has controls on the bottom right and left sides under the chair skirt that controls the swivel and side to side action of the chair. Thor MoTor CoaCh...
  • Page 48: Euro Recline With Ottoman

    Make sure the seat locks into the position you have selected. arm rests Arm rests can be rotated up and out of the way when not required. Thor MoTor CoaCh...
  • Page 49: Entry Door

    Note: If the override switch is OFF and the step is extended and the door is left open, the light will turn OFF after five minutes. The under step light is not available on all step models. Thor MoTor CoaCh...
  • Page 50: Storage Compartments

    As the slide out room is closed and the awning rolls up, these puddles may spill over the sides of the awning. Note: For detailed information regarding the Slide out Topper Awning refer to the A & E Systems, Slide Topper Installation And Operating Instructions Manual. Thor MoTor CoaCh...
  • Page 51: Manual Patio Awning

    Manually Closing The automatic awning: Please consult your owner's manual for complete instructions or a qualified service technician. Note: The awning must be serviced by a qualified service technician before attempting to open the awning after this procedure has been performed. Thor MoTor CoaCh...
  • Page 52: Heating And Air Conditioning

    (right of center) gives the driver the ability to select where the air will flow. Keep the condenser and radiator free of bugs and debris. During periods of little use, operate the A/C system monthly to keep the compressor lubricated. Periodically inspect belts and hoses for wear and proper tension. Thor MoTor CoaCh...
  • Page 53: Roof Mounted Air Conditioner

    If repairs are necessary during the terms of the motor home warranty, please contact the nearest authorized Thor Motor Coach dealer for service. In the event repairs are necessary during transit, contact Thor Motor Coach Customer Service. Certain individual parts of the Heating and Air Conditioning System such as the compressor, dryer and condenser are covered under the chassis manufacturer warranty.
  • Page 54: Furnace

    On/Off Mode button and toggle through the modes until the On/Off green LED is on. The LCD will go out and the green LED will remain on for approximately 15 seconds, then go out. Thor MoTor CoaCh...
  • Page 55: Ceiling Vents

    You may use your Create A Breeze while driving or in windy conditions. In this case keep your dome fully open. Note: A vent cover or foam filter is not recommended on vent. Refer to the owner's manual for complete instructions and proper long term storage Note: procedures. Thor MoTor CoaCh...
  • Page 56: Electrical Systems

    The electrical system is engineered and tested for safety. Circuit breakers and fuses protect the electrical circuits from overloading. If you plan to make modifications or additions to the electrical system, Thor Motor Coach strongly recommends consulting a certified electrician for assistance to ensure continued integrity and safety of the electrical systems.
  • Page 57: Batteries

    15 minutes. In case of eye contact, seek immediate medical treatment. Never add acid to a battery once the battery has been placed in service. Doing so may result in hazardous splattering of electrolyte solution. Thor MoTor CoaCh...
  • Page 58: Battery Maintenance

    13.2 volts for about 10 seconds. In the event the automotive battery is discharged, it will be necessary to press and hold the Start Switch located in the dash. Thor MoTor CoaCh...
  • Page 59: Battery Disconnect Switch

    Remove the battery vent caps before charging, and make sure that the electrolyte does not splash out as a result of charging too quickly. Check literature supplied by battery manufacturer, and follow warnings or cautions outlined. Thor MoTor CoaCh...
  • Page 60: Power Converter

    Note: The GFCI does not protect any circuit other than the one to which it is connected. Thor MoTor CoaCh...
  • Page 61: 12 Volt System Fuses

    These fuses protect the automotive features which are installed by Thor Motor Coach. There is a complete breakdown on the various fuses printed on the backside of this fuse panel cover. The class C fuse panel can be located under the bed, in the dinette base or kitchen base, depending on the model of your motor home.
  • Page 62: Class A And Class C - System Panels

    ELECTrICaL SYSTEMS CLASS A AND CLASS C - GAS SYSTEM PANELS Please use this information as a guide. Check your motor home for the sticker with Note: the exact call outs. 110V For Units With 50 amp Service 110V For Units With 30 amp Service and No Electric Water heater...
  • Page 63: Chassis Alternator

    Amp Reset Button in the Battery Control Center, located under the hood. Remove cover from the black box to access. Note: On a Class C gas motor home there is a 50 amp reset button located behind the converter. CHASSIS ALTERNATOR The automotive chassis 12 volt system alternator supplies power to both the automotive systems as well as any auxiliary battery if equipped, and directly to the motor home living quarters while the vehicle’s motor is running.
  • Page 64: Generator

    To start the generator locate the generator start switch, which is located at one of the following locations: • Generator Control Panel • Kitchen Base Cabinet • Remote Dash Switch Thor MoTor CoaCh...
  • Page 65: Water Systems

    Use a clean hose or bucket from a clean, safe source of water. Be sure to replace the fill spout cap after the tank is filled. Note: Never leave the hose unattended while you are filling the fresh water tank. 6.6. Thor MoTor CoaCh...
  • Page 66: Monitor Panel

    Windsport brand motor home. Specific locations along the water lines will vary depending on the model of your motor home. The low point drains forthe Windsport model is the outside shower which is located in an exterior compartment, below the floor. Thor MoTor CoaCh...
  • Page 67: Sanitizing The Fresh Water System

    10. Continue flushing the system, allowing the water to flow for several minutes, and then turn off the water pump. Close the tank valve and faucets. Refill the system with potable water. Thor MoTor CoaCh...
  • Page 68: Monitor Panel

    Residue in the drain water lines can also produce odors. To combat gray water holding tank odors, an approved deodorizing agent should be used. An agent that dissolves grease and fats and contains a detergent will help keep tank and drain lines clean and free-flowing. Thor MoTor CoaCh...
  • Page 69: Holding Tanks

    Note: The diagram below shows a typical waste water system termination valve layout. TERMINATION TERMINATION VALVES VALVE (SOME MODELS) Thor MoTor CoaCh...
  • Page 70: Waste Water System

    Note: Always remember to clean up the dump site before leaving. NEVER empty your holding tanks directly on the ground, roadway or into a river or stream. DO NOT POLLUTE. Thor MoTor CoaCh...
  • Page 71: Toilets

    If the black water tank becomes full, you will no longer be able to flush the stool until the tank can be drained. If 12 Volt power is lost for some reason, turn the black knob on the rear of the toilet to flush. Thor MoTor CoaCh...
  • Page 72: Water System Winterization

    Damage to water system components will result if proper winterization steps are not taken: Note: Thor Motor Coach recommends this be done by a qualified technician or dealer. Class a Water System Winterization Level the unit for good system drainage.
  • Page 73: Water System Maintenance

    WaTEr SYSTEMS Class C Water System Winterization Level the unit for good system drainage. Drain the waste water tanks (black then grey following drainage guidelines). Turn the water pump switch off. Open all faucets, and water heater drain. Open low point drains on the water lines (pull up and twist valve) and the outside shower to let water drain.
  • Page 74: Propane Gas Systems

    Never remove the propane gas tank from the motor home. Always drive the motor home to the gas supplier to fill. Have the supplier connect the fill nozzle to the tank fill connection. Always remember to close the supply valve and open the 20% liquid level valve. Thor MoTor CoaCh...
  • Page 75: Propane Gas Regulator

    Always use moisture-free propane gas, and make sure the tank has not been filled beyond 80% of capacity. If moisture has entered the tank, have the tank purged, or have hydrous methanol added by an authorized propane gas supplier. Thor MoTor CoaCh...
  • Page 76: Propane Gas Tank

    Look for signs of deterioration such as cracks or loss of flexibility. When replacing the hose or other propane components, always replace them with components of the same type and rating. Check with your dealer regarding proper replacement components.. Thor MoTor CoaCh...
  • Page 77: Propane Gas Safety Precautions

    Make sure that you and your family understand and follow all of them. Never remove these warning labels and decal's. If one should be lost, it should be replaced as soon as possible. Thor MoTor CoaCh...
  • Page 78: Care And Maintenance

    If a situation arises involving a maintenance or cleaning activity for which you are not sure of the proper procedure, do not hesitate to contact your dealer, or chassis service representative for information. Note: Performing periodic maintenance is not covered under the Thor Motor Coach Limited Warranty. FIBERGLASS SIDING The care of fiberglass siding is essentially the same as any automotive finish.
  • Page 79: Exterior Paint (Optional)

    If surface deterioration is apparent, contact a Thor Motor Coach dealer for assistance with finish restoration. Physical damage to the fiberglass, such as cracks, holes, and chips, must be attended to immediately to avoid moisture from entering and causing problems with interior walls and components.
  • Page 80: Frame

    Special sealers are also required for the skylights. It is especially important to check the seals before and after periods of extended storage or non-use. Fall and spring inspections are recommended. Thor Motor Coach recommends all roof maintenance be performed by your dealer.
  • Page 81: Windows And Doors

    The valve groove may then be cleaned out with a screwdriver or similar tool. Replace the valve in the line and reinstall the screws to secure it in place. Thor MoTor CoaCh...
  • Page 82: Tv Antenna

    When cleaning your head lamps, please observe the following: do not rub them dry, and never use abrasives or strong solvents. Remove dirt and contamination, such as insects, by soaking with shampoo and then rinsing with plenty of water. Always use a de-icer spray to remove accumulated ice and snow; never use a scraper. Thor MoTor CoaCh...
  • Page 83: Sinks And Countertops

    Make sure to read all literature provided with each of the appliances, and follow the maintenance instructions included. Pay particular attention to any cautions or warnings included. Each appliance in the motor home is warranted by their respective manufacturer. Thor MoTor CoaCh...
  • Page 84: Pre-Finished Panels And Wood Surfaces

    Thor MoTor CoaCh...
  • Page 85: Winter Precautions

    It is important to remember that heating with Propane consumes gas rapidly, so refill tank immediately when low, to avoid running out completely. heating NEVEr USE ThE raNGE For hEaTING. aSPhYXIaTIoN CoULD rESULT. USE oNLY ThE FUrNaCE To hEaT ThE MoTor hoME. IT IS ProPErLY VENTED To ThE oUTSIDE. Thor MoTor CoaCh...
  • Page 86: Water System

    Indoors, mold growth is unfavorable. Left unchecked, molds break down natural materials, such as wood products and fabric. Knowing the potential risks is important for an owner to protect their investment. Thor MoTor CoaCh...
  • Page 87: Effects Of Prolonged Occupancy

    Use of this product for long term or permanent occupancy may lead to premature deterioration. Long-term occupancy may not be considered normal, and may under the terms of the warranty constitute misuse, abuse or neglect, and void certain warranty protections. Thor MoTor CoaCh...
  • Page 88: Mold

    Particular attention should be devoted to ensure the slide outs are functioning properly. Each time a slide out is used, it should be inspected to ensure proper operation and sealing. The slide out gaskets should also be inspected to ensure proper sealing when the slide out is operated. Thor MoTor CoaCh...
  • Page 89: Storage Of The Motor Home

    Small amounts of mold should be cleaned as soon as it appears. Small areas of mold should be cleaned using a detergent/soapy solution or an appropriate household cleaner. Gloves should be worn during cleaning. The cleaned area should then be thoroughly dried. Dispose of any sponges or rags used to clean mold. Thor MoTor CoaCh...
  • Page 90: Periodic Maintenance Chart

    Seats Check all Seat Belt Buckles, Release Mechanisms & Belt ▲ Webbing Follow Chassis Lubrication & Maintenance Procedures & ▲ Chassis Components Schedules Properly Load and Verify Specified Load Limits & Weight ▲ Weight & Distribution Distribution Thor MoTor CoaCh...
  • Page 91 Formaldehyde ..............................23 Ventilation ..............................23 CIrCUIT BrEaKErS ..........................6.2 CLaSS a aND CLaSS C SYSTEM PaNELS ..................6.3 110 V For Units With 30 Amp Service And No Electric Water Heater ............63 110V For Units With 50 Amp Service ......................63 BCC Fuse Panel ............................64...
  • Page 92: Fiberglass Siding

    DaSh CoNTroLS aND SWITChES ....................30 Battery Boost ............................31 Ceiling Light ............................32 Docking Lights ............................31 Emergency Start ............................30 Fog Lights ..............................30 Generator Remote Start .........................30 Light Control Knob ..........................32 Main Awning ............................32 Mirror Control Button ..........................30 Mirror Heat .............................30 Panel Light Dimmer Control Wheel ......................32 Porch Light .............................31 Privacy Shade ............................31 Step Light ...............................32...
  • Page 93 Sanitizing the Fresh Water System ......................68 Water Pump ............................67 FUrNaCE ............................55 Furnace Operation Instructions ......................55 FUrNITUrE ............................45 Air Hide-A-Bed ( No Drawer Storage Below) ..................46 Air Hide-A-Bed Sofa ( Drawer Storage Below) ..................46 Barrel Chair ............................46 Dinette ..............................47 Euro Recline With Ottoman ........................47 Hide-A-Bed Sofa ............................46 Jack Knife Sofa ............................45...
  • Page 94: Roof Mounted Air Conditioner

    PErIoDIC MaINTENaNCE CharT ....................91 PoWEr CoNVErTEr ........................6.1 PrE-FINIShED PaNELS aND WooD SUrFaCES ................ 85 ProPaNE GaS DETECTor ......................22 About the Propane Gas Detector ......................22 Checking the Propane System for Leaks ....................22 How To Test ............................21 Maintenance ............................21 Most Common Causes of Apparent Malfunction ..................
  • Page 95: Windows And Doors

    WaTEr SYSTEM ..........................6.6. WaTEr SYSTEM MaINTENaNCE ....................74 WaTEr SYSTEM WINTErIZaTIoN ....................73 Class A Water System Winterization ......................73 Class C Water System Winterization ..................... 74 WhEELS ............................81 WINDoWS ............................43 WINDoWS aND DoorS ........................82 WINTEr PrECaUTIoNS ........................86.
  • Page 96 0201211...

This manual is also suitable for:

HurricaneWindsportSerrano

Table of Contents