Table of Contents
Advertisement
X +
0 +
Y
2
0
M
H Z
O W N E R ' S G U I D E
C I N E M A P R O P A C K
M O D E L N U M B E R :
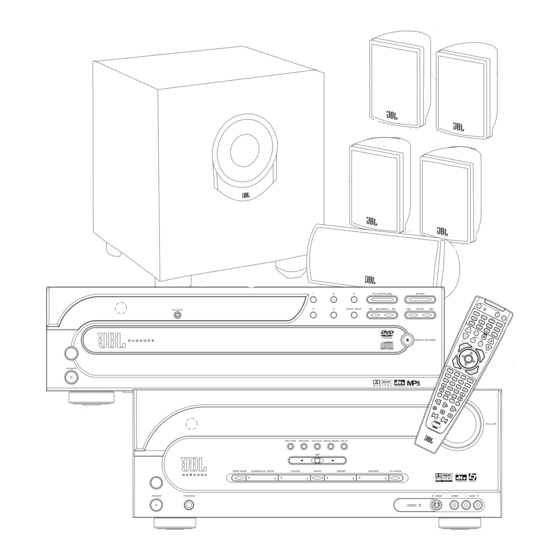
I n c l u d e s : D C R 6 0 0
D E S I G N G O A L : Re-create the excitement of the movies using high-performance separate components in one convenient package.
A U D I O / V I D E O R E C E I V E R : DCR600
With Dolby* Digital, Dolby Pro Logic* II, DTS
II
S O U R C E U N I T: DVD600
Five-Disc Carousel DVD/CD/CD-R/CD-RW/VCD Changer With MP3 Decoding and
II
On Screen Library™ (patent pending) Feature
R E M O T E C O N T R O L : JBL One-Click™ (patent pending) Remote Commander
L O U D S P E A K E R S : SCS135P Six-Piece Home Cinema Speaker System With Four Satellites, One Center and
One 100-Watt, 8-Inch Subwoofer
™
6 0 0
II
, D V D 6 0 0
a n d S C S 1 3 5 P
II
II
®
and Logic 7
®
Advertisement
Table of Contents

Related Manuals for JBL DCR600 II


Summary of Contents for JBL DCR600 II
- Page 1 On Screen Library™ (patent pending) Feature R E M O T E C O N T R O L : JBL One-Click™ (patent pending) Remote Commander L O U D S P E A K E R S : SCS135P Six-Piece Home Cinema Speaker System With Four Satellites, One Center and...
-
Page 2: Table Of Contents
Where to Place the Speakers Mounting Options Connecting the Speakers Making the Audio Connections Making the Video Connections Completing Setup 12 Quick Guide to Using the JBL Cinema ProPack 600 14 DCR600 Front Panel Controls 16 DCR600 Front Panel Information Display 17 DCR600... -
Page 3: Important Safety Precautions
re a d f i rs t ! 1. Read Instructions. All the safety and operating instructions should be read before the product is operated. 2. Retain Instructions. The safety and operating instructions should be retained for future reference. 3. Heed Warnings. All warnings on the product and in the operating instructions should be adhered to. -
Page 4: Important Safety Information
Important Safety Information Verify Line Voltage Before Use Your JBL Cinema ProPack 600 home theater system has has been designed for use with 120-volt AC current. Connection to a line voltage other than that for which it is intended can create a safety and fire hazard and may damage the system. -
Page 5: Installing And Connecting The Equipment
Feel free to read them now, or review them at a later time. Please go to the section labeled Where To Place the Speakers on page 9 to begin setting up your JBL Cinema ProPack 600 system. and DVD600... - Page 6 BASIC INSTALLATION: Your TV must at a minimum have a composite video input (this connector usually has a yellow-colored core), and Left (usually has a white-colored core) and Right (red-colored core) Stereo audio preamp-level RCA outputs. All wires for this hookup are included. S-VIDEO IN S-VIDEO OUT Yellow...
- Page 7 Quick Installation Diagrams ALTERNATE INSTALLATION FOR BETTER PICTURE QUALITY: Your TV must have an S-Video input, and Left (usually has a white-colored core) and Right (red-colored core) Stereo audio preamp-level RCA outputs. Two pieces of S-Video cable are not included and should be purchased separately. S-VIDEO OUT S-VIDEO IN S-Video cable...
- Page 8 ALTERNATE INSTALLATION FOR BEST PICTURE QUALITY: Your TV must have Y/Pr/Pb component video inputs (three separate RCA connectors with red-, blue- and green-colored cores), and Left (usually has a white-colored core) and Right (red-colored core) Stereo audio preamp-level RCA outputs. The component video cable is not included and should be purchased separately.
-
Page 9: Mounting Options
Where to Place the Speakers The front speakers should be placed the same distance from each other as they are from the listening position. They should be placed at about the same height from the floor as the listeners’ ears will be, or they may be angled toward the listeners. -
Page 10: Making The Audio Connections
(+) and (–) terminals. Most manufacturers of speakers and electronics, including JBL, use red to denote the (+) terminal and black for the (–) terminal. The (+) lead of the speaker wire is noted with a ridge or stripe. It is important to connect both speakers identically: (+) on the speaker to (+) on the receiver and (–) on the speaker to (–) on the... -
Page 11: Making The Video Connections
The DCR600 is set at the factory to a default configuration for use with small satellite speak- ers and a subwoofer such as the JBL SCS135P system. If other speakers are used, then the speaker configurations may need to be changed (see page 38). -
Page 12: Quick Guide To Using The Jbl Cinema Propack
Quick Guide to Using the JBL Cinema ProPack 600 The DVD600 can play discs in the following formats: • Both 5-inch (12cm) and 3-inch (8cm) discs • CD audio discs • DTS audio discs • CD-R audio discs • CD-RW audio discs •... - Page 13 DVD600 needs to be increased to ensure proper operation. This completes the quick setup and operation of your JBL Cinema ProPack 600 system. Additional information is provided in the follow- ing sections for those users with additional components, or those who wish to make other,...
-
Page 14: Front Panel Controls
DCR600 1 Main Power Switch: Press this button to apply power to the DCR600 . When the switch is pressed in, the unit is placed in a Standby mode, as indicated by the amber Power Indicator 3 surrounding the System Power Control 2. - Page 15 ! Input Source Selector: Press this button to change the input by scrolling up or down through the list of input sources. When an audio source is selected, the last video input used remains routed to the Video 1 Output › and Video Monitor Output °.
- Page 16 DCR600 Front Panel Information Display 96KHz 192KHz A Bitstream Indicators: When the input is a digital source, these indicators display the specific type of data signal. The DCR600 will also indicate when it detects a digital signal with a resolution of either 96kHz or 192kHz. This can occur when the receiver is used with an external DVD-Audio player or other device that is capable of transmitting this type of sig-...
-
Page 17: Rear Panel Connections
DCR600 IMPORTANT NOTES A. The AC plug connections should always be the last connections made when installing an A/V system. When making subsequent connec- tions to audio source equipment or speakers, it is always a good practice to unplug the unit from the AC wall outlet. - Page 18 ¤ Video 1 Video Inputs: Connect to PLAY/OUT composite or S-Video jacks on a VCR or other video source. ‹ Video 1 Audio Inputs: Connect jacks to the PLAY/OUT audio jacks on a VCR or other video source. › Video 1 Video Outputs: Connect to RECORD/INPUT composite or S-Video jack on a VCR or other video receiver.
- Page 19 DVD600 Main Power Switch: Press this button to apply power to the DVD600 . When the switch is pressed in, the unit is placed in a Standby mode, as indicated by the amber Power Indicator surrounding the System Power Control .
- Page 20 DVD600 Front Panel Information Display 96KHz 24bit Disc Type: Lights to show the type of disc currently being played. Disc Number: Shows if a disc is loaded in a tray position. The indicator for the disc in play flashes. Note that if a disc is added to or removed from the tray while a disc is playing, the indicator will not show the change until all discs are cycled.
- Page 21 Remote Control Input: Connect the out- put of a remote infrared sensor, or the remote control output of another JBL (or other compat- ible) product, to this jack. This will enable the remote control to operate even when the front panel Remote Sensor is blocked.
-
Page 22: Remote Control Functions
DVD changer. Press the Main Button h to return the remote to control of the DCR600 receiver. IMPORTANT NOTE: The remote control for the JBL Cinema ProPack 600 may be pro- grammed to control up to eight devices, includ- ing the DCR600 and DVD600 . - Page 23 TV is selected. This button is also used during the “Auto Search” procedure when programming the remote. u All Off: This feature of the JBL One-Click™ (patent pending) remote simultaneously sends Power Off commands to all programmed devices controlled by the remote.
- Page 24 to select the channel being adjusted, followed by the Set Button . You may Buttons y then use the again to ⁄ ¤ change the level for that channel. Press the Set Button to lock in the setting. When using the DVD600 to play a DVD disc, this button functions as a Title button, and dis- plays the disc’s Title Select Menu, or a symbol...
- Page 25 Preset Up/Down/Slow-Play Buttons: When the tuner is in use, press these buttons to scroll through the stations pro- grammed into the receiver’s memory. When a DVD disc is playing and the DVD600 has been selected, press these buttons to move forward or backward through the disc in slow speed.
- Page 26 Remote Control Function Grid v i c MAIN # Button DCR600 +DVD600 01 POWER OFF Power Off Power Off 02 POWER ON Power On Power On MUTE Mute DVD Input Select DVD Select STATUS STATUS Open/Close MAIN DCR Select DCR Select CD Input Select CD Select TAPE...
- Page 27 Remote Control Function Grid D e v MAIN Button Tun-M Tuner Mode Angle Select Memory Memory Tuning Up Tune Up Step + Direct Direct Tuner Entry Program, Chapter Direct Clear Clear Clear Preset Up Preset Tune Up Slow Forward 49 Tuning Down Tune Down Step–...
- Page 28 Remote Control Code Tables Maker (Brand) Name Setup Code Number A-MARK ADMIRAL AKAI AMPRO ANAM BLAUPUNKT BROKSONIC CANDLE CAPEHART CENTURION CETRONIC CITIZEN CLASSIC CONCERTO CONTEC CORANDO CORONADO CRAIG CROWN CURTIS MATHES DAEWOO DAYTRON CIGI LINK DYNASTY DYNATECH ELECTROHOME EMERSON FUNAI FUTURETECH GOLDSTAR GRUNDIG...
- Page 29 Remote Control Code Tables Maker (Brand) Name Setup Code Number MINERVA MITSUBISHI NATIONAL NIKEI ONKING ONWA OPTONICA ORION PANASONIC PHILCO PHILIPS PIONEER PORTLAND PROSCAN PROTON QUASAR RADIO SHACK REALISTIC RUNCO SAMPO SAMSUNG SANYO SCOTT SEARS SHARP SIEMENS SIGNATURE SONY SOUNDESIGN SPECTRICON SYLVANIA SYMPHONIC...
- Page 30 Remote Control Code Tables Maker (Brand) Name Setup Code Number AIWA AKAI AMPRO AMSTRAD AUDIO DYNAMICS BROKSONIC CANDLE CANON CAPEHART CITIZEN CRAIG DAEWOO DAYTRON DUAL DYNATECH ELECTROHOME EMERSON FERGUSON FINLUX FISHER FUNAI GO VIDEO GOLDSTAR GRAETZ HARMAN KARDON HITACHI JC PENNEY JENSEN KENWOOD LLOYD...
- Page 31 Remote Control Code Tables Maker (Brand) Name Setup Code Number NORDMENDE OPTIMUS ORION PANASONIC PHILCO PHILIPS PILOT PROTLAND PULSAR QUARTZ QUASAR RADIO SHACK REALISTIC RICO RUNCO SABA SAISHO SALORA SAMSUNG SANSUI SANYO SCHAUB LORENZ SCOTT SEARS SHARP SONY SOUNDESIGN SYLVANIA SYMPHONIC TANDY TASHICO...
- Page 32 Remote Control Code Tables Maker (Brand) Name Setup Code Number ALLEGRO AMERICAST ARCHER BELCOR CABLE STAR CITIZEN COLOUR VOICE DIGI EAGLE EASTERN ELECTRICORD EMERSON FOCUS G.I. GC ELECTRONICS GEMINI GENERAL GENERAL INSTRUMENT GOODMIND HANLIN HITACHI JASCO JERROLD LINSAY MACOM MAGNAVOX MOVIE TIME PACE PANASONIC...
- Page 33 Remote Control Code Tables Maker (Brand) Name Setup Code Number SPRUCER STARCOM STARGATE TANDY TELECAPATION TEXSCAN TIMELESS TOCOM UNITED CABLE UNIVERSAL VIDEOWAY VIEWSTAR ZENITH ZENTEK CATV...
-
Page 34: Satellite Receivers
Remote Control Code Tables Maker (Brand) Name Setup Code Number ALPHASTAR ALPHASTAR DBS ALPHASTAR DSR BIRDVIEW CHANNEL MASTER CHAPARRAL CITOH DRAKE DX ANTENNA ECHOSTAR ELECTRO HOME FUJITSU GENERAL INSTRUMENT HITACHI DBS HOUSTON TRACKER HUGHES JANIEL JERROLD KATHREIN LEGEND MACOM MAGNAVOX MEMOREX NEXTWAVE NORSAT... - Page 35 Remote Control Code Tables Maker (Brand) Name Setup Code Number ADCOM AIWA AKAI AUDIO TECHNICA AUDIOACCESS AUDIOFILE CALIFORNIA AUDIO CAPETRONIC CARRERA CARVER CASIO CLARINETTE DENON EMERSON FISHER FRABA FUNAI GENEXXA GOLDSTAR HAITAI HARMAN KARDON HITACHI INKEL JC PENNEY JENSEN KENWOOD LOTTE LUXMAN MAGNAVOX...
-
Page 36: Tape Deck
SANYO SCOTT SHARP SHERWOOD SONY SOUNDSTREAM SYMPHONIC TAEKWANG TEAC THETADIGITAL TOSHIBA VECTOR RESEARCH VICTOR WARDS YAMAHA YORX Maker (Brand) Name Setup Code Number JBL DCR600 HARMAN KARDON Maker (Brand) Name Setup Code Number HARMAN KARDON CD Players Receivers Tape Deck... -
Page 37: Dvd Players
Remote Control Code Tables Maker (Brand) Name Setup Code Number CALIFORNIA AUDIO DENON GOLDSTAR HARMAN KARDON JBL DVD600 KENWOOD LOTTE MAGNAVOX MARANTZ MITSUBISHI ONKYO OPTIMUS PANASONIC PHILIPS PIONEER PROSCAN RUNCO SAMSUNG SANYO SHARP SONY TECHNICS THOMSON TOSHIBA YAMAHA ZENITH ZENITH DIVX... -
Page 38: Memory Backup
Configuring the Speakers The following instructions are to be followed only if the DCR600II is NOT used with JBL SCS135P, or if speaker settings have been accidently altered from the default settings, which are SMALLfor all positions with the subwoofer set to SUB L/R+LFE. -
Page 39: Adjusting The Output Levels
Configuring the DCR600 9. When you have completed your selection for the surround channel, press the Set Button ^ , and then press the Selector Buttons 5 on the front panel to change the display to S-W SPEAKER. 10. Press the Set Button ^ , and then press the Selector Buttons 5 on the front panel to select the option that best describes your system. -
Page 40: Setting Delay Times
Configuring the DCR600 at the channel being adjusted to give you time to make the adjustment. When you release the button, the circulation will resume after 15 seconds. 5. Continue to adjust the individual speakers until they all have the same volume. Note that adjustments should be made with the Buttons y on the remote or the... - Page 41 Configuring the DCR600 7. Press the Set Button 8. Select the Dolby Digital mode either by press- ing the front panel Surround Mode Selector 7 or by pressing the Surround Mode Selector t on the remote until DOLBY DIG appears in the Main Information Display U.
-
Page 42: Remote Control Functions
Remote Control Functions The JBL Cinema ProPack 600 is equipped with a powerful remote control that will control the functions of not only the DCR600 receiver and DVD600 DVD changer, but also most popular brands of audio and video equipment, including... - Page 43 Power On Button b, and two more that are accessed by pressing the Macro Buttons fg. The JBL One Click™ remote also features two preprogrammed functions, ALL OFF u and ALL ON v, that turn all eight programmed devices off or on when the appropriate key is pressed.
- Page 44 Remote Control Functions • Press the MAIN Selector h. • Press the Mute Button c to store the DCR600 ’s Power On command. • Press the TV Input Selector Button o to indicate the next command is for “TV Power On.” •...
- Page 45 Remote Control Functions Channel Control Punch-Through The remote may be programmed to operate so that the channel control function for either the TV, cable or satellite receiver used in your system may be used in conjunction with one of the other devices controlled by the remote.
-
Page 46: Dvd Changer
Configuring the DVD600 DVD Compatibility & Terminology The DVD600 is more than a DVD player; it will play the following disc formats: • Both 5-inch (12cm) and 3-inch (8cm) discs • CD audio discs • DTS audio discs • CD-R audio discs •... -
Page 47: Selecting Audio Output Languages
Configuring the DVD600 only one title, but some may have more than one, to give you a “Double Feature” presenta- tion or to include special presentations that take you “behind the scenes” of the main feature. Press the Title button to see a listing of the titles on a disc. -
Page 48: Parental Lock And Passwords
Configuring the DVD600 Note that when a default subtitle language is selected, it will be used whenever that lan- guage is present on the DVD disc being played. However, when that language is not present, the language used will be the one prepro- grammed into the disc itself. - Page 49 Configuring the DVD600 Figure 7 To enter a password, you may either enter the four-digit number directly, using the Numeric Keys – , or you may use the Buttons y to select the number ⁄ ¤ for a position, and then press the Button ›...
-
Page 50: Setting The Dynamic Range
Configuring the DVD600 Once the new password has been entered, the system remains locked with the new password Button ` to return to in effect. Press the ‹ the main menu. If you have no other changes to make after setting this default, press the Menu Button z to remove the Setup Menu from the screen, or press the Play/Pause Button to begin or resume playback. -
Page 51: Setting The Linear Pcm Bit Rate
Configuring the DVD600 • On: Select this option to turn on the Dynamic Range compression circuitry so that the dialogue will remain clear even at low volume levels. Figure 14 When you have made your selection using the Buttons y to highlight the desired ⁄... -
Page 52: Surround Mode Chart
Operating the DCR600 MODE FEATURES Dolby Digital Available only with digital input sources encoded with Dolby Digital data. It provides up to five separate main audio channels and a special dedicated Low-Frequency Effects channel. Available only with digital input sources encoded with DTS data. Available on special DVD, LD and audio-only compact discs, DTS provides up to five separate main audio channels and a special dedicated low-frequency channel. -
Page 53: Selecting A Surround Mode
Operating the DCR600 Selecting a Surround Mode One of the most important features of the DCR600 is its ability to reproduce a full multi- channel, surround sound field from digital sources, analog matrix surround-encoded programs and standard stereo programs. In all, a total of thirteen listening modes are available on the DCR600 Selection of a surround mode is based on personal... - Page 54 Operating the DCR600 When the digital source is playing, the DCR600 will automatically detect whether it is a multi- channel Dolby Digital or DTS source, or a conven- tional PCM signal, which is the standard output from CD players. A Bitstream Indicator A will light in the Main Information Display ( to confirm that the digital signal is Dolby Digital, DTS or PCM.
-
Page 55: Operating The Tuner
Operating the DCR600 5. When a Dolby Digital or DTS source is playing, it is not possible to make an analog recording using the Tape ¶ and Video 1 Record Outputs ›fi. However, the digital signals will be passed through to the Digital Audio Output ¡. PCM Audio Playback PCM (Pulse Code Modulation) is the noncom- pressed digital audio system used for compact... -
Page 56: Playback Basics
• Do not attempt to rotate the disc tray by hand. If the tray drawer or carousel tray appears to be stuck, contact your local JBL authorized service center. • Do not load more than one disc in each slot in... -
Page 57: Using The Dvd Disc's Menu
Operating the DVD600 • Turn the unit on by pressing the System Power Control , if it has not already been engaged. If there are already discs loaded in the unit, the last disc to be played will automatically begin playing. •... -
Page 58: Selecting Titles And Chapters
Operating the DVD600 • On some discs, when you select the DVD menu during the playback of a movie, the disc will return to the point in the program where the menu was selected by offering a “Play Movie” option. Press the Enter Button or Play/Pause Button resume play. -
Page 59: Changing Languages (Audio)
Operating the DVD600 will be replaced with two dashes (– –). 5. Using the Numeric Keys – enter the number of the chapter to be accessed. 6. The desired chapter will automatically be started. You may also simply enter the chapter number while the disc is playing to skip to that chapter. -
Page 60: Playing Mp3 And Video Cd Discs
Operating the DVD600 Buttons ` 2. Press the until the ‹ › camera icon with the letters “Ang” below it (fifth from the left) is highlighted in white between yellow brackets. 3. Press the Enter Button 4. Note that the main Menu Bar will be replaced with a single display of the angle number (Figure 21). -
Page 61: Vcd Playback
Operating the DVD600 MP3 Disc Playback When the DVD600 reads a disc and recognizes it as an MP3 disc, no Disc Type Indicator will light; however, a listing of all the directories and tracks on the disc will appear on the video screen. - Page 62 Operating the DVD600 There are two versions of the VCD format: an early version which is simply called “VCD” and a later version with Playback Control which is called “Version 2.0” or “PBC”. The DVD600 compatible with both forms of VCD, although playback will vary according to which version is used and the specific way in which the disc was created.
-
Page 63: Programmed Play
Operating the DVD600 The DVD600 is equipped with a wide range of programmed play functions that enable you to have the unit select or repeat tracks for you, or you may program a specific order for discs and tracks to play. Random Play The Random Play function will play all of the tracks on a CD or chapters on a DVD in a ran-... - Page 64 Operating the DVD600 5. The third box will now be highlighted to indi- cate that a selection for chapter should be made. This choice is available only for DVD discs, as CD discs do not have chapter capa- bility. The number in parentheses under the box shows the maximum number of chapters on the disc.
-
Page 65: Dvd Language Codes
Operating the DVD600 The availability of specific languages for the main audio track or subtitles is dependent on the choices made by a disc’s producer. You should always consult the disc’s jacket for information on languages for any disc. In the case of some languages, you may be required to enter a code from the list below to access that language. -
Page 66: Troubleshooting
VFD FULL. • Check speaker wire connections for shorts at receiver and speaker ends. • Contact your local JBL service center. • Check that DCR600 • Check all wires and connections between the DCR600 and speakers. - Page 67 No sound from one speaker • No audio signal is being transmitted to the speakers No sound from surround or • Incorrect surround mode center speakers • Input is monaural • Stereo or Mono program material • No audio signal is being transmitted to the speaker •...
- Page 68 Disc does not play • Disc loaded improperly • Incorrect disc type • Invalid Region Code • Rating is above parental preset • Wrong source for CD was selected No picture • Intermittent connections • Wrong input • Different types of video connections in use Picture is distorted or jumps during •...
-
Page 69: Technical Specifications
500mV at 1kHz, ±75kHz Deviation JBL On Screen Library is a trademark of JBL, Inc. (patent pending). JBL One-Click is a trademark of JBL, Inc. (patent pending). *Manufactured under license from Dolby Laboratories. “Dolby,” “Pro Logic,” “AC-3” and the Double-D symbol are trademarks of Dolby Laboratories. - Page 70 Technical Specifications Playback Media: Video Section: Signal format: Composite Output: S Output: Component Outputs: Audio Section: Coaxial Digital Output: Frequency Response: Dynamic Range: Channel Separation: THD: Signal-to-Noise Ratio: Wow and Flutter: General: Unit Power Consumption: Unit Dimensions: Unit Weight: Depth measurement includes knobs and buttons. Height measurement includes feet and chassis.
- Page 71 Technical Specifications SCS135P Overall Frequency Response: 35Hz – 20kHz (–6dB) Satellites Configuration: 2-Way, video-shielded Recommended Amplification: Use with DCR600 Impedance: 8 Ohms nominal Sensitivity: 86dB @ 1 watt/1 meter Tweeter: One 1/2" titanium-laminate dome Midrange: One 3" cone Unit Dimensions: Width: 3.19 inches (81mm) Height: 4.38 inches (111mm) Depth: 3.75 inches (95mm)
- Page 72 On Screen Library™ (patent pending) Feature R E M O T E C O N T R O L : JBL One-Click™ (patent pending) Remote Commander L O U D S P E A K E R S : SCS135P Six-Piece Home Cinema Speaker System With Four Satellites, One Center and...
Need help?
Do you have a question about the DCR600 II and is the answer not in the manual?
Questions and answers