
Related Manuals for JBL AVR580


Summary of Contents for JBL AVR580
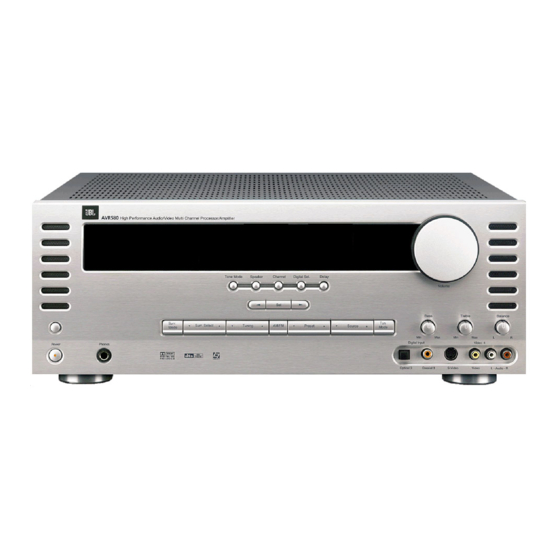
- Page 1 OWNER’S GUIDE AVR580 HIGH-PERFORMANCE AUDIO/VIDEO MULTICHANNEL PROCESSOR/AMPLIFIER ®...
-
Page 2: Table Of Contents
AVR580 AUDIO/VIDEO RECEIVER Introduction Important Safety Information Unpacking Front-Panel Controls Front-Panel Information Display Rear-Panel Connections Main Remote Control Functions Zone II Remote Control Functions Installation and Connections System Configuration Speaker Placement System Setup Input Setup Surround Setup Speaker Setup Delay Settings... -
Page 3: Important Safety Precautions
read first! Important Safety Precautions! CAUTION RISK OF ELECTRIC SHOCK DO NOT OPEN CAUTION: To reduce the risk of electric shock, do not remove cover (or back). No user-serviceable parts inside. Refer servicing to qualified service personnel. CAUTION: To prevent electric shock, do not use this (polarized) plug with an extension cord, receptacle or other outlet unless the blades can be fully inserted to... - Page 4 A few minutes spent learn- ing the functions of the various controls will enable you to take advantage of all the power the AVR580 is able to deliver. If you have any questions about this prod- uct, its installation or its operation, please contact your retailer or custom installer.
-
Page 5: Safety Information
Do not obstruct the ventilation slots on the top of the unit, or place objects directly over them. Due to the weight of the AVR580 and the heat generated by the amplifiers, there is the remote possibility that the rubber padding on the bottom of the unit’s feet may leave marks on... -
Page 6: Front Panel Control
“ON” position. 2 System Power Control: When the Main Power Switch 1 is “ON,” press this button to turn on the AVR580; press it again to turn the unit off. Note that the Power Indicator 3 in the center of the switch will turn orange when the unit is on. - Page 7 ! Tuner Band Selector: Pressing this button will automatically switch the AVR580 to the Tuner mode. Pressing it again will switch between the AM and FM frequency bands. (See page 35 for more information on the tuner.)
-
Page 8: Front-Panel Information Display
FRONT-PANEL INFORMATION DISPLAY A Upper Display Line B Lower Display Line C OSD Indicator D Multiroom Indicator A Upper Display Line: Depending on the unit’s status, a variety of messages will appear here. In normal operation, the cur- rent audio and video input source informa- tion will appear on this line. -
Page 9: Rear-Panel Connections
(+) ter- minal on the Surround Right speaker with the older color-coding. Connect the black (–) terminal on the AVR580 to the match- ing black negative (–) terminals for each surround speaker. (See page 17 for more information on speaker polarity.) - Page 10 (+) terminals on the AVR580 to the red (+) terminals on the speakers and the black (–) terminals on the AVR580 to the black (–) terminals on the speakers. See page 17 for more information on speaker polarity. ¶ Fan Vents: These ventilation holes are the output of the AVR580’s airflow...
- Page 11 CD Audio Inputs: Connect these jacks to the analog audio output of a compact disc player or CD changer. k DVD Audio Inputs: Connect the left/right analog outputs of a DVD player or other audio source to these jacks. Optical Digital Audio Inputs: Connect the optical digital output from a DVD player, HDTV receiver, the S/P-DIF output of a compatible computer sound...
-
Page 12: Main Remote Control Functions
Learn Button Mute EzSet Sensor Microphone NOTE: The function names shown here are each button’s feature when used with the AVR580. Most buttons have additional functions when used with other devices. See pages 46–47 for a list of these functions. - Page 13 Input Selectors e. e Input Selectors: Pressing one of these buttons will perform three actions at the same time. First, if the AVR580 is not turned on, this will power up the unit. Next, it will select the source shown on the button as the input to the AVR580.
- Page 14 ` Transport Controls: These buttons do not have any functions for the AVR580, but they may be programmed for the forward/reverse play operation of a wide variety of CD or DVD players, and audio or video cassette recorders.
- Page 15 AVR580’s remote. (See page 41 for more information on using the remote’s learning function.) Mute: Press this button to momen- tarily silence the AVR580 or TV set being controlled, depending on which device has been selected. When the AVR580 remote is being programmed to operate...
-
Page 16: Power Off
CD, DVD or cassette deck products. NOTE: The Zone II remote may be used in either the same room where the AVR580 is located, or it may be used in a separate room with an optional infrared sensor that is connected to the AVR580’s Multiroom IR Input d jack. -
Page 17: System Installation
&*. Audio Inputs 4. Connect the coaxial or optical Digital Audio Outputs gi on the rear panel of the AVR580 to the matching digital input connections on a CD-R or MiniDisc recorder. 5. Assemble the AM Loop Antenna sup- plied with the unit so that the tabs at the bottom of the antenna loop snap into the holes in the base. -
Page 18: System And Power Connections
. NEVER connect the TV’s video outputs to the Video 3 Video Input Jacks ° or to any other inputs on the AVR580. If you are not using your television as a signal source (e.g., if you are separately connecting a cable TV box to the Video 2 Audio and Video Input Jacks fl... - Page 19 To obtain additional infor- mation on the use of the AVR580 with RS-232 control, please contact your local JBL distributor. The AVR580 features a removable power...
-
Page 20: System Configuration
(without delay from the center speaker compared to the left and right speakers). When the AVR580 is used in 5.1-channel operation, the preferred location for sur- round speakers is on the side walls of the room, at or slightly behind the listening position. - Page 21 Using the On-Screen Display When making the following adjustments, you may find it easier to use the AVR580’s on-screen display system. These easy-to- read displays give you a clear picture of the current status of the unit and make it easy to see which speaker, delay, input or digital selection you are making.
-
Page 22: Surround Setup
– you may change it later. However, to make it easier to establish the initial parameters for the AVR580, it is best to select Dolby Pro Logic II or Logic 7 for most analog inputs and Dolby Digital for inputs con- nected to digital sources. - Page 23 Digital EX and DTS-ES will appear, as they are only available when seven main speakers are present. In addition, some of the modes available in the AVR580 will not appear unless a digital source is selected and is playing the correct bit- stream.
-
Page 24: Speaker Setup
BACK TO MASTER MENU line and press the Set Button p. Speaker Setup This menu tells the AVR580 which type of speakers are in use. This is important as it adjusts the settings that decide whether your system will use the “5-channel”... - Page 25 This line serves two functions in that it not only configures the setting for the surround back channels when they are present; it also tells the AVR580’s pro- cessing system to configure the unit for either 5.1 or 6.1/7.1 operation.
-
Page 26: Delay Settings
The AVR580’s advanced software enables you to quickly and easily set delay times without the need to calculate them using a complex formula. -
Page 27: Output Level Adjustment
Output level adjustment is a key part of the configuration of any surround sound product. It is particularly important for a digital receiver such as the AVR580, as correct outputs ensure that you hear soundtracks with the proper directionality and intensity. - Page 28 Information Display ˜. If the sound from a speaker location does NOT match the position indicated in the display, turn the AVR580 off using the Main Power Switch 1 and check the speaker wiring or connections to external power ampli- fiers to make certain that each speaker is connected to the correct output terminal.
- Page 29 OSD Button v to return to normal operation of the AVR. Once the settings outlined on the previ- ous pages have been made, the AVR580 is ready for operation. While there are some additional settings to be made,...
-
Page 30: Source Selection
OPERATION Basic Operation Once you have completed the initial setup and configuration of the AVR580, it is sim- ple to operate and enjoy. The following instructions will help you maximize the enjoyment of your new receiver: Turning the AVR580 On or Off •... -
Page 31: Surround Mode Selection
Surround Mode Selection One of the most important features of the AVR580 is its ability to reproduce a full multichannel surround sound field from digital sources, analog matrix surround- encoded programs and standard stereo programs. -
Page 32: Speaker/Channel Indicators
DTS discs. You may use any LD or CD player equipped with a digital output to play DTS-encoded discs with the AVR580. All that is required is to connect the player’s output to either an Optical or Coaxial Input on the rear or front panel &*. - Page 33 “Audio Select” button or in a menu screen on the disc) to send a full 5.1 feed to the AVR580. It is also possible for the type of signal feed to change dur- ing the course of a DVD playback. In some cases, the previews of special material will only be recorded in 2.0...
-
Page 34: Surround Mode Chart
The two Hall modes create sound fields that resemble a small (Hall 1) and medium-sized (Hall 2) concert hall. VMAx Near When only the two front-channel loudspeakers are used, JBL’s patented VMAx mode delivers a three-dimensional sound space VMAx Far with the illusion of “phantom speakers”... -
Page 35: Tuner Operation
• Due to the wide variation in MP3 for- mats and encoding speeds, it is possi- ble that the AVR580 may not be com- patible with all MP3 input signals. Some may produce unacceptable results and some may not be decoded. This is not... -
Page 36: Output Level Trim Adjustment
Output Level Trim Adjustment Normal output level adjustment for the AVR580 is established using the test tone, as outlined on pages 27 – 29. In some cases, however, it may be desirable to adjust the output levels using program material such as a test disc, or a selection you are familiar with. -
Page 37: Advanced Features
However, you may prefer to always have the AVR580 turn on at a specific setting, regardless of what was last in use when the unit was turned off. To change the... - Page 38 This setting is temporary and will remain active only until it is changed or until the AVR580 is turned off. Once the unit is turned off, the semi-OSD displays will remain activated, even if they were switched off for the previous listening session.
-
Page 39: Multiroom Operation
Selector buttons to turn on to a specific source. As long as an IR feed to the AVR580 has been established from the remote room, using any of the buttons on either remote will control the remote location volume î, change the tuner frequency... - Page 40 Multiroom Audio Outputs h. Once the multiroom system is turned on, it will remain on even if the AVR580 is placed in the Standby mode in the main room by pressing the Power Off Button å or the System Power Control 2 on the front panel.
-
Page 41: Programming The Product Codes
Method. Auto Search Method If the unit you wish to include in the AVR580’s remote is not listed in the code tables in this manual or if the code does not seem to operate properly, you may wish to program the correct code using the Auto Search method that follows: 1. -
Page 42: Macro Programming
Learning Codes In addition to using codes from the remote’s internal code library, the AVR580’s remote is able to “learn” codes from remotes that may not be in the code library. Also, you may use this function to “learn over” the codes from a prepro- grammed device to add functions not included in the preprogrammed codes. -
Page 43: Programmed Device Functions
Input Selectors ef will blink and then turn off. Example: To program the Macro 1 button so that it turns on the AVR580, TV and a cable box, follow these steps: • Press the Macro 1 Button... -
Page 44: Volume Punch-Through
Volume Control and Mute functions of either the TV or the AVR580 in conjunction with any of the devices controlled by the remote. For example, since the AVR580 will likely be used as the sound system for TV viewing, you may wish to have the AVR580’s volume activated, although the... -
Page 45: Resetting The Remote Memory
Before programming the remote for • Volume, Channel or Transport Punch- Through, make certain that any pro- gramming needed for the specific TV, CD, DVD, cable or satellite receivers has been completed. Reassigning Device Control Selectors Although each Input Selector e is nor- mally assigned to the category of product shown on the remote, it is possible to reassign one of these buttons to operate a... -
Page 46: Function List
FUNCTION LIST No. Button Name AVR Function Power On Power On Power Off Power Off Mute Mute AVR Select DVD Input Select CD Input Select Tape Tape Input Select VID 1 Video 1 Select VID 2 Video 2 Select VID 3 Video 3 Select VID 4 Video 4 Select... - Page 47 No. Button Name AVR Function Direct Direct Tuner Entry Clear Clear Preset Up Preset Tune Up Tune Down Tune Down D. Skip Preset Down Preset Tune Down Macro 1 Macro 2 Macro 3 Macro 4 Dolby Dolby Modes DTS SURR DTS Digital Modes DTS Neo:6 DTS Neo:6 Select...
- Page 48 SETUP CODE TABLE: TV Manufacturer/Brand ADMIRAL AKAI AKURA ALBA ALBIRAL ALLORGAN AIWA AMSTRAD ANAM ARC EN CIEL ARCAM ARISTONA ARTHUR MARTIN ASTRA ASUKA ATLANTIC ATORI AUDIOSONIC AUDIOTON AUSIND AUTOVOX BAIRD BANG & OLUFSEN BARCO BASIC LINE BAUR BEKO BLAUPUNKT BOOTS BRANDT ELECTRONIQUE 029 034 074 182 186 BRIONVEGA BRITANNIA...
- Page 49 Manufacturer/Brand Setup Code Number CTC CLATRONIC DAEWOO 063 140 145 161 193 195 375 DANSAI DAYTRON 195 226 DECCA 111 120 200 286 DECCA (UK) 046 050 102 106 131 DEGRAAF 023 122 209 262 DIXI 063 195 DORIC 104 105 DUAL 050 095 139 156 168 243 DUAL-TEC...
- Page 50 Manufacturer/Brand GORENJE GRAETZ GRANADA GRANADA (UK) GRUNDIG HANSEATIC HANTAREX HEMMERMANN HIFIVOX HIGASHI HINARI HITACHI HYPER IMPERIAL INGELEN INGERSOL INNO HIT INTERFUNK INTERVISION IRRADIO ISUKAI ITT-NOKIA JET POINT KAISUI KAMOSONIC KAPSCH KARCHER KATHREIN KAWASHO KENDO KENNEDY KLARMAX KNEISSEL KONKA KORTING KRIESLER LENOIR LEYEO LG (GOLDSTAR)
- Page 51 Manufacturer/Brand Setup Code Number LYCO M ELECTRONIC 003 235 308 330 MAAZ 326 327 MAGNADYNE 045 046 047 062 065 104 120 139 150 168 265 273 279 MAGNAFON 045 046 050 068 075 090 120 235 265 272 291 MANESTH MARANTZ MARELLI...
- Page 52 Manufacturer/Brand OTTO VERSAND P.T. ACTRON PAEL PANASONIC PATHÉ CINEMA PATHÉ CINEMA (F) PATHÉ MARCONI PAUSA PERDIO PHILCO PHILIPS PHOENIX PHONOLA PIONEER PRANDONI-PRINCE PREMIER PRIMA PRINCE PROFEX PROLINE PROTECH QUASAR QUELLE RADIOLA RADIOMARELLI RADIONETTE RAMK RANDT RANK RBM(UK) REDIFFUSION ROADSTAR ROBOTRON ROTEL ROWSONIC SABA...
- Page 53 Manufacturer/Brand Setup Code Number SANYO 003 018 020 041 050 056 065 102 117 131 143 189 198 201 206 209 257 275 280 286 287 306 368 063 112 157 158 192 268 271 SCHAUB LORENZ 090 104 136 139 153 159 162 171 198 262 SCHNEIDER 031 040 050 063 065 069 079 095 104 112 114 139 148 156 158 160 168 188 243 250 262 271 283 297...
- Page 54 Manufacturer/Brand TRISTAR TRIUMPH UHER ULTRAVOX UNIVERSUM UNIVOX UTAX VEGAVOX VESTEL VEXA VICTOR VOLTEC VORTEC VOXSON WALTHAM WATSON WATT RADIO WELTBLICK WESTINGHOUSE WESTON WHITE WHITE WESTINGHOUSE 050 113 WINTERNITZ YOKO ZANUSSI ZOPPAS Setup Code Number 304 319 004 046 147 235 294 069 080 090 113 147 148 236 242 262 044 045 047 050 065 104 133 139 279 003 020 076 155 202 235 244 245 246 308 312 330...
- Page 55 SETUP CODE TABLE: VCR Manufacturer/Brand Setup Code Number AGASHI AIOSTAY AIWA 039 044 055 073 112 116 121 148 152 AKAI 028 035 044 053 070 090 092 103 124 133 149 150 155 AKURA 029 112 ALBA 029 061 073 114 119 120 121 136 144 ALBIRAL AMSTRAD 039 107 119 148...
- Page 56 Manufacturer/Brand DESMET DIXI DOMOH DORIC DUAL DUMONT DYNATECH ELBE ELIN ELTA EMERSON ESSELTE EUROMAN FENNER FERGUSON FIDELITY FINLADIA FINLUX FIRST LINE FISHER FORMENTI FORMENTI-PHOENIX FRONTECH FUJITSU FUNAI GRANADA(UK) GBC(UK) GELOSO GENERAL GOLDMEDAL GOODMANS GRAETZ GRAETZ(ITT) GRANADA GRANADA(UK) GRANDIN GRONIC GRUNDIG HANSEATIC HARMAN KARDON HIFIVOX...
- Page 57 Manufacturer/Brand Setup Code Number INGERSOL INNO HIT 042 054 093 160 INTERFUNK 054 084 155 160 INTERVIDEO INTERVISION 148 155 015 019 042 044 084 090 103 133 139 ITT-NOKIA 015 019 042 044 045 084 090 103 106 133 139 149 150 155 160 162 JENSEN 001 004 007 010 044 045 047 085 090 112 115 133 135 141 KAMBROOK...
- Page 58 Manufacturer/Brand NAONIS NATIONAL NECKERMANN NESCO NEWTECH NIKKAI NOBLIKO NOGAMATIC NOKIA NORDMENDE OCEANIC (ITT) OCEANIC OLYMPUS OMAGA OPTONICA ORAVA/OTF ORION OSAKI OTTO VERSAND PALLADIUM PANAMA PANASONIC PATHÉ MARCONI PENTAX PERDIO PHILCO PHILIPS PHONOLA PIONEER PLANTRON PORTLAND PROLINE PROSCO QUALCRAFT QUARTZ QUELLE RADIOLA RADIONETTE REALISTIC...
- Page 59 Manufacturer/Brand Setup Code Number SAISHO 011 032 073 078 087 090 114 127 136 148 SALORA 001 019 053 134 162 SAMBERS SAMSUNG 009 042 054 056 057 060 062 066 067 092 096 150 155 169 172 SANYO 002 008 015 019 040 073 106 149 151 160 054 079 082 SCHAUB LORENZ 044 045 084 090 106 160...
- Page 60 Manufacturer/Brand TENOSAL TENSAI TETUNG THOMSON THORN THORN-FERGUSON TOSHIBA TOTEVISION TRANSONIC UHER ULTRAVOX UNIC RADIO UNITECH UNIVERSUM UNIVOX URANYA VEXA VICTOR VICTOR RESEARCH VIDEO TEC VIDITAL WARDS WATSON WATTRADIO WELTBLICK WHITE WESTINGHOUSE 139 160 XENON YAMAHA YOKO ZANELA ZANUSSI ZENDER ZOPPAS Setup Code Number 148 155 016 020 044 045 047 090 126 128 133 141...
- Page 61 SETUP CODE TABLE: CD Manufacturer/Brand Setup Code Number ADCOM AIWA AKAI ARCAM AUDIOACCESS AUDIOFILE AUDIOMECA AUDIO TECHNICA CALIFORNIA AUDIO CAPETRONIC CARRERA CARVER CASIO CLARINETTE CROWN CURTIS MATHES DENON EMERSON FISHER FRABA FUNAI GENEXXA GRUNDIG HAITAI HARMAN KARDON HITACHI INKEL JC PENNEY JENSEN KENWOOD KYOCERA...
- Page 62 Manufacturer/Brand MODULAIRE NAKAMICHI NAIM NIKKO ONKYO OPTIMUS PANASONIC PHILIPS PIONEER PROTON QUASAR RADIO SHACK REALISTIC REVOX ROTEL SAMSUNG SANSUI SANYO SCOTT SEARS SHARP SHERWOOD SIGNATURE SONY SOUNDSTREAM SYLVANIA SYMPHONIC T & A TAEKWANG TANDY TEAC TECHNICS TECHWOOD THETA DIGITAL THOMSON THORENS TOSHIBA UNIVERSUM (QUELLE)
- Page 63 SETUP CODE TABLE: TAPE Manufacturer/Brand Setup Code Number HARMAN KARDON SETUP CODE TABLE: DVD Manufacturer/Brand Setup Code Number APEX DIGITAL CALIFORNIA AUDIO DENON 002 019 022 034 051 003 004 HARMAN KARDON 001 032 066 080 081 001 081 KENWOOD 007 050 069 LG (GOLDSTAR) 005 055 064 070 078...
- Page 64 SETUP CODE TABLE: SAT Manufacturer/Brand AIWA AKAI ALBA ALDES ALLSONIC AMSTRAD ANKARO ARCON ARISTONA ARTHUR MARTIN ASTRA ASTRO BARCOM BLAUPUNKT BRUNS BT SATELLITE BUSH BUSH (UK) CAMBRIDGE CHAPARRAL CONNEXIONS DISKXPRESS DRAKE ECHOSTAR ELTASAT EMME ESSE FERGUSON FINLUX FRACARRO FUBA G SAT GALAXIS GIUCAR RECORD GOODMANS...
- Page 65 Manufacturer/Brand Setup Code Number LEMON LENCO LG(GOLDSTAR) LOEWE LOKIA LORENZEN LUXOR MACAB MAGAI MANHATTAN MARANTZ MASPRO MATSUI MEMPHIS METZ MINERVA MITSUBISHI MORGAN MULTISTAR NEIRU NETA NETWORK NEXTWAVE NOKIA NORSAT OLYMPIC OPTEX ORIGO OTTO VERSAND PACE PALCOM PANASONIC PHILIPS PHONOLA PLANET PROSAT PTT TELECOM QUADRAL...
- Page 66 Manufacturer/Brand SIEMENS SIERA SILVA SINTRACK SKY MASTER SKYLAB SKY LIFE SONY STARSAT STELLA STRONG TAGRA TANDBERG TANDY TATUNG TECHNISAT TELECOM TELEFUNKEN TELEMAX THORN-FERGUSON TRIAD UNIDEN VIDIO WAY VORTEC WINERSAT WISI WOLSEY ZEHNDER ZENITH Setup Code Number 347 384 352 353 327 347...
- Page 67 SETUP CODE TABLE: CBL Manufacturer/Brand Setup Code Number BT CABLE CABLETIME CLYDE CABLE VISION C & M DECSAT CANAL DONG GUK FILMNET FRANCE TELECOM JERROLD LG(GOLDSTAR) MEMOREX MOVIE TIME PARAGON PHILIPS PIONEER PULSAR SAGEM SALORA SAMSUNG SATBOX SCIENTIFIC ATLANTA SONY TAEKWANG TELESERVICE TOSHIBA...
-
Page 68: Processor Reset
• Remote sensor is obscured • Local interference • Digital audio feed paused • Additional cooling may not be required To clear the AVR580’s entire system memory including tuner presets, output level settings, delay times and speaker configuration data, first put the unit in Standby by pressing the System Power Control Button 2. - Page 69 † † Without input anti-slewing and output isolation networks. JBL and Logic 7 are a registered trademarks of Harman International Industries, Incorporated. is a trademark of Harman International Industries, Incorporated (patent no. 5,386,478). Trademarks of Dolby Laboratories, Inc. DTS, DTS Surround, DTS-ES and DTS Neo:6 are registered trademarks of Digital Theater Systems, Inc.
- Page 70 NOTES NOTES...
- Page 71 NOTES NOTES...
- Page 72 ® JBL Consumer Products 250 Crossways Park Drive Woodbury, NY 11797 USA 8500 Balboa Blvd. Northridge, CA USA www.jbl.com © 2004 Harman International Industries, Incorporated Part No. 55818580...
Need help?
Do you have a question about the AVR580 and is the answer not in the manual?
Questions and answers