Table of Contents
Advertisement
Quick Links
Advertisement
Table of Contents

Related Manuals for JBL LSR6300 Series


Summary of Contents for JBL LSR6300 Series
- Page 1 LSR6300 Studio Monitors Owner’s Manual...
-
Page 2: Important Safety Instructions
ARTICLE A LA PLUIE OU A L’HUMIDITE. The information contained in this document is confidential and the copyright of JBL Professional. To convey its contents, in part of it whole, to any party without prior written authorization is a violation of the copyright. -
Page 3: Table Of Contents
A. Wiring Requirements B. Mounting Specifications C. RMC™ Room Mode Correction System Specifications Specifications LSR6328P LSR6332 LSR6312SP Warranty Statement JBL Professional Contact Information 7 - 9 10 - 11 12 - 15 13-14 16 - 18 16 - 17 19 - 21... -
Page 4: Introduction
LSR6300 systems to provide higher peak output with less power compression, greater heat dissipation and a flatter impedance curve at higher frequencies. By reducing the thermal related effects, the LSR6300 Studio Monitors sound the same at low, medium or high levels. -
Page 5: Getting Started
Placement: The design of the LSR6300 systems lend themselves to a wide variety of placement options. Covered here is a typical stereo setup for near to mid field monitoring. A more detailed discussion of multi-channel sound system placement is available from JBL in Tech Note Volume 3, Number 3. -
Page 6: Power Connections
Angling toward the listening position: The LSR6300-Series monitors should be angled to directly face the listener. The center of the high frequency transducer should be on-axis with the ear level of the listener. Ideally, full-range speakers should be placed on suitable speaker stands away from boundaries. -
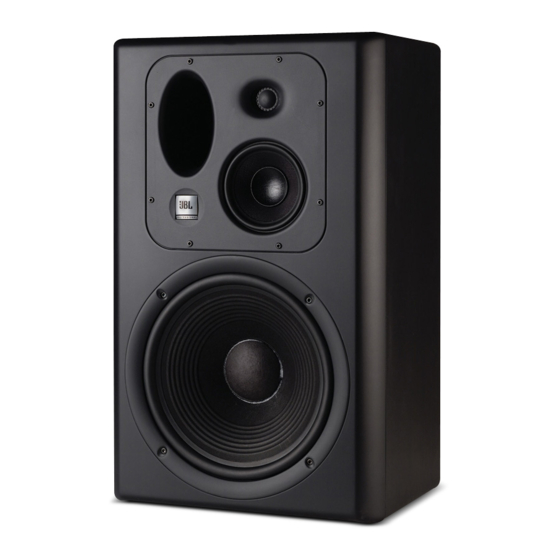
Page 7: Lsr6328P Biamplified Studio Monitor System
The addition of JBL RMC™ Room Mode Correction circuit and boundary compesnation ensures accurate low fre- quency response at the listening position, free of the spectral shift caused by room modes and the effect of boundaries. -
Page 8: Ac Power Connections
The ground terminal of the IEC plug is required by wiring codes and regulations. It must always be connected to the electrical installa- tion safety ground. The LSR6300 Series models have carefully designed internal grounding and balanced inputs and outputs to reduce the possibility of ground loops (hum). -
Page 9: Lsr6328P Biamplified Studio Monitor System
Boundary Compensation Switch 5 introduces a low frequency shelf roll-off of -1.5 dB, while Switch 6 introduces a low frequency shelf rolloff of -3 dB. Engaging both switches will produce a low frequency shelf rolloff of -4.5 dB. These functions are known as Boundary Compensation and are used to adjust for the build-up of low frequencies that accompany the placement of loudspeakers near walls or corners, or work surfaces. -
Page 10: Lsr6332 Studio Monitor System
The neodymium 12" woofer is based on JBL's patented Neodymium Differential Drive NDD™ technology. With the Neodymium magnet structure and dual drive coils, power compression is kept to a minimum to reduce spectral shift as power levels increase. -
Page 11: Lsr6332 Studio Monitor System
LSR6332 Studio Monitor System This adjustment is accomplished via the barrier strip on the back of the enclosure located above the dual pair of 5-way binding posts. Moving the link between the 0 and -1 dB positions will change the high frequency drive level. Please note that the loudspeaker should be disconnected from the amplifier during this procedure for safety of the system. -
Page 12: Audio Connections
LSR6312SP Powered Subwoofer System The LSR6312SP Active Subwoofer consists of a Neodymium Differential Drive NDD™ 12" neodymium woofer integrated with a powerful 260 watt continuous power output amplifier. The active drive circuitry has been developed to maximize the acoustic output power while maintaining overall low distortion and excellent transient performance. - Page 13 Do Not Expose This Equipment to Rain or Moisture See Owners Manual for Set-up and Safety Precautions Summed Figure J WARNING AVIS! SHOCK HAZARD DO NOT OPEN RISQUE DE CHOC ELECTRIQUE NE PAS OUVRIR Serial No: JBL PROFESSIONAL Assembled in USA...
-
Page 14: Lsr6312Sp Powered Studio Subwoofer System
The LSR6312SP power supply voltage is internally set at the factory for 100-125V or 200-250V. The ground terminal of the IEC plug is required by wiring codes and regulations. It must always be connected to the electrical installation safety ground. The LSR6300 Series electronic units have carefully designed internal grounding and balanced inputs and outputs to reduce the likelihood of ground loops. -
Page 15: Lsr6312Sp Powered Studio Subwoofer System
System Configuration Left Source Direct LFE Left Rear LSR6312SP Powered Studio Subwoofer System Center Right Right Rear... -
Page 16: Appendix
Appendix A Wiring Requirements For optimum performance, some attention to wiring details now can reduce system degradation later. The cabling recommendations given below follow standard wiring practice for differential inputs. Balanced Sources: The best way to run your system is balanced, where both "HOT" (+) and "COLD" (-) signals are supplied from the source along with a GROUND/SHIELD. - Page 17 Diagram D details the connections using single conductor shielded cable with a Tip/Ring/Sleeve plug for the 6328P input. Single con- ductor cable should be used as a last resort as it provides the greatest likelihood of problems. The "HOT" (+) signal should be connect- ed to the tip of the Tip/Ring/Sleeve plug.
-
Page 18: Appendix
Appendix B Mounting Specifications for LSR6328P, LSR6332 and LSR6312SP Mounting points are provided for use with readily available industry standard mounting brackets. Mounting points are located on the bottom of the LSR6328P and rears of the LSR6332 and LSR6312SP models. Fasterner specifications: Type: M6 metric thread Length: 38.1 mm (1.5 in) plus the thickness of the mounting plate... -
Page 19: Lsr6328P
For this reason, any current JBL product may differ in some respect from its published description, but will always equal or exceed the original design specification unless otherwise stated. -
Page 20: Lsr6332
For this reason, any current JBL product may differ in some respect from its published description, but will always equal or exceed the original design specification unless otherwise stated. -
Page 21: Lsr6312Sp
For this reason, any current JBL product may differ in some respect from its published description, but will always equal or exceed the original... -
Page 23: Warranty Statement
Who Pays for What? JBL will pay all labor and material expenses for all repairs covered by this warranty. Please be sure to save the original shipping car- tons because a charge will be made if replacement cartons are requested. Payment of shipping charges is discussed in the next sec- tion of this warranty. -
Page 24: Jbl Professional Contact Information
Register your product online at www.jblpro.com/registration Part# 350800-001 Outside the USA: Contact the JBL Professional Distributor in your area. A com- plete list of JBL Professional international distributors is pro- vided at our U.S.A.website - www.jblpro.com En Dehors des Etats-Unis: Contacter votre Distributeur JBL Professional.
Need help?
Do you have a question about the LSR6300 Series and is the answer not in the manual?
Questions and answers