
Related Manuals for Shure SCM268


Summary of Contents for Shure SCM268
- Page 1 Shure Brothers Incorporated 222 Hartrey Avenue Evanston IL 60202-3696 U.S.A. Model SCM268 User Guide SCM268 Four-Channel Microphone Mixer 1999, Shure Brothers Incorporated Printed in U.S.A. 27A8606 (SC)
-
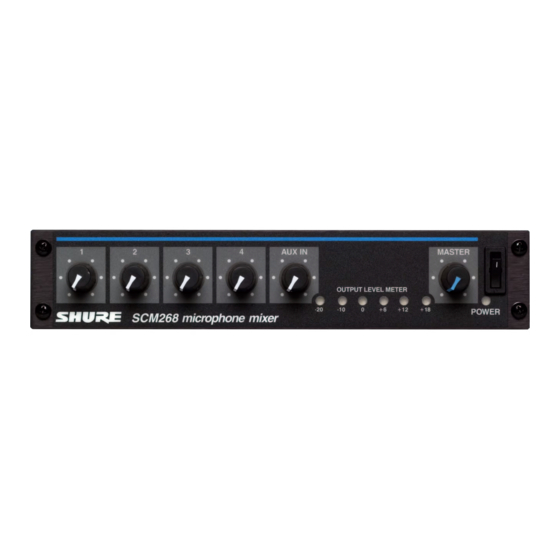
Page 2: Front Panel
Versatile in all types of applications, the SCM268 integrates mounts securely in single or dual rackmount installations. For transformer-balanced XLR inputs, a switchable microphone/line fixed installations, the SCM268 can be fastened on or below a level transformer-balanced XLR output, phono jack inputs and shelf, counter, or tabletop. -
Page 3: Gain Control
RED—Clip METER illuminate to reflect the peak level of the mixed output sig- nal from the SCM268 (in reference to balanced line output) in dBu (0 dBu = 0.775 V). Use the master gain control (MASTER) to adjust peak levels, Peak Level as indicated by the LEDs. -
Page 4: Line Out
CONNECTIONS The following diagram illustrates a few of the many types of connections possible with the SCM268. Note that nothing is connected to the channel 4 microphone input (MIC LEVEL INPUT 4). This is because channel 4 is being used for the consumer-level equipment con- nected to the channel 4 auxiliary level input (AUX LEVEL INPUT 4). -
Page 5: Installation
Bracket Screw Wood Screw Rackmount Screw Rackmount Installation The SCM268 can be mounted as a single unit or dual- Fixed Installation mounted with either another SCM268 or another Shure half-rack To permanently affix the SCM262 above or below a table, unit such as the SCM262 or DFR11EQ. -
Page 6: Internal Modifications
5. Slide the back panel and pc board out from the rear of the chassis. Line Pad CAUTION: When reassembling the SCM268, DO NOT OVER- To insert a 50 dB line pad for a given microphone input, re- TIGHTEN the knob retainer nuts. Use a minimal amount of force move the specified resistor and short the solder points at the spe- to secure the nut (0.6–0.8 N m (5–7 in lb)). -
Page 7: Specifications
Measurement Conditions (unless otherwise specified): Line Hum and Noise voltage 120 Vac, 60 Hz (SCM268) or 230 Vac, 50 Hz (SCM268E); Equivalent Input Hum and Noise ....
Need help?
Do you have a question about the SCM268 and is the answer not in the manual?
Questions and answers