Table of Contents
Advertisement
Quick Links
Advertisement
Table of Contents

Subscribe to Our Youtube Channel
Related Manuals for Remak DoorMaster C1

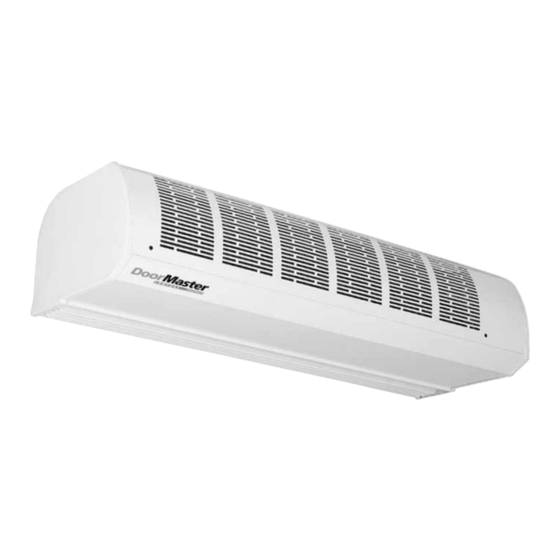
Summary of Contents for Remak DoorMaster C1
- Page 1 Air curtains C1, D2...
-
Page 2: Table Of Contents
Controllers and room thermostats ..................16 Connection diagrams ........................17 Chaining of curtains ........................22 Operating and maintenance instructions ................23 Maintenance, operation checks ....................24 Troubleshooting ........................25 Spare parts, service and disposal ...................26 The up to date version of this document is available at our website: www.remak.eu... -
Page 3: Application, Operating Conditions And Construction
Air curtains Application, Operating Conditions and Construction Information from the manufacturer be installed in a non-freezing area, i.e. +5 °C to +40 °C. Otherwise, a sufficient supply of heated water must be DoorMaster door curtains are manufactured in compli- provided so that the medium in the water exchanger ance with the valid Czech and European technical regu- does not freeze. - Page 4 Air curtains Designation, Storage and Dispatch The covering sidewalls are laminated. The intake panel Figure 1 - designation of curtains has an integrated filter insert (G1). The exhaust cham- C1 - E1 - 150 / TR-M ber is furnished with anti-noise insulation. The exhaust optional equipment screen is adjustable.
-
Page 5: Installation
Air curtains Installation, mounting Rules for location - correct installation Figure 4 - service procedures Install the curtains above the entrance door with the outlet slot near the side of the door and with the intake Service procedures for the side in the direction of the room. -
Page 6: Dimensions
Air curtains Dimensions Figure 6 - dimensions of the curtains in the C1 series Size A * W: curtain with water heating ZAV – Hanging on hanging profile ** E1, E2: curtain with el. heating, N: curtain without heating NKC – Hanging on wall console Figure 7 - basic dimensions of the curtains in the D2 series Size A... -
Page 7: Arrangement
Air curtains Arrangements Figure 8 – basic description of C1 series curtain cover connections plastic for the for the media sidewall wiring removable intake panel adjustable terminals outlet for the electrical screen connection Figure 9 – basic description of D2 series curtain removable internal connections for the... -
Page 8: Technical Parameters
Air curtains Technical parameters Low-temperature Water heating DoorMaster C1 C1-N-100 C1-N-150 C1-N-200 C1-W-100 C1-W-150 C1-W-200 Door width (max.) 1.000 1.500 2.000 1.000 1.500 2.000 Total width of curtain 1.040 1.540 2.040 1.040 1.540 2.040 Height of curtain body Depth of curtain body... - Page 9 Air curtains Technical parameters Low-temperature Water heating DoorMaster D2 D2-N-100 D2-N-150 D2-N-200 D2-N-250 D2-W-100 D2-W-150 D2-W-200 D2-W-250 Door width (max.) 1.000 1.500 2.000 2.500 1.000 1.500 2.000 2.500 Total width of curtain 1.020 1.520 2.020 2.520 1.020 1.520 2.020 2.520 Height of curtain body Depth of curtain body Weight (1-speed / 3-speed)
- Page 10 Air curtains Installation, Media Connection Raise the curtain and slide the hanging profile Set the curtain (behind the heads of the screws) between the binding washers. into the hanger. Tighten the nuts (counter). Screw the M8x40 safety screws with the 8 spring ...
- Page 11 Air curtains Wiring and Commissioning Using flexible stainless hoses is the easiest way to and leaving a warning (a sign with the text: "Do not connect the water heat exchanger to the heating wa- switch on. Work is being performed on the device."). ter distribution piping;...
-
Page 12: Mounting
Air curtains Wiring and Commissioning As standard, the DoorMaster COMFORT air curtains Note: There is no possibility to control the speed with are designed to be controlled by remote (external) con- the C1 air curtain basic version (without TR). trollers; therefore, no controls are situated on the air b) Electric Heater Connection curtain casing. - Page 13 Air curtains Accessory Installation stat 80°C, operation thermostat 60°C) is forbidden. Thermostatic Valve It is forbidden to operate the electric heater without A thermostatic valve, either a TVW-P 9 thermostatic re- the outlet air temperature control and without ensuring gulator (with a separate sensor and a capillary) or TVW- a steady flow of transported air.
- Page 14 Air curtains Accessory Installation Figure 16 – Thermo-valve sensor installation, C1 Figure 17 – Thermo-valve sensor installation, D2 TVW-P (optional accessory) Thermostat sensor Thermostat capillary tube Sensor holder ...
-
Page 15: Controllers And Room Thermostats
Air curtains Controllers and Room Thermostats Figure 19 – Fan speed controller Figure 21 – Room thermostats RAB 91 RAA 10 Three-stage fan speed controller Heating output control using a room thermostat Application: Application: - C1 air curtains …/TR - C1-E1 E2 air curtains (with transformer) (electric heater) - D2 air curtains, all versions... - Page 16 Air curtains Wiring diagrams Figure 22 – C1-E1 air curtains connection X1 - Main power connection (supply) L1+L2+L3+N+PE - Input voltage terminals TK-TK - under-voltage circuit breaker connection terminals DK1-DK2 - Door contact connection terminals LV+Q3 - Two-pole switch/breaker connection ter- minals LE+Q1E - Electric heater controller power supply terminals...
- Page 17 Air curtains Wiring diagrams Figure 24 – C1-E2 air curtains connection X1 - Main power connection (supply) L1+L2+L3+N+PE - Input voltage terminals TK-TK - under-voltage circuit breaker connection terminals DK1-DK2 - Door contact connection terminals LV+Q3 - Two-pole switch/breaker connection terminals Electric heater controller power supply terminals: Q1E - I.
- Page 18 Air curtains Wiring diagrams Figure 26 – C1-W and C1-N air curtains connection X1 - Main power connection (supply) L+N+PE - Input voltage terminals DK1-DK2 - Door contact connection terminals LV+Q3 - Fan controller connection terminals: STA21 + VVI 46.20 - TVW-E thermo-electric valve Figure 27 –...
- Page 19 Air curtains Wiring diagrams Figure 28 – D2-E1 and D2-E2 air curtains connection Figure 28 - D2-E1 and D2-E2 air curtains connection X1 - Main power connection (supply) L1+L2+L3+N+PE - Input voltage terminals TK-TK - under-voltage circuit breaker connection terminals DK-DK - Door contact connection terminals XV - Fan controller connection terminals Q1 - 1.
- Page 20 Air curtains Wiring diagrams Figure 30 – control of chained C1 air curtains using an internal switch Q1 - 1. Speed stage Q2 - 2. Speed stage Q3 - 3. Speed stage (the highest speed) Table 3 – Possible control according to air curtain type Speed control Heating control Possibility...
- Page 21 Air curtains Air Curtain Chaining Observing all instructions of the Installation Instructions screws. The connection must be carried out so that the Manual, suspension dimensioning and instructions for air curtains will not touch each other and a minimum electrical wiring, the air curtains can be chained into any gap of 2 mm (at the side wall bulging) will be left be- configuration (of the same air curtain line and type of tween them.
-
Page 22: Operating And Maintenance Instructions
Air curtains Operating and Maintenance Instructions Wiring Figure 32 – Mechanical connection points a) Fan and Electric Heater Control Electrical chaining of these air curtains is not limited, and there is no need for any specific external accesso- ries. Simple air curtain chaining can be ensured by a suitable combination of air curtains types. - Page 23 Air curtains Maintenance and Screening Checks Screening Checks and Maintenance Important: If taking the exchanger out of operation during the winter season, the water must be com- DoorMaster air curtains are made of high quality com- pletely drained from the exchanger, and possible ponents;...
-
Page 24: Troubleshooting
Air curtains Náhradní díly, servis Troubleshooting Expert Check The heat-exchanging surface of the exchanger can be vacuumed or blown through. To remove deeper dirt, Expert checking of the device can only be performed by use a long bristle brush. Be careful not to damage the professionally trained persons who have been informed exchanger fins! If distorted, the exchanger fins can be of possible dangers arising from the assignments which... -
Page 25: Spare Parts, Service And Disposal
LV + Q1 or LV + Q2 or LV + Q3 llowing address: Heating output controller (the air curtain does not REMAK a.s., Zuberská 2601, CZ-756 61 Rožnov pod heat): Radhoštěm, Czech republic LE + Q1E or LE + Q2E or LE + Q3E... - Page 26 These Installation and Operating Instructions (as a whole or a part) must not be printed or copied without prior written permission from REMAK a. s., Zuberská 2601, Rožnov pod Radhoštěm. These Installation and Operating Instructions are the sole property of REMAK a. s.
- Page 27 Air curtains...
- Page 28 REMAK a.s. Zuberská 2601, 756 61 Rožnov pod Radhoštěm, tel.: +420 571 877 878, fax: +420 571 877 877, email: remak@remak.cz, internet: www.remak.cz...
Need help?
Do you have a question about the DoorMaster C1 and is the answer not in the manual?
Questions and answers