AEG SANTO Operating Instructions Manual
Refrigerator/freezer combinations
Hide thumbs
Also See for SANTO:
- Operating instructions manual (56 pages) ,
- Installation instructions manual (25 pages) ,
- Operating instructions manual (28 pages)

Related Manuals for AEG SANTO


Summary of Contents for AEG SANTO
- Page 1 SANTO Kühl-/Gefrierkombinationen Refrigerator/Freezer Combinations Gebrauchsanweisung Operating Instructions...
- Page 2 "Something not working". If these instructions should not be sufficient, please contact your local AEG Service Force Centre. Printed on paper manufactured with environmentally sound processes. he who thinks ecologically acts accordingly ...
-
Page 3: Table Of Contents
Contents Safety ............39 Environmental Information . - Page 4 Contents Interior Accessories ..........55 Storage Shelves .
-
Page 5: Safety
Safety The safety of our appliances is in accordance with recognised techno- logical standards and appliance safety legislation. We nevertheless feel that it is important to acquaint you with the following safety guideli- nes: Use for Intended Purpose • The appliance is intended for household use. It is suited for the refri- geration, freezing and frozen storage of foods as well as the prepara- tion of ice. - Page 6 Safety • Before disposing of old appliances make them inoperable. Remove plug from mains, sever the power cable, remove or destroy any snap or latch closures. This eliminates the danger that playing children lock themselves into the appliance (danger of suffocation!) or place them- selves into other life-endangering situations.
- Page 7 Safety • Do not remove the power cord by pulling on its lead, particularly when the fridge/freezer is being pulled out of its niche. Damage to the cord may cause a short circuit, fire and/or electric shock. • Do not place heavy articles or the fridge/freezer itself on the power cord.
-
Page 8: Environmental Information
Environmental Information Packaging All transit packaging materials are environmentally compatible and can be reused. Wood is un-treated. The plastics can be recycled and are identified as follows: >PE< for polyethylene, e.g. the outer covering and the bags in the interior. >PS<... -
Page 9: Appliance Transport
Appliance Transport Two persons are required for transport of the appliance. There are two recessed handles at the back of the appliance at the top for improved gripping. 1. Grip the appliance with the recessed handles positioned as in the draw- ing, and transport the appliance. -
Page 10: Installation
Installation Installation Location The appliance should be installed in a well ventilated, dry room. Energy use and efficient performance of the appliance is affected by the ambient temperature. The appliance should therefore – not be exposed to direct sunlight; – not be installed next to radiators, cookers or other sources of heat; –... -
Page 11: The Refrigerator/Freezer Needs Ventilation
Installation The refrigerator/freezer needs ventilation Air is fed under the door through the vent slots in the base and is exhausted upwards along the back wall. To ensure proper air circulation never cover or alter the vent openings. Important! If the appliance is installed under a hanging cabinet, a clearance of at least 10 cm between the top of the appliance and the... -
Page 12: Electrical Connection
Electrical Connection A properly installed socket outlet with earthing contact is required for electrical connection. Electrical fuse protection must be of at least 10 ampere. If the outlet socket is no longer accessible after installation of the appliance, appropriate measures must be taken during electrical instal- lation to assure that the appliance can be disconnected from the mains (e.g. - Page 13 Reversing The Door 2. Unscrew the centre door bear- ing: Open the fridge and freezer doors. Undo the screws far enough to be able to take the top door bearing bolt out of the freezer door. Close the freezer door. Remove the door bearing bolt from the bottom of the fridge door and close the fridge door.
- Page 14 Reversing The Door After changing the door hinges, check that the magnetic seals on the doors fit perfectly against the housing and that the interior lighting goes off when the door is closed. 10. Depending on the model: Model with bar handle Unscrew the top handle bracket from the handle rod (1).
-
Page 15: Appliance Description
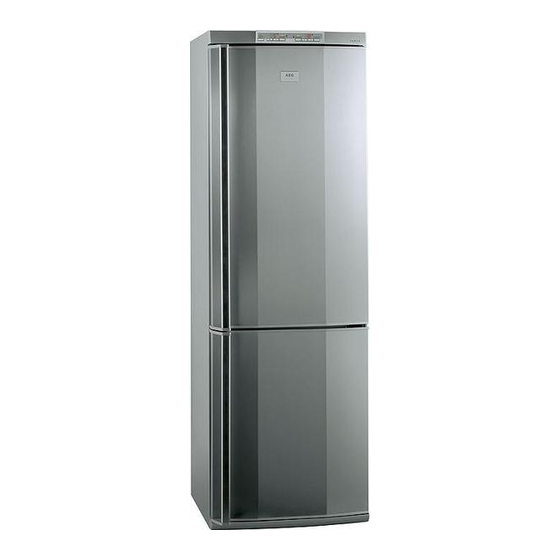
Appliance Description View of Appliance (various models) á Control Panel à Butter and Cheese Compartment with Lid â Door Storage Compartments ä Bottle Compartment/Bottle Rack ã FRESH Box å Fruit/Vegetable Drawer ç Shelves é Freezer Drawer (Maxi Box) è Freezer Drawer ê... -
Page 16: No-Frost-System
No-Frost-System The no-frost-system enables both the freezing of fresh foods and the storage of ready frozen or cooled foods by means of cold air. A vapor- iser cools the air in the interior space of the appliance, which is circu- lated and uniformly distributed by a ventilator. -
Page 17: Starting Up And Regulating The Temperature
Starting Up and Regulating the Temperature Fridge and freezer sections can each be regulated independently of the other. The control panel is situated behind the fridge door at the top of the fridge section. 1. Insert plug into mains socket. Within 20 seconds the electronics carry out a system test and switch the appliance on. -
Page 18: Frostmatic Button
2. Using a coin, set the temperature required for the freezer by turning the temperature regulator. Select a middle position for normal opera- tion. 3. Press the FROSTMATIC button. The FROSTMATIC button will be illumi- nated in yellow and the compressor will operate continuously. 4. -
Page 19: Open Door" Warning
– a fault in the appliance. Attention! If suspicion of partial or complete thawing exists, please check the quality of the foods to determine if they can be used. If the temperature warning stays on for a longer period please contact AEG Service Force. -
Page 20: Switching The Appliance Off
Switching the Appliance Off 1. To switch off, hold down the ON/OFF button for approx. 3 seconds. The green illumination in the button will go off. If the appliance is not going to be used for an extended period: 1. Switch off the appliance by holding down the ON/OFF button for approx. -
Page 21: Interior Accessories
Interior Accessories Storage Shelves The shelf in the lowest runners above the fruit and vegetable drawer is stopped with plastic corners on the back. It must always remain in this position, so that fruit and vegetables stay fresh for longer. To remove the stops, the plastic corners must be twisted 90°... -
Page 22: Fruit/Vegetable Drawer
Interior Accessories Fruit/Vegetable Drawer (not offered in all models) On some models there is a moisture filter in front of the shelf above the fruit and vegetable compartments. This preserves the natural moisture content of the food in the fruit and vegetable compartments for longer. -
Page 23: Correct Storage
Correct storage The cooling fans ensure an even tem- perature distribution in the fridge. Foods with different perishability can therefore be arranged on the shelves as you like, without having to take into account the different temperature zones which usually occur. The temper- ature in the fruit and vegetable drawer is somewhat higher than the fridge temperature set. -
Page 24: Freezing
Freezing Warning! • Before foods are frozen, the actual temperature in the freezer compartment must be -18 °C or colder. • Please observe indicated freezing capacity on the rating plate. The freezing capacity represents the maximum amount of fresh goods that can be frozen within 24 hours. -
Page 25: Frozen Storage
Frozen Storage Warning! Before initial loading of the freezer compartment with previously frozen goods, the required storage temperature of -18 °C must be reached. • Load freezer only with packaged frozen goods, so that they do not dry out or lose their flavour, and so that no flavour contamination of other frozen goods can occur. -
Page 26: Maintenance And Cleaning
Maintenance and Cleaning Before any maintenance or cleaning work is carried out DISCONNECT the appliance from the ELECTRICITY supply. Warning! • Do not use detergents, abrasive powders, highly perfumed cleaning products, wax polishes or cleaning products containing bleach or alcohol. •... -
Page 27: Energy Saving Advice
Accumulation of dust at the condenser increases energy consumption. For this reason carefully clean the condenser at the back of the appliance once a year with a soft brush or a vacuum cleaner. 7. After everything is dry place appliance back into service. Energy Saving Advice •... -
Page 28: Something Not Working
Something not Working Correcting Malfunctions A malfunction may be caused by only a minor fault that you can rectify yourself using the following instructions. Do not perform any other work on the appliance if the following information does not provide assistance in your specific case. - Page 29 Appliance is not level. Refer to Normal Operating Sounds If after the above checks there is still a fault, call your local AEG Service Force Centre. In-guarantee customers should ensure that the above checks have been made as the engineer will make a charge if the fault is not a mechanical or electrical breakdown.
-
Page 30: Replace Light Bulb
Something not Working Replace light bulb Warning! Danger of electrical shock! Before replacing the light bulb switch off the appliance and remove the mains plug. Light bulb specifications (depending on model): 2x Standard 220-240 V, max. 25 W, socket: E 14 or 1x Halogen 220-240 V, max. -
Page 31: Normal Operating Sounds
Normal Operating Sounds The following noises are characteristic of refrigeration appliances: • Clicks Whenever the compressor switches on or off, a click can be heard. • Humming As soon as the compressor is in operation, you can hear it humming. •... -
Page 32: Technical Terminology
Technical Terminology • Refrigerant Liquids that can be used to a generate a cooling effect are known as refrigerants. They have a relatively low boiling-point, indeed so low, that the warmth from the food stored in the fridge or freezer can cause the refrigerant to boil and vaporise. -
Page 33: Customer Service
Customer Service If you cannot find the remedy for a malfunction in these operating instructions, please contact your dealer or our customer service depart- ment. Addresses and telephone numbers are listed in the accompanying booklet "Guarantee Conditions/Customer Service Locations". Selective ordering of replacement parts can save unnecessary travel and costs. - Page 34 USD 14 billion in more than 150 countries around the world. AEG Hausgeräte GmbH Postfach 1036 D-90327 Nürnberg http://www.aeg.hausgeraete.de © Copyright by AEG Änderungen vorbehalten 214.3674.01 – 01 - 1203 Subject to change without notice...
Need help?
Do you have a question about the SANTO and is the answer not in the manual?
Questions and answers