AEG SANTO Operating Instructions Manual
Electronic refrigerator/freezer combination
Hide thumbs
Also See for SANTO:
- Operating instructions manual (56 pages) ,
- Installation instructions manual (25 pages) ,
- Installation instructions manual (24 pages)

Related Manuals for AEG SANTO


Summary of Contents for AEG SANTO
- Page 1 SANTO Electronic Refrigerator/Freezer Combination Operating Instructions 818 17 03-01/1...
- Page 2 Dear customer, Before placing your new refrigerator/freezer into operation please read these operating instructions carefully. They contain important information for safe use, for installation and for care of the appliance. Please keep these operating instructions for future reference. Pass them on to possible new owners of the appliance.
-
Page 3: Table Of Contents
Contents Important Safety Instructions ........5 Environmental Information . - Page 4 Contents Opening the Freezer Compartment Door ......24 Interior Accessories ..........25 Storage Shelves .
-
Page 5: Important Safety Instructions
Important Safety Instructions These warnings are provided in the interests of your safety. Ensure that you understand them all before installing or using this appliance. Your safety is of paramount importance. If you are unsure about any of the meanings of these warnings contact the Customer Care Department. - Page 6 Important Safety Instructions Child Safety • Do not allow children to tamper with the controls or play with the pro- duct. • Keep packaging material away from children! (There is a risk of suffoca- tion!) During Use • This appliance is designed for domestic use only, specifically for the storage of edible foodstuffs only.
-
Page 7: Environmental Information
Environmental Information Packaging All transit packaging materials are environmentally compatible and can be reused. Wood is un-treated. The plastics can be recycled and are identified as follows: >PE< for polyethylene, e.g. the outer covering and the bags in the inte- rior. -
Page 8: Before Use
0 In order to push the appliance into its final position, press carefully at the top of the door and tip the appliance back slightly. The weight is thus transferred to the back wheels and the appliance can be easily pushed. -
Page 9: Installation
Remove the transport fittings from the storage shelves: 0 Slide the fittings securing the shelf forward to the thicker section on the edge of the storage shelf. 0 Slide the storage shelf far enough forward so that it can be hinged downwards and the fittings can be removed from the guides. -
Page 10: The Refrigerator/Freezer Needs Ventilation
Installation The refrigerator/freezer needs ventilation Air is fed under the door through the vent slots in the base and is exhausted upwards along the back wall. To ensure proper air circulation never cover or alter the vent openings. Important! If the appliance is installed under a hanging cabinet, a clearance of at least 10 cm between the top of the appliance and the cabinet above it must... -
Page 11: Electrical Connection
Installation Electrical Connection Any electrical work required to install this appliance should be carried out by a qualified electrician or competent person. WARNING – THIS APPLIANCE MUST BE EARTHED The manufacturer declines any liability should these safety measures not be observed. Before switching on, make sure the electricity supply voltage is the same as that indicated on the appliance rating plate. -
Page 12: Changing Over The Door Hinges
Changing Over The Door Hinges The door hinges can be changed from right (as supplied) to left if requi- red to suit the location where the appliance is installed. Warning! Unplug from the mains, before reversing the door. 0 Open the freezer compartment door and remove the plinth to the front. - Page 13 Changing Over The Door Hinges 0 Move the bearing pivot from the right to the left hand hole. Remove the freezer compartment door carefully to the front and place on one side. 0 Unscrew the centre door bearing. 0 Remove the fridge compartment door carefully to the front and place on one side.
- Page 14 Changing Over The Door Hinges 0 Move the door handles from the left to the right and cover the remaining holes with the hole cover pins. 0 Fasten the self-closing mechanism to the bottom left of the fridge compartment door. 0 Carefully slide the fridge com- partment door onto the top bea- ring pivot and close.
- Page 15 Changing Over The Door Hinges 0 Fasten the self-closing mechanism on the top left of the freezer compartment door, 0 Carefully slide the freezer com- partment door onto the centre bearing pivot and close. 0 Place the lower door bearing with the bearing pivot in the lower left of the freezer compartment door and fasten.
-
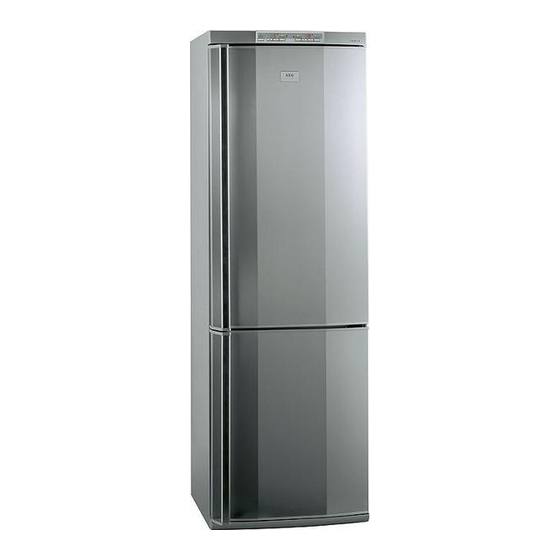
Page 16: Appliance Description
Appliance Description View of Appliance (various models) Control panel and elements Butter and cheese compartment with lid Door storage compartments Variable storage box (not included with all models) Bottle compartment/bottle rack Fruit and vegetable drawers Shelves (General purpose box, not included with all models) Freezer drawer (only for storage) When defrosting the bottom drawer also serves as a water collecting vessel. -
Page 17: Freezer Tray With "Cold Accumulation Block
Appliance Description Freezer tray with "Cold Accumulation Block" On some models a freezer tray with a cold accumulation block and two ice trays is included above or below the upper drawer in the freezer compartment. On some models a freezer tray with two ice trays is fitted to the top drawer in the freezer com- partment. -
Page 18: Control Panel
Appliance Description Control Panel ON/OFF indicator light for refrigerator (green) ON/OFF button for refrigerator Temperature display for refrigerator Buttons for adjusting the temperature for refrigerator FAST CHILL indicator light (yellow) • FAST CHILL for intensive cooling in the refrigerator FAST CHILL button ON/OFF indicator light for freezer compartment (green) ON/OFF button for freezer compartment Temperature display for freezer compartment... -
Page 19: Temperature Display
Appliance Description • With each further press of one of the two buttons, the DESIRED tem- perature is adjusted by one display field. • If neither button is pressed, the temperature display automatically switches back after a short period (approx. 5 sec.) to the display of the ACTUAL temperature. -
Page 20: Prior To Initial Start-Up
Prior to Initial Start-Up Before connecting the appliance to the mains and putting it into ope- ration for the first time, leave the appliance to stand for 30 minutes if was transported upright. After transport on its side, the appliance must be left to stand for 4 hours before putting it into operation. -
Page 21: Initial Start-Up
Initial Start-Up Refrigerator and freezer compartments can be operated and controlled independently of one another. 0 Insert plug into mains socket. Refrigerator Start-Up 0 Press refrigerator ON/OFF button. The green power indicator for the fridge compartment lights up. The flashing red warning light indicates that the required storage tempera- ture has not yet been reached. -
Page 22: Temperature Adjustment
Temperature Adjustment With the individual buttons for temperature adjustment the desired temperatures in the refrigerator and in the freezer compartment can be adjusted independently of one another. 0 Press either the „+“ (WARMER) or „-“ (COLDER) button. The temperature display switches over and the DESIRED temperature currently set flashes on the temperature display. -
Page 23: Fast Freeze
FAST FREEZE The FAST FREEZE function provides for quick freezing of fresh food products, and at the same time protects pre- viously stored goods against undesired warming in the freezer compartment. 0 The FAST FREEZE function is switched on by pressing the FAST FREEZE button. -
Page 24: Control And Information Systems
Control and Information Systems The control and information systems consist of temperature displays, an optical warning display and an acoustic warning. The system warns if: – the temperature in the refrigerator or freezer compartment is too high; – functional disturbances at the appliance. Temperature Warning The red warning display flashes and an audible warning sounds, as soon as the temperature in the freezer compartment is warmer than -12 °C. -
Page 25: Interior Accessories
Interior Accessories Storage Shelves 0 A storage shelf must be inserted into the lower guide track above the fruit and vegetable trays. It must always remain in this position, so that fruits and vegetables remain fresh longer. The remaining storage shelves can be adjusted to various heights: 0 Pull the storage shelf forward until it can be tipped up or down and... -
Page 26: Variable Inner Door
0 To do this pull the bottle rack for- ward until it can be tilted upwards, then slide the front sup- port into the next level up. Variable Inner Door The door compartments can be pulled up and removed, and inserted at other positions as needed. -
Page 27: Correct Storage
Correct storage For physical reasons, the refrigerator compartment has different tempera- ture zones. The coldest zone is on the lowest storage shelf immediately above the fruit and vegetable trays. Warmer zones are the upper storage shelves and door racks. The arrange- ment (see fig.) indicates where dif- ferent types of food are best stored to make the most of temperature... -
Page 28: Freezing
Freezing Except for the bottom drawer, which serves only for storage purposes, all compartments and drawers in the freezer compartment are suited for freezing. Warning! • Before foods are frozen, the actual temperature in the freezer com- partment must be -18°C or colder. •... -
Page 29: Frozen Storage
Tips: • The following are suited for the packaging of frozen goods: – freezer bags and polyethylene wraps; – plastic containers for frozen foods; – extra-thick aluminium foil • The following are suited for sealing bags and wraps: plastic clips, rubber bands or adhesive tape. •... -
Page 30: Storage Goods Symbols/Freezing Calendar
Storage Goods Symbols/Freezing Calendar • The symbols on the drawers show different types of frozen goods. • The numbers indicate storage times in months for the appropriate types of frozen goods. Whether the upper or lower value of the indi- cated storage time is valid depends on the quality of the foods and pre-treating before freezing. - Page 31 Defrosting Warning! • Do not use electrical heating appliances or any other mechanical or artificial devices to speed up the defrosting process, with the excep- tion of those recommended in these operating instructions. • Do not use defrosting sprays, because they may be health endange- ring and/or contain substances damaging to plastics.
-
Page 32: Hints And Tips
Hints and Tips Normal Operating Sounds • You may hear faint gurgling or bubbling sounds when the refrigerant is pumped through the coils or tubing at the rear, to the cooling plate/evaporator. • When the compressor is on, the refrigerant is being pumped round and you will hear a whirring sound or pulsating noise from the com- pressor. -
Page 33: Maintenance And Cleaning
Maintenance and Cleaning Before any maintenance or cleaning work is carried out DISCONNECT the appliance from the ELECTRICITY supply. Internal Cleaning 0 If the refrigerator only is to be cleaned, press the FAST FREEZE button several hours in advance, in order to build up sufficient chill reserve in the freezer compartment for the interruption in service. -
Page 34: Replace Light Bulb
Maintenance and Cleaning Replace light bulb For safety reasons the interior lighting switches off after 20 minutes when the door is open. It switches on again the next time the door is opened. Warning! Danger of electrical shock! Before replacing the light bulb switch off the appliance and remove the mains plug. -
Page 35: Something Not Working
Something not Working Before contacting your local service force centre, check the following points. Symptom Solution Check there is power at the socket Check there is not a power cut by No power to the appliance. checking the household lights. Check the fuse has not blown. - Page 36 Something not Working Symptom Solution The compressor does not start immedia- This is normal, the compressor starts after tely after changing the temperature set- a period of time. ting. If after the above checks there is still a fault, call your local AEG Service Force Centre.
-
Page 37: Technical Terminology
Technical Terminology • Refrigerant Liquids that can be used to a generate a cooling effect are known as refrigerants. They have a relatively low boiling-point, indeed so low, that the warmth from the food stored in the fridge or freezer can cause the refrigerant to boil and vaporise. -
Page 38: Guarantee Conditions
Guarantee Conditions AEG offer the following guarantee to the first purchaser of this appliance. 1. The guarantee is valid for 12 months commencing when the appliance is handed over to the first retail purchaser, which must be verified by purchase invoice or similar docu- mentation. -
Page 39: Service & Spare Parts
Service & Spare Parts If after carrying out the necessary checks there is still a fault with your appliance please contact your local AEG Service Force Centre. In guarantee customers should ensure that the suggested checks have been made as the engineer will make a charge if the fault is not a mechanical or electrical breakdown. - Page 40 AEG Hausgeräte GmbH Postfach 1036 D-90327 Nürnberg http://www.aeg.hausgeraete.de © Copyright by AEG 818 1703 – 01/1 - 0301...
Need help?
Do you have a question about the SANTO and is the answer not in the manual?
Questions and answers