JVC DD-8 Instructions Manual
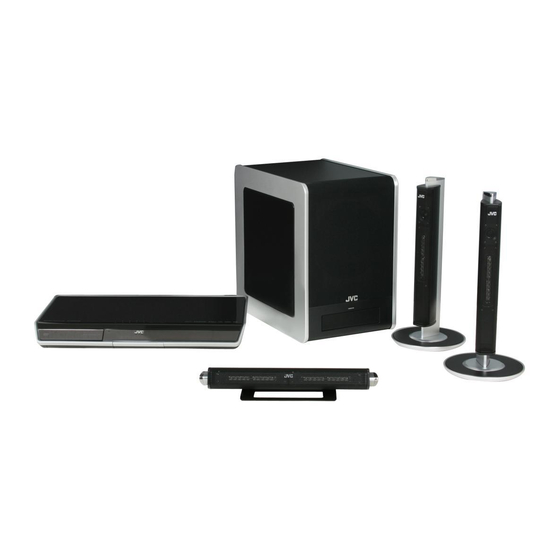
Network media system
Hide thumbs
Also See for DD-8:
- Instructions manual (120 pages) ,
- Network manual (22 pages) ,
- Instructions manual (168 pages)
Table of Contents
Advertisement
Advertisement
Table of Contents

Subscribe to Our Youtube Channel
Related Manuals for JVC DD-8


Summary of Contents for JVC DD-8
- Page 1 NETWORK MEDIA SYSTEM DD-8 Consists of CA-DD8, SP-PWDD8, SP-DD8F and SP-DD8S DD-3 Consists of CA-DD3, SP-PWDD3, SP-DD3F and SP-DD8S DIGITAL MEDIA SYSTEM DD-1 Consists of CA-DD1, SP-PWDD1, SP-DD1F and SP-DD1S (Only for DD-8 and DD-3) INSTRUCTIONS LVT1546-002A...
- Page 2 Warnings, cautions and others CAUTION To reduce the risk of electrical shocks, fire, etc.: 1. Do not remove screws, covers or cabinet. 2. Do not expose this appliance to rain or moisture. CAUTION • Do not block the ventilation openings or holes. (If the ventilation openings or holes are blocked by a newspaper or cloth, etc., the heat may not be able to get out.) •...
- Page 3 Attention: (Business users) This symbol is only If you wish to dispose of this product, please visit our web page www.jvc-europe.com valid in the Euro- to obtain information about the take-back of the product. pean Union. [Other Countries outside the European Union]...
- Page 4 Warnings, cautions and others (continued) CAUTION — F button! (CA-DD8/CA-DD3/CA-DD1) Disconnect the mains plug to shut the power off completely (the STANDBY lamp goes off). When installing the apparatus, ensure that the plug is easily accessible. The F button in any position does not disconnect the mains line. •...
-
Page 5: Safety Instructions
SAFETY INSTRUCTIONS “SOME DOS AND DON'TS ON THE SAFE USE OF EQUIPMENT” This equipment has been designed and manufactured to meet international safety standards but, like any electrical equipment, care must be taken if you are to obtain the best results and safety is to be assured. ✮✮✮✮✮✮✮✮✮✮✮✮✮✮✮✮✮✮✮✮✮✮✮✮✮✮✮✮✮✮✮✮✮✮✮✮✮✮✮✮✮✮✮✮✮✮✮... -
Page 6: Table Of Contents
Table of contents Thank you for purchasing a JVC product. Please read all instructions carefully before operation, to ensure your complete understanding and to obtain the best possible performance from the unit. Resuming playback........30 Introduction Pausing playback..........31 Advancing the picture frame by frame ..31 Part description ......3... - Page 7 • This manual explains operations mainly with Specifications ......56 diagrams of the remote control supplied with Main unit (CA-DD8/CA-DD3/CA-DD1)..56 DD-8/DD-3. If you are operating DD-1, Subwoofer for DD-8 please keep in mind the differences between (SP-PWDD8) ..........56 your remote control shown on page 4.
-
Page 8: Part Description
Rear view *2 For DD-8/DD-3 users: Refer to the separate volume of the operation manual for the network function. For DD-1 users: The [LAN] terminal is not available. *3 For DD-8/DD-3 users: Refer to page 12. -
Page 9: Using The Remote Control
Using the remote control The numbers refer to the pages in which the parts There are some differences between DD-8/DD-3 are explained. and DD-1 in the locations of the remote control buttons as shown below. DD-8/DD-3 DD-1 Refer to the separate Refer to page 19. -
Page 10: Preparation
Preparation Do not turn on the power until you complete the connection. Connecting the antennas AM loop antenna (supplied) FM antenna (supplied) Setting up the AM loop antenna FM antenna Main unit (rear view) Stretch out the FM antenna horizontally. If reception is poor Main unit (rear view) If insulation covers the tips of the... -
Page 11: Connecting The Speakers
Connecting the speakers Assembling the speaker stands (DD-8) The speakers for DD-8 must be assembled to the speaker stands before the speakers can be connected to the subwoofer. Follow the diagrams below. Left and right speakers Center surround speaker ■ CAUTION •... - Page 12 Preparation (continued) Do not turn on the power until you complete the connection. Connecting the speakers to the subwoofer (DD-8) Gray Blue Rear view Before connecting the speaker cables, twist and pull off the insula- tion at the end of each speaker cable.
- Page 13 Assembling the speaker stands (DD-3) The speakers for DD-3 must be assembled to the speaker stands before the speakers can be connected to the subwoofer. Follow the diagrams below. Left and right speakers ■ CAUTION • The left and right speakers and center surround speaker for DD-3 can be installed on a wall.
- Page 14 Preparation (continued) Do not turn on the power until you complete the connection. Connecting the speakers to the subwoofer (DD-3) Gray Blue Rear view Before connecting the speaker cables, twist and pull off the insula- tion at the end of each speaker cable.
- Page 15 Connecting the speakers to the subwoofer (DD-1) Gray Blue Rear view Before connecting the speaker cables, twist and pull off the insula- tion at the end of each speaker cable. Subwoofer (SP-PWDD1) Black lines Black Black Rear view Rear view Center surround speaker (SP-DD1S) Right speaker Left speaker...
-
Page 16: Speaker Layout
Doing so may damage the main unit. • The supplied speakers are manufactured exclu- sively for use with the supplied main unit as parts of the DD-8/DD-3/DD-1 system. Do not connect the supplied speakers to devices other Peel off the protective sheets than the supplied main unit. -
Page 17: Connecting A Tv
“HDMI” for the monitor out type. (Refer to page 14.) • DD-8 and DD-3 support up to HDMI version 1.0. The HDMI video signal type can be checked with the “HDMI” indicator in the display window. -
Page 18: Selecting The Video Signal Type
Preparation (continued) Do not turn on the power until you complete the connection. ■ CAUTION • Connect the main unit directly to a TV (or a mon- itor) without routing through a video cassette recorder (VCR). Otherwise picture distortion may occur during playback. (Routing the con- nection through a VCR, however, does not affect the audio quality.) (or monitor) - Page 19 • When the TV is connected to the [HDMI] ter- minal, the video signal type can be selected “NO HDMI”. as instructed below. (Only for DD-8 and DD-3) • When using an HDMI cable to connect a TV - Select “AUTO” for normal usage. (the ini- to the main unit, select “HDMI”.
-
Page 20: Connecting A Portable Digital Audio Player
Preparation (continued) Do not turn on the power until you complete the connection. ■Selecting the analog output level of the Connecting a portable digital [LINE OUT] terminal audio player You can lower the analog output level to prevent the system from producing unnecessarily loud sound. -
Page 21: Connecting Other Digital Audio Devices
Connecting other digital Connecting other analog audio devices audio devices AV amplifier with a Input Output Audio device built-in decoder To an optical digital input terminal Optical digital cable (not supplied) Audio cable (not supplied) Main unit (rear view) Input Output Main unit Input... -
Page 22: Basic Operations
[VOLUME+/ ] on the main unit. – DIMMER NOTE (For DD-8/ • Refer to page 18 for adjusting the volume of the DD-3) center surround speaker/subwoofer. • Refer to page 18 for adjusting the volume bal- ance between the left and right speakers. -
Page 23: Sharpening The Voice Sound
Sharpening the voice sound Adjusting the volume of the center surround speaker/ This function allows you to easily understand dia- subwoofer log recorded on the disc/file even with the volume down low. Press [CH LEVEL] to repeatedly Press [CLEAR VOICE]. select “SURR”... -
Page 24: Changing The Brightness Of The Display Window
Basic operations (continued) Changing the brightness of Using the sleep timer the display window When the time you specify elapses, the main unit automatically turns off. Press [DIMMER]. Press [SLEEP]. • Each time you press [DIMMER], the display • Each time you press [SLEEP], the time indicated changes in the display window as follows. -
Page 25: Auto Standby Function
For the locations of the remote control buttons, refer to page 17. Auto standby function Locking disc ejection If no sound is produced for 3 minutes, the main You can lock the disc tray to prevent the disc from unit automatically turns off. being ejected. -
Page 26: Listening To Radio Broadcasts
Listening to radio broadcasts Selecting a radio station Press [FM/AM] to select “FM” or “AM” in the display window. • Each time you press [FM/AM], the band tog- gles between “FM” and “AM”. Remote control • Repeatedly pressing [SOURCE] on the mode selector main unit can also select a radio broadcast as the source. -
Page 27: Tuning In To A Preset Radio Station
Tuning in to a preset radio Radio Data System station Receiving FM radio broadcasts with Presetting radio stations in the main unit allows Radio Data System you to easily tune in to a radio station. Radio Data System allows FM radio stations to send an additional signal along with their regular Presetting radio stations program signals. - Page 28 Listening to radio broadcasts (continued) Press [PTY SELECT +] or [PTY Changing the Radio Data System SELECT –] repeatedly to select a information PTY code while “PTY SELECT” is You can refer to Radio Data System information in flashing in the display window. the display window while listening to an FM radio broadcast.
- Page 29 For the locations of the remote control buttons, refer to page 21. PTY codes None: Undefined. Finance: Stock market reports, commerce and trading. News: News. Children: Programs targeted at a young audi- ence. Affairs: Topical program expanding or enlarg- Social: Programs about sociology, history, ing upon news-debate or analysis.
-
Page 30: How The Enhanced Other Networks Function Actually Works
For the locations of the remote Listening to radio broadcasts (continued) control buttons, refer to page 21. Switching to a program type of your How the Enhanced Other Networks choice temporarily function actually works The Enhanced Other Networks function allows the CASE 1 main unit to switch temporarily to a broadcast pro- If there is no radio station broadcasting the... -
Page 31: Basic Operations Of Disc/File Playback
Basic operations of disc/file playback Playing back a disc This part explains playing back the types of discs shown above. Remote control Press [OPEN/CLOSE ] on the mode selector remote control or on the main unit. • The disc tray ejects. Place a disc. -
Page 32: Playing Back A File
Basic operations of disc/file playback (continued) • The main unit does not charge a USB mass stor- Playing back a file age class device connected to the [USB] termi- nal. Press [DVD/CD 3] or [USB 3]. This part explains playing back 1) files recorded on •... -
Page 33: Display Window On The Main Unit For Disc/File Types
For the locations of the remote control buttons, refer to page 26. NOTE VCD/SVCD • You can also use the buttons on the main unit. ■When a disc is played back Repeatedly pressing [SOURCE] can select the disc/file as the source, and pressing 3 starts playback. - Page 34 Basic operations of disc/file playback (continued) JPEG file ■When a disc is played back ■When a file is played back or stopped File type Group Track number Elapsed playback File number number time ■When a disc is stopped Messages on the TV screen When a DVD VIDEO is selected as the source, the messages shown below are displayed on the TV screen to indicate the disc status.
-
Page 35: Stopping Playback
For the locations of the remote control buttons, refer to page 26. Stopping playback Guide icons on the TV screen (on-screen guide) : Play : Pause ■When a disc/file is played back : Fast reverse/fast forward search Press : Slow motion playback (reverse/ Resuming playback forward directions) : Containing multi-view angles (Refer to... -
Page 36: Pausing Playback
Basic operations of disc/file playback (continued) Playing back from a position Pausing playback 10 seconds before ■When a disc is played back ■When a disc/file is played back Press 8. Press [ONE TOUCH REPLAY • Press [DVD/CD 3] or [USB 3] to return to the NOTE normal playback. -
Page 37: Selecting A Chapter/Track Using The Number Buttons
For the locations of the remote control buttons, refer to page 26. Selecting a chapter/track Selecting a track from the using the number buttons menu screen (PBC off) ■When a disc is stopped or played back ■When a disc/file is played back Press [MENU] or [TOP MENU]. -
Page 38: Convenient Functions Of Disc/File Playback
Convenient functions of disc/file playback Selecting the audio language, subtitle language and view angle ■When a disc/file is played back Remote control Press the desired button shown below. mode selector • Each time you press the button, the audio lan- guage, subtitle language or view angle changes. -
Page 39: Playing Back A Disc/File In The Desired Order (Program Playback)
Display for a VCD/SVCD/CD Playing back a disc/file in the • Select a track number. desired order (Program • As you finish the track selection, the total time for the program playback is displayed. playback) Track indicator (only for the loaded disc) You can program a maximum of 99 tracks. -
Page 40: Playing Back A Disc/File In A Random Order (Random Playback)
Convenient functions of disc/file playback (continued) Playing back a disc/file in a Magnifying the picture random order (Random playback) ■When a disc is played back or paused Press [ZOOM]. • Each time you press the button, the picture (only for the loaded disc) magnification changes in the display win- ■When a disc/file is stopped dow. -
Page 41: Playing Back A Disc/File Repeatedly (Repeat Playback)
For the locations of the remote control buttons, refer to page 33. Playing back a disc/file Selecting the surround mode repeatedly (Repeat playback) Press [SURROUND MODE]. (PBC off) • Each time you press [SURROUND MODE], the display changes in the display window as fol- ■When a disc/file is played back lows. -
Page 42: Adjusting The Picture Quality (Vfp)
For the locations of the remote Convenient functions of disc/file playback (continued) control buttons, refer to page 33. Adjusting the picture quality Press 5 or / to select the item you want to adjust. (VFP) • Each time you press 5 or /, the item changes on the TV screen as follows. -
Page 43: Using The Status Bar And The Menu Bar
Using the status bar and the menu bar Function list ■When a disc/file is played back To select the settings for those items listed below without a description of their operation, press 5 or Press [ON SCREEN] twice. / to select an item and press [ENTER]. TV screen for a DVD VIDEO (example) Changes the time information in the Time... -
Page 44: Playing Back A Specified Part Repeatedly (A-B Repeat Playback)
For the locations of the remote Using the status bar and the menu bar (continued) control buttons, refer to page 33. Playing back a specified part Designating the time repeatedly (A-B repeat (Time search) playback) (PBC off) (PBC off) ■When a disc is played back You can play back the desired part repeatedly by Press [ON SCREEN] twice. -
Page 45: Changing The Initial Settings With The Preference Screen
Changing the initial settings with the preference screen Basic operations ■When a disc/file is stopped or no disc is You can change the initial settings of the main unit loaded (“NO DISC” is displayed in the dis- with the preference screen according to the envi- play window) ronment where the main unit is used. -
Page 46: Picture
Changing the initial settings with the preference screen (continued) PICTURE Items Items Contents ( : initial setting) Contents ( : initial setting) MONITOR Select the display method suitable for SCREEN You can turn or OFF the screen TYPE your TV. SAVER saver. -
Page 47: Audio
STREAM/PCM NETWORK For DD-8/DD-3 users: DTS/Dolby Digital decoder or device hav- SETUP Refer to the separate volume of the oper- ing the same function. ation manual for the network function. -
Page 48: Language Codes
Changing the initial settings with the preference screen (continued) List of relationships of DIGITAL AUDIO OUTPUT preference items and output signal DIGITAL AUDIO OUTPUT preference Playback disc/file STREAM/PCM DOLBY DIGITAL/PCM PCM ONLY 48 kHz, 16/20/24 bits linear PCM DVD VIDEO 48 kHz, 16 bits stereo linear PCM 96 kHz linear PCM DVD VIDEO DTS DVD VIDEO... -
Page 49: Playing Back Sources From Other Devices
Playing back sources from other devices Start playback on the connected device. • Refer also to the operation manual for the connected device. Adjust the volume and make other necessary settings. • Refer to “Basic operations” on page 17. Selecting the signal gain You can select the gain of the signal from the [LINE IN 1] and [LINE IN 2] terminals. -
Page 50: Qp Link
For the locations of the remote Playing back sources from other devices (continued) control buttons, refer to page 44. Start playback on the portable dig- QP LINK ital audio player. When you start analog playback of a portable digi- • If the main unit is off, the main unit automati- tal audio player connected to the [LINE IN 1] termi- cally turns on. -
Page 51: Operating Other Devices Using The Remote Control
Operating other devices using the remote control You can operate your TV, video cassette recorder Operating a TV using the (VCR) and set-top box (STB) using the remote remote control control of this system. Setting the manufacturer code Slide the remote control mode selector to [TV]. -
Page 52: Operating A Vcr/Stb Using The Remote Control
Operating other devices using the remote control (continued) Release [TV F]. Operating a VCR/STB using NOTE the remote control • Manufacturer codes are subject to change with- out notice. You may not be able to operate the Setting the manufacturer code TV produced by the manufacturer. - Page 53 For the locations of the remote control buttons, refer to page 46. Manufacturer codes for STBs Using the remote control for the Examples: VCR/STB operation For an Amstrad STB: Press [0], then [3]. For a Triax STB: Press [3], then [0]. Before the VCR/STB operation, select the remote When the manufacturer of your STB has 2 or more control mode for the VCR/STB.
-
Page 54: Notes On Operation
Notes on operation Suitable locations for the License and trademark main unit • Manufactured under license from Dolby Labora- tories. “Dolby” and the double-D symbol are To minimize the need for servicing and maintain trademarks of Dolby Laboratories. the high quality of this system, do not place the •... -
Page 55: Notes On Handling
Notes on handling Safety Precautions Avoid moisture, water and dust Do not place the system in moist or dusty places. Important cautions Avoid high temperatures Installation of the system Do not expose the system to direct sunlight and do • Select a place which is level, dry and neither too not place it near a heating equipment. -
Page 56: Notes On Discs/Files
Playable files stored on a computer Refer to the separate volume of the operation manual for (Only for DD-8 and DD-3) the network function. • Even though listed above, some types may be Region code of DVD VIDEO DVD VIDEO players and DVD VIDEO discs have unplayable. -
Page 57: Unplayable Discs
• This system can play back a baseline JPEG file, diameter) cannot be played back. excluding monochromatic JPEG files. • JVC does not guarantee the operation and • This system can play back JPEG data taken with sound quality of discs not authorized by CD-DA, a digital camera conforming to the DCF (Design which is a CD specification. - Page 58 • The system supports DivX files with a resolution of 720 x 480 pixels or less (30 fps) and 720 x • JVC bears no responsibility for any loss of data 576 pixels or less (25 fps). on the USB mass storage class device while •...
-
Page 59: Data Hierarchy
Data hierarchy Handling discs DVD VIDEO • Do not use any non-standard shape disc (like a A DVD VIDEO consists of “titles” and each title heart, flower or credit card, etc.) available on the may be divided into “chapters”. market, because it may damage the system. •... -
Page 60: Troubleshooting
Connect a TV compatible with No sound/video is pro- patible with HDCP. HDCP. duced via the [HDMI] The main unit fails to recognize terminal. (Only for DD-8/ Disconnect the HDMI cable and the TV connected to the [HDMI] DD-3) connect it again. terminal. -
Page 61: Specifications
Specifications Main unit (CA-DD8/CA-DD3/ Subwoofer for DD-8 (SP-PWDD8) CA-DD1) Type: Bass reflex type Magnetically shielded type Tuner Amplifier: FM frequency: 87.50 MHz - 108.00 MHz • Subwoofer: 120 W at 4 Ω (110 Hz, AM frequency: 522 kHz - 1 629 kHz THD 10%) •... -
Page 62: Subwoofer For Dd-1 (Sp-Pwdd1)
Specifications (continued) Subwoofer for DD-1 (SP-PWDD1) Left and right speakers for DD-8 (SP-DD8F) Type: Bass reflex type Amplifier: Type: 2-way 3-speaker bass reflex • Subwoofer: 120 W at 4 Ω (110 Hz, type THD 10%) Magnetically shielded type • Left/right speaker: 25 W x 2 at 3 Ω (1 kHz,... -
Page 63: Center Surround Speaker For Dd-8/Dd-3 (Sp-Dd8S)
Power handling capacity:30 W • CD-ROM for the network function setup (Only for 3 Ω Impedance: DD-8 and DD-3) [This CD-ROM is for use on a Frequency range: 140 Hz - 40 kHz computer. It cannot be played back on this sys- Sound pressure level:79 dB/W •... - Page 64 2006 Victor Company of Japan, Limited 0806SKMMODJEM...
Need help?
Do you have a question about the DD-8 and is the answer not in the manual?
Questions and answers