Table of Contents
Advertisement
Advertisement
Table of Contents

Related Manuals for Baofeng UV-B5


Summary of Contents for Baofeng UV-B5
- Page 1 BAOFENG UV-B5 TWO-WAY RADIO USER’S MANUAL...
- Page 2 PREFACE Thank you for purchasing UV-B5 Amateur Portable Radio, which is a dual band/dual display radio. This easy-to-use radio will deliver you secure, instant and reliable communications at peak efficiency. Please read this manual carefully before use. The information presented herein will help you to derive maximum performance...
-
Page 3: Table Of Contents
CONTENT 01 SAFETY INFORMATION 11 COMMAND I KEY DEFINITION 02 FEATURES AND FUNCTIONS 13 COMBINATION KEY FUNCTION 03 UNPACKING AND CHECKING 1750 Hz TONE FOR ACCESS TO REPEATERS RESET (Restore to default setting) EQUIPMENTS 14 ADVANCED OPERATION 04 BATTERY CHARGING SET MENU DESCRIPTION 05 BATTERY INFORMATION FREQUENCY HOPPING "STEP"... - Page 4 CONTENT TONE END OF TRANSMISSION "STE" NAME OF CHANNEL "NAME" WIDEBAND OR NARROW BAND "W/N" AUDIO COMPANDING "COMP" 28 ADDITIONAL FEATURES AND SETTINGS STORED IN MEMORY CHANNEL ALARM FUNCTION COMMERICIAL FM RADIO MEMORIZING FM RADIO STATIONS 30 CTCSS TABLE 31 DCS TABLE 32 TECHNICAL SPECIFICATION 34 TROUBLESHOOTING 36 WARRANTY...
-
Page 5: Safety Information
This equipment shall be serviced by qualified technicians only. Do not modify the radio for any reason. Use only BAOFENG supplied or approved batteries and chargers. Do not use any portable radio that has a damaged antenna. If a damaged antenna comes into contact with your skin, a minor burn can result. -
Page 6: Features And Functions
FEATURES AND FUNCTIONS 1. Frequency Range: Commercial FM radio 65-108MHz (only for reception) VHF 136-174 (RX/TX) UHF 400-470MHz (RX/TX) dual band 2. Mode: VFO, Channel Mode 3. Commercial FM radio 4. Dual Display/Dual Band 5. DTMF encoding 6. Incorporates 104 codes "DCS" and 50 privacy codes "CTCSS" programmable 7. -
Page 7: Unpacking And Checking Equipments
UNPACKING AND CHECKING EQUIPMENTS Carefully unpack the transceiver. We recommend that you identify the items listed in the following before discarding the packing material. If any items are missing or have been damaged during shipment, please contact your dealers immediately. ITEM QUANTITY Transceiver Unit... -
Page 8: Battery Charging
BATTERY CHARGING Use only the charger specified by the manufacturer. The charger's LED indicates the charging progress. Please follow these steps: 1. Plug the AC connector of the adapter into the AC outlet socket. 2. Place the radio with the battery attached, or the battery alone, in the charger. 3. -
Page 9: Battery Information
BATTERY INFORMATION INITIAL USE New batteries are shipped uncharged fully from the factory. Charge a new battery for 5 hours before initial use. The maximum battery capacity and performance is achieved after three full charge/discharge cycles. If you notice the battery power runs low, please recharge the battery. -
Page 10: Battery Storage
BATTERY INFORMATION BATTERY STORAGE 1. Fully charge a battery before you store it for a long time, to avoid battery damage due to over-discharge. 2. Recharge a battery after several months' storage (Li-Ion batteries: 6 months), to avoid battery capacity reduction due to over-discharge. 3. -
Page 11: Installation Of Accessories
INSTALLATION OF ACCESSORIES INSTALLING THE ANTENNA Install the antenna as shown in the figure below and turn it clockwise until it stops. Note: - When installing the antenna, don't rotate it by its top, holding it by its base and turn. - If you use an external antenna, make sure the “SWR”... -
Page 12: Battery Installation
INSTALLATION OF ACCESSORIES BATTERY INSTALLATION - When attaching the battery, make sure the battery is in parallel and in good contact with the aluminum chassis. The battery bottom is about 1 to 2 centimeters below the bottom of the radio's body. - Align the battery with the guide rails on the aluminum chassis and slide it upwards until a “click”... -
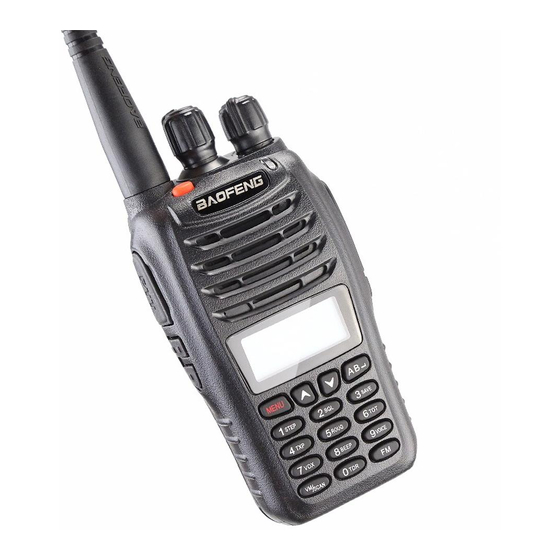
Page 13: Parts, Controls And Keys
PARTS, CONTROLS AND KEYS RADIO OVERVIEW A: LED indicator K: Mic B: Knob (Channel) G: Alarm Button C: Knob (ON/OFF, volume) H: LCD D: PTT Key (push-to-talk) I: Speaker E: Monitor J: Keypad F: SP&MIC Jack... -
Page 14: Basic Operation
BASIC OPERATION RADIO ON-OFF - Make sure the antenna and battery are installed correctly and the battery charged. - Rotate the knob clockwise to turn the radio on, and rotate the knob fully counter-clockwise until a “click” is heard to turn the radio off. VOLUME CONTROL Press and hold the MONI button, then rotate the knob clockwise or counter-clockwise, to adjust the volume. -
Page 15: Command I Key Definition
COMMAND/KEY DEFINITION [MENU] KEY 1. Press [MENU] key, then press [UP] or [DOWN] key to choose each menu. All menu parameters and channel saving are confirmed by pressing [AB/] key. 2. Press and hold on [MENU] key for 2 seconds, to lock the keypad or unlock the keypad. - Page 16 COMMAND/KEY DEFINITION VM/SCAN - Press [VM/SCAN] key to switch VFO mode and channel mode - Press [MENU] key, then press [VM/SCAN] key to scan the frequency/channel. - Press and hold on [VM/SCAN] about 2 seconds to store frequency. Now press [UP] or [DOWN] key, if the left top numeric flashes, that means it is blank;...
-
Page 17: Combination Key Function
COMBINATION KEY FUNCTION 1750 Hz TONE FOR ACCESS TO REPEATERS - The user needs to establish long distance communications through an amateur radio repeater which is activated after receiving a 1750Hz tone. Press and hold on the [PTT], then press the [MONI] button to transmit a 1750Hz tone. RESET (Restore to default setting) - Press and hold on [MENU] key, then switch on, to reset the radio, the LCD displays “VFO”... -
Page 18: Advanced Operation
ADVANCED OPERATION - You can program your transceiver operating in the setup menu to suit your needs or preferences. SET MENU DESCRIPTION Menu Function/Description Available settings STEP (Frequency step) 5/6.25/10/12.5/20/25kHz SQL (Squelch level) SAVE (Battery save) OFF/ON TXPR (Transmit power) HIGH/LOW ROGE (Off transmission tone) OFF/ON... - Page 19 ADVANCED OPERATION Menu Function/Description Available settings ANI (Automatic number identification of the radio) 0-9; A-F PTIDM (The mode of transmitting the signal code ) OFF/BOT/EOT/BOTH DTST (The DTMF tone of transmitting code) OFF/ON MDF-1 (Under channel mode, F1 channel displays) FREQ/CHAN/NAME MDF-2 (Under channel mode, F2 channel displays) FREQ/CHAN/NAME...
-
Page 20: Frequency Hopping "Step
ADVANCED OPERATION 1. FREQUENCY HOPPING "STEP" Schedule frequent breaks to select the receive and transmit frequency adequate. Perform the following steps to select the desired frequency hopping: 1. Press the [MENU], then press [UP]/[DOWN] to select the Menu 01 "STEP" 2. -
Page 21: Selecting Transmit Power "Power
ADVANCED OPERATION 4. SELECTING TRANSMIT POWER "POWER" Select the transmission power high or low in the transceiver, following the procedure detailed below: 1. Press the [MENU], then press [UP]/[DOWN] to select the Menu 04 "POWER" 2. Press [AB/], then press [UP]/[DOWN] to select HIGH/LOW. 3. -
Page 22: Function "Vox
ADVANCED OPERATION 7. FUNCTION "VOX" (VOICE OPERATED TRANSMISSION) This function is not necessary to push the [PTT] on the transceiver transmission. Transmission is activated automatically by detecting the radio voice. When finish speaking, the transmission automatically terminated and the transceiver will automatically receive signal. -
Page 23: Dual Watch/Dual Standby "Tdr
ADVANCED OPERATION 3. Press [AB/] to save the setting. 4. Press [MENU] or any numeric key to exit. 10. DUAL WATCH/DUAL STANDBY "TDR" This feature allows you to operate between UHF and VHF VFO mode. Periodically, the transceiver checks whether a signal is received on another frequency that we have scheduled. -
Page 24: Subtones / Codes For Transmitting
ADVANCED OPERATION 12. SUBTONES/CODES FOR TRANSMITTING "TCODE" In some cases only want to establish communications in a closed user group at a particular frequency or channel, for it will use "CTCSS" or code "DCS" for transmission. The "squelch" opens only when transmitting a frequency with "CTCSS" or codes "DCS"... -
Page 25: Automatic Number Identification "Ani
ADVANCED OPERATION Perform the following procedure to enable or disable this feature: 1. Press the [MENU], then press [UP]/[DOWN] to select the Menu 14 "PTT ID" 2. Press [AB/], then press [UP]/[DOWN] to select OFF/ON. 3. Press [AB/] to save the setting. 4. -
Page 26: Dtmf Tone "Dtst
ADVANCED OPERATION 17. DTMF TONE "DTST" Under transmitting code, you can hear the DTMF tone, if you set "DTST" as ON. Please do as follows: 1. Press the [MENU], then press [UP]/[DOWN] to select the Menu 17 "DTST". 2. Press [AB/] then press [UP]/[DOWN] to select OFF/ON. 3. -
Page 27: Direction Of Frequency Shift "Shift
ADVANCED OPERATION Follow the steps below to enable or disable this feature: 1. Press the [MENU], then press [UP]/[DOWN] to select the Menu 20 "BCL". 2. Press [AB/], then press [UP]/[DOWN] to set ON/OFF. 3. Press [AB/] to save the setting. 4. -
Page 28: Frequency Shift "Offse
ADVANCED OPERATION 22. FREQUENCY SHIFT "OFFSE" The "OFFSET" is the difference or offset between the reception frequency and the frequency of transmission for access to amateur radio repeaters. Set the "OFFSET" according to the "OFFSET" amateur radio repeater through which want to communicate. -
Page 29: Priority Transmitting "Txab
ADVANCED OPERATION 24. PRIORITY TRANSMITTING "TXAB" When activate function "Dual Watch", the frequency display will switch between F1 and F2. If you come to MENU 24, select F1 or F2, the TX will be selected. Please see the following steps: 1. -
Page 30: Name Of Channel "Name
ADVANCED OPERATION Follow the steps below to enable or disable this feature: 1. Press the [MENU], then press [UP]/[DOWN] to select the Menu 26 "SCANM". 2. Press [AB/], then press [UP]/[DOWN] to select ON/OFF. 3. Press [AB/] to save the setting. 4. -
Page 31: Audio Companding "Comp
ADVANCED OPERATION 29. AUDIO COMPANDING "COMP" Audio companding technology compresses the transmission signal availably and then expand the signal at the receiving terminal. So decrease the background noise, increase the talk quality. Follow the steps below to enable or disable this feature: 1. -
Page 32: Additional Features And Settings
ADDITIONAL FEATURES AND SETTINGS 1.STORED IN MEMORY CHANNEL You can store up to 99 channels in the transceiver memory. Follow the steps below to save the channels: 1. Select the desired frequency in VFO mode and the undertones "CTCSS" codes "DCS", and the frequency shift and direction of travel for access to repeaters. - Page 33 ADDITIONAL FEATURES AND SETTINGS 1. Under FM radio mode (VFO), press and hold down [VM/SCAN] about 2 seconds, the display will flash "01-16". 2. Press [UP]/[DOWN] to select the memory location in which to store the radio station. 3. Press [AB/] to save the station. 4.
-
Page 34: Ctcss Table
CTCSS TABLE CTCSS TABLE Tone Tone Tone Tone Tone № № № № № (Hz) (Hz) (Hz) (Hz) (Hz) 67.0 94.8 131.8 171.3 203.5 69.3 97.4 136.5 173.8 206.5 71.9 100.0 141.3 177.3 210.7 74.4 103.5 146.2 179.9 218.1 77.0 107.2 151.4 183.5... -
Page 35: Dcs Table
DCS TABLE DCS TABLE № Code № Code №° Code №° Code № Code D023N D131N D251N D371N D532N D025N D132N D252N D411N D546N D026N D134N D255N D412N D565N D031N D143N D261N D413N D606N D032N D145N D263N D423N D612N D036N D152N D265N D431N... -
Page 36: Technical Specification
TECHNICAL SPECIFICATION GENERAL 65MHz-108MHz (Only commercial FM radio reception) Frequency range VHF:136MHz-174MHz (Rx/Tx) UHF:400MHz-470MHz (Rx/Tx) Memory channels Up to 99 channels Frequency stability 2.5ppm Frequency step 5kHz/6.25kHz/10kHz/12.5kHz/20kHz/25kHz Antenna impedance 50Ω Operating temperature -20°C to +60°C Supply voltage Rechargeable Lithium-Ion 7.4V/1800mAh Mode of operation Simplex or semi-duplex Duty cycle... -
Page 37: Troubleshooting
TROUBLESHOOTING Problem Possible cause/solution The battery is low, replace the battery with a charged The radio does not start. battery or proceed to the battery. The battery is not installed correctly, remove the battery and reattach it. The battery life has come to an end, replace the The battery runs down battery with a new one. - Page 38 TROUBLESHOOTING Problem Possible cause/solution In "standby" mode, the Check the level adjustment function "VOX" is not set transceiver transmits without too sensitive. pressing the "PTT". Receive communications from other user groups while Change frequency or channel. Change the communicating with your undertones "CTCSS"...
-
Page 39: Warranty
WARRANTY: (Better buy the radios from local dealer) - Page 40 WARRANTY: (Better buy the radios from local dealer) The device described in this Certificate is guaranteed for a period of TWO YEARS from the date of sale to the final user. This Warranty Certificate is unique and not transferable and may not be reissued for new or original or copy.
Need help?
Do you have a question about the UV-B5 and is the answer not in the manual?
Questions and answers