Advertisement
Table of Contents
- 1 Table of Contents
- 2 Introduction
- 3 Safety Precautions
- 4 Operating Condition
- 5 Identification of Accessories
- 6 Identification of Parts
- 7 Operating Your Air Conditioner
- 8 Installation Instructions
- 9 Air Filters Installation
- 10 Operation Instructions
- 11 Water Drainage
- 12 Remote Control
- 13 Care and Maintenance
- 14 Technical Data
- 15 Troubleshooting
- 16 Warranty Information
- Download this manual
Advertisement
Table of Contents

Related Manuals for Whynter ARC-142BX


Summary of Contents for Whynter ARC-142BX
- Page 1 WHYNTER ECO-FRIENDLY 14,000 BTU PORTABLE AIR CONDITIONER MODEL#: ARC-142BX Instruction Manual Congratulations on your new WHYNTER product. Please read this Instruction Manual carefully before using this product to ensure proper operation. Keep this manual in a safe place for future reference.
-
Page 2: Table Of Contents
TABLE OF CONTENTS INTRODUCTION SAFETY PRECAUTIONS IDENTIFICATION OF ACCESSORIES IDENTIFICATION OF PARTS OPERATING YOUR AIR CONDITIONER INSTALLATION INSTRUCTIONS 9-12 AIR FILTERS INSTALLATION OPERATION INSTRUCTIONS 14-15 WATER DRAINAGE REMOTE CONTROL CARE AND MAINTENANCE TECHNICAL DATA TROUBLESHOOTING 20-21 WARRANTY INFORMATION P a g e... -
Page 3: Introduction
We trust that your Whynter air conditioner will provide the performance and reliability that we stand for. Please keep this user manual in a safe place for future reference. -
Page 4: Safety Precautions
Your safety and the safety of others are very important to us. To reduce the risk of fire, electrical shock or injury when using your appliance, follow these basic precautions. SAFETY PRECAUTIONS Before the appliance is used, it must be properly positioned and installed as detailed in this manual. -
Page 5: Operating Condition
Do not allow children to climb, stand or hang on the appliance. The air conditioner could tip over and get damaged and/or seriously injure somebody Keep fingers out of the air intakes and air outlets The appliance is an electrical appliance. To avoid injury from electrical shock do not operate it with wet hands, while standing on a wet surface or while standing in water. -
Page 6: Identification Of Accessories
IDENTIFICATION OF ACCESSORIES IMAGE ACCESSORY NAME QUANTITY Exhaust hose Flat Mouth Adaptor 1 set Round Adaptor (pre-installed on unit) Window sliders and Clear plastic plug 1 set (plug is in the upper corner of the plastic bag that holds the user manual) Foam seal 3 pcs Remote control and Batteries... -
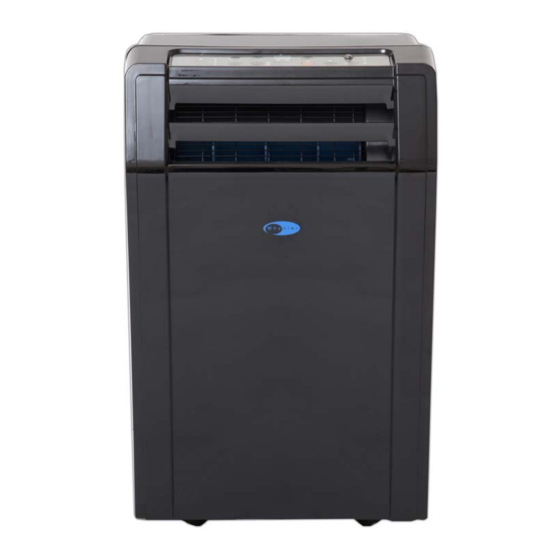
Page 7: Identification Of Parts
IDENTIFICATION OF PARTS Front 1. Control Panel 2. Front Air Vent / Louvers 3. Caster (four) 4. Handle (both sides) Rear 6. Upper air filter 7. Air outlet (hot air exhaust) 8. Power cord outlet 9. Upper air intake 10. Upper drain port 11. -
Page 8: Operating Your Air Conditioner
OPERATING YOUR AIR CONDITIONER Before you begin, thoroughly familiarize yourself with the control panel, remote control and all of the functions. Follow the symbol for the desired function. The unit can be controlled by the unit control panel alone or with the remote control. CONTROL PANEL 1. -
Page 9: Installation Instructions
4. Only extend the exhaust hose to the necessary length. We do not recommend extending the exhaust hose more than 9' long. If you are interested in purchasing an additional 5’ exhaust hose please contact info@whynter.com for retail sales information. P a g e... - Page 10 Window kit Installation When you use this air conditioner unit, hot air must be exhausted out of the room to complete the air exchange of the condenser. Wh en the unit is operating in fan-only mode, no exhaust is required. Your window kit has been designed to fit most standard vertical and horizontal windows.
- Page 11 Window kit Installation in a double-hung window 1. Open window or sliding door for approximately 5” 2. Cut the foam seal (adhesive type) to the proper length and attach it to the bottom of the window. Fig.10. 3. Adjust the length of the window bars to the same length and width of the opening of the window.
- Page 12 Window kit Installation in a sliding door/ window 1. Open window or sliding door for approximately 5” 2. Cut the foam seal (adhesive type) to the proper length and attach it to the bottom of the door / window. Fig.14. 3.
-
Page 13: Air Filters Installation
AIR FILTER INSTALLATION Your Whynter portable air conditioner is equipped with a 2 in 1 silver-ion coated washable pre- filter and activated carbon filter. The washable pre-filter removes large particles such as dust, pet hair and dander. The Activated Carbon filter is designed to remove smoke and other odors. It is recommended you replace the Activated Carbon filter every 2-3 months or as needed. -
Page 14: Operation Instructions
OPERATION INSTRUCTIONS BEFORE USING YOUR APPLIANCE Remove the exterior and interior packing Before connecting the appliance to the power source, let it stand upright for approximately 4 hours. This will reduce the possibility of a malfunction in the cooling system from handling during transportation SWITCHING ON/OFF THE AIR CONDITIONER ... - Page 15 TIMER (DELAYED SWITCH ON / OFF) FUNCTION This function mode enables a delayed switch ON or delayed switch OFF of the air conditioner. The time (hours) delay can be set, enabled and disabled SETTING SW ITCH OFF TIMER With the air conditioner operating in any function mode, press the TIMER button. The TIMER OFF light will come on.
-
Page 16: Water Drainage
WATER DRAINAGE When the water level of the bottom tray reaches maximum level, the unit will beep 8 times and the digital display will show P1 symbol. Also, the cooling or dehumidifying function will stop and the fan only function will start. Manual drainage To drain the water from the bottom try, carefully move the unit to a drain location, remove the... -
Page 17: Remote Control
REMOTE CONTROL The portable air conditioner can be switched on by the remote control. To transmit signals from the remote control to the air conditioner, point the front part of the remote handset towards the control panel on the air conditioner. Reception of the signal is confirmed by a beep. The maximum signal transmission distance is approximately 8 meters / 26 feet. -
Page 18: Care And Maintenance
CARE AND MAINTENANCE IMPORTANT: Switch off the air conditioner and disconnect the plug from the power outlet Drain water by removing the drain plug Always transport the air conditioner in an upright position only CLEANING THE AIR FILTERS ... -
Page 19: Technical Data
TECHNICAL DATA Cooling capacity 14,000 BTU Power supply 115v/ 60Hz Maximum power input 1480 Watts Maximum input 12 Amps Dehumidifying capacity 71 Pts / Day Thermostat 62°F / 17°C to 88°F / 30°C Refrigerant R410A/14.8oz Air flow (max.) 540 m3/ Hour Fan speeds 4 (Auto, H, M, L) Exhaust hose length... -
Page 20: Troubleshooting
Drain water from the air conditioner Possible loose internal connection. Please full and ‘P1” appears on display contact Whynter for service The room temperature is This unit is designed to work in ambient The unit turns on but... - Page 21 Windows or doors are open Close all windows and doors The unit has worked for a long time, but the There are too many people in You may need additional cooling or another room is not cold enough the room air conditioner ...
-
Page 22: Warranty Information
MERCHANTABILITY OR FITNESS FOR A PARTICULAR PURPOSE, ARE LIMITED TO ONE YEAR OR THE SHORTEST PERIOD ALLOWED BY LAW, BUT NOT LESS THAN ONE YEAR. WHYNTER SHALL NOT BE LIABLE FOR CONSEQUENTIAL OR INCIDENTAL DAMAGES SUCH AS PROPERTY DAMAGE AND INCIDENTAL EXPENSES RESULTING FROM ANY BREACH OF THIS WRITTEN LIMITED WARRANTY OR ANY IMPLIED WARRANTY.
Need help?
Do you have a question about the ARC-142BX and is the answer not in the manual?
Questions and answers