Table of Contents
Advertisement
Quick Links
Please read this manual first for correct installation and operation. This manual should be retained for future
reference. The information in this manual was current when published. The manufacturer reserves the right
to revise and improve its products. All specifications are therefore subject to change without notice.
PRECAUTIONS
1.
Do not install the camera near electric or magnetic fields.
Install the camera away from TV/radio transmitters, magnets, electric motors, transformers and audio
speakers since the electromagnetic fields generated from these devices may distort the video image.
2.
Never disassemble the camera beyond the recommendations in this manual nor introduce
materials other than those recommended herein.
Improper disassembly or introduction of corrosive materials may result in equipment failure or other
damage.
3.
Try and avoid facing the camera toward the sun.
In some circumstances, direct sunlight may cause permanent damage to the sensor and/or internal
circuits.
4.
Keep the power cord away from water and other liquids and never touch the power cord with
wet hands.
Touching a wet power cord with hands or touching the power cord with wet hands may result in electric
shock.
5.
Never install the camera in areas exposed to water, oil or gas.
Water, oil or gas may result in equipment failure, electric shock or, in extreme cases, fire.
6.
Cleaning
Do not touch the surface of the sensor directly with the hands. Use a damp soft cloth to remove any
dirt from the camera body. Use lens tissue or a cotton tipped applicator and ethanol to clean the sensor
and the camera lens. Please do not use complex solvents, corrosive or abrasive agents for cleaning.
7. Do not operate the camera beyond the specified temperature, humidity or power source ratings.
Use the camera at temperatures within -10°C~50°C (14°F~122°F) and humidity between 20~80%.
The input power source is 12VDC/24VAC.
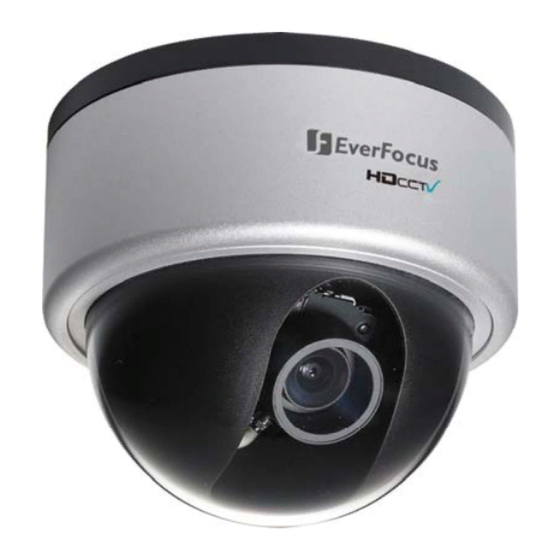
2 Megapixel Full HD-CCTV
Outdoor Dome Camera
Operation Instructions
Model No.
EHH5200
Advertisement
Table of Contents

Related Manuals for EverFocus EHH5200


Summary of Contents for EverFocus EHH5200
- Page 1 2 Megapixel Full HD-CCTV Outdoor Dome Camera Operation Instructions EHH5200 Model No. Please read this manual first for correct installation and operation. This manual should be retained for future reference. The information in this manual was current when published. The manufacturer reserves the right to revise and improve its products.
-
Page 2: Table Of Contents
TABLE OF CONTENTS 1. PRODUCT OVERVIEW .......................3 1.1 Main Features ............................... 3 1.2 Package Contents............................3 1.3 Specifications ..............................5 1.4 Dimensions ..............................6 2. NAMES AND FUNCTIONS OF PARTS................7 2.1 Camera Component Description........................7 2.2 Front And Back Panel Layout .......................... 7 2.3 Related Products............................ - Page 3 4.3 Day/Night..............................21 4.4 Special................................ 21 4.4.1 Resolution ..............................21 4.4.2 Camera Title ............................. 21 4.4.3 D-Effect..............................22 4.4.4 TV standard.............................. 22 4.4.5 Language ..............................22 4.4.6 Default ..............................23 4.5 Image Adjust ............................... 23 4.5.1 Sharpness ..............................23 4.5.2 Brightness ..............................23 4.5.3 Contrast ..............................
-
Page 4: Product Overview
1. PRODUCT OVERVIEW The EHH5200 is an HD-CCTV outdoor dome camera with true Day/Night capability in an IP66 vandal resistant housing. Based on a 2 megapixel progressive scan sensor for your choice of 1080 or 720 resolution HD 100% digital images, it delivers vastly superior video quality compared to traditional CCTV images. - Page 5 Please Note: If an item appears to have been damaged in shipment, replace it properly in its carton and notify the shipper. If any items are missing, notify your EverFocus Electronics Corp. Sales Representative or Customer Service. The shipping carton is the safest container in which the unit may be transported.
-
Page 6: Specifications
1.3 Specifications Pickup Device 1/2.7" 2 megapixel CMOS sensor Sensitivity 0.5lux/F=1.4 S/N Ratio 39dB Video Format Main Output HD-SDI/HD-CCTV Resolution Main Output 1920x1080 or 1280x720 Video Mode Main Output Field select 1080i60, 1080p30 or 720p60 for 60Hz systems 1080i50, 1080p25 or 720p50 for 50Hz systems Main Output Connector BNC-F Video Format Test Output... -
Page 7: Dimensions
1.4 Dimensions 123mm x 107.8mm ; 4.8” x 4.2” Ø 5.143mm//0.2” Ø 94.7mm/3.78” - 6 -... -
Page 8: Names And Functions Of Parts
2. NAMES AND FUNCTIONS OF PARTS 2.1 Camera Component Description Exterior view Base Outer Cover ring Rotatable cover .2 Front And Back Panel Layout ront Panel Layout: - 7 -... - Page 9 Back Panel Layout: External Light Sensor External Light sensor i s used to detect the lighting level the environment. (The light sensor is “down” when the internal camera module is properly positioned). (2) Zoom Ring To adjust th e viewing angle, loosen the zoom ring knob. Turn the ring toward <W> to Zoom out or <T>...
-
Page 10: Related Products
Type Bracket: BA-EDMS N220 5.6 inch LCD Test Monitor 3. INSTALLATION This chapter will describe, in general terms, how to install the EHH5200 camera. STEPS: 3.1. Mounti ng Camera: 1. Drill the Holes. See 3.1.1... -
Page 11: Mounting Camera
3.1 Mounting Camera 3.1 .1 Drill the Holes 1. Paste the drilling template on the ceiling or wall 2. Drill 4 holes, 1 for the power/video cable, 3 for screws A, B and C. Screw hole A Screw hole C Installation sticker Screw hole B Wire outlet hole for... -
Page 12: Mounting
3.1.2 Mounting 1. Ta ke of f camera’s cover by rotating the cover counter clockwise. Loose outer cover ring first Take off camera’s cover - 11 -... - Page 13 Pull the cables to be connected to the power and video cables from the ceiling or wall. HD-CCTV Video output Power input 3. Fix the camera base to ceiling or wall by using 3 screws and washers. The washers are used to create the IP66 seal and must be used.
-
Page 14: Adjusting Camera
Wall Mount: 3.2 Adjusting Camera 3.2.1 Adjusting Camera Po sition Adjust the camera to any angle that you wish. Pan and tilt to aim the camera at what you need to watch until the best angle of image is obtained. Adjust the camera to best angle for viewing. -
Page 15: Adjusting Zoom And Focus
3.2.2 Adjusting Zoom and Focus It is highly recommended to use an EverFocus Test Monitor to set up the camera. Find the Video test connection on the back of the camera module. Connect using the video cable included in the package. -
Page 16: Camera Setting
Please refer to Chapter 3 OSD Menu & Configuration, to get more details about OSD menu usage. 3.2.4 Close the Camera Cover (after installation is complete) The EHH5200 is specially designed with one inner cover and one outer cover ring for water-proofing and ease of installation. Please follow these instructions for closing the camera cover. - Page 17 Correct Wrong (not aligned) 3. If the lens is not aligned with the window, loosen the outer cover, adjust the inner cover so that the lens aimed exactly at the window. Slightly adjust the cover 4. Tighten the outer cover ring until it is firmly secured. Turn the external ring - 16 -...
-
Page 18: Osd Menu & Configuration
4. OSD Menu & Configuration Access the user setup menu screen: Press inward on the end of the joystick The menu screen will appear on the monitor. Navigating with the joystick Angle the joystick or to move the cursor up or down. Angle the joystick or to adjust the mode or value of a setting. - Page 19 Menu Tree Lens — DC Shutter — Auto ; 1/50 ; 1/60 ; 1/100 ; 1/120 ; 1/250 ; 1/500 ; 1/700 ; 1/1000 ; 1/1600 ; 1/2500 ; 1/5000 ; 1/8000 Exposure — High ; Middle ; Low ; Off —...
-
Page 20: Exposure
In this section, user can do camera settings including Lens, Shutter, Iris, AGC, BLC and Anti-flicker. Please select the item by moving the joystick UP or DOWN. Select “Return” to return to the previous menu. 4.1.1 Lens DC mode is fixed in Lens level for EHH5200 camera. - 19 -... -
Page 21: Shutter
4.1.2 Shutter Select the shutter mode by moving the joystick LEFT or RIGHT. Select from Auto,1/50,1/60,1/100,1/120,1/250,1/500,1/700,1/1000,1/1600,1/2500,1/5000 and 1/8000. 4.1.3 AGC (Auto Gain Control – basic low light signal amplification) Select the level you would like to choose by moving the joystick LEFT or RIGHT. The more the level of gain increases, the brighter the screen, but the level of noise increases as well. -
Page 22: Day/Night
Select “Return” to return to the previous menu. 4.3 Day/Night These settings control the operation of the camera when the illumination level changes. Choices are Color at all times; B/W at all times; or color when illumination is bright, switching to B/W in low light. Please select one of the 3 modes below by moving the joystick UP or DOWN then press “Set”... -
Page 23: D-Effect
4.4.3 D-Effect In this section, user can do camera settings including Mirror, Gamma and Neg_Image. Please select the item by moving the joystick UP or DOWN. Select “Return” to return to the previous menu. 4.4.3.1 Mirror Select one of the 4 modes below by moving the joystick LEFT or RIGHT. -Off: Disable the effects. -
Page 24: Default
4.4.6 Default Select “Yes” to load system settings to default factory values. Or select “No” to disregard this option. 4.5 Image Adjust In this section, user can adjust Sharpness, Brightness and Contrast of the image. Please select the item by moving the joystick UP or DOWN. Select “Return” to return to the previous menu. 4.5.1 Sharpness Select the sharpness level by moving the joystick LEFT or RIGHT. - Page 25 EverFocus USA - California: EverFocus USA - New York: 1801 Highland Avenue, Unit A, Duarte, CA 91010, USA 415 Oser Avenue, Unit S, Hauppauge, NY 11788, USA TEL: +1 626 844 8888 TEL: +1 631 436 5070...
Need help?
Do you have a question about the EHH5200 and is the answer not in the manual?
Questions and answers