
Related Manuals for Watchguard WGSENTINEL


Summary of Contents for Watchguard WGSENTINEL
- Page 1 Watchguard™ Sentinel Wireless Alarm System Model: WGSENTINEL Document: Watchguard Sentinel – User Manual.doc Release: 15 July 2009 U s e r M a n u a l Designed in Australia & Made in Taiwan By: www.rhino.com.au...
-
Page 2: Table Of Contents
Contents Contents ......................2 1. Introduction ....................3 1.1. What You Get ..................4 1.2. The Passive Infrared Detector (PIR) ............. 5 1.3 The Strobe and Siren ................5 2. Installation ....................6 2.1. Planning the Installation ................ 6 2.2. The Main Unit ..................7 2.3. -
Page 3: Introduction
1. Introduction Your Watchguard Sentinel Home Alarm System is specifically designed for simple DIY installation (Do It Yourself). It is suitable for use in homes or offices where the owner wishes a siren to trigger if there is unauthorized entry into the premises. -
Page 4: What You Get
Power Supply (plug pack) The main unit requires a regular mains power supply. The Watchguard is supplied with a 12V DC plug pack that connects to the main unit’s power connector on the end of the 10m cable. -
Page 5: The Passive Infrared Detector (Pir)
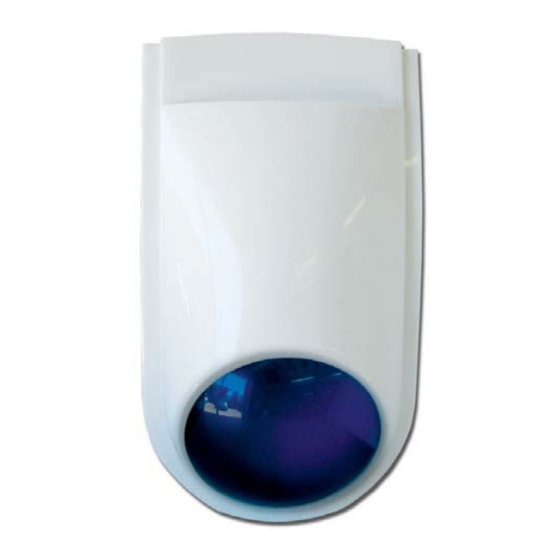
The wire, which runs around the edge of the detector, is the antenna. Do not touch, remove or cut this wire 1.3 The Strobe and Siren The siren/strobe contains the main alarm unit for the Watchguard Sentinel Home Alarm System. Functions: The LED •... -
Page 6: Installation
2. Installation 2.1. Planning the Installation Each separate component of the Watchguard Sentinel Home Alarm System should be placed in strategic locations. Below is a guide to where you should place the main unit and the detectors. It is important that you take into account that the maximum range without any obstructions between the main unit and each detector is no further than 50 metres. -
Page 7: The Main Unit
2.2. The Main Unit Mount the Watchguard main unit at the front or front side of the building. The mounting position should be under an eave or out of direct contact with rain or other water sources. The position should allow line of sight viewing from both the street (for visual deterrence) and from your main point of entry (for visual confirmation of arming/disarming). -
Page 8: The Power Supply
2.3. The Power Supply Inside Roof Power Supply Mounting 1. Drill a small hole (15mm diameter) into the ceiling where the wire can go through to be connected to the wire from the main unit. 2. Feed the wire through the hole in the ceiling and up to where it will join the wire from the main unit. -
Page 9: The Detector
2.4. The Detector Firstly, the mounting bracket must be fixed to the wall using the self-tapping screw and other accessories supplied. Mounting must be at a minimum height of 1.2 metres and maximum of 2.1 metres (lower is better). Drill a 5mm diameter hole (at least 30mm deep) into the gyprock for mounting the detector bracket/socket base. - Page 10 • Select a location where the detector can provide the best detecting range. Always ensure that you do not cover an area with multiple detectors, so as to avoid simultaneous transmission back to the receiver in your Watchguard Sentinel Home Alarm System. The receiver can only decode one coded signal at any given time.
-
Page 11: Powering The Detector
2.4.2. Powering the detector When you first remove the detector from the box it is not powered, although the batteries are in place. To turn the detector on, pull the piece of plastic from one of the battery terminals (in the direction indicated in figure 7). -
Page 12: Intelligent Power Saving (Ips) & Normal Mode
2.4.4 Intelligent Power Saving (IPS) & Normal Mode This detector has Intelligent Power Saving (IPS). This means that in normal operation or normal mode the red light will indicate valid movement detection but the green light will not turn on at all. Lights will not flash every time you move in front of the detector. -
Page 13: Turning The System On
3. Operation 3.0. Turning the system on After completing installation as outlined above, switch the system on at the power point. Every time the system is powered up it will enter learn/programming mode. If you wish to learn in a new wireless device, please see Section 4 for programming instructions. -
Page 14: Disarming
3.3. DISARMING When to use The system should be disarmed before entering the building or premise (there is no entry delay to the alarm). Indications The siren will beep twice and the blue strobe light will flash three times. The siren will beep 12 times if the alarm has been triggered while the system was armed. - Page 15 This detector has Dual Edge Sensing (DES) Technology, developed to eliminate false alarms yet still provide maximum security. The detector uses a pattern infrared beam zones to sense body movement. The detection pattern in an optimal temperature environment is shown in figure 9.
- Page 16 Triggering the detector In figure 10, a body moving from position 1 to position 2, into the infrared beam zone, will create a pulse. Moving from position 2 to 3, out of the other side of the same infrared beam zone, will create another pulse.
-
Page 17: Programming
Refer to Section 3 of this manual for remote operation instructions. Your Watchguard Sentinel Home alarm System can only store a maximum of FIVE wireless devices in its memory. If you learn in an 6th remote, the 1st remote control will be erased. -
Page 18: Adding A Detector
4.2. Adding a Detector TO ADD A DETECTOR Turn the system off, from the power supply or unplug. Wait 10 seconds. Turn the system on. Press the tamper switch inside the detector. The lights in the detector will flash and the system will beep 4 times to signify that a valid detector has been learnt in. -
Page 19: Testing The Detector
4.3 Testing the Detector It is vital that the detector is tested carefully for each installation. Placing the unit into test mode is the best way of checking the detector. At 25°Celsius, the detector should have a detection range of approximately 10 metres and a scope angle of 90°, i.e. -
Page 20: Maintenance
5. Maintenance The complete system should be tested at regular intervals. We suggest testing it once every fortnight or at least once per month. 5.1. The Remote Control The batteries in the remote control will need to be replaced every 1 to 3 years, depending on usage. You are able to recognise when the batteries are low from when the range on the remote control reduces. -
Page 21: Cleaning The Pyro Detector
When replacing the batteries you must take the following into consideration: • You must replace both batteries at the same time. Don’t just replace one of them. • Be sure not to touch the pyro detector on the removal or replacement of the batteries. -
Page 22: Warranty
6. Warranty 6.1. Warning Limitations & Warranty While this system is an advanced design security system, it does not offer guaranteed protection against burglary, fire or any other emergency. Any alarm system, whether commercial or residential, is subject to compromise or failure to warn for a variety of reasons. - Page 23 • Alarm warning devices such as sirens, bells or horns may not alert people or wake up sleepers who are located on the other side of closed or partly open doors. If warning devices sound on a different level of the residence from the bedrooms, then they are less likely to waken or alert people inside the bedrooms.
- Page 24 less of cause or origin, seller's maximum liability shall not in any case exceed the purchase price of the product, which shall be the complete and exclusive remedy against seller. This warranty replaces any previous warranties and is the only warranty made by Seller on this product.
- Page 25 Where did you purchase your Watchguard System? Store Location Who installed your Watchguard System? This information will only be used by the manufacturer and will not be sold to any third parties. Dear Customer, We appreciate your confidence in our product, and you can be certain that we will do everything possible to ensure that you are happy with your decision and that you have years of satisfaction from your Watchguard System.
Need help?
Do you have a question about the WGSENTINEL and is the answer not in the manual?
Questions and answers