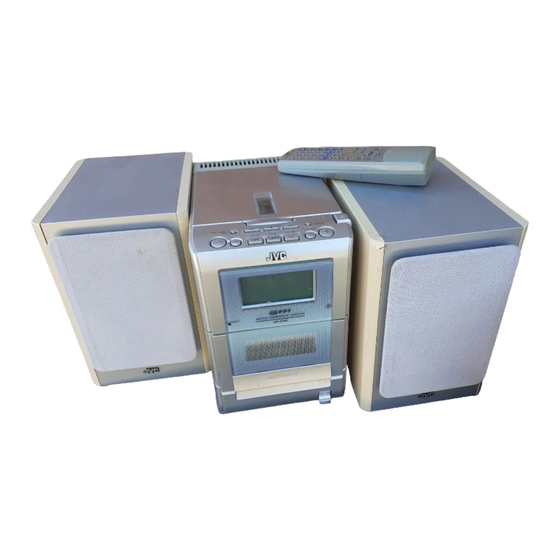
JVC UX-H30 Service Manual
Hide thumbs
Also See for UX-H30:
- Instructions manual (32 pages) ,
- Přiručka k obsluze (35 pages) ,
- Instructions manual (60 pages)
Table of Contents
Advertisement
SERVICE MANUAL
MICRO COMPONENT SYSTEM
8
2003
MB024
1
PRECAUTION. . . . . . . . . . . . . . . . . . . . . . . . . . . . . . . . . . . . . . . . . . . . . . . . . . . . . . . . . . . . . . . . . . . . . . . . . 1-3
2
SPECIFIC SERVICE INSTRUCTIONS . . . . . . . . . . . . . . . . . . . . . . . . . . . . . . . . . . . . . . . . . . . . . . . . . . . . . . 1-6
3
DISASSEMBLY . . . . . . . . . . . . . . . . . . . . . . . . . . . . . . . . . . . . . . . . . . . . . . . . . . . . . . . . . . . . . . . . . . . . . . . 1-7
4
ADJUSTMENT . . . . . . . . . . . . . . . . . . . . . . . . . . . . . . . . . . . . . . . . . . . . . . . . . . . . . . . . . . . . . . . . . . . . . . . 1-17
5
TROUBLESHOOTING . . . . . . . . . . . . . . . . . . . . . . . . . . . . . . . . . . . . . . . . . . . . . . . . . . . . . . . . . . . . . . . . . 1-21
COPYRIGHT © 2003 VICTOR COMPANY OF JAPAN, LIMITED
UX-H30
MICRO COMPONENT SYSTEM
TABLE OF CONTENTS
Area Suffix
U ---------------- Other Areas
UP ---------------------- Korea
UT --------------------- Taiwan
UW ---- Brazil,Mexico,Peru
No.MB024
2003/8
Advertisement
Table of Contents

Related Manuals for JVC UX-H30


Summary of Contents for JVC UX-H30
-
Page 1: Table Of Contents
SERVICE MANUAL MICRO COMPONENT SYSTEM MB024 2003 UX-H30 MICRO COMPONENT SYSTEM Area Suffix U ---------------- Other Areas UP ---------------------- Korea UT --------------------- Taiwan UW ---- Brazil,Mexico,Peru TABLE OF CONTENTS PRECAUTION............... . . 1-3 SPECIFIC SERVICE INSTRUCTIONS . - Page 2 SPECIFICATION 20 W (10 W + 10 W) at 4 Ω (10% THD) Amplifier Output Power Audio input sensitivity/Impedance (at 1 kHz) AUX 500 mV/48.75 kΩ 4 Ω Speakers/Impedance Tuner FM tuning range 87.50 MHz - 108.00 MHz AM tuning range AM 10 kHz intervals 530 kHz - 1 710 kHz AM 9 kHz intervals 531 kHz - 1 710 kHz...
-
Page 3: Precaution
SECTION 1 PRECAUTION Safety Precautions (1) This design of this product contains special hardware and voltmeter. many circuits and components specially for safety purpos- Move the resistor connection to each exposed metal es. For continued protection, no changes should be made part, particularly any exposed metal part having a return to the original design unless authorized in writing by the path to the chassis, and measure the AC voltage across... - Page 4 Preventing static electricity Electrostatic discharge (ESD), which occurs when static electricity stored in the body, fabric, etc. is discharged, can destroy the laser diode in the traverse unit (optical pickup). Take care to prevent this when performing repairs. 1.5.1 Grounding to prevent damage by static electricity Static electricity in the work area can destroy the optical pickup (laser diode) in devices such as CD players.
- Page 5 Important for laser products 5.CAUTION : If safety switches malfunction, the laser is able 1.CLASS 1 LASER PRODUCT to function. 2.DANGER : Invisible laser radiation when open and inter lock failed or defeated. Avoid direct exposure to beam. 6.CAUTION : Use of controls, adjustments or performance of procedures other than those specified herein may result in 3.CAUTION : There are no serviceable parts inside the hazardous radiation exposure.
-
Page 6: Specific Service Instructions
SECTION 2 SPECIFIC SERVICE INSTRUCTIONS This service manual does not describe SPECIFIC SERVICE INSTRUCTIONS. 1-6 (No.MB024) -
Page 7: Disassembly
SECTION 3 DISASSEMBLY Main body 3.1.1 Removing the rear panel (See Fig.1,2) (1) From behind the body, remove the nine screws A attach- ing the rear panel. (2) Turing the body upside down, remove the two screws B at- taching the rear panel, and remove. 3.1.2 Removning the side panel (L) and (R) (See Fig.2~5) •... - Page 8 3.1.3 Removing the CD player assembly CD player assembly CD servo control board (See Fig.6,7) CN604 • Prior to performing the following procedure, remove the rear CN603 panel and the left and right side panels. (1) Disconnect the card wires from the two connectors CN603 CN604 on the CD servo control board.
- Page 9 3.1.4 Removing the power amplifier board and heat sink Power amplifier board (See Fig.8~10) CN301 • Prior to performing the following procedure, remove the rear panel, the left and right side panels, and the CD player assem- bly. (1) Remove the five screws E and F attaching the heat sink. (2) Disconnect the wire from connector CN901 on the power...
- Page 10 3.1.6 Removing the front panel assembly (See Fig.12,13) • Prior to performing the following procedure, remove the rear Front panel assembly panel the left and right side panels, the CD player assembly, the power amplifier board. (1) Disconnect the card wire from the connector CN714 on the LCD system CPU board.
- Page 11 3.1.8 Remove the cassette mechanism assembly Front panel assembly (See Fig.16,17) • Prior to performing the following procedure, remove the front panel assembly. (1) Disconnect the card wire from the connector CN713 on the LCD system CPU board. (2) Remove the four screws K and L attaching the cassette mechanism assembly, and remove.
- Page 12 3.1.9 Remove the LCD system CPU board (See Fig.18) (1) Disconnect the wire from the connector CN716 on the LCD system CPU board. (2) Release the two joints f and pull out the LCD system CPU board. CN716 LCD system CPU board Fig.18 3.1.10 Removing the operating switch board (See Fig.19,20)
- Page 13 Cassette mechanism assembly 3.2.1 Removing the Play/Record & Clear head Cassette mechanism assembly Fly wheelR (See Fig.1~3) (1) While moving the trigger arm on the right side of the head mount in the direction of the arrow, turn the flywheel R counterclockwise until the head mount comes ahead and clicks.
- Page 14 3.2.2 Removing the head amplifier & mechanism control board (See Fig.4) (1) Turn over the cassette mechanism assembly and remove Main motor assembly the three screws A attaching the head amplifier & mecha- nism control board. Capstan belt (2) Disconnect the flexible wire from connector CN31 on the head amplifier &...
- Page 15 3.2.4 Removing the flywheel (See Fig.8, 9) • Prior to performing the following procedure, remove the head amplifier & mechanism control board and the main motor as- sembly. (1) From the front side of the cassette mechanism, remove the slit washers attaching the capstan shaft L and R. Pull out the flywheels backward.
- Page 16 3.2.6 Reattaching the Play/ Record & Clear head (See Fig.11~13) (1) Reattaching the head mount assembly. a) Change front of the direction cover of the head mount assembly to the left (Turn the head forward). b) Fit the bosses O', P', Q', U' and V' on the head mount assembly to the holes P and V, the slots O, U and Q of the mechanism sub assembly (See Fig.11 to 13).
-
Page 17: Adjustment
SECTION 4 ADJUSTMENT Measurement Instruments Required for Adjustment (1) Low frequency oscillator 4.2.2 Tuner section This oscillator should have a capacity to output 0dBs to Voltage applied to tuner +B : DC5.7V 600Ω at an oscillation frequency of 50Hz-20kHz. VT : DC 12V (2) Attenuator impedance : 600Ω... - Page 18 Cassette mechanism adjustment Head azinuth Head azinuth adjustment screw adjustment screw (Forward side) (Reverse side) CN31 Head azinuth Head azinuth R/P head, Erase head adjustment screw adjustment screw (Forward side) (Reverse side) Mecha control board VR37 R371 FW100 Motor speed CN33 VR37 C374...
- Page 19 4.3.1 Mechanism section Adjustment Item Condition Measurement method Ref. value position Head azimuth Test tape (1) Playback the test tape VT703L (8kHz). Maximum output Only adjust :VT703L (8kHz) (2) Adjust to maximum output level by azi- at changed Output terminal muth adjustment screw for forward side head :Speaker out...
- Page 20 4.3.2 Electrical adjustment Adjustment Item Condition Measurement method Ref. value position Recording BIAS • Forward or Reverse (1) Set the test tape(AC-514 TYPE ll and AC-225 VR31 adjustment • Test tape AC-225 TYPE l), then make REC/ : 4.20µA : AC-514 TYPE ll PAUSE condition.
-
Page 21: Troubleshooting
SECTION 5 TROUBLESHOOTING Flow of functional operation untill TOC read (CD) Check Point Slider turns REST Power Key Power ON Check that the voltage at the pin 5 SW ON. of CN801 is 0V? Automatic tuning of TE offset Check that the voltage at the Laser ON pin2 of IC601 is 4.4V? Detection of disc... - Page 22 Maintenance of laser pickup (CD) Replacement of laser pickup (CD) (1) Cleaning the pick up lens Before you replace the pick up, please try to clean the lens Turn off the power switch and, disconnect the with a alcohol soaked cotton swab. power cord from the ac outlet.
- Page 23 (No.MB024)1-23...
- Page 24 VICTOR COMPANY OF JAPAN, LIMITED AV & MULTIMEDIA COMPANY AUDIO/VIDEO SYSTEMS CATEGORY 10-1,1chome,Ohwatari-machi,Maebashi-city,371-8543,Japan (No.MB024) Printed in Japan...
-
Page 25: Schematic Diagrams
SCHEMATIC DIAGRAMS MICORO COMPONENT SYSTEM UX-H30 CD-ROM No.SML200309 MICRO COMPONENT SYSTEM Area Suffix U ---------------- Other Areas UP ---------------------- Korea UT --------------------- Taiwan UW ---- Brazil,Mexico,Peru Contents Block diagram Standard schematic diagrams Prited circuit boards No.MB024SCH COPYRIGHT 2003 VICTOR COMPANY OF JAPAN, LTD. - Page 26 In regard with component parts appearing on the silk-screen printed side (parts side) of the PWB diagrams, the parts that are printed over with black such as the resistor ( diode ( ) and ICP ( ) or identified by the " " mark nearby are critical for safety. (This regulation does not correspond to J and C version.)
-
Page 27: Block Diagram
Block diagram IFOUT SDATA/VOLDA MUTE/IFOUT OSCOUT CD DOOR S7500 to S7512 LCD LAMP DATA SCK/VOLCK LOUT FM/AM,SDIN FM RF SWITCH KEY MATRIX FTUNERSW ROUT ST/MONO TUNER FM/AM FM DET AMOSC RST/CLOSE KEY0,KEY1 SWITCH AM DET AMRF COM0 to COM3 STEREO S0 to S39 AM RF AMOSC... - Page 28 Standard schematic diagrams Primary section D905 6A10E2 6A10E2 6A10E2 F903 D905 F903 D905 T6.3AL F903 6.3A/125V T6.3AL J902 J902 J902 QNA0016-001 QNA0016-001 QNA0016-001 L901 F901 QQR1321-001 F901 L901 F901 T500mAL T500mAL 1A/125V J901 J901 J901 QNC0092-001 QNC0091-001 QNC0091-001 6A10E2 6A10E2 D905 D905 F903...
- Page 29 Q9002 2SC2785/FE/-T C9003 R9013 220P R9015 4.7K Q9006 2SC2785/FE/-T R1803 2.7K R2803 2.7K Q9070 2SC3576-JVC-T C2959 K9100 QQR0621-001Z C9070 CN301 10/25 CN305 QGB1214J1-20S QGF1205F1-10 Parts are safety assurance parts. When replacing those parts make sure to use the specified one.
- Page 30 Micon / LCD & Key control section BL701 QLL0147-001 QSW0122-001 S7550 BL702 R7501 R7502 R7503 R7504 R7505 R7506 R7500 2.7K 1.2K 1.8K 2.2K DI701 RST/CLOSE QLL0147-001 QLD0260-001 KEY0 KEY1 FW701 CN716 QGF1205C1-04 FW701 QUM022-12Z3Z3 R7508 R7509 R7510 R7511 R7512 R7513 R7514 R7507 1.2K...
- Page 31 CD servo control section R605 TBAL TP603 R606 680k FBAL 180k C691 R607 R609 220K 150p C619 C692 C620 C669 470/6.3 560P 100P 150p BTLM C624 C693 C655 C653 0.022/25 BLKCK 0.022 R635 C625 150p QCZ0202-155Z C694 100p SUBQ 0.0022 390k VDET SQCK...
- Page 32 MSI-5U2LWA R371 R108 RECL R106 R302 R110 2.2K CN42 Q342 QGF1205F1-09 KRA111M-T C104 VR37 C102 QVP0077-103Z 0.01 220p Q343 R306 2SC3576-JVC-T 4.7K R336 Q344 R344 C340 2SC3576-JVC-T 47/50V CN32 4.7K QGF1205F1-09 R339 C341 Q345 R345 100K C304 1/50V 2SC3576-JVC-T 10/16V R304 4.7K...
- Page 33 Tuner section QAU0161-001 0.0039 0.0022 0.47/50 470P 0.047/16 0.047/16 1/50 22/16 0.022 10/16 3.9K 10/16 0.001 10/16 100/16 1000P 0.022 0.022 3.3K QAX0677-001Z LC72136N 1SS133-T2 LA1838 1SS133-T2 QNB0153-001 QAX0677-001Z 5.6K 10/16 DTA114YKA-X QQR0793-001 150P 150P 150P 1/50 0.022/16 QQR0796-003 QAX0610-001Z 0.047/16 3.3k 10/16...
- Page 34 Printed circuit boards Trans board K602 R668 R659 C652 X651 C677 R669 C651 C901 R671 C668 C696 K601 C695 R672 D901 C665 IH603 C902 C655 C663 C669 D902 R602 R667 R603 R656 C904 R654 R653 R652 D904 R651 C903 Q602 C602 D903 C608...
- Page 35 Micon board PP701 FW701 R7500 FW701 C7008 D7007 D7001 R7052 IC932 D7006 R7051 D7005 D7004 R7017 C7009 R7038 D7003 C7010 R7053 D7008 C7011 R7054 R7055 R7028 R7026 Q7003 R7025 R7506 C7015 C7013 C7500 R7071 R7508 R7072 R7019 R7008 K7003 R7061 L7003 CN716 R7006...
- Page 36 Cassette (switch) board VR37 R371 FW100 CN33 C374 R310 CN34 R105 R313 CN32 R342 C105 C107 C205 Q302 Q375 R372 C310 Q376 Q372 R205 R338 C314 C313 R375 C371 R376 R337 R335 L301 R305 C331 R353 C300 R327 C304 R339 C213 IC32 R304...
- Page 37 << MEMO >> 2-11...
- Page 38 VICTOR COMPANY OF JAPAN, LIMITED AV & MULTIMEDIA COMPANY AUDIO/VIDEO SYSTEMS CATEGORY 10-1,1chome,Ohwatari-machi,Maebashi-city,371-8543,Japan Printed in Japan (No.MB024SCH)
-
Page 39: Parts List
PARTS LIST [ UX-H30 ] * All printed circuit boards and its assemblies are not available as service parts. Area suffix UP ---------------------------- Korea UT --------------------------- Taiwan UW ---------- Brazil,Mexico,Peru U ---------------------- Other Areas - Contents - 3- 2 Exploded view of general assembly and parts list (Block No.M1) 3- 5 Speaker assembly and parts list (Block No.M2) - Page 40 Exploded view of general assembly and parts list Block No. LCD system light board LCD system CPU board CD servo control baord...
- Page 41 Power ampliifier board LCD system light board LCD system CPU board Power supply board Tuner board Head amplifier & mechanism control board...
- Page 42 TAP SCREW 3mm x 10mm QYSBSF3010Z TAP SCREW 3mm x 10mm(x2) GV10127-003A FRONT PANEL QYSBSF3010Z TAP SCREW 3mm x 10mm GV40077-002A JVC BADGE QYSBSF3010Z TAP SCREW 3mm x 10mm GV20202-001A PUSH BUTTON H30U, H30UT, QYSBSF2608Z TAP SCREW 2.6mm x 8mm(x2)
- Page 43 Speaker assembly and parts list Block No. Speaker Block No. [M][2][M][M] Symbol No. Part No. Part Name Description Local J201XH3000B10 SPEAKER FRAME (x2) J200XH3000B00 FRONT PANEL (x2) J282XH3000B00 LATCH (x8) 21302UXP510 JVC MARK (x2) 305J0XH300800 WOOFER (x2) 411B84012AB1 SCREW (x8) 6000XH30U00 RATING LABEL (x2)
- Page 44 Cassette mechanism assembly and parts list Block No. SLC-S302M Grease = EM-30L =UD-24 =LEN-320M =MOBIL-1 The lower side Switch board Head amplifier board...
-
Page 45: Cassette Mechanism
Cassette mechanism Block No. [M][P][M][M] Symbol No. Part No. Part Name Description Local VKS1165-00L CHASSIS B. ASSY VKS2274-002 REEL GEAR (x2) VKW5286-002 B.T. SPRING (x2) VKS5559-001 PLAY IDLE GEAR VKS5595-002 BLIND VKS5560-003 FR IDLE GEAR LV42013-001A EARTH SPRING SLC-RP4SVM HEAD MOUNT ASSY VKY3149-002 CASSETTE SP. -
Page 46: Electrical Parts List
390pF 50V K C636 QCBB1HK-391Y C CAPACITOR 390pF 50V K Q601 KTA1271/OY/-T TRANSISTOR C638 QFVF1HJ-104Z MF CAPACITOR 0.1uF 50V J Q1150 2SC3576-JVC-T TRANSISTOR C641 QCZ0313-105Z C CAPACITOR 1uF 25V Z Q1400 2SC2785/FE/-T TRANSISTOR C642 QCBB1HK-103Y C CAPACITOR 0.01uF 50V K... - Page 47 Symbol No. Part No. Part Name Description Local Symbol No. Part No. Part Name Description Local C2503 QTE1V06-106Z E CAPACITOR 10uF 35V R654 QRE141J-101Y C RESISTOR 100Ω 1/4W J C2504 QFVF1HJ-104Z MF CAPACITOR 0.1uF 50V J R656 QRE141J-102Y C RESISTOR 1kΩ...
- Page 48 Micon board Symbol No. Part No. Part Name Description Local Block No. [0][2][0][0] R9001 QRE141J-1R0Y C RESISTOR 1Ω 1/4W J R9002 QRE141J-1R0Y C RESISTOR 1Ω 1/4W J Symbol No. Part No. Part Name Description Local R9003 QRE141J-1R0Y C RESISTOR 1Ω 1/4W J R9004 QRE141J-471Y C RESISTOR...
- Page 49 Symbol No. Part No. Part Name Description Local Symbol No. Part No. Part Name Description Local QEKC1HM-105Z E CAPACITOR 1uF 50V M NRSA63J-332X MG RESISTOR 3.3kΩ 1/16W J NCB31HK-222X C CAPACITOR 2200pF 50V K NRSA63J-392X MG RESISTOR 3.9kΩ 1/16W J NCB31HK-471X C CAPACITOR 470pF 50V K...
- Page 50 QQL231K-470Y COIL 47uH K Q302 2SC2001/K/-T TRANSISTOR L7003 QQL231K-4R7Y COIL 4.7uH K Q305 2SC2001/K/-T TRANSISTOR QQR0793-001 Q342 KRA111M-T DIGI TRANSISTOR Q343 2SC3576-JVC-T TRANSISTOR BL701 QLL0147-001 LAMP Q344 2SC3576-JVC-T TRANSISTOR BL702 QLL0147-001 LAMP Q345 2SC3576-JVC-T TRANSISTOR QAX0677-001Z C FILTER 10.700MHz Q346...
- Page 51 Symbol No. Part No. Part Name Description Local R106 QRE141J-113Y C RESISTOR 11kΩ 1/4W J R107 QRE141J-912Y C RESISTOR 9.1kΩ 1/4W J R108 QRE141J-273Y C RESISTOR 27kΩ 1/4W J R110 QRE141J-103Y C RESISTOR 10kΩ 1/4W J R116 QRE141J-102Y C RESISTOR 1kΩ...
-
Page 52: Packing Materials And Accessories Parts List
Packing materials and accessories parts list Block No. 3-14... - Page 53 Packing and accessories Block No. [M][3][M][M] Symbol No. Part No. Part Name Description Local GVT0101-003A INST BOOK ENG CHI(PEKIN) H30U GVT0101-004A INST BOOK H30UP GVT0101-012A INST BOOK CHI(TIWAN) H30UT H30U GVT0101-013A INST BOOK ENG SPA POR QAL0457-001 ANT.WIRE QAL0014-001 AM LOOP ANT H30U, QAM0060-002 AC ADAPTOR...
Need help?
Do you have a question about the UX-H30 and is the answer not in the manual?
Questions and answers