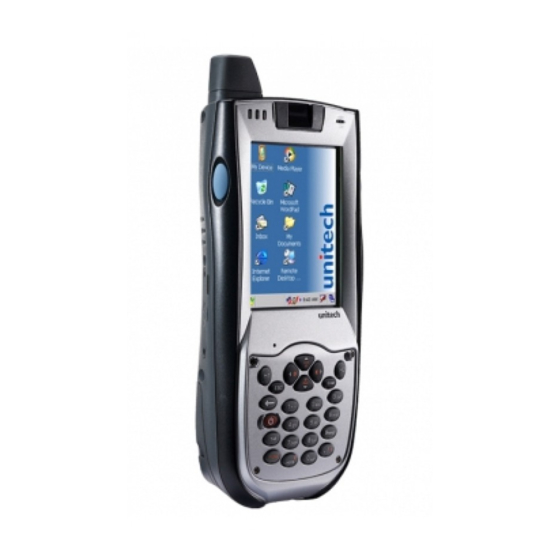
Unitech PA968 User Manual
Rugged mobile computer
Hide thumbs
Also See for PA968:
- Operation manual (117 pages) ,
- User manual (48 pages) ,
- Quick reference manual (12 pages)

Related Manuals for Unitech PA968


Summary of Contents for Unitech PA968
- Page 1 PA968 Rugged Mobile Computer Enter wxyz pqrs FUNC alpha User’s Manual 400648G Version 1.0 © Copyright 2009 Unitech Electronics Co., Ltd.
-
Page 2: Regulatory Compliance Statements
Preface About This Manual This manual explains how to install, operate and maintain the PA968 Rugged Mobile Computer. No part of this publication may be reproduced or used in any form, or by any electrical or mechanical means, without permission in writing from the manufacturer, which includes photocopying, recording, or information storage and retrieval systems. -
Page 3: Canadian Compliance Statement
The PA968 is equipped with a Lithium-Ion Battery Pack and Backup Battery. Both batteries will discharge power if not frequently in use. Initially charge the PA968 for at least 16 hours to fully charge both battries. This ensures that the Backup Battery will save data on SDRAM for at least 8 hours, when the Main Battery disconnects from the PA968. -
Page 4: Battery Charge Notice
The warranty becomes void if the equipment is modified, improperly installed/used, damaged by accident/neglect or if any parts are improperly installed or replaced by the user. Only use the PA968’s AC Adapter. Using the wrong AC Adapter may damage the PA968, and it will void the warranty. -
Page 5: Table Of Contents
Getting Started Introducing the PA968 ....................... 1 Features ........................... 2 Package Contents ....................... 3 A Tour of the PA968 ......................4 Front View..........................4 Back View ..........................5 Setting up the PA968 ......................6 Installing the Battery ....................... 6 Charging the Battery....................... 8 Charging the battery with USB charging cable.............. - Page 6 Using the Laser Bar Code Scanner ................20 Chapter 3 Getting Connected Establishing Device-PC Connection ................22 Installing Microsoft ActiveSync ..................... 22 Connecting the PA968 to a Computer .................. 23 Using ActiveSync to Exchange Files ................ 24 Bluetooth Connection ...................... 25 GPRS Connection ......................28 Wi-Fi Connection .......................
-
Page 7: Getting Started
To reduce total cost of ownership, the PA968 is sealed to meet IP65 standards and has undergone multiple 5-foot drop tests to prevent downtime. Thanks for purchasing the PA968 Rugged Mobile Computer. Copyright 2009 unitech Electronics Co., Ltd. All rights reserved. unitech is a registered trademark of unitech Electronics Co., Ltd. -
Page 8: Features
Chapter 1 Getting Started Features Powerful System Audio • Microsoft Windows CE 5.0 Operat- • MIC. ing System. • Speaker. • 520Mhz Intel PXA270 Processor. • Headset Connector. • Receiver. System Memory Picture Capture • 128 MB SDRAM. • 320 MB Flash ROM. •... -
Page 9: Package Contents
PA968 Lithium-Ion Battery Stylus Stylus Bungee USB Charging Cable AC Adapter Cable Unitech CD-ROM AC Adapter (Unitech Quick Reference Guide) Copyright 2009 unitech Electronics Co., Ltd. All rights reserved. unitech is a registered trademark of unitech Electronics Co., Ltd. -
Page 10: A Tour Of The Pa968
Indicates the operating status. LED indicators (left to right): - GPRS/GPS Communication. - Scan Engine Reading. - Power Charging. LCD Touch- Displays the PA968’s applications and data. It is touch screen. sensitive and responds to a stylus or finger. Microphone. Receives sound. -
Page 11: Back View
Illuminates images for the camera. Memory Card Slot. Accommodates the SD memory card. Battery Compartment Opens and closes the Battery Compartment. Tab. Copyright 2009 unitech Electronics Co., Ltd. All rights reserved. unitech is a registered trademark of unitech Electronics Co., Ltd. -
Page 12: Setting Up The Pa968
Dispose of used batteries according to local recycling guidelines. A Backup Battery cell is embedded in the PA968 to prevent data loss when the remov- able Battery Pack disconnects from the PA968. The Backup Battery will maintain data and system settings for up to 8 hours. -
Page 13: Chapter 1 Getting Started
NOTE: Make sure the Battery Compartment closes securely, or the PA968 may not start. Copyright 2009 unitech Electronics Co., Ltd. All rights reserved. unitech is a registered trademark of unitech Electronics Co., Ltd. -
Page 14: Charging The Battery
Getting Started Charging the Battery Charge the PA968 for at least 16 hours before initial use. After the initial charge, the PA968 will recharge to full capacity in 4 hours. Charge the PA968 with the USB Charging Cable or the Docking Station. -
Page 15: Checking The Led Status
Connect the PA968 to an external power supply while synchronizing. 1. Press and hold the USB Charging Cable’s Release Buttons while connecting to the PA968 (1). Copyright 2009 unitech Electronics Co., Ltd. All rights reserved. unitech is a registered trademark of unitech Electronics Co., Ltd. -
Page 16: Turning The Terminal On For The First Time
3. Plug the other end of the AC Adapter into an electrical outlet (3). Turning the terminal on for the first time Charge the PA968 for at least 16 hours prior to initial use. Start the PA968, calibrate the display, learn some basic stylus usage, and setup the date and time through the... -
Page 17: Calibrating The Screen
The alignment screen appears. NOTE: Or simultaneously press FUNC and ESC to access the calibration screen. 4. Tap the target mark firmly and accurately. Copyright 2009 unitech Electronics Co., Ltd. All rights reserved. unitech is a registered trademark of unitech Electronics Co., Ltd. -
Page 18: Set Date And Time
5. Continue tapping the target mark until calibra- tion is complete. 6. Press Enter to accept the new settings, or press ESC to maintain the old settings. Set Date and Time In the Date/Time Properties window, Set Date use the Stylus to select the current date and time, time zone and daylight saving time option. -
Page 19: Using The Hardware
“Numeric mode on” is the PA968’s default condition. But, “CAPS mode off” is the default condition in Alpha mode. Use the Alpha key to toggle into CAPS mode. Copyright 2009 unitech Electronics Co., Ltd. All rights reserved. unitech is a registered trademark of unitech Electronics Co., Ltd. -
Page 20: Using Function Keys
Chapter 2 Using the Hardware Using Function keys Description Toggle LCD backlight on and off. FUNC Toggle keypad LED backlight on and off. FUNC Increase screen brightness. FUNC Decrease screen brightness. FUNC Bring up Task Manager. FUNC Bring up Scanner Control Panel. pqrs FUNC Bring up Power Properties. -
Page 21: Using The Windows Ce Keyboard
Chapter 2 Using the Hardware Using the Windows CE Keyboard The Windows CE Software provides a touch-screen keyboard for alphanumeric input. The Windows based keyboard replicates the layout of a standard PC keyboard. Open the Windows CE keyboard by tapping the keyboard icon on the task bar and tap Keyboard. -
Page 22: Using The Sd/Mmc Memory Card
2. Press the card in, and release. The card pops out. 3. Remove the card from the slot. Copyright 2009 unitech Electronics Co., Ltd. All rights reserved. unitech is a registered trademark of unitech Electronics Co., Ltd. -
Page 23: Using The Sim Card
Using the SIM Card The PA968’s GPRS SIM Card Slot is inside the Battery Compartment. CAUTION! Please backup data to prevent data loss before installing the SIM Card. Inserting the SIM card 1. Remove the Battery Compartment Cover and the Main Battery. See Installing the Battery on page 6. -
Page 24: Using The Camera
My Device field. 4. Tap Capture → Start Video to start recording a video. Tap Capture → End Video to end the recording. Copyright 2009 unitech Electronics Co., Ltd. All rights reserved. unitech is a registered trademark of unitech Electronics Co., Ltd. -
Page 25: Using The Fingerprint Reader
Chapter 2 Using the Hardware Using the Fingerprint Reader The PA968 has a fingerprint reader for advanced fingerprint reading identification. Launch the FingerDemo through the following: 1. Tap Start → Programs → Utilities → FingerDemo. 2. Tap Snap to test the fingerprint reader. When... -
Page 26: Using The Laser Bar Code Scanner
Scanner Settings and Scan2Key. Launch the Scanner Control Panel through the following: 1. Tap Start → Settings → Control Panel. Copyright 2009 unitech Electronics Co., Ltd. All rights reserved. unitech is a registered trademark of unitech Electronics Co., Ltd. -
Page 27: Chapter 2 Using The Hardware
Interval: field. Tap Start. 3. Aim the laser Scanner at a bar code, and press either one of the PA968’s scanner triggers. If Auto-Scan is enabled, aim the laser scanner at a bar code while the laser emits light at reg- ular intervals. -
Page 28: Getting Connected
3. Browse to the location of the downloaded file, and double-click it. The installa- tion wizard begins. 4. Follow the onscreen instructions to install Microsoft ActiveSync. Copyright 2009 unitech Electronics Co., Ltd. All rights reserved. unitech is a registered trademark of unitech Electronics Co., Ltd. -
Page 29: Connecting The Pa968 To A Computer
Micro- soft ActiveSync window appears. 6. Synchronization will initiate, and it will synchronize periodically or upon connec- tion. NOTE: A PC can partner with multiple PA968’s. But, a PA968 can only partner with up to two computers. -
Page 30: Chapter 3 Getting Connected
1. Connect the PA968 to the computer. 2. In Microsoft ActiveSync on the computer, click Explore. Windows Explorer opens the PA968’s Mobile Device window. Copyright 2009 unitech Electronics Co., Ltd. All rights reserved. unitech is a registered trademark of unitech Electronics Co., Ltd. -
Page 31: Bluetooth Connection
3. Locate the desired file to copy on the PA968 or computer. 4. Do one of the following: – To copy the file to the PA968, right-click the file and click Copy. Place the cur- sor in the desired folder for the device, right-click, then click Paste. - Page 32 Trusted and then Active. 5. On the computer, click Active- Sync → File → Connection Set- tings. Select the BT COM Port and click Copyright 2009 unitech Electronics Co., Ltd. All rights reserved. unitech is a registered trademark of unitech Electronics Co., Ltd.
- Page 33 Chapter 3 Getting Connected 6. On the PA968, tap Start → Programs → Blu- etooth → Double-tap BTActiveSync. 7. The BTActiveSync icon appears on the task- bar. Double-tap BTActiveSync. 8. Tap More. 9. Tap Inquiry. Select a desired device to syn- chronize.
-
Page 34: Gprs Connection
1. Tap Start → Programs → GPRS → 32WANDEMO. 2. Tap Power on. 3. The screen displays Modem Power Status is ON. Tap OK. Copyright 2009 unitech Electronics Co., Ltd. All rights reserved. unitech is a registered trademark of unitech Electronics Co., Ltd. - Page 35 Chapter 3 Getting Connected 4. Tap Start → Programs → GPRS → 32WANRAS. The 32WANRAS DialUp window appears. Tap Open Connection. 5. The Connection window appears. Tap Con- nect. 6. On the taskbar the GPRS icon appears indi- cating the signal strength. Tap Disconnect Connection, to end the GPRS connection.
-
Page 36: Wi-Fi Connection
3. A window appears with the message: A Power Cycle is required to make settings activate properly. Tap OK → OK to exit the Summit Client Utility window. Copyright 2009 unitech Electronics Co., Ltd. All rights reserved. unitech is a registered trademark of unitech Electronics Co., Ltd. - Page 37 Chapter 3 Getting Connected 4. Tap Start → Programs → Utilities → Boot- Mode. Tap Warm Boot to Warm Start the ter- minal and load the previous settings. 5. The RF setting window appears once the RF signal is detected. Double-tap Add New or double-tap a pre- ferred network.
-
Page 38: Using The Summit Utilities
2. Enter the Admin Password (Default password: SUMMIT). Tap OK. Scan Available AP 1. Under the Profile tab, tap Scan for the avail- able AP. Copyright 2009 unitech Electronics Co., Ltd. All rights reserved. unitech is a registered trademark of unitech Electronics Co., Ltd. -
Page 39: Commit And Activate
2. Select a desired AP to create a new profile. Tap Configure. 3. Tap Yes to create the new profile. 4. Enter the WEP key or network key. Tap OK. Commit and Activate 1. Tap Commit to activate the setting. - Page 40 Control Utility. Tap Disable Radio to discon- nect the AP. Under the Status tab view the IP address, sig- nal strength and signal quality. Copyright 2009 unitech Electronics Co., Ltd. All rights reserved. unitech is a registered trademark of unitech Electronics Co., Ltd.
-
Page 41: Bar Code Scanner Programs
Chapter 4 Bar Code Scanner Programs The PA968’s Laser Bar Code Scanner can scan and decode various types of 1D and 2D bar codes. Scanner Setting When it is necessary for the user to change the default bar code symbology for a dif-... -
Page 42: Bar Code Symbologies
2 Digit Addenda, 5 Digit Addenda, Addenda Required, Include Addenda Separator, Send Number System, Expanded UPC-E NOTE: *Value Adjustable Scanner Control Panel Version 5.14. Copyright 2009 unitech Electronics Co., Ltd. All rights reserved. unitech is a registered trademark of unitech Electronics Co., Ltd. -
Page 43: Bar Code Symbologies 2D
Chapter 4 Bar Code Scanner Programs Bar Code Symbologies 2D Check Transmit Bar code Enable/ Char/Digit Check Others Symbology Disable verification Char/Digit Aztec Runes, *Data Length Codablock F *Data Length Code 49 *Data Length Data Matrix *Data Length EAN-UCC UPC Composite, Composite *Data Length MaxiCode... -
Page 44: Advanced Settings
Microsoft ActiveSync operation, it is possible to restore any data that was previ- ously synchronized to the computer or data can be retrieved from a storage card. Copyright 2009 unitech Electronics Co., Ltd. All rights reserved. unitech is a registered trademark of unitech Electronics Co., Ltd. -
Page 45: Method 1: From Windows Ce
Chapter 5 Advanced Settings Method 1: From Windows CE 1. Tap Start → Programs → Utilities → Boot- mode. The BootMode Window appears. 2. Tap Cold Boot. The system resets and all data is lost (includ- ing files in the RAM memory). Method 2: From Hardware 1. -
Page 46: Appendix
Desktop USB Cradle USB Communication and Charging Cable AC Adapter (Includes Regional Power Cord) Vehicle Cradle Battery Charger 4-Slot Multi-Bay Ethernet Cradle Copyright 2009 unitech Electronics Co., Ltd. All rights reserved. unitech is a registered trademark of unitech Electronics Co., Ltd. -
Page 47: Worldwide Support
Chapter 5 Worldwide Support Worldwide Support Region Web site Global Operation Center www.unitech-adc.com Unitech Taiwan adc-utt.unitech.com.tw Unitech Asia Pacific & Middle www.unitech-utp.com.tw Unitech China www.ute.com.cn Unitech Japan www.unitech-japan.co.jp Unitech America www.ute.com Unitech Latin America latin.ute.com Unitech Europe www.unitech-europe.nl...
Need help?
Do you have a question about the PA968 and is the answer not in the manual?
Questions and answers