Table of Contents
Advertisement
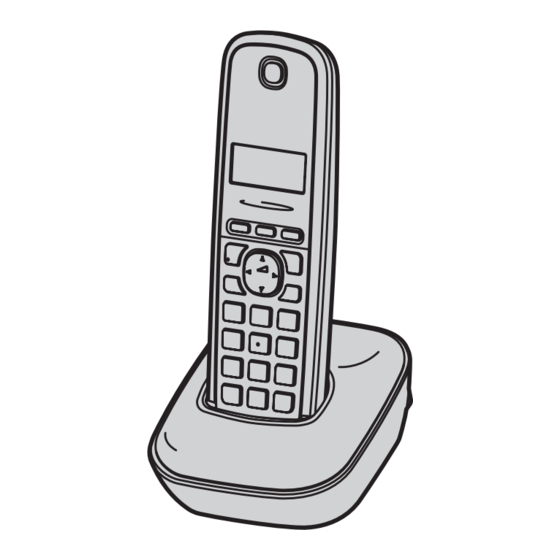
Model shown is KX-TG1611.
Before initial use, see "Getting Started"
on page 8.
Thank you for purchasing a Panasonic product.
Please read these operating instructions before using the unit and save them for
future reference.
This unit is compatible with Caller ID. You must subscribe to the appropriate service
offered by your service provider/telephone company.
Please access our online customer survey:
http://panasonic.net/pcc/tel/q
Operating Instructions
Digital Cordless Phone
Model No.
KX-TG1611AL
KX-TG1612AL
Advertisement
Table of Contents

Related Manuals for Panasonic KX-TG1611AL


Summary of Contents for Panasonic KX-TG1611AL
-
Page 1: Operating Instructions
Model shown is KX-TG1611. Before initial use, see “Getting Started” on page 8. Thank you for purchasing a Panasonic product. Please read these operating instructions before using the unit and save them for future reference. This unit is compatible with Caller ID. You must subscribe to the appropriate service offered by your service provider/telephone company. -
Page 2: Table Of Contents
Table of Contents Introduction Model composition....3 Accessory information ....3 Important Information For your safety. -
Page 3: Introduction
*1 The telephone line cord comes connected with the telephone plug. *2 See page 3 for replacement battery information. *3 The handset cover comes attached to the handset. Additional/replacement accessories Please contact your nearest Panasonic dealer for sales information. Accessory item Model number Rechargeable... -
Page 4: Important Information
Important Information L Do not allow the AC adaptor or telephone line cord to be excessively pulled, bent or For your safety placed under heavy objects. L It is advised not to use the equipment at a To prevent severe injury and loss of life/ refuelling point. -
Page 5: Important Safety Instructions
L This equipment will be inoperable when Base unit location/avoiding noise mains power fails. The base unit and other compatible Panasonic L When a failure occurs which results in the units use radio waves to communicate with internal parts becoming accessible, each other. -
Page 6: Other Information
Important Information the handset and base unit in an indoor environment. Other information – away from electronic appliances such as TVs, radios, personal computers, wireless devices, or other phones. Notice for product disposal, transfer, – facing away from radio frequency or return transmitters, such as external antennas L This product can store your private/... -
Page 7: Specifications
Important Information Specifications ■ Frequency range: 1.88 GHz to 1.90 GHz ■ RF transmission power: Approx. 10 mW (average power per channel) ■ Power source: 220–240 V AC, 50/60 Hz ■ Power consumption: Base unit: Standby: Approx. 0.6 W Maximum: Approx. 3.3 W Charger: Standby: Approx. -
Page 8: Getting Started
Getting Started ■ Charger Setting up Connections L Use only the supplied Panasonic AC adaptor PNLV226AL. Hooks L When mounting the unit on a wall, see page (220-240 V AC, 50/60 Hz) ■ Base unit Important: L First plug in the supplied telephone line... -
Page 9: Note When Setting Up
L Use the supplied rechargeable batteries. For replacement, we recommend using the L The battery level may not be displayed Panasonic rechargeable batteries noted on correctly after you replace the batteries. In page 3, 5. this case, place the handset on the base... -
Page 10: Controls
Getting Started ■ Control type A Navigator key Controls – {^}, {V}, {<}, or {>}: Scroll through various lists and items. – ? (Volume: {^} or {V}): Adjust the Handset receiver volume while talking. – {<} (y: Caller list): View the caller list. –... -
Page 11: Turning The Power On/Off
Getting Started Item Meaning Date and time Battery level {j/OK} Phonebook is opened. {r}: “Set Time” s {j/OK} New voice mail message {r}: “Date & Time” s {j/OK} received. (page 20) Enter the current date, month, and year. *1 Caller ID subscribers only s {j/OK} *2 Voice mail subscribers only Example: 15 July, 2011... -
Page 12: Making/Answering Calls
Making/Answering Calls Note: L When editing: Making calls – To erase a number, place the cursor to the right of where you want to erase the Lift the handset and dial the phone number, then press {C}. number. – To insert a number, place the cursor to L To correct a digit, press {C}. -
Page 13: Useful Features During A Call
Making/Answering Calls Note: Adjusting the handset ringer volume L To prevent other users from joining your ■ While the handset is ringing for an conversations with outside callers, turn the incoming call: privacy mode on (page 16). Press {^} or {V} repeatedly to select the desired volume. -
Page 14: Phonebook
Phonebook Edit the name if necessary (12 characters max.; page 22). s {j/OK} Handset phonebook Edit the phone number if necessary (24 digits max.; page 12). s {j/OK} The phonebook allows you to make calls 2 times without having to dial manually. You can add 50 names and phone numbers, and confirm {ic} the number of entries (page 14). -
Page 15: Programming
Programming Programmable settings You can customise the unit by programming the following features using the handset. Programming by scrolling through the display menus {j/OK} Press {V} or {^} to select the desired main menu. s {j/OK} Press {V} or {^} to select the desired item in sub-menu 1. s {j/OK} L In some cases, you may need to select from sub-menu 2. - Page 16 Programming Main menu Sub-menu 1 Sub-menu 2 Page – Setup Language <English> – – Contrast (Display contrast) <Contrast 03> – – Clock Disp. <On> – Auto Talk <Off> – Register HS – – Keytones <On> *3, *8 – Recall/Flash <100 msec.> *3, *9, *10 –...
-
Page 17: Special Programming
Programming L We recommend selecting a different ringer tone from the one used for Special programming outside calls. {r}: “Volume” s {j/OK} Alarm {r}: Select the desired volume. s An alarm sounds at the set time (once or daily) {j/OK} for 2 minutes. -
Page 18: Caller Id Service
Caller ID Service You can answer the 2nd call, keeping the 1st call on hold. Follow your service provider/ Using Caller ID service telephone company instructions using {R}. (Recall/flash function) Important: L If the phone number is stored in the L This unit is Caller ID compatible. -
Page 19: Erasing Caller Information
Caller ID Service To call back, press {C}. To exit, press {ic}. Editing a caller’s phone number before calling back {<} (y) {r}: Select the desired entry. s {j/OK} {r}: “Edit & Call” s {j/OK} Edit the number. L Press dial key () to 9) to add, {C} to delete (page 12). -
Page 20: Voice Mail Service
Voice Mail Service Voice mail service Voice mail is an automatic answering service offered by your service provider/telephone company. After you subscribe to this service, your service provider/telephone company’s voice mail system answers calls for you when you are unavailable to answer the phone or when your line is busy. -
Page 21: Intercom/Locator
Intercom/Locator Intercom Transferring calls, conference calls Available for: KX-TG1612 Available for: KX-TG1612 Intercom calls can be made between handsets. Outside calls can be transferred or a Note: conference call with an outside party can be L If you receive an outside call while talking made between 2 handsets. -
Page 22: Useful Information
Useful Information Character entry The dial keys are used to enter characters and numbers. Each dial key has multiple characters assigned to it. The characters that can be entered depend on the character entry mode (page 22). – Press {<} or {>} to move the cursor left or right. –... - Page 23 Useful Information Extended 1 character table (p) L The following are used for both uppercase and lowercase: Extended 2 character table (O) L The following are used for both uppercase and lowercase: Cyrillic character table (P)
-
Page 24: Error Messages
Useful Information Error messages Display message Cause/solution L The phonebook memory is full. Erase unwanted entries (page Memory Full 14). Troubleshooting If you still have difficulties after following the instructions in this section, disconnect the base unit’s AC adaptor and turn off the handset, then reconnect the base unit’s AC adaptor and turn on the handset. -
Page 25: Battery Recharge
Useful Information Problem Cause/solution I cannot use the intercom feature. L This feature is shared between the handsets. Although the handset displays “Intercom”, this feature is not available for this model. *1 KX-TG1611 Programmable settings Problem Cause/solution The display is in a language I L Change the display language (page 11). -
Page 26: Liquid Damage
Useful Information Problem Cause/solution The handset does not ring. L The ringer volume is turned off. Adjust ringer volume (page 13). I cannot make a call. L The handset is too far from the base unit. Move closer and try again. L Another unit is in use. -
Page 27: Registering A Handset To The Base Unit
Useful Information Registering a handset to the base unit Handset: {j/OK} {r}: “Setup” s {j/OK} {r}: “Register HS” s {j/OK} Base unit: Press and hold {x} for about 5 seconds. (No registration tone) L If all registered handsets start ringing, press {x} again to stop, then repeat this step. (KX-TG1612) Handset: Wait until “PIN:____”... -
Page 28: Wall Mounting
Useful Information Wall mounting Note: L Make sure that the wall and the fixing method are strong enough to support the weight of the unit. ■ Base unit ■ Charger 25 mm 30 mm Screws (Not supplied) Screws (Not supplied) Hook Hooks Wall mounting template... -
Page 29: Index
Index Index Alarm: 17 Answering calls: 12 Auto talk: 12 Battery: 8, 9 Caller ID service: 18 Caller list: 18 Caller list edit: 19 Call share: 13 Call waiting and Caller ID compatible: 18 Chain dial: 14 Character entry: 22 Conference calls: 21 Control type: 10 Date and time: 11... - Page 30 Notes...
- Page 31 Notes...
- Page 32 Attach your purchase receipt here. Customer Care Centre Tel. No.: 132600 or website www.panasonic.com.au Sales Department: 1 Innovation Road, Macquarie Park NSW 2113, Australia 1-62, 4-chome, Minoshima, Hakata-ku, Fukuoka 812-8531, Japan © Panasonic System Networks Co., Ltd. 2011 PNQX3235ZA TC0211MU0 (A)
Need help?
Do you have a question about the KX-TG1611AL and is the answer not in the manual?
Questions and answers