Table of Contents
Advertisement
Available languages
Available languages
Convection Oven ESO955
EN
Operating Instructions
FR
....................................13-21
Instructions
NL
Gebruiksaanwijzing .........
...............1-12
................... ...22-30
.
CZ
á
.......
N vod K Obsluze
SK
žívanie .......
N vod Na Pou
á
IT
Istruczioni ...
.......................................47-55
ES
Instrucciones ........
.......................31-38
.................39-46
.............................56-63
Advertisement
Table of Contents

Related Manuals for Electrolux ESO955


Summary of Contents for Electrolux ESO955
- Page 1 Convection Oven ESO955 Operating Instructions ....1-12 á ......31-38 N vod K Obsluze ........13-21 žívanie ......39-46 Instructions N vod Na Pou á Gebruiksaanwijzing .......22-30 Istruczioni ..........47-55 Instrucciones ........56-63...
-
Page 2: Safety Instructions
Safety instructions: WARNINGS: This appliance is intended for domestic / household use only, and should not be Used for any other purpose. Any other use may invalidate the warranty and might be dangerous. The temperature of accessible surfaces may be high when the appliance is operating. We have designed and made this appliance to meet European safety standards, but as with any appliance, you must take care to stay safe and get the best results. - Page 3 Unplug from outlet when not in use and before cleaning. Allow to cool before cleaning the appliance. Do not operate the appliance with a damaged cord or plug or after the appliance malfunctions or has been damaged in any way. Consult the retail store where you bought the appliance for advice.
-
Page 4: Electrical Connection (Uk Only)
Ensure that the appliance is switched off before replacing the lamp to avoid the possibility of electric shock. Only use the correct lamp E14 230V 20W 300ºC. ELECTRICAL CONNECTION (UK ONLY) For your safety please read the following information. Warning: This appliance must be earthed. The appliance must be connected to a 220-240 volts 50 cycle AC supply by means of a three pin socket, suitably earthed and should be protected by a 13 amp fuse in the plug. -
Page 5: Parts Description
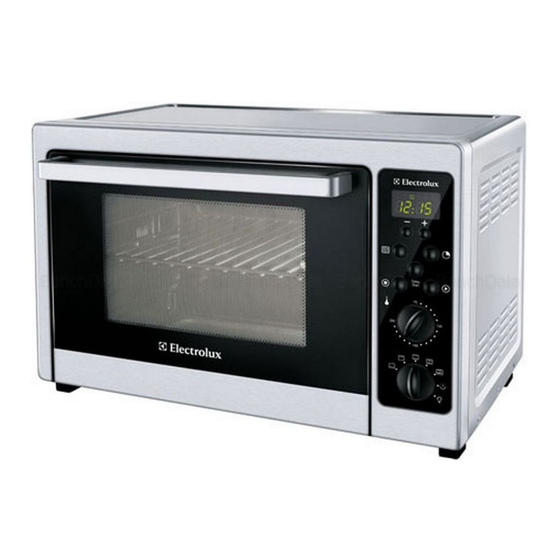
Parts description Door handle 2. Digital display Control k nobs Control k nobs 5. Oven feet X 4 Baking rack Baking tray Crumb tray Rotisserie forks Rotisserie helper handle 9” Pizza pan Caution: hot surfaces Control panel... -
Page 6: Before Use
Before use 1. Remove all accessories and shipping materials packed inside oven. oven 2. Wash all accessories in warm soapy water. Wipe the inside of the with a damp cloth or sponge. Blot dry with paper towels to be sure the unit is dry before using. -
Page 7: Using The Oven
Using the oven 1. Place the baking rack in a position that will accommodate the heig ht of the food to be cooked. 2. Place the food on the rack. Make sure that you always use an ovenproof container in the oven, never use plastic or cardboard containers in the oven. -
Page 8: Convection Setting
Convectional setting: After plugging in, press the stop button once. 1. Turn the function knob to“ ”.The display will show” ” .The default time is 30 minutes. 2. Turn the temperature knob to set the temperature. The temperature range is 70~250 . 3. -
Page 9: Delay Start
” to start ; the display begins to count-down time. 4. Press “ times,and then When cooking is finished the oven will beep three switch to waiting state, “00:00 ” shows on the display. Light When plugged in, turn the function knob , the oven light will turn on. - Page 10 Rotisserie Setting: After plugging in, press the stop button once. Turn the function knob to “ ”, the display will show “ ” . The default time is 30 minutes. 2. Turn the temperature knob to set the temperature. The temperature range is 70~250 3.
-
Page 11: Stop Function
9. Lift the left side of the rotisserie rods out of the bracket first and pull slightly toward you. 10. Gently remove the right pointed of the rotisserie rods from the rotisserie socket and remove the food on the forks from the oven. - Page 12 Tables and tips Auto menu Weight (kg) Shelf position Temp ( Time (min) Roast beef Defrost Roast veal Roast pork Chicken Rotisserie Medium lamb quiche & tart Thick fish Gratin...
-
Page 13: Care And Cleaning
Care and cleaning 1. Before cleaning unplug the convection oven and allow it to cool completely. 2. Wash all the attachments with mild, soapy water including the rack and the baking tray. 3. Do not use abrasive cleansers, scrubbing brushes or chemical cleaner as this will ca use damage to the coating baking tray. - Page 14 INSTRUCTIONS DE SÉCURITÉ IMPORTANTES LIRE AVEC ATTENTION ET GARDER POUR DE FUTURES UTILISATIONS Nous avons conçu et fabriqué cet appareil selon les normes de sécurité européennes, mais comme avec tout appareil, vous devez prendre les précautions d'usage pour sécurité et afin obtenir les meilleurs résultats .
-
Page 15: Noms Des Pieces
Ne débranchez pas l’appareil en tirant sur le câble d’alimentation ; maintenez la prise pour la débrancher. N’immergez pas le produit, le câble d’alimentation ou la prise dans de l’eau. Un câble d’alimentation court est fourni afin de réduire tout risque d'accident (trébucher sur le câble Enlevez tous les emballages de protection avant de placer les aliments dans le four. -
Page 16: Panneau De Controle
PANNEAU DE CONTROLE AVANT LA PREMIERE UTILISATION 1. Enlevez tous les accessoires et les matériaux d’emballage de l’intérieur du four. 2. Lavez tous les accessoires dans de l’eau chaude et savonneuse. Essuyez l’intérieur du four avec une éponge ou un chiffon humide. Séchez avec une serviette en papier pour que le four soit complètement sec avant de l’utiliser. -
Page 17: Utilisation Du Four
FONCTIONS Cuisson Gril : Lorsque cette fonction est sélectionnée, les éléments supérieurs de cuisson fonctionnent. Fonction idéale pour cuire et griller les côtes de boeuf ,les steaks, les côtes de porc, les côtes d’agneau, les cuisses de poulet, les filets de poisson, les steaks de saumon. Cuisson au four traditionnel : Lorsque cette fonction est sélectionnée, les éléments supérieurs et inférieurs de cuisson fonctionnent. - Page 18 4. Lorsque la durée sera écoulée, l’affichage indiquera 30 :00 . ” “ 5. Si aucune opération n’est effectuée durant 3 minutes, l’affichage retournera au mode horloge. REGLAGE POUR CUISSON TRADITIONNELLE : Branchez puis appuyez une fois sur la touche Stop. 1.
- Page 19 ECLAIRAGE Lorsque le four est en marche, tournez le bouton des fonctions sur et la lampe du four s’allumera. Si vous sélectionnez une autre fonction, la lampe s’éteindra. MENU AUTOMATIQUE Branchez puis appuyez une fois sur la touche Stop. 1. Appuyez sur , le four affichera «...
- Page 20 UTILISATION DES BROCHES DE ROTISSERIE : Embrochez l’aliment sur la tige en centrant le poids ; le poids maximum doit être de Enfilez les broches à chaque extrémité de la tige et appuyez fermement en perçant l’aliment pour le faire tenir en place. Insérez les broches sur différents angles afin de maintenir solidement l’aliment.
-
Page 21: Entretien Et Nettoyage
VERROUILLAGE DE SECURITE POUR LES ENFANTS 1. Appuyez sur le bouton et maintenez le bouton pressé durant 3 secondes, un long bip “ ” sonore retentira. Le four sera alors verrouillé et ne pourra pas être utilisé. Pour déverrouiller, appuyez sur la touche et maintenez-la enfoncée pendant 3 “... - Page 22 Nous nous excusons d'avance pour les désagréments causés par les quelques erreurs mineures que vous pourriez rencontrer, généralement dues à un décalage entre la mise à jour du manuel et les constantes améliorations que nous apportons à nos produits. Electricals HU1 3AU 10-11-10...