
Related Manuals for Electrolux ESO944


Summary of Contents for Electrolux ESO944
- Page 1 Convection Oven ESO944 Operating Instructions ....1-11 Instructions ......12-22 Gebruiksaanwijzing ......23-33...
- Page 2 WARNINGS This appliance is intended to be used in household and similar applications such as: staff kitchen areas in shops, offices and other working environments; farm houses; by clients in hotels, motels and other residential type environments; ...
- Page 3 instruction concerning use of the appliance in a safe way and understand the hazards involved . Children shall not play with the appliance . Cleaning and user maintenance shall not be made by children unless they are older than 8 and supervised. . ...
- Page 4 The surfaces are liable to get hot during use. The temperature of accessible surfaces may be high when the appliance is operating. Do not touch hot surface. Do not place the appliance in or near hot gas or electric burner, or permit to touch a heated oven or mini oven.
-
Page 5: Important Safety Instructions
IMPORTANT SAFETY INSTRUCTIONS Read these instructions carefully before operating the oven. Keep them for further reference. To protect against electric shock, do not immerse the cord, plug, or any parts of the oven in water or other liquids. Do not let the cord hang over the edge of a table or counter, or touch hot surfaces. ... -
Page 6: Before First Use
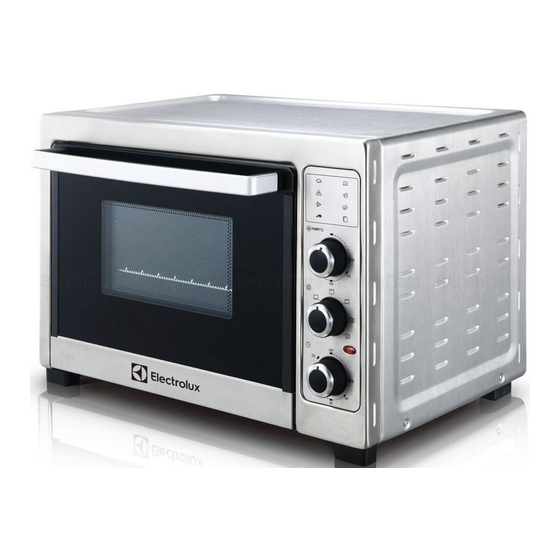
PARTS 1. Door handle 7. Crumb tray 2. Glass door 8. Rack 3. Thermostat knob 9. Tray 4. Function knob 10. Rotisserie skewer 5. Red indicator light 11. Rotisserie skewer handle 6. Timer knob 12. Rack / tray handle BEFORE FIRST USE ... -
Page 7: Control Settings
Place the oven on a stable flat surface. Be sure that no other appliances are plugged into the same circuit with the oven. CONTROL SETTINGS TEMPERATURE SETTING FUNCTION SETTING You can turn the function knob to select the OFF, grill, lower heating, convectional, convectional with fan or rotisserie setting. -
Page 8: Operation
Adjusting Time Timer can be changed during cooking. Turn the timer knob to the required time. Continuous cooking without timer If you want to use the oven without timer control, turn the timer knob to the “Stay-on” position. The oven will work unless the timer knob is set to the “Off” position. OPERATION For the first time use, set the thermostat to 230 °C, set the function knob to the position and... - Page 9 Convectional with fan The settings are ideal for use when cooking baked potatoes, roasting meat and vegetables, ready meals, casseroles, stews, bread, cakes and desserts. 1. Place food on the baking tray and slide onto the middle position in the oven. Close the oven door. 2.
- Page 10 5. Insert the pointed end of the rotisserie skewer Drive socket into the drive socket located on the right hand side of the oven wall. 6. Make sure the square end of the rotisserie skewer rests on the rotisserie skewer support located on the left hand side of the oven wall.
-
Page 11: Cleaning And Maintenance
Remove the rotisserie skewer by placing the hooks of the rotisserie skewer handle under the grooves on the either side of the rotisserie skewer. Lift the left side of the rotisserie skewer first by lifting it up and out. Then pull the rotisserie skewer out of the drive socket and carefully remove the roast from the oven. -
Page 12: Specifications
The appliance should be taken to your local collection point for recycling. Some collection points accept appliance free of charge. We apologise for any inconvenience caused by minor inconsistencies in these instructions, which may occur as a result of product improvement and development. Electrolux 31 / 05 / 2016... - Page 13 ATTENTION Cet appareil est destiné à être utilisé dans des applications domestiques et analogues telles que: les coins cuisines réservés au personnel des magasins, bureaux et autres environnements professionnels; les fermes; l’utilisation par les clients des hôtels, motels et autres environnements à...
- Page 14 physiques, sensorielles ou mentales réduites ou un manque d’expérience et de connaissances à condition qu’elles aient reçu une supervision ou des instructions concernant l’utilisation de l ’ appareil en toute sécurité et qu’elles comprennent les dangers encourus. Les enfants ne doivent pas jouer avec l’appareil.
- Page 15 les surfaces en contact avec les à la section aliments, référez-vous “NETTOYAGE ET ENTRETIEN” en page La porte ou la surface extérieure peut devenir chaude lorsque l'appareil fonctionne. Les surfaces sont susceptibles de devenir chaudes au cours de l'utilisation . ...
-
Page 16: Mises En Garde Importantes
MISES EN GARDE IMPORTANTES Lisez attentivement le mode d'emploi avant d'utiliser votre four pour la première fois. Gardez-le afin de pouvoir vous y référer ultérieurement. Afin d éviter tout risque d électrocution, ne mettez jamais le câble, la prise mâle ni toute autre partie ’... - Page 17 DESCRIPTION...
-
Page 18: Avant La Première Utilisation
1. Poignée de porte 7. Ramasse-miettes 2. Porte en verre 8. Grille de cuisson 3. Bouton du thermostat 9. Plaque de cuisson 4. Bouton de fonction 10. Brochette de rôtissoire 5. Témoin lumineux rouge 11. Poignée de la brochette de rôtissoire 6. - Page 19 Convection à chaleur tournante: Les résistances du haut et du bas chauffent en même temps, et le ventilateur marche. Rôtissoire Seules les résistances du haut chauffent. Le moteur de la rôtissoire tourne. RÉGLAGE HEURE La durée maximale de la minuterie est de 120 minutes. Le four fonctionne soit avec la minuterie, soit avec le bouton de la minuterie sur Stay On (allumage continu) (voir section "Cuisson en continu sans la minuterie"...
- Page 20 2. Pour les aliments susceptibles de produire du jus pendant la cuisson, utilisez la plaque. Assurez-vous que les récipients utilisés peuvent aller au four; n'utilisez en aucun cas des récipients en plastique ou en carton. 3. N'utilisez en aucun cas des casseroles en verre ou en céramique. 4.
- Page 21 1. Mettez l’aliment sur la plaque, et mettez celle-ci sur la hauteur inférieure du four. Fermez la porte du four. 2. Mettez le bouton de fonction sur 3. Réglez la température en tournant le bouton du thermostat. 4. Mettez le bouton de la minuterie sur Stay On ou sur le temps de cuisson requis. Fonction rôtissoire 1.
-
Page 22: Nettoyage Et Entretien
ATTENTION: Si le temps de cuisson est inférieur à 5 minutes, vous devez d'abord amener le bouton de la minuterie au-delà de 10 minutes pour ensuite revenir en arrière jusqu'à la durée en question. Le réglage sera ainsi plus sûr et plus précis. ATTENTION : Le plat, la grille et les aliments peuvent être portés à... -
Page 23: Spécifications
Le service après-vente est joignable au +32 2 334 00 00, du lundi au vendredi de 8h à 18h et le samedi de 9h à 18h. En raison des mises au point et améliorations constamment apportées à nos produits, de petites incohérences peuvent apparaî tre dans ces instructions. Veuillez nous excuser pour la gêne occasionnée. Electrolux 31/05/2016... - Page 24 WAARSCHUWINGEN Dit apparaat is bedoeld om te gebruiken in huishoudelijke en gelijkaardige toepassingen, zoals: in personeelskeukens van winkels, kantoren en andere werkomgevingen; in boerderijen; door klanten in hotels, motels en andere omgevingen van het residentiële type; ...
- Page 25 betreffende het veilige gebruik van dit apparaat hebben ontvangen en inzicht hebben in de gevaren die het gebruik ervan kan inhouden. Kinderen mogen niet met dit apparaat spelen. Reinigen en onderhoud mogen alleen worden gedaan door kinderen als zij ouder zijn dan 8 jaar en onder toezicht staan.
- Page 26 De buitenkant van het apparaat kan zeer warm worden terwijl het apparaat is ingeschakeld. De temperatuur van het apparaat kan hoog zijn terwijl het apparaat in werking is. De temperatuur van toegankelijke onderdelen kan hoog zijn terwijl het apparaat in werking is.
-
Page 27: Belangrijke Veiligheidsvoorzorgen
BELANGRIJKE VEILIGHEIDSVOORZORGEN Lees de volledige handleiding voordat u deze oven in gebruik neemt en bewaar voor toekomstig gebruik Dompel het snoer, de stekker of andere onderdelen van de oven niet onder in water of andere vloeistof om elektrische schokken te voorkomen. ... - Page 28 ONDERDELEN 1. Deurklink 3. Thermostaatknop 2. Glazen deur 4. Functieknop...
-
Page 29: Voor De Eerste Ingebruikname
5. Rood controlelampje 9. Bakplaat 6. Timerknop 10. Draaispit 7. Kruimellade 11. Handgreep draaispit 8. Rek 12. Handgreep rek / bakplaat VOOR DE EERSTE INGEBRUIKNAME Verwijder alle verpakkingsmaterialen en veeg de buitenkant van het apparaat schoon met een goed uitgewrongen vaatdoek. Was alle accessoires af in een warm sopje. - Page 30 DE TIMER INSTELLEN De timer kan worden ingesteld tot 120 minuten. Om de oven te laten werken dient u ofwel een bereidingstijd in te stellen of de timerknop naar de stand “Stay-on” (aanblijven) (zie onderstaande paragraaf “Voortdurende bereiding zonder timer”). Bereiding met de timer Draai de timerknop rechtsom om de gewenste bereidingstijd in te stellen.
- Page 31 Convectie Deze stand is ideaal voor het bakken van aardappelen, het roosteren van vlees en groente, het opwarmen van kant-en-klare maaltijden en voor ovenschotels, stoofpotten, brood, cake en dessert. 1. Zet het gerecht op de ovenschaal en schuif in de middelste stand van de oven. Sluit de ovendeur. 2.
- Page 32 Spitklemmen duimschroeven 5. Draai het scherpe uiteinde van het draaispit in Aandrijving de aandrijving op de rechterzijde van de ovenwand. 6. Let erop dat het vierkant uiteinde van het draaispit op de steun op de linkerzijde van de ovenwand rust. 7.
-
Page 33: Reinigen En Onderhoud
Verwijder het draaispit door de haken van de handgreep onder de groeven van beide zijden van het draaispit te plaatsen. Til de linkerzijde van het draaispit eerst op en uit de oven. Trek daarna het draaispit uit de aandrijving en verwijder voorzichtig het gerecht uit de oven. -
Page 34: Technische Gegevens
0900 0555 (lokaal tarief), geopend van maandag t/m vrijdag van 9.00 tot 17.00 uur. We verontschuldigen ons voor enig ongemak veroorzaakt door kleine inconsistenties in deze gebruikershandleiding, die kunnen ontstaan door productverbetering of –ontwikkeling. Electrolux 31 / 05 / 2016... - Page 35 Share more of our thinking at www.electrolux.com...
Need help?
Do you have a question about the ESO944 and is the answer not in the manual?
Questions and answers