Table of Contents
Advertisement
Quick Links
Advertisement
Table of Contents

Related Manuals for CDA SC309


Summary of Contents for CDA SC309
- Page 1 Manual for Installation, Use and Maintenance Passionate about style Customer Care Department • The Group Ltd. • Harby Road • Langar • Nottinghamshire • NG13 9HY T : 01949 862 012 F : 01949 862 003 E : service@cda.eu W : www.cda.eu...
-
Page 2: Installation
Dear Customer Thank you for choosing one of our appliances, carefully designed and built by our specialist staff and thoroughly tested to satisfy your cooking requirements. We suggest that you read this Instruction Booklet so that you will understand fully how to operate your appliance. Please keep the booklet handy. -
Page 3: Electrical Supply To Your Oven
Electrical supply to your oven IMPORTANT: Installation must be carried out according to the manufacturer's instructions. Incorrect installation may cause harm and damage to people, ani- mals or property, for which the manufacturer accepts no responsibility. Before carrying out any work on the electrical section of the appliance, it must be disconnected from the mains. - Page 4 ✓ CONNECTION BY A THREE PIN SOCKET (Fig. 1) ➜ The appliance must be connected to a 220-240 volts 50 cycle AC supply by means of a three pin socket, suitably earthed and should be protected by a 3 amp fuse. ➜...
-
Page 5: General Notes
GENERAL NOTES ✓ The wires in the mains lead on this appliance are coloured in accordance with the following code: Green and Yellow - Earth Blue – Neutral Brown – Live ✓ As the colours may not correspond with the markings identifying the terminals in your plug or in your spur box, proceed as follows: ➜... -
Page 6: Gas Supply Requirements
Gas supply requirements The installation must conform to the relevant British Standards. - Page 7 CDA are not legally able to provide any assistance in the installation of gas appliances except to Corgi registered installers. Any Corgi registered fitter requiring help must pro- vide name, address and registration number. Information supplied will be validated before help is provided.
- Page 8 Ventilation Location The oven is designed to fit into a cabinet of 600 mm width. The oven can be built in or built under the kitchen units, but you must ensure that it is properly ventilated. In the diagram the built in oven is ventilated by means of a space at the top of the kitchen cabinet.
-
Page 9: How To Install Your Oven
How to install your oven Ensure that air can flow freely around the housing area. If the oven is being installed into a fully enclosed built under oven housing unit it may be necessary to cut a small slot in the top of the plinth fitted under the unit. Cut a section 400 mm wide and a minimum of 15 mm high to allow air to pass under the unit. - Page 10 Gas conversion (to L.P .G. or Natural gas) This appliance is regulated to work with Figure 5 the gas indicated in the gas regulation label. If it has to work with another type of gas (L.P .G. or Natural gas), before the appliance is connected you must substitute the oven and grill burner injectors as follows:...
- Page 11 Figure 8 b) REPLACEMENT OF THE GRILL BURNER INJECTOR ✓ Remove the burner by unscrewing the front screw (fig. 8). Gently suspend the burner as shown in figure 9. Be careful not to damage the wire of the electric ignition and the probe of the safety valve.
- Page 12 Flames regulation of the oven and grill burners Using a cross-head screwdriver, slacken the screw securing the air flow regulation col- lar (figs. 10 and 11) and move the collar forward or backward to increase or reduce the air aperture in accordance with gas type and the indications in the “TABLE FOR THE INJECTORS”.
- Page 13 REGULATION OF THE MINIMUM FLAME This needs to be done only for the oven burner (the grill is a fixed capacity) by acting on the thermostat. Considering that in the minimum position the flame must have a length of about 4 mm and must remain lit even with a brusque passage from the maximum position to that of minimum.
- Page 14 How to use your gas oven Locate the wire side frames as indicated in Fig. 13. Slide in, on the guides, the shelf and the tray etc. (Fig. 14). The rack must be fitted so that the safety catch, which stops it sliding out, faces the inside of the oven (Fig.
-
Page 15: General Features
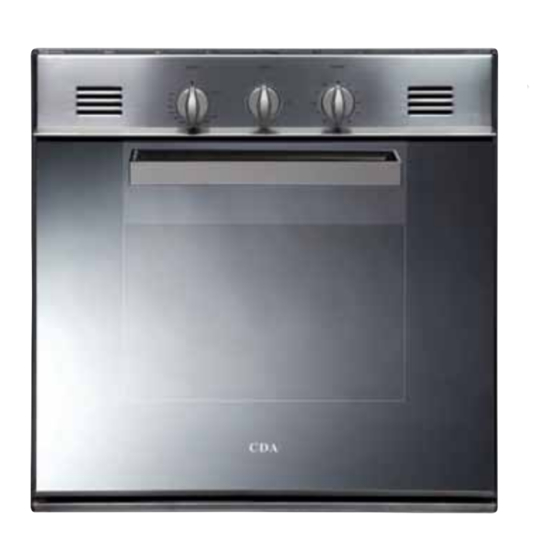
How to use your gas oven/gas grill Figure 15 CONTROL PANEL - Controls description 1. Oven/grill gas control knob 2. Oven light selector 3. 60’ timer. GENERAL FEATURES The oven is furnished completely clean. It is advisable, however, upon first use, to turn the oven on to the maximum temperature to eliminate possible traces of grease from the burner. -
Page 16: Thermostat Knob
THERMOSTAT KNOB Figure 16 The values from print- ed on the facia panel around the ther- mostat knob (fig. 16) show in a growing sequence the oven temperature in °C. Figure 17 TIMER The timer can be set to a maximum of 60 minutes. - Page 17 LIGHTING OF OVEN BURNER The thermostatic tap controlling the gas supply to the burner is equipped with a safety device which automatically stops the gas flow in case of flame extinction. The tempera- ture is constantly maintained on the set value. The electric ignition starts up by pressing the thermostat knob.
- Page 18 LIGHTING OF GAS GRILL BURNER The thermostatic tap controlling the gas supply to the burner is equipped with a safety device which automatically stops the gas flow in case of flame extinction. The electric ignition starts up by pressing the thermostat knob. A safety device prevents the electric ignition from functioning when the oven door is shut.
-
Page 19: Traditional Grilling
TRADITIONAL GRILLING Very important: always use with the door ajar (Fig. 22). Switch the grill on, setting the knob to position Leave to warm up for approximately 5 minutes with the door ajar. Place the food inside positioning the rack as near as possible to the grill. Insert the drip pan under the rack to collect the cooking juices. -
Page 20: Cooking Guide
Cooking guide Your gas oven is a newly designed oven which incorporates an indirect burner located under the oven base plate. If you have previously been used to cooking with gas you may need to slightly alter your cooking methods. The bottom of the oven is hot and is ideal for browning the underside of shallow pastry dishes and pizzas. -
Page 21: Temperature Recipe Guide
Temperature recipe guide APPROX. HEAT OF MARK TYPE OF DISH TO COOK TEMP . OVEN 125°C Very cool Meringue cakes, 257°F oven slow cooking items 140°C Cool Milk puddings, very rich fruit 275°F oven cakes, i.e., Christmas 150°C Cool or Stews, casseroles, braising, 300°F slow oven... -
Page 22: Cleaning And Maintenance
Cleaning and Maintenance Figure 24 GENERAL CLEANING Before cleaning, always disconnect the electrical supply to the oven. Do not use a steam cleaner because the moisture can get into the appliance thus make it unsafe. OVEN DOOR The inside window can be easily removed fol cleaning by unscrewing the two fixing screws (Fig. -
Page 23: Enamelled Parts
ENAMELLED PARTS All the enamelled parts must be cleaned with a sponge and soapy water only or other non-abrasive products. Dry preferably with a soft cloth. Acidic substances like lemon juice, tomato sauce, vinegar etc. can damage the enamel if left too long. INSIDE OF OVEN The oven should always be cleaned after use when it has cooled down. - Page 24 Check the following points: 1. The power is switched on (is there a power cut?). 2. That the controls are switched on. 3. The fuse in the plug and main fuse. 4. If all the above are correct - please call CDA.
-
Page 25: Appliance Servicing
Appliance servicing CDA provide a quality and effective after-sales service to cover all your servicing needs. Please attach your receipt to this page for safekeeping. Please help us to help you by having the following information available when booking a service-call: 1. - Page 26 CDA and the labour will be charged at the commercial rate applicable at the time of repair.
-
Page 28: Gas Ovens
Descriptions and illustrations in this booklet are given as simply indicative. The manufacturer reserves the right, considering the characteristics of the models described here, at any time and without notice, to make eventual necessary modifications for their construction or for commercial needs.
Need help?
Do you have a question about the SC309 and is the answer not in the manual?
Questions and answers